Smoked Ribs Perfection: Pitmaster Approved Recipe
There’s something magical about pulling a rack of perfectly smoked ribs off the grill. The bark crackles under your teeth, the meat falls off the bone with minimal effort, and that smoky flavor penetrates every fiber. This isn’t luck—it’s technique, patience, and understanding the fundamentals of low-and-slow cooking that separate backyard barbecue from authentic pitmaster-quality ribs.
After years of experimenting with different methods, rubs, and smoking techniques, I’ve developed a comprehensive approach to smoked ribs that consistently delivers competition-level results. Whether you’re using a barrel smoker, offset firebox, or pellet grill, these principles will elevate your rib game. The secret isn’t complicated: it’s about respecting the meat, controlling temperature, and mastering the three-zone cooking method that pitmasters have perfected over decades.
This guide covers everything from selecting the right ribs to achieving that coveted smoke ring, complete with timing charts and troubleshooting tips. Let’s dive into what makes smoked ribs truly perfect.
Choosing Your Ribs: Varieties and Selection
Not all ribs are created equal, and selecting the right cut significantly impacts your final product. The three primary types available at most butcher shops each have distinct characteristics that affect cooking time and flavor profile.
Baby back ribs are the most popular choice for home cooks. These come from the upper portion of the ribcage, closer to the spine. They’re smaller, more tender, and cook faster than their larger cousins—typically finishing in 4-5 hours. Baby backs have less meat but higher tenderness, making them ideal for beginners and those seeking fall-off-the-bone results quickly.
Spare ribs are larger and meatier, cut from the lower ribcage. They contain more connective tissue and fat, which translates to deeper flavor and juicier meat when smoked low and slow. Spare ribs require longer cooking times (5-6 hours) but reward patience with superior taste. Pitmasters often prefer these for competition because the larger surface area accepts smoke more readily.
St. Louis style ribs are essentially spare ribs trimmed into a rectangular shape. They’re a middle ground between baby backs and full spare ribs—more uniform than spare ribs but meatier than baby backs. These cook in approximately 5-5.5 hours and represent an excellent choice for consistent results.
When selecting ribs, look for meat that’s bright red or pink, never gray. The bones should be white, not yellowed. Avoid packages with excessive liquid, which indicates older meat. Ideally, purchase ribs from a quality butcher who can trim them properly and recommend the best option for your smoking goals.
Preparing Your Ribs for Smoking
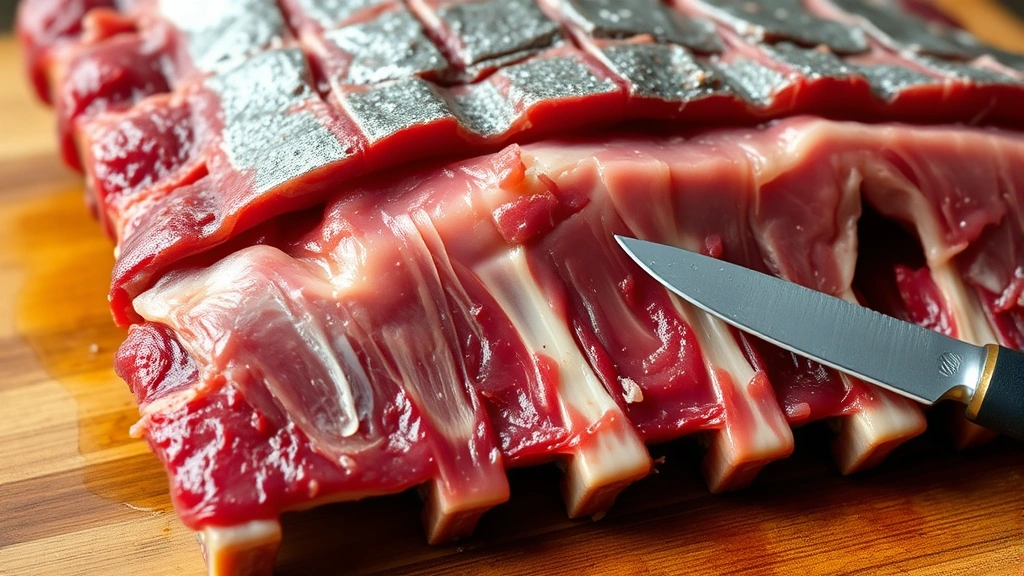
Proper preparation sets the foundation for excellence. Many home cooks skip critical steps here, which explains inconsistent results. Begin by removing the silver skin—that thin, tough membrane on the bone side. Using a sharp knife, slip the blade under the membrane at one end and work it loose, then grab it with a paper towel for better grip and pull steadily. This membrane doesn’t break down during smoking and prevents rub penetration and smoke absorption on the underside.
Next, trim excess fat from the top side, but don’t go overboard. A thin layer of fat (about 1/4 inch) protects the meat and adds flavor. Remove any dangly pieces that might burn, but preserve the integrity of the meat itself. Trimming takes just 5-10 minutes per rack and dramatically improves appearance and cooking consistency.
Pat the ribs completely dry with paper towels. Moisture is the enemy of bark development—that desirable dark, crunchy exterior. A truly dry surface allows the rub to adhere properly and enables better smoke adhesion. Many pitmasters let trimmed, dried ribs sit uncovered in the refrigerator for 2-4 hours before applying the rub, which further dries the surface.
If you’re planning to smoke your ribs the next day, you can apply the rub the night before. This allows flavors to penetrate the meat. However, if smoking immediately, apply the rub 30 minutes before the meat hits the grate, giving it time to adhere without drying out excessively.
Creating the Perfect Dry Rub
The rub is your canvas for flavor. Unlike sauces that sit on top, a quality dry rub becomes part of the meat through the smoking process, creating layers of taste that evolve from the surface to the center.
Base components should include brown sugar (for sweetness and bark development), paprika (for color and subtle smoke), and kosher salt (for seasoning and meat binding). These three ingredients alone create a respectable rub, but depth comes from strategic additions.
Here’s a pitmaster-approved dry rub formula:
- 3 tablespoons brown sugar (packed)
- 2 tablespoons kosher salt
- 1 tablespoon black pepper (freshly ground)
- 1 tablespoon paprika (smoked preferred)
- 1 tablespoon garlic powder
- 1 tablespoon onion powder
- 1 teaspoon cayenne pepper (optional, for heat)
- 1 teaspoon dry mustard
- 1/2 teaspoon ground ginger
Combine all ingredients in a bowl, breaking up any brown sugar lumps. The ratio should be roughly 3 parts sugar to 2 parts salt to 1 part spices. This creates balance—sweetness that caramelizes, salt that seasons deeply, and spices that add complexity.
Apply the rub generously to all sides of the ribs, pressing it in firmly so it adheres to the meat rather than just sitting on the surface. Use approximately 1-2 tablespoons per rack. Don’t be shy—the rub is your primary flavor vehicle for the first few hours of smoking, before bark forms and smoke penetration truly begins.
Some pitmasters create a “binder” (usually mustard or egg white) before applying the rub, which helps it stick better and prevents excessive seasoning from falling into the smoker. This step is optional but professional.
Smoking Temperature and Technique
Temperature control is the cornerstone of pitmaster-quality smoked ribs. Maintain a consistent 225-250°F throughout the entire cook. This range allows fat to render slowly, collagen to break down into gelatin (creating tenderness), and smoke to penetrate without cooking too quickly.
Most experienced pitmasters prefer 225°F for maximum smoke absorption and bark development, though 250°F is acceptable and cooks slightly faster. Fluctuations above or below this range compromise results—too hot and the meat dries out, too cool and cooking takes excessively long with less bark formation.
Invest in a quality digital thermometer with a probe to monitor your smoker’s internal temperature. The thermometer built into most smokers is notoriously inaccurate. Place your probe in the coolest area of the smoker (usually near the food), away from heat sources.
Wood selection profoundly affects flavor. Hickory produces a strong, bacon-like smoke that pairs excellently with ribs. Oak provides a medium, balanced smoke that doesn’t overpower. Fruitwoods (apple, cherry, pecan) offer milder, slightly sweet smoke. Start with hickory or oak if you’re new to smoking, then experiment once you understand baseline results. Use only hardwoods—never softwoods like pine or cedar, which create creosote and bitter flavors.
Soak wood chips in water for 30 minutes before adding to your smoker if using a charcoal or offset smoker. This extends the smoldering phase, producing more smoke and less flame. Pellet grills don’t require soaking.
Maintain consistent smoke throughout the cook by adding wood every 45 minutes to an hour. You want thin, blue smoke—not thick, white smoke, which indicates incomplete combustion and produces acrid flavors. If you see white smoke billowing from your smoker, adjust your fire or add less wood.
The 3-2-1 Method Explained
The 3-2-1 method is the gold standard for smoked ribs, developed by professional pitmasters and proven effective across thousands of cooks. The numbers represent hours, divided into three distinct phases that optimize tenderness, bark development, and final texture.
Phase One: The First 3 Hours (Smoke Exposed)
Place rubbed ribs directly on the smoker grates, bone-side down. This initial phase is critical for smoke absorption. The meat’s surface is still relatively firm, allowing maximum smoke penetration. Resist the urge to spray, mop, or wrap during this phase—you want the surface to develop bark undisturbed.
Maintain 225°F and consistent smoke. At the 1.5-hour mark, spritz the ribs lightly with apple juice or cider vinegar. This adds subtle flavor and helps prevent excessive drying. Repeat the spritz every 30 minutes for the remainder of this phase. Don’t oversaturate—just a light mist.
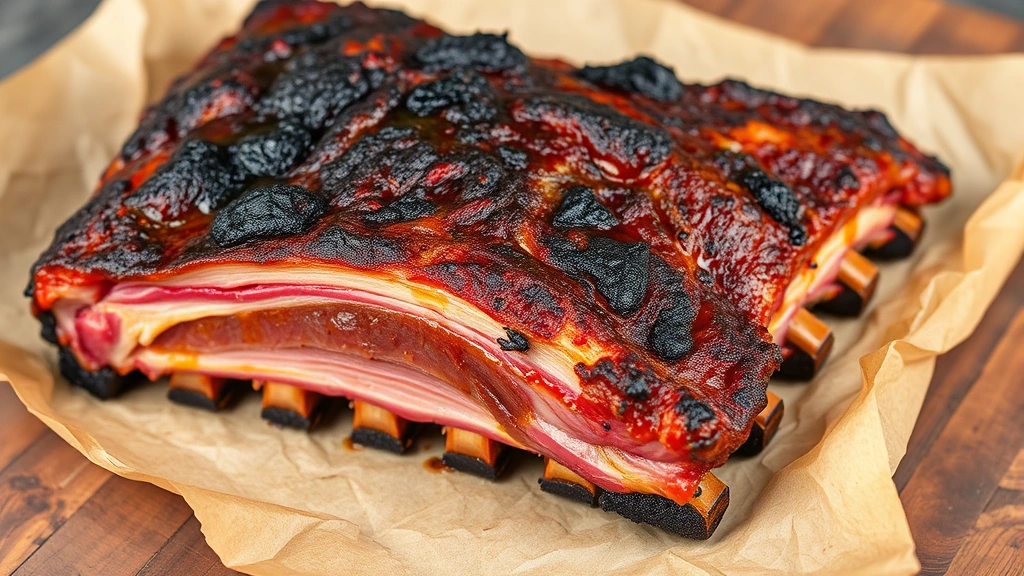
By hour three, you should see a distinct dark bark forming on the surface, and the meat will have pulled back from the bones by approximately 1/4 inch. The smoke ring (that pink layer just beneath the surface) develops during this phase, indicating successful smoke absorption.
Phase Two: The Next 2 Hours (Wrapped and Braised)
This phase tenderizes the meat by creating a humid environment. Remove the ribs and place them on heavy-duty aluminum foil. Add a braising liquid—commonly a mixture of butter, brown sugar, honey, and a splash of cider vinegar or bourbon. Some pitmasters use apple juice or even Dr Pepper for sweetness.
Here’s an effective braising liquid:
- 4 tablespoons butter
- 3 tablespoons honey
- 2 tablespoons brown sugar
- 2 tablespoons cider vinegar
- 1 teaspoon vanilla extract (optional but excellent)
Divide this mixture between two foil packets (one per rack), place the ribs on the foil, then wrap tightly. This creates a sealed environment where steam and heat rapidly break down collagen and connective tissue. The meat becomes noticeably more tender, and the sugars caramelize into the meat.
Return the wrapped packets to the smoker and maintain 225°F. No additional smoke is needed during this phase—the foil prevents smoke penetration anyway. This is your hands-off period; check only once to ensure nothing has leaked.
Phase Three: The Final 1 Hour (Unwrapped and Glazed)
After two hours of wrapping, unwrap the ribs carefully—the liquid inside is extremely hot. Reserve this liquid; it’s liquid gold for basting. Place the ribs back on the grates, bone-side down.
At this stage, the meat is incredibly tender. The final hour firms up the exterior, allows the bark to re-establish, and provides time for sauce absorption if you choose to apply it. Brush the ribs with your favorite barbecue sauce during the last 15-20 minutes of cooking. The heat caramelizes the sauce, creating a glossy finish.
If you prefer unwrapped ribs (some pitmasters skip wrapping entirely), extend the first phase to 4-5 hours and skip phases two and three. You’ll achieve excellent results with slightly less tenderness but superior bark development. This “Texas crutch” variation suits those who prioritize bark over fall-off-the-bone texture.
Testing for Doneness
Professional pitmasters use the “bend test” to determine doneness. Pick up a rack with tongs in the middle—properly cooked ribs should bend significantly and nearly break in half. The meat should pull back from the bones by 1/2 inch or more, and a toothpick should slide through the meat with zero resistance.
Internal temperature is less relevant for ribs than for other cuts, but properly cooked ribs reach approximately 190-203°F in the thickest part. Use your instant-read thermometer to verify, but don’t rely solely on temperature—visual and tactile cues matter more.
If ribs aren’t quite done at the 5-6 hour mark, continue cooking in 30-minute increments. Factors like rib size, smoker type, and ambient temperature affect total cooking time. Keep detailed notes so you can refine your process for future cooks.
A common mistake is overcooking, which results in mushy meat that falls apart rather than cleanly separating from bone. Err on the side of slightly undercooked—you can always return ribs to the smoker, but you can’t undo mushiness.
Resting and Serving
Resting is non-negotiable. Remove the ribs from the smoker and let them rest on a cutting board for 5-10 minutes before cutting. This allows juices to redistribute throughout the meat, ensuring each bite stays moist. Cutting too early causes moisture loss and dry ribs.
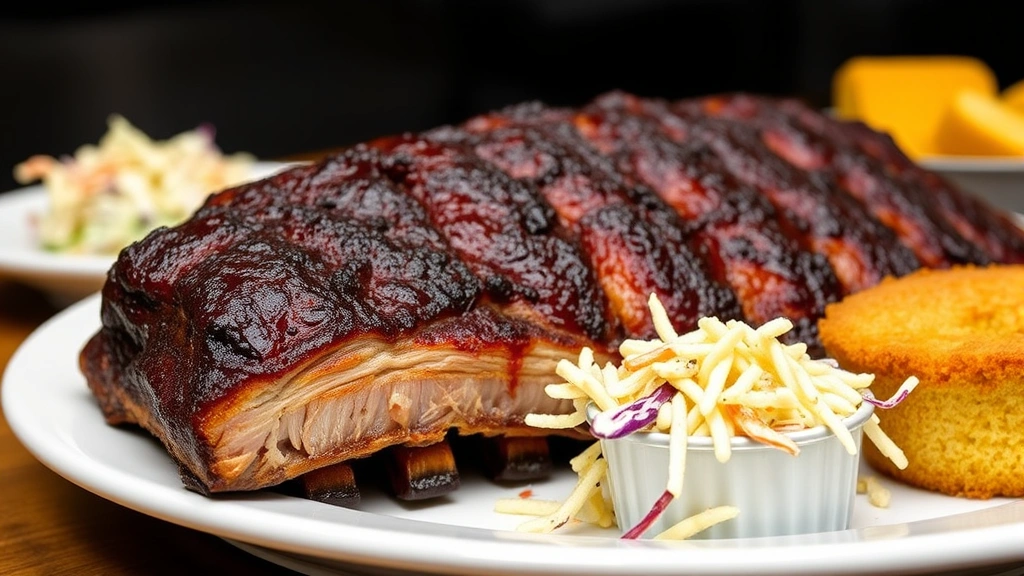
For serving, cut between the bones using a sharp knife. Presentation matters—arrange the ribs standing upright on a platter to showcase the smoke ring and bark. Serve with extra sauce on the side; let guests apply as much or as little as they prefer.
Pair smoked ribs with classic sides. Creamy coleslaw provides contrast to the rich meat. Baked beans complement the smoky flavors. Cornbread or homemade bread rounds out the meal. Pickled vegetables like homemade pickles provide brightness and cut through richness.
If you have leftovers, store them in an airtight container in the refrigerator for up to 4 days. Reheat gently in a 225°F oven wrapped in foil to preserve moisture. Cold smoked ribs make exceptional sandwiches when shredded and tossed with sauce.
For a complete barbecue experience, explore how to cook with cast iron for cornbread, or check the Fresh Plated Daily Blog for complementary recipes. If you’re planning a summer cookout, browse best breakfast food recipes for morning preparations, and don’t forget homemade ice cream for dessert.
FAQ
How long do smoked ribs take to cook?
Using the 3-2-1 method, expect 5-6 hours total at 225°F. Baby back ribs typically finish in 5 hours, while larger spare ribs may need closer to 6 hours. Always prioritize doneness tests over time, as variables like smoker type, weather, and rib size affect cooking duration.
What’s the difference between a smoke ring and bark?
The smoke ring is the pink layer directly beneath the meat’s surface, caused by nitric oxide from smoke reacting with myoglobin. Bark is the dark, crusty exterior that develops from rub caramelization and smoke exposure. Both indicate quality smoking technique.
Should I wrap my ribs or smoke them unwrapped?
Both methods produce excellent ribs. Wrapping (the 3-2-1 method) creates maximum tenderness and faster cooking. Unwrapped smoking develops superior bark and takes longer (6-8 hours) but yields exceptional texture. Choose based on your priorities and available time.
Can I use a pellet grill for this recipe?
Absolutely. Pellet grills maintain consistent temperature exceptionally well, making them ideal for beginners. Follow the same 3-2-1 method or unwrapped approach. Pellet grills produce less aggressive smoke than offset smokers, so consider smoke intensity when selecting pellet brands.
What’s the best wood for smoking ribs?
Hickory is the classic choice, offering strong bacon-like smoke that pairs perfectly with ribs. Oak provides balanced, medium smoke. Fruitwoods (apple, cherry, pecan) offer milder sweetness. Experiment to find your preference, but start with hickory if you’re new to smoking.
Why are my ribs mushy?
Mushiness typically results from overcooking, particularly with the wrapping method. The 3-2-1 timeline is a guideline, not a strict rule. If ribs are already tender at 4.5 hours, remove them rather than continuing to the full 6 hours. Adjust your timing for future cooks based on doneness tests.
Can I smoke ribs overnight?
Yes, though it requires careful temperature management. Many pitmasters smoke ribs overnight at 225°F, finishing in the morning. Use a reliable thermometer with an alarm to monitor temperature throughout the night. This method works exceptionally well for preparing ribs for daytime serving.
How do I achieve more bark?
Maximize bark by smoking unwrapped for the entire cook (6-8 hours at 225°F) rather than using the 3-2-1 method. Increase your rub application, ensuring a thick, even coating. Avoid spritzing during the first few hours, which softens the forming bark. Use a smoker that produces thin, blue smoke consistently.


