Homestyle Chicken and Gravy? Grandma’s Secret
There’s something magical about a plate of tender chicken smothered in rich, velvety gravy. It’s the kind of comfort food that transports you straight back to your grandmother’s kitchen, where the aroma of slow-cooked chicken and bubbling gravy filled every corner of the house. This beloved chicken and gravy recipe has been passed down through generations, and today, we’re unveiling the secrets that make it truly spectacular.
The beauty of homestyle chicken and gravy lies in its simplicity and the care taken in each step. Unlike complicated restaurant dishes, this is honest, straightforward cooking that relies on quality ingredients and proper technique. Whether you’re cooking for a family dinner, a special occasion, or simply craving that nostalgic taste of home, mastering this classic dish will make you the hero at any table.
In this guide, we’ll walk through every aspect of creating restaurant-quality chicken and gravy at home, from selecting the right cut of chicken to achieving that silky gravy texture that coats a spoon perfectly. Let’s dive into Grandma’s secrets.
Choosing the Right Chicken Cut
The foundation of any great chicken and gravy dish starts with selecting the proper cut of chicken. While you might be tempted to use boneless, skinless breasts for convenience, Grandma knew better. The most flavorful option is bone-in, skin-on chicken thighs and drumsticks. These cuts contain significantly more collagen and fat, which break down during cooking to create a naturally rich, gelatinous gravy without any additional thickeners.
Bone-in chicken thighs are particularly prized because they stay moist and tender during the cooking process, while the bones contribute essential flavor compounds that elevate your gravy from ordinary to extraordinary. If you prefer white meat, bone-in chicken breasts work wonderfully too, though they require slightly shorter cooking times to prevent drying out. A combination of both dark and white meat creates an interesting texture profile and appeals to different preferences at the dinner table.
When selecting your chicken, look for pieces that are fresh, with no discoloration or off odors. Pat them dry with paper towels before cooking—this is crucial for achieving that beautiful golden-brown exterior that locks in moisture and develops deep, complex flavors through the Maillard reaction.
Preparing Your Ingredients
Proper mise en place—having all ingredients prepped and ready—is the secret weapon of every experienced cook. For this classic dish, you’ll need chicken stock or broth, which forms the base of your gravy. Homemade stock is ideal, but quality store-bought versions work perfectly well. The difference between stock and broth matters: stock is made from bones and creates a richer, more gelatinous result, while broth is made from meat and is lighter.
Beyond stock, gather your aromatics: one large yellow onion (roughly chopped), four to five garlic cloves (minced), and fresh herbs like thyme and bay leaves. These humble ingredients are where much of the depth comes from. Fresh herbs are superior to dried in this application because they release their essential oils more effectively during the cooking process.
You’ll also need all-purpose flour for creating a roux—the thickening agent that gives gravy its signature body. Some cooks prefer using cornstarch or arrowroot powder for a more delicate texture, but flour provides a more traditional, rustic result. Have cold butter on hand as well; it’s essential for both browning the chicken and enriching the final gravy.
Browning the Chicken Properly
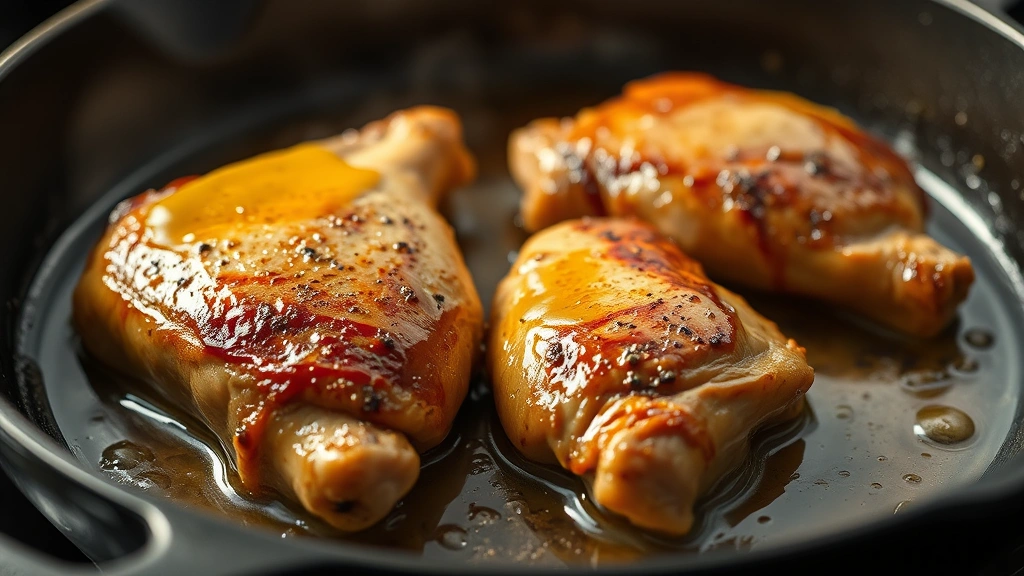
This step cannot be rushed or skipped. Browning the chicken is where the magic begins. Heat a large, heavy-bottomed Dutch oven or deep skillet over medium-high heat until it’s genuinely hot—you should see wisps of smoke beginning to form. Add two tablespoons of butter and let it foam, then carefully place your chicken pieces skin-side down in the hot fat.
Resist the urge to move the chicken around. Let each piece sit undisturbed for four to five minutes, allowing the skin to make direct contact with the hot surface. This creates a golden, crispy exterior through the Maillard reaction, which is a chemical process that develops hundreds of new flavor compounds. When you lift a piece and see that beautiful golden-brown color, you’ll know it’s ready to flip.
Brown the other side for another three to four minutes, then transfer the chicken to a clean plate. Don’t worry if the chicken isn’t cooked through at this point—that happens later during simmering. The browning step is purely about developing flavor and color, not cooking the meat.
Building the Gravy Base
With the chicken resting on the side, it’s time to build your gravy foundation. In the same pot with all those flavorful brown bits stuck to the bottom (called fond), add your chopped onions and sauté for three to four minutes until they become soft and translucent. Add minced garlic and cook for another minute until fragrant. This aromatic base is crucial—it’s where classical French cooking begins, and it’s exactly what Grandma understood intuitively.
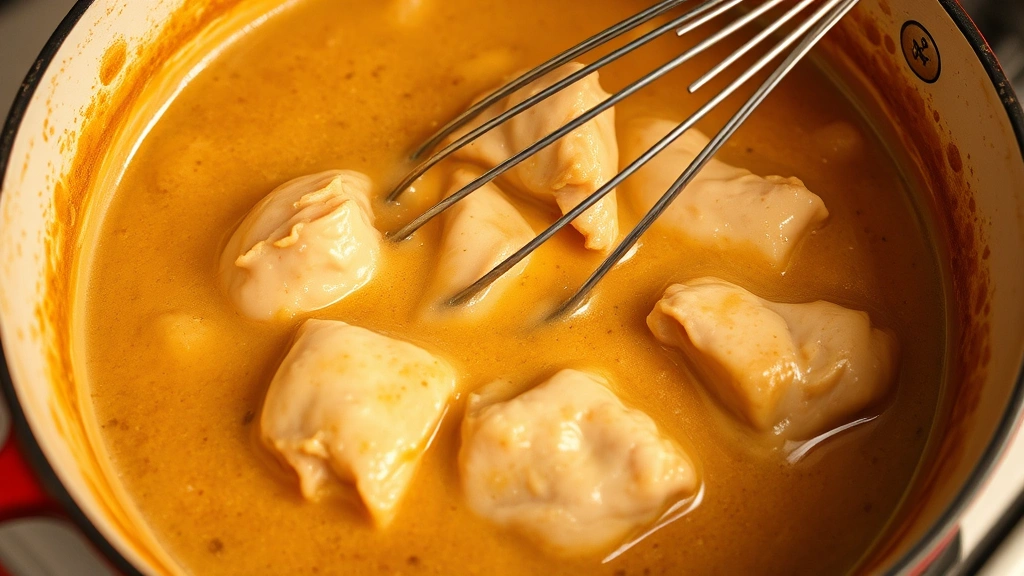
Now comes the roux. Sprinkle three tablespoons of flour over the onions and garlic, stirring constantly with a wooden spoon for about two minutes. This cooking time is important because it helps eliminate the raw flour taste while the flour absorbs the fat in the pan. You’ll notice the mixture becomes thick and paste-like—this is your roux, and it’s the thickening agent for your gravy.
Slowly pour in three to four cups of chicken stock while whisking constantly to prevent lumps from forming. This gradual incorporation ensures a smooth, lump-free gravy. If lumps do appear, don’t panic—simply strain the gravy through a fine-mesh sieve before serving. Add your bay leaves and fresh thyme sprigs, then return the browned chicken pieces to the pot, nestling them into the liquid.
Simmering to Perfection
Reduce heat to low and bring the mixture to a gentle simmer—you should see small, occasional bubbles breaking the surface, not a rolling boil. Cover the pot partially with a lid and let it simmer for thirty to forty minutes, depending on your chicken pieces’ size. Bone-in thighs typically need closer to forty minutes, while breasts may be done in thirty.
The chicken is ready when the meat is tender and easily separates from the bone when tested with a fork. The skin should be soft and have absorbed some of the gravy’s flavor. During this simmering period, the bones release gelatin into the liquid, naturally thickening the gravy and creating that silky mouthfeel that distinguishes homemade gravy from thin, watery versions.
Resist the urge to increase the heat to speed up cooking. Gentle simmering keeps the chicken tender and moist, while high heat can cause the meat to become tough and stringy. This is where patience becomes a virtue—low and slow is always the answer with braised dishes.
Seasoning and Finishing Touches
Once your chicken is cooked through, it’s time to assess and adjust the gravy. Remove the bay leaves and thyme sprigs. Taste the gravy carefully—it should be rich and flavorful. Season generously with kosher salt and freshly ground black pepper. Remember that salt enhances all flavors, so don’t be shy. Many home cooks undersalt their gravies, resulting in a flat-tasting dish.
If your gravy seems too thin, you can make a beurre manié—equal parts softened butter and flour mixed into a paste—and whisk small pieces into the simmering gravy. Each addition will thicken it slightly. Add these in small increments and let them dissolve fully before assessing if you need more. Alternatively, if you have time, simply let the gravy simmer uncovered for an additional five to ten minutes, which allows some liquid to evaporate and naturally concentrate the flavors and thickness.
For extra richness, stir in a splash of heavy cream or a dollop of sour cream just before serving. Some cooks add a teaspoon of Worcestershire sauce or a splash of white wine for added depth. These finishing touches are where you can personalize the recipe to match your family’s preferences. Learn more about how to make homemade sauces to master additional techniques.
Serving Suggestions
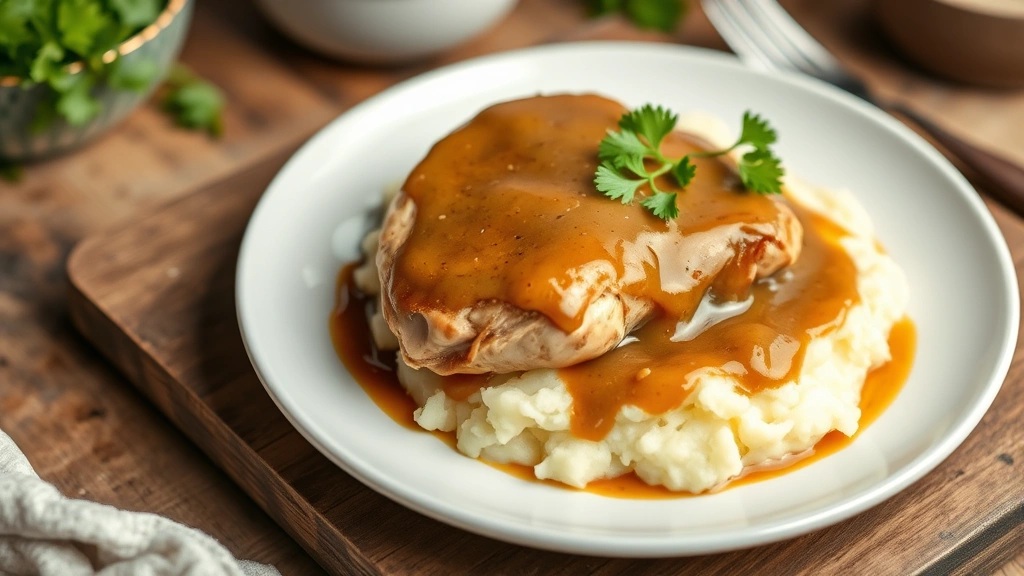
The beauty of homestyle chicken and gravy is its versatility. Traditionally, it’s served over mashed potatoes, which provide the perfect vehicle for soaking up every drop of that precious gravy. Buttery egg noodles work beautifully too, offering a slightly richer complement to the dish. Some families prefer serving it over fluffy biscuits or soft dinner rolls.
For a lighter option, serve the chicken and gravy over cauliflower rice or steamed vegetables. You can even incorporate this dish into other recipes—shred the cooked chicken and use it in quick and easy pasta recipes, or use it as filling for pot pies.
Garnish with fresh parsley or chives for a pop of color and freshness that contrasts beautifully with the rich gravy. A sprinkle of crispy fried onions adds textural interest and a subtle onion flavor that complements the dish perfectly.
Consider pairing this comfort classic with simple sides like steamed green beans, roasted Brussels sprouts, or a crisp green salad dressed with a light vinaigrette. The acidity in the salad helps balance the richness of the gravy, creating a well-rounded meal.
If you’re concerned about food waste reduction tips, save any leftover bones and skin to make homemade stock. This practice honors traditional cooking methods and maximizes every ingredient’s value.
Leftovers keep beautifully in an airtight container in the refrigerator for up to four days. To reheat, gently warm over low heat on the stovetop, adding a splash of chicken stock if the gravy has thickened too much. You can also freeze chicken and gravy for up to three months. When reheating frozen portions, thaw overnight in the refrigerator first, then gently warm on the stovetop.
For those interested in exploring different cooking methods, how to use a pressure cooker can provide alternative techniques for preparing this dish in a fraction of the traditional time, though the stovetop method allows for more control over the final texture and flavor development.
FAQ
Can I use boneless chicken breasts for this recipe?
Yes, you can, though the results won’t be quite as rich since boneless breasts lack the collagen and gelatin from bones. If using boneless breasts, reduce the simmering time to twenty to twenty-five minutes and consider adding a tablespoon of gelatin or a splash of cream to compensate for the missing richness. Bone-in breasts are a better compromise.
What’s the difference between gravy and sauce?
Gravy is traditionally made from meat drippings and stock, thickened with flour or another starch, and served with meat dishes. Sauce is a broader category that can be made from various ingredients. Both use similar techniques—learn more by exploring how to make homemade pasta sauce to understand sauce-making principles.
How do I fix lumpy gravy?
Strain the gravy through a fine-mesh sieve to remove lumps. Alternatively, use an immersion blender to smooth out the lumps. To prevent lumps initially, always whisk the stock in slowly while stirring the roux constantly.
Can I make this in advance?
Absolutely. Prepare the dish completely, cool it to room temperature, then refrigerate in an airtight container for up to four days. Reheat gently on the stovetop over low heat, stirring occasionally and adding a splash of stock if needed. This dish often tastes even better the next day as flavors meld.
What type of chicken stock works best?
Homemade stock is superior because it contains gelatin from bones, creating a naturally rich, velvety texture. However, quality store-bought bone broth or chicken stock works well. Avoid broth labeled as “light” or “low-sodium,” as these often lack the body and flavor needed for a proper gravy.
Why does my gravy break or separate?
Gravy can break if the heat is too high or if you add cold liquid to hot roux too quickly. Always whisk slowly and maintain a gentle simmer. If separation occurs, whisk vigorously off heat or blend with an immersion blender to recombine.
Can I make this gluten-free?
Yes. Replace the all-purpose flour with cornstarch, arrowroot powder, or a gluten-free flour blend. Use a one-to-one ratio, though cornstarch may create a slightly more delicate texture. Ensure your chicken stock is certified gluten-free.


