Best Sourdough English Muffins? Proven Recipe
Sourdough English muffins represent the pinnacle of breakfast baking—combining the tangy complexity of wild fermentation with the distinctive nooks and crannies that make English muffins irresistible. Unlike their yeasted counterparts, sourdough versions develop deeper flavor through extended fermentation, creating a naturally leavened crumb with superior texture and digestibility. If you’ve ever wondered how to achieve that perfect balance between a chewy interior and crispy exterior, this proven recipe will transform your breakfast table.
Making sourdough English muffins at home requires patience and technique, but the results far surpass commercial varieties. The process involves building a robust sourdough starter, developing the dough through bulk fermentation, shaping individual muffins, and cooking them on a griddle or cast iron surface. This guide walks you through every step, from starter maintenance to troubleshooting common issues, ensuring consistent success every time you bake.
Understanding Sourdough English Muffins
Sourdough English muffins differ fundamentally from standard English muffins because they rely exclusively on wild yeast and bacteria for leavening rather than commercial yeast. This natural fermentation process creates a more complex flavor profile—earthy, slightly tangy, with subtle notes that develop over days rather than hours. The extended fermentation also breaks down gluten and makes the dough easier to digest.
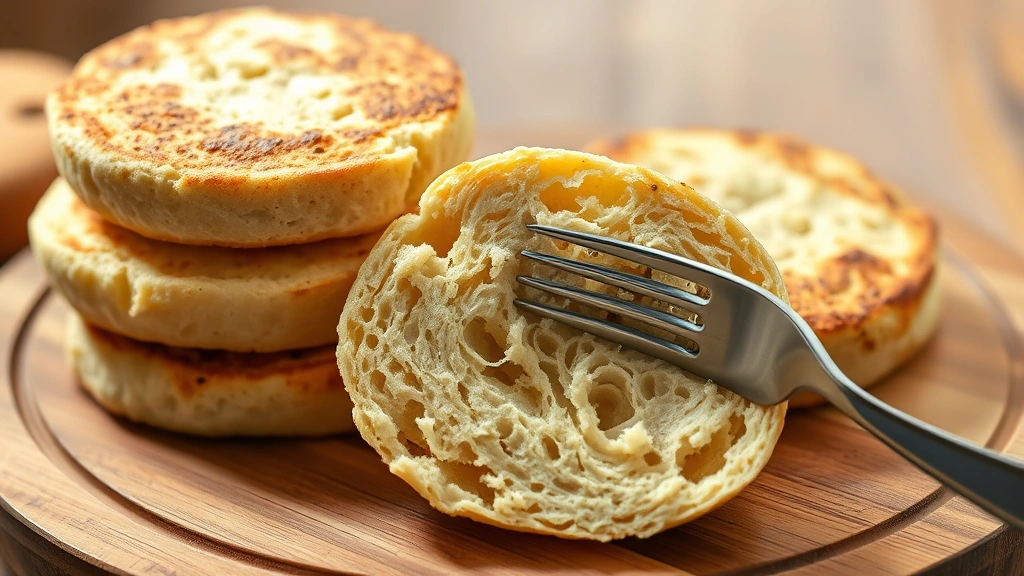
The distinctive texture of English muffins comes from cooking them on a griddle rather than baking them in an oven. This method creates a golden-brown exterior while the interior steams gently, producing those coveted air pockets. When you split a perfectly made sourdough English muffin with a fork, you’ll find an open crumb structure ideal for absorbing butter, jam, or your favorite spreads.
Unlike regular sandwich bread, English muffins benefit from a slightly wetter dough and longer fermentation periods. The sourdough method intensifies these characteristics, requiring you to understand fermentation timing and dough handling techniques. Many bakers find that sourdough English muffins have superior keeping qualities—they stay fresh longer and develop even better flavor after a day or two.
Essential Ingredients and Measurements
Creating exceptional sourdough English muffins starts with simple, quality ingredients. You’ll need just five components, though proper ratios matter significantly for achieving the ideal texture and rise.
- Active sourdough starter: 150 grams (fed 4-6 hours prior, at peak bubbling stage)
- Bread flour: 350 grams (higher protein content ensures proper gluten development)
- Water: 210 grams (adjust based on humidity and flour absorption)
- Sea salt: 7 grams (improves flavor and strengthens gluten network)
- Cornmeal or semolina: For dusting (prevents sticking during cooking)
The ratio of starter to flour creates a relatively high hydration dough—approximately 60% hydration—which produces the characteristic open crumb. Your active sourdough starter should be bubbly and nearly doubled in size before mixing, indicating peak fermentation activity. If you’re new to sourdough baking, we recommend reviewing Fresh Plate Daily’s comprehensive baking guides for detailed starter information.
Water temperature influences fermentation speed significantly. During warmer months, use cooler water (around 75°F) to slow fermentation; in winter, warmer water (80-85°F) accelerates the process. This control allows you to manage bulk fermentation timing around your schedule.
Preparing Your Sourdough Starter
A healthy, vigorous sourdough starter forms the foundation of successful English muffins. Your starter should be maintained at a 1:1:1 ratio (starter:flour:water by weight) and fed regularly, ideally once or twice daily depending on room temperature.
Starter maintenance routine:
- Feed your starter 4-6 hours before beginning the recipe
- Use a clean jar and combine equal parts starter, flour, and water
- Mix thoroughly until no dry flour remains
- Cover loosely and leave at room temperature
- Watch for visible bubbles throughout the mixture, indicating active fermentation
- Peak activity occurs when the starter has roughly doubled and shows a dome shape
For sourdough English muffins, you want your starter at absolute peak—just as it reaches maximum volume but before it begins collapsing. This timing ensures maximum leavening power. If your starter peaks and you’re not ready to bake, you can refrigerate it for up to two weeks, feeding it before use.
The flour you feed your starter affects the final muffin flavor. Whole wheat or rye additions create deeper, more complex notes, while all-white flour produces milder tanginess. Experiment with different feeding schedules to develop a starter personality that matches your taste preferences.
Step-by-Step Recipe Instructions
Mixing and autolyse phase (5 minutes active time):
Combine 350 grams bread flour and 210 grams water in a large bowl, mixing until all flour is hydrated. Let this mixture rest for 30 minutes—this autolyse period allows flour to fully absorb water and begins gluten development naturally. After resting, add 150 grams of peak-activity sourdough starter and 7 grams sea salt, incorporating thoroughly with wet hands or a dough whisk.
Bulk fermentation phase (4-5 hours at 75°F):
This phase determines your muffins’ flavor and texture. Place the mixed dough in a lightly oiled container and cover with a damp kitchen towel or plastic wrap. Every 30 minutes for the first two hours, perform a series of stretch-and-folds: wet your hand, grab one side of the dough, stretch it up and fold it over the center, rotating the bowl 90 degrees and repeating four times. This builds strength without aggressive kneading.
After two hours of stretch-and-folds, let the dough rest undisturbed for the remaining 2-3 hours. You’re looking for roughly 50-75% volume increase and visible bubbles throughout the dough. The dough should feel airy but still hold its shape. Room temperature dramatically affects timing—warmer kitchens ferment faster, cooler ones slower. Use visual and tactile cues rather than strict timing.

Shaping and final proof (2-4 hours):
Turn your dough onto a lightly floured surface and gently divide into 8 equal pieces (roughly 100 grams each). Shape each piece into a ball by pulling the edges toward the center, creating surface tension. Flip seam-side down and use your cupped hands to roll each ball in a circular motion, creating a smooth, rounded top.
Place shaped muffins on parchment paper, leaving 2 inches between each one. Cover loosely with plastic wrap or a kitchen towel and allow final proof at room temperature. The muffins should increase noticeably in size and feel pillowy when gently pressed—they should spring back slowly rather than immediately or not at all. This typically takes 2-4 hours depending on temperature and starter strength.
Pre-cooking preparation:
About 30 minutes before cooking, dust each muffin generously with cornmeal or semolina on both sides. This prevents sticking and creates a pleasant texture contrast. You can also use a combination of cornmeal and whole wheat flour for added flavor. Have your griddle or cast iron skillet ready—you’ll want to start cooking as soon as you’re ready, as the muffins benefit from cooking shortly after final proof.
Griddle Cooking Technique
Cooking sourdough English muffins correctly separates good results from exceptional ones. Unlike oven-baked breads, muffins require careful temperature management and precise timing to develop the ideal crust-to-crumb ratio.
Equipment setup:
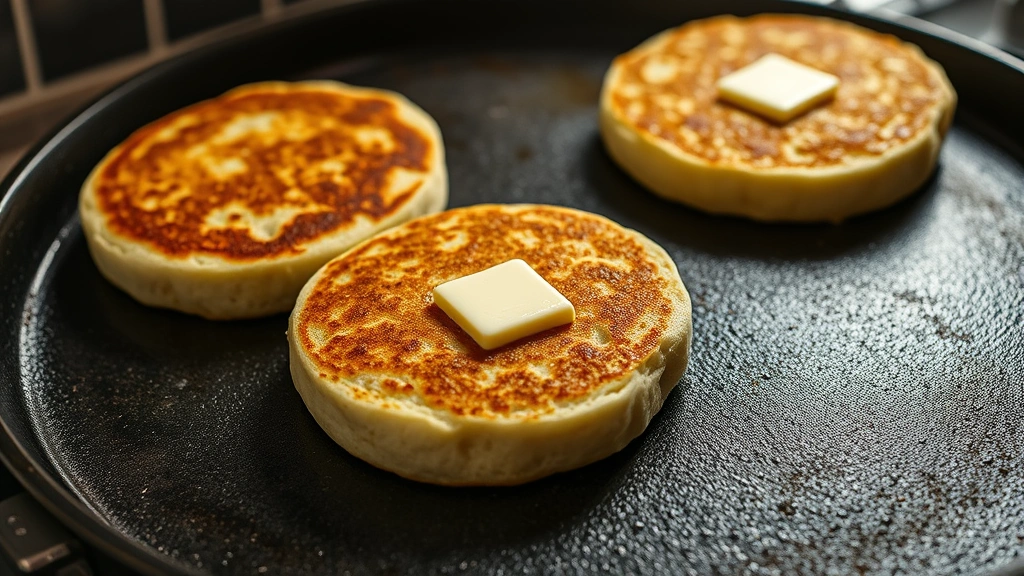
Use a heavy-bottomed griddle, cast iron skillet, or flat-top griddle heated to medium-low heat (approximately 325-350°F). If you’re using cast iron cooking, season your pan properly beforehand to prevent sticking. A properly seasoned cast iron surface requires minimal oil and develops superior browning. Heat your pan for at least 5 minutes before placing muffins to ensure even temperature distribution.
Cooking process:
- Test pan temperature by dropping a small water bead on the surface—it should sizzle gently, not violently
- Carefully transfer muffins to the hot pan, cornmeal-side down, leaving 1 inch between each
- Cook for 5-7 minutes until the bottom develops a golden-brown crust and sounds hollow when tapped
- Flip carefully using a thin spatula, supporting the muffin from underneath
- Cook the second side for 4-5 minutes until golden and the muffin feels firm when pressed
- The total cooking time is typically 10-12 minutes per batch
Temperature control proves critical—too hot and your muffins brown excessively before cooking through; too cool and they spread and cook unevenly. You may need to adjust heat slightly between batches as the pan temperature stabilizes. A reliable instant-read thermometer can help—the interior should reach 200-205°F when fully cooked.
Some bakers cover their pan with a dome or large pot lid during cooking to trap steam, which helps the interior cook while maintaining a tender crumb. If you use this method, reduce cooking time slightly and monitor closely to prevent over-browning.
Storage and Reheating Tips
Properly stored sourdough English muffins maintain quality for up to a week and actually develop deeper flavor over time. The tangy notes intensify as the muffins age, making day-old muffins exceptional.
Short-term storage (3-5 days):
Allow muffins to cool completely on a wire rack before storing. Place them in an airtight container or resealable bag at room temperature. Avoid refrigeration unless your kitchen is exceptionally warm—cold temperatures dry out the crumb faster than room temperature storage. If you need to store longer, wrap individual muffins in plastic wrap before placing in a bag, which maintains moisture better.
Freezing for extended storage:
Sourdough English muffins freeze beautifully for up to three months. Wrap cooled muffins individually in plastic wrap, then place in a freezer bag with as much air removed as possible. Frozen muffins thaw at room temperature in 1-2 hours or can be toasted directly from frozen—add 1-2 minutes to standard toasting time.
Reheating methods:
- Toaster: Split muffins with a fork and toast to desired crispness—this revives the texture beautifully
- Toaster oven: Wrap in foil and warm at 350°F for 5 minutes, creating a soft-crust version
- Skillet: Butter-toast split muffins in a hot pan for 2-3 minutes per side, creating a crispy exterior
- Microwave: Wrap in a damp paper towel and microwave 15-20 seconds—quick but less ideal texturally
For food waste reduction, stale muffins transform into breadcrumbs, croutons, or bread pudding. Cube day-old muffins and dry them in a low oven, then pulse in a food processor for homemade breadcrumbs—far superior to store-bought versions.
Troubleshooting Common Problems
Dense, gummy crumb:
This typically indicates underproofing or insufficient fermentation. Ensure your starter is at peak activity before mixing, and extend bulk fermentation time. The dough should show visible bubbles and increase 50-75% in volume. Additionally, verify that muffins are cooked through—internal temperature should reach 200-205°F. Dense muffins also result from using old flour with weak gluten—store flour in cool, dry conditions and replace every 6-8 months.
Flat, spread-out muffins:
Overproofing causes muffins to lose structure and spread during cooking. Reduce final proof time—muffins should feel pillowy but still spring back when gently pressed. If your kitchen is warm, use cooler water during mixing and watch for visual cues rather than relying on timing alone. A dough thermometer helps—aim for 75-78°F dough temperature at the end of mixing.
Pale, underbaked exterior:
Pan temperature is likely too low. Increase heat gradually and use an instant-read thermometer to verify griddle temperature. Medium-low (325-350°F) should produce golden browning in 5-7 minutes on the first side. If your pan has hot and cool spots, rotate muffins halfway through cooking to ensure even browning.
Excessive sourness:
Longer fermentation develops more acidity. If your muffins taste overly sour, reduce bulk fermentation time by 30 minutes or use cooler water to slow fermentation. Alternatively, feed your starter more frequently (twice daily) to reduce acidity in the culture. The type of flour also affects sourness—whole wheat increases tang more than white flour.
Starter won’t rise:
Your starter may be underfed, inactive, or kept too cold. Increase feeding frequency to twice daily, use warmer water (80-85°F), and ensure your kitchen temperature stays above 70°F. If your starter shows no activity after a week of regular feeding, it may have died—discard and begin a new culture. A healthy starter typically doubles within 4-8 hours of feeding at room temperature.
Muffins stick to the griddle:
Insufficient cornmeal dusting or inadequate seasoning on cast iron causes sticking. Dust muffins generously on both sides with cornmeal before cooking, and ensure your cast iron has a dark, smooth patina. You can also lightly oil the pan with a high-smoke-point oil (avocado, grapeseed) before cooking, though this reduces the traditional texture slightly.
FAQ
Can I use all-purpose flour instead of bread flour?
All-purpose flour works but produces softer, less structured muffins. Bread flour’s higher protein content (12-14% vs. 10-12%) develops stronger gluten, creating better rise and structure. For best results, stick with bread flour, though a blend of 75% all-purpose and 25% vital wheat gluten approximates bread flour.
How do I know when my sourdough starter is ready to use?
Your starter should roughly double in size and show visible bubbles throughout. When you poke it, it should spring back slowly or not at all. The surface may dome slightly before beginning to collapse. Peak activity occurs 4-8 hours after feeding, depending on temperature and starter maturity.
What’s the difference between English muffins and regular bread?
English muffins use wetter dough, shorter fermentation, and griddle cooking rather than oven baking. This produces a tender, open crumb with a chewy interior and crispy exterior. Regular bread typically has lower hydration and is oven-baked, creating a different crumb structure and crust.
Can I make sourdough English muffins without a starter?
Not truly—the sourdough designation requires wild yeast fermentation. However, you could make English muffins with commercial yeast, which is faster but lacks the complex flavor sourdough provides. If you don’t have a starter, begin one now—it takes just 5-7 days to become usable.
Why do my muffins spread instead of rise?
Spreading indicates overproofing or weak gluten development. Reduce final proof time, perform more stretch-and-folds during bulk fermentation, or use bread flour with higher protein. Ensure your kitchen temperature doesn’t exceed 78°F, which accelerates fermentation.
Can I refrigerate the dough overnight?
Yes—this is called a cold retard and develops flavor beautifully. After shaping, refrigerate muffins for 8-16 hours, then allow them to come to room temperature (2-3 hours) before cooking. Cold fermentation produces more complex flavor and easier-to-handle dough.
What’s the best way to split English muffins?
Always use a fork to split muffins by inserting tines around the equator and gently pulling apart. This creates a rustic, uneven surface with maximum nooks and crannies—perfect for trapping butter and spreads. Avoid using a knife, which crushes the delicate crumb.
How can I add flavor variations?
Incorporate seeds, herbs, or spices during mixing—try 30 grams toasted sesame seeds, 5 grams dried Italian herbs, or 3 grams ground cardamom. For sweeter muffins, add 15 grams honey or maple syrup. Feed your starter on rye or whole wheat flour for deeper, nuttier flavor.
Do I need special equipment?
A heavy griddle or cast iron skillet is essential—avoid thin pans that create hot spots. Beyond that, you need a large bowl, kitchen scale for accuracy, wet hands for mixing, and a thermometer to verify internal temperature. Most home bakers already own these basics.


