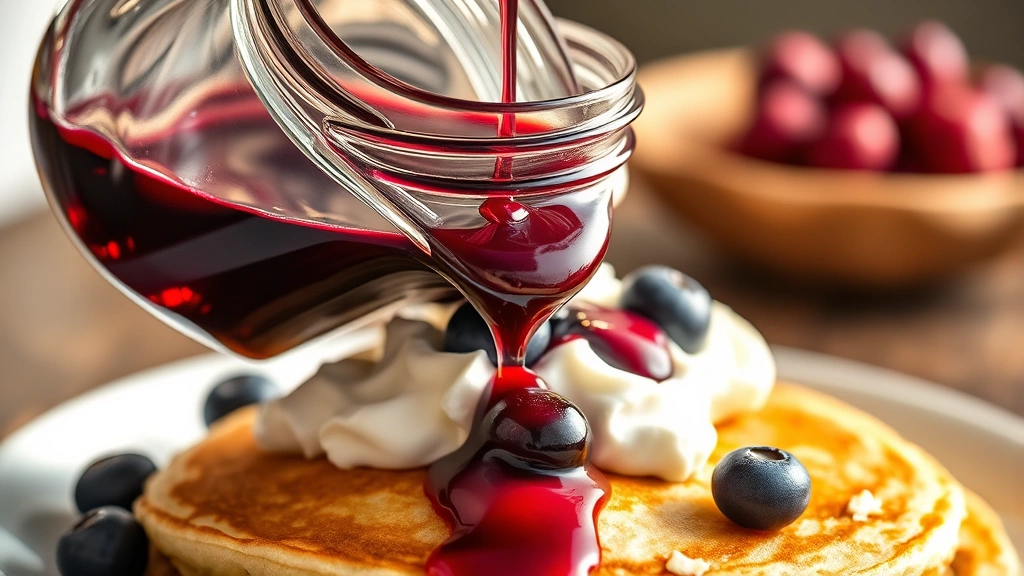
Making homemade blueberry syrup is one of the easiest and most rewarding kitchen projects you can tackle. Unlike store-bought versions loaded with artificial flavors and excessive sugar, homemade blueberry syrup delivers pure, vibrant berry flavor that transforms ordinary breakfasts into something truly special. Whether you’re drizzling it over sourdough English muffins, pancakes, waffles, or yogurt, this simple syrup brings restaurant-quality results to your table.
The beauty of this recipe lies in its simplicity and versatility. You need just a handful of ingredients, minimal cooking time, and basic kitchen equipment. The entire process takes roughly 20-30 minutes from start to finish, making it perfect for weekend breakfast prep or last-minute dessert drizzles. Fresh blueberries shine through beautifully, creating a syrup that’s naturally sweet, slightly tart, and absolutely delicious.
Beyond breakfast applications, this syrup works wonderfully as a topping for ice cream, a component in cocktails, a filling for pastries, or even a glaze for roasted meats. Once you master the basic technique, you’ll find yourself making batch after batch. Let’s dive into everything you need to know about creating this homemade treasure.
Ingredients You’ll Need
The ingredient list for blueberry syrup is refreshingly short, which is part of what makes this recipe so appealing. Quality ingredients make all the difference here, since there’s nowhere for flavors to hide.
- Fresh blueberries: 3 cups (about 18 ounces). Fresh berries deliver superior flavor compared to frozen, though frozen works in a pinch. Look for plump, deeply colored berries without soft spots or mold.
- Granulated sugar: 1.5 cups. This sweetens the syrup while helping it achieve the right consistency. You can substitute with honey, maple syrup, or agave for different flavor profiles.
- Water: 0.5 cup. This helps the berries release their juice and creates the syrup base. Spring or filtered water works best.
- Fresh lemon juice: 2 tablespoons. Lemon brightens the blueberry flavor and prevents the syrup from tasting one-dimensional. Freshly squeezed is always superior to bottled.
- Lemon zest: 0.5 teaspoon (optional but recommended). This adds aromatic citrus notes and beautiful flecks throughout your syrup.
- Vanilla extract: 0.5 teaspoon (optional). A touch of vanilla deepens the berry flavor and adds subtle complexity.
- Pinch of salt: Just a small amount enhances all the other flavors without making the syrup taste salty.
Consider sourcing blueberries from farmers markets or local orchards when possible. Peak blueberry season runs from June through August in most regions, offering the best prices and most vibrant flavors. If you’re making this syrup outside peak season, high-quality frozen blueberries (thawed) are perfectly acceptable.
Equipment Essentials
You don’t need fancy equipment to make excellent blueberry syrup. Most home cooks already have everything required.
- Medium saucepan: A 2-3 quart saucepan works perfectly. Stainless steel or non-stick both work well.
- Wooden spoon or silicone spatula: For stirring and mashing berries without damaging the pan surface.
- Fine mesh strainer: Optional but helpful for achieving smooth syrup. If you prefer a rustic, berry-filled syrup, you can skip this step.
- Measuring cups and spoons: Accuracy matters in syrup-making for consistent results.
- Glass bottles or jars: For storing the finished syrup. Mason jars work beautifully and keep syrup fresh longer.
- Candy or instant-read thermometer: Optional but useful for monitoring temperature and achieving the perfect consistency.
- Cheesecloth: If you prefer crystal-clear syrup, cheesecloth provides excellent filtering without removing too much flavor.
Step-by-Step Instructions
Follow these carefully outlined steps to create perfect blueberry syrup every time.
- Prepare your ingredients: Rinse your blueberries and pat them completely dry with paper towels. Wet berries can dilute your syrup. Measure out all ingredients before beginning. This mise en place approach ensures smooth cooking without scrambling for items mid-process.
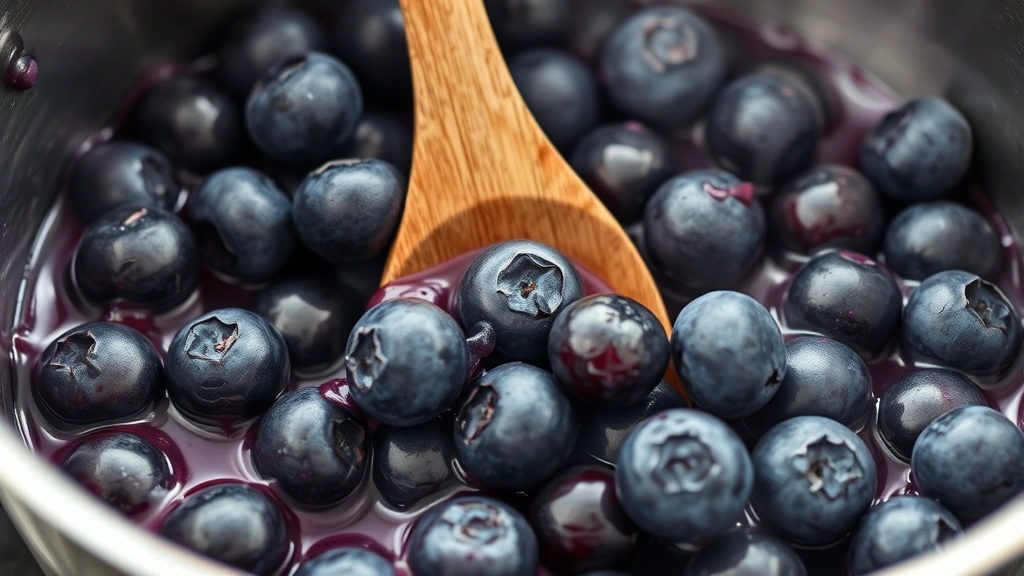
- Combine berries and water: Pour your 3 cups of fresh blueberries and 0.5 cup water into your medium saucepan. Stir gently to combine. The water helps berries begin releasing their juice.
- Heat the mixture: Place the saucepan over medium-high heat. Bring the mixture to a gentle boil, stirring occasionally. You should see steam rising and small bubbles breaking the surface. This typically takes 5-8 minutes depending on your stove.
- Mash the berries: Once boiling, reduce heat to medium. Using your wooden spoon, gently mash the blueberries against the side of the saucepan. You don’t need to pulverize them completely—aim for a mixture with some berry pieces remaining. This releases more juice and intensifies flavor. Continue for 2-3 minutes.
- Add sugar: Stir in your 1.5 cups granulated sugar, one-third at a time, stirring well after each addition. The sugar dissolves into the hot berry mixture. Keep the temperature at a gentle simmer (not a rolling boil, which can make syrup too thick).
- Simmer the syrup: Reduce heat to medium-low. Let the mixture simmer gently for 10-15 minutes. During this time, the syrup thickens as water evaporates. Stir occasionally to prevent sticking. The syrup should coat the back of a spoon lightly when ready. If using a candy thermometer, aim for 220°F (104°C).
- Add finishing touches: Remove from heat and stir in 2 tablespoons fresh lemon juice, 0.5 teaspoon vanilla extract (if using), 0.5 teaspoon lemon zest (if using), and a pinch of salt. Taste and adjust sweetness or tartness as desired. Add more lemon juice if you prefer tangier syrup.
- Strain (optional): For smooth syrup, pour the mixture through a fine mesh strainer into a bowl, pressing gently on solids. For rustic syrup with berry pieces, skip this step and proceed directly to cooling.
- Cool completely: Let the syrup cool to room temperature, about 30-45 minutes. The syrup will thicken further as it cools. If it becomes too thick, thin with a tablespoon or two of water.
- Transfer to storage containers: Pour the cooled syrup into clean glass jars or bottles. Seal tightly and store in the refrigerator.
The entire cooking process is quite forgiving. If your syrup seems too thin, you can return it to the stove and simmer for a few more minutes. If it’s too thick, whisk in water gradually until you reach your preferred consistency. This flexibility makes the recipe beginner-friendly.
Pro Tips for Perfect Syrup
These insider tips help you achieve professional-quality results consistently.
- Don’t skip the lemon: Lemon juice is essential for brightening blueberry flavor. It prevents the syrup from tasting flat or overly sweet. The citric acid also helps preserve the syrup longer.
- Temperature control matters: Maintain a gentle simmer rather than a rolling boil. High heat can cause the syrup to crystallize or become grainy. If you notice rapid boiling, reduce your heat immediately.
- Test consistency properly: To check if your syrup is ready, place a small spoonful on a chilled plate. Let it cool for 30 seconds, then push it with your finger. It should move slowly without running. This is the cold-plate test used by jam makers everywhere.
- Use fresh lemon juice always: Bottled lemon juice contains preservatives that can affect flavor. Fresh-squeezed juice provides superior taste and better preservation properties.
- Don’t overcook the syrup: Cooking too long creates overly thick, almost gel-like syrup. Remember, syrup thickens further as it cools, so stop cooking while it’s still slightly thinner than your target consistency.
- Consider berry type: While blueberries are traditional, you can experiment with blackberries, raspberries, or mixed berries. Adjust cooking time slightly based on berry size and water content.
- Make double batches: Since the process takes minimal time, doubling the recipe makes sense. You’ll have syrup on hand for multiple breakfasts or to share with friends and family.
Storage and Shelf Life
Proper storage ensures your blueberry syrup stays fresh and delicious for weeks.
Refrigerator storage: Sealed in clean glass jars, homemade blueberry syrup keeps for 3-4 weeks in the refrigerator. The combination of sugar and lemon juice acts as natural preservatives. Always use clean utensils when scooping syrup to prevent contamination.
Freezer storage: For longer storage, freeze syrup in ice cube trays, then transfer frozen cubes to freezer bags. This method lets you thaw individual portions as needed. Frozen syrup keeps for up to 6 months. Thaw in the refrigerator overnight before using.
Canning for long-term storage: If you want shelf-stable syrup lasting 1-2 years, you can use water-bath canning methods. Follow NCHFP (National Center for Home Food Preservation) guidelines for safe canning procedures. This requires sterilized jars and proper processing times.
Signs of spoilage: Discard syrup if you notice mold, off-odors, or fermentation bubbles. Properly stored syrup should smell fresh and fruity with no sour notes.
Creative Flavor Variations
Once you master the basic recipe, try these delicious variations.
Blueberry-Lavender Syrup: Add 1 teaspoon dried culinary lavender during the simmering stage. Strain carefully to remove lavender buds. This creates an elegant syrup perfect for breakfast dishes or desserts.
Blueberry-Bourbon Syrup: Stir in 2-3 tablespoons bourbon whiskey after removing from heat. The alcohol cooks off slightly, leaving rich, complex flavor. Perfect for ice cream or cocktails.
Spiced Blueberry Syrup: Add 0.25 teaspoon cinnamon, 0.125 teaspoon nutmeg, and 0.125 teaspoon allspice during cooking. These warm spices complement blueberry beautifully, especially in fall and winter.
Blueberry-Ginger Syrup: Add 1 tablespoon fresh ginger, minced finely, during cooking. The ginger adds warming spice and subtle heat. Strain before serving for smooth texture.
Blueberry-Mint Syrup: Stir in 8-10 fresh mint leaves after removing from heat. Let steep for 5 minutes, then strain. This refreshing variation works wonderfully on yogurt or in cocktails.
Blueberry-Maple Syrup: Replace 0.5 cup granulated sugar with 0.5 cup pure maple syrup. This creates deeper, more complex flavor with subtle woodsy notes. Excellent for bagels and toast.
Blueberry-Raspberry Syrup: Use 1.5 cups blueberries and 1.5 cups raspberries instead of all blueberries. The raspberry tartness creates beautiful balance and gorgeous color.
Each variation requires the same basic cooking technique. Simply adjust flavoring ingredients to your taste preferences. Start with smaller amounts of new flavors and increase if desired.

Using your syrup creatively: Beyond traditional breakfast applications, try drizzling this syrup over sourdough focaccia for a sweet-savory combination, swirling into cheesecake batter before baking, mixing into cocktails for fruity drinks, or brushing onto sourdough pizza crust for unexpected dessert pizzas. The versatility of homemade syrup extends far beyond what most people imagine.
For those interested in understanding the science behind syrup-making, Serious Eats provides excellent technical resources on sugar concentrations and syrup consistency. Additionally, King Arthur Baking Company offers professional guidance on achieving perfect syrup textures through temperature control.
FAQ
Can I use frozen blueberries instead of fresh?
Yes, absolutely. Thaw frozen blueberries completely and drain excess liquid before using. Frozen berries work wonderfully and often cost less than fresh, especially outside blueberry season. The final syrup quality is nearly identical to versions made with fresh berries.
What if my syrup is too thick?
Simply whisk in water, one tablespoon at a time, until you reach your preferred consistency. Warm the syrup slightly if whisking cold syrup for easier blending. This adjustment is quick and easy, so don’t hesitate to modify thickness to your liking.
Can I reduce the sugar content?
You can reduce sugar to 1 cup, though the syrup will be less thick and less shelf-stable. The syrup will still taste delicious but may separate slightly during storage. Stir well before each use. For a healthier alternative, consider using honey or maple syrup instead of granulated sugar.
How do I make syrup without a candy thermometer?
Use the cold-plate test described in the Pro Tips section. This traditional method works just as well as thermometers and requires no special equipment. Most experienced cooks prefer this tactile method.
Is homemade syrup safer than store-bought?
Homemade syrup made with proper hygiene and storage is perfectly safe. The high sugar content and acidic lemon juice create an inhospitable environment for harmful bacteria. Store-bought syrups often contain preservatives and additives not present in homemade versions, making homemade actually preferable for many families.
Can I make this syrup with blueberry jam?
While possible, the result differs significantly from fresh syrup. Jam is thicker and has different flavor characteristics from syrup made with fresh berries. Start with fresh or frozen berries for authentic blueberry syrup.
What’s the difference between syrup and sauce?
Syrup is thinner and pours easily, while sauce is thicker and clings to foods. This recipe creates true syrup through careful temperature control. If you prefer thicker sauce, simply cook longer until it reaches your desired consistency.
Can I use this syrup in baking recipes?
Absolutely. Homemade blueberry syrup works wonderfully in baked goods. Use it as a filling for muffins, a swirl in cheesecake, a glaze for cakes, or a filling for donuts. The pure fruit flavor elevates baked goods significantly compared to store-bought syrups.


