Chicken and Biscuits Recipe: Grandma’s Classic Comfort Food
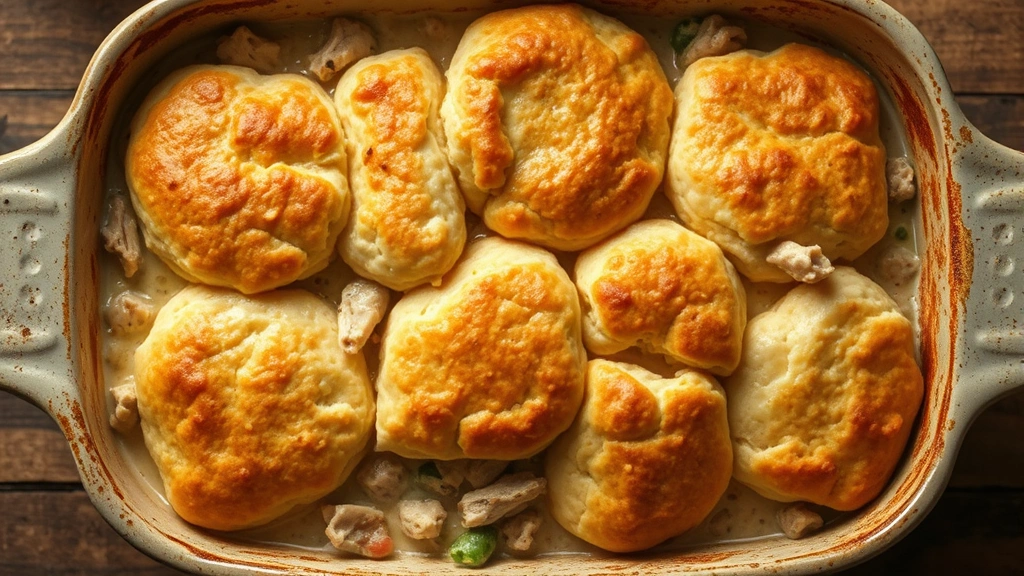
There’s something truly magical about a steaming bowl of chicken and biscuits on a cold evening. This beloved comfort food has graced dinner tables for generations, bringing families together with its warm, inviting flavors and tender, flaky biscuits. Grandma’s version of this classic dish is more than just a recipe—it’s a time-honored tradition that speaks to the heart of home cooking. The creamy chicken filling, studded with vegetables and rich broth, pairs perfectly with buttery biscuits that are crispy on the outside and soft on the inside.
What makes this dish so special is its simplicity combined with depth of flavor. Unlike complicated restaurant dishes, this chicken and biscuits recipe relies on basic ingredients and straightforward techniques that anyone can master. Whether you’re a seasoned cook or just beginning your culinary journey, you’ll find that homemade chicken and biscuits is surprisingly approachable and incredibly rewarding. The beauty of this classic lies in how it transforms humble ingredients into something truly memorable.
Ingredients You’ll Need
The foundation of an excellent chicken and biscuits recipe starts with quality ingredients. For the chicken filling, gather three cups of cooked, shredded chicken (rotisserie chicken works wonderfully), four tablespoons of unsalted butter, one large onion diced, three medium carrots sliced, two celery stalks chopped, four cloves of garlic minced, and one cup of frozen peas. You’ll also need four tablespoons of all-purpose flour for the roux, four cups of chicken broth, one cup of heavy cream, one teaspoon of dried thyme, half a teaspoon of dried rosemary, salt, and black pepper to taste.
For the biscuits, you’ll want two cups of all-purpose flour, one tablespoon of baking powder, half a teaspoon of salt, one cup of cold butter cut into cubes, and three-quarters cup of buttermilk. Some cooks prefer adding a tablespoon of honey to the biscuit dough for subtle sweetness. Having all these ingredients measured and ready before you begin will make the cooking process smooth and enjoyable.
Making the Creamy Chicken Filling
The chicken filling is the soul of this dish, and creating it properly ensures restaurant-quality results at home. Start by melting your butter in a large, heavy-bottomed pot over medium heat. Once the butter is foaming, add your diced onions and cook for about five minutes until they become translucent and fragrant. This step is crucial because it builds the flavor foundation for your entire dish. Add the carrots and celery, continuing to cook for another five minutes while stirring occasionally.
Once your vegetables have softened slightly, add the minced garlic and cook for just one minute—this prevents the garlic from burning and becoming bitter. Now comes the important step of creating a roux, which will thicken your filling. Sprinkle the four tablespoons of flour over your vegetables and stir constantly for two to three minutes. This cooking time allows the flour to lose its raw taste and become a proper thickening agent. You should see the mixture become paste-like and smell nutty and toasted.
Gradually pour in your chicken broth while whisking constantly to prevent lumps from forming. This slow addition is essential for achieving a smooth, silky sauce. Once all the broth is incorporated, add the heavy cream and stir well. Bring the mixture to a gentle simmer and let it cook for about five minutes until it thickens to a consistency similar to gravy. Add your cooked shredded chicken, frozen peas, thyme, and rosemary. Season generously with salt and pepper, tasting as you go. Some home cooks enjoy adding a bay leaf during simmering for extra depth—just remember to remove it before serving. Let this filling simmer gently for another ten minutes while you prepare your biscuits.
Crafting Perfect Biscuit Dough
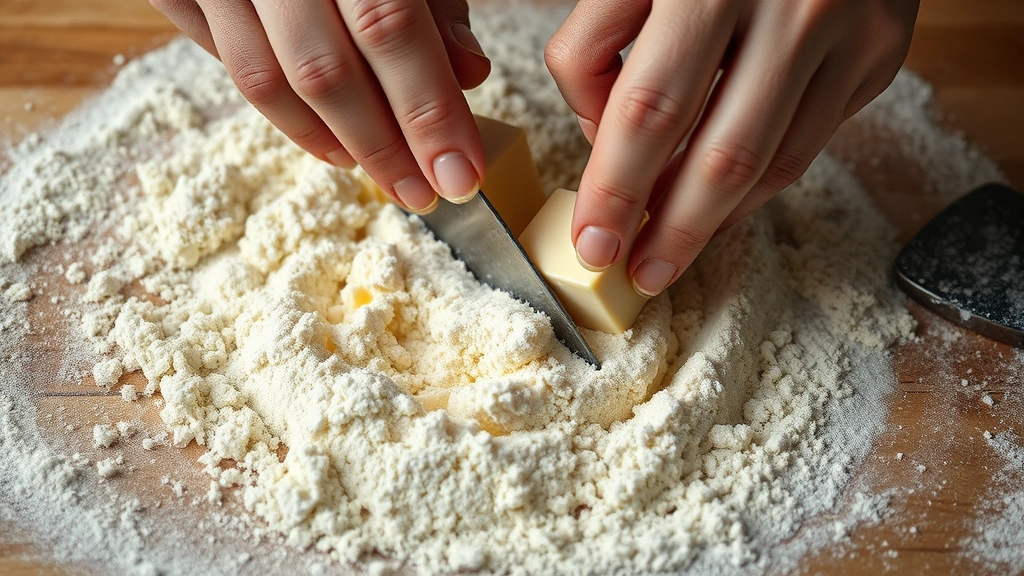
Perfect biscuits are flaky, tender, and golden brown—and they’re entirely achievable at home. The secret lies in keeping everything cold and handling the dough as little as possible. Start by whisking together your two cups of flour, baking powder, and salt in a large mixing bowl. Add your cold butter cubes to the dry ingredients. Using a pastry cutter, two knives, or your fingertips, work the butter into the flour until the mixture resembles coarse breadcrumbs. This step is critical—the small pockets of butter create steam during baking, which makes your biscuits rise and become flaky.
Pour in your buttermilk and gently fold it into the mixture using a wooden spoon or rubber spatula. Mix just until the dough comes together—overmixing develops gluten and results in tough, dense biscuits. The dough should be slightly shaggy and moist but not sticky. If it seems too dry, add a splash more buttermilk. If it’s too wet, dust in a bit more flour.
Turn your dough out onto a lightly floured surface and gently pat it into a half-inch thickness. Using a two-inch biscuit cutter or the rim of a glass, cut out your biscuits and place them on a parchment-lined baking sheet. For extra-tall, impressive biscuits, stack two rounds together before placing on the sheet. Brush the tops lightly with melted butter or buttermilk for a beautiful golden finish.
Assembly and Baking
Preheat your oven to four hundred twenty-five degrees Fahrenheit before you begin preparing your biscuits. Transfer your hot chicken filling into a nine-by-thirteen-inch baking dish or a large cast-iron skillet. The filling should be warm but not boiling when you top it with biscuits. Arrange your cut biscuits directly on top of the hot filling, leaving a small gap between each one for steam to escape and biscuits to rise properly.
Place the assembled dish in your preheated oven and bake for eighteen to twenty-two minutes until the biscuits are puffed and golden brown on top. You’ll know they’re done when they’re deeply golden and sound hollow when tapped. The edges of the biscuits should be slightly darker than the tops. Remove from the oven and let rest for five minutes before serving—this allows the filling to set slightly and makes serving easier.
When plating, use a spoon to scoop out the creamy chicken filling along with a warm biscuit. The combination of textures and temperatures creates an incredibly satisfying meal. Many families enjoy serving this with a simple side salad or steamed green vegetables to balance the richness.
Pro Tips for Success
Temperature control is absolutely essential when making this classic dish. Keep your butter cold until the moment you add it to the flour—some professional bakers even chill their mixing bowls beforehand. If your kitchen is particularly warm, refrigerate your flour and butter separately for fifteen minutes before combining. This ensures maximum flakiness in your final biscuits.
When making the chicken filling, don’t rush the simmering process. A gentle, steady simmer allows flavors to meld beautifully while preventing the cream from breaking or becoming grainy. If you notice the sauce is too thick, add a splash of broth or cream. If it’s too thin, let it simmer a bit longer—the starches in the roux will continue to thicken it naturally.
For the most flavorful results, use freshly cooked chicken if possible. While rotisserie chicken is convenient and works well, homemade poached chicken has a more delicate flavor. To poach chicken, place breasts in a pot with broth, aromatics, and herbs, then simmer until fully cooked. The resulting broth can even be used in your filling for extra flavor depth.
Don’t skip the resting period after baking. This five-minute pause allows the biscuits to firm up slightly and the filling to thicken just a bit more, making the dish easier to serve and more structurally sound. It also gives you time to prepare any side dishes or set the table.
Delicious Variations
While Grandma’s classic version is wonderful, this dish welcomes creative adaptations. For a healthier version, try using best healthy food recipes principles by substituting half the cream with Greek yogurt or using low-sodium broth. Add extra vegetables like mushrooms, bell peppers, or asparagus for additional nutrition and texture.
Some cooks enjoy adding herbs like fresh tarragon, dill, or sage to the filling for more sophisticated flavor profiles. Others incorporate sharp cheddar cheese into both the filling and the biscuit dough for a richer, more complex taste. A splash of dry white wine or sherry added to the filling creates restaurant-quality depth.
For those who enjoy seafood, this same technique works beautifully with shrimp or crabmeat instead of chicken. Turkey is another excellent substitute, particularly around the holidays. Vegetarians might use a combination of mushrooms, beans, and hearty vegetables with vegetable broth for a completely meat-free version that’s equally satisfying.
Consider topping variations as well. Some bakers add grated Parmesan or cheddar to the biscuit dough, or sprinkle fresh herbs like chives or parsley on top before baking. A light dusting of coarse sea salt adds sophistication and textural interest.
FAQ
Can I make chicken and biscuits ahead of time?
Absolutely! You can prepare the chicken filling up to two days in advance and store it in an airtight container in the refrigerator. Prepare your biscuit dough up to four hours ahead—keep it in the refrigerator until you’re ready to bake. For maximum convenience, assemble the entire dish, cover it with plastic wrap, and refrigerate for up to eight hours. When ready to bake, add five to ten minutes to the baking time since the dish will be cold.
What’s the best way to reheat leftovers?
Preheat your oven to three hundred fifty degrees Fahrenheit. Transfer leftovers to an oven-safe dish, cover with foil, and heat for fifteen to twenty minutes until warmed through. For a crispy biscuit top, remove the foil during the last few minutes. Alternatively, reheat individual portions in the microwave for one to two minutes, though this may soften the biscuits slightly.
Why are my biscuits not fluffy?
Dense biscuits usually result from overmixing the dough or using warm butter. Remember to handle the dough minimally and keep all ingredients cold. Also ensure your baking powder is fresh—old baking powder loses its leavening power. Finally, don’t skip the resting period—it allows the biscuits to rise properly.
Can I use self-rising flour for the biscuits?
Yes, self-rising flour works well for this recipe. If using it, omit the baking powder and salt from the biscuit dough. Use two cups of self-rising flour with one cup of cold butter and three-quarters cup of buttermilk. The results will be slightly different but equally delicious.
How do I prevent my cream sauce from breaking?
Keep your heat at a gentle simmer rather than a rolling boil. Add the cream slowly and stir constantly. If you’re adding wine or acidic ingredients, do so before adding the cream. If the sauce does break and becomes grainy, strain it through a fine-mesh sieve and whisk in a tablespoon of cornstarch mixed with cold water to restore smoothness.
What if I don’t have buttermilk?
Make a quick substitute by combining three-quarters cup of regular milk with one tablespoon of lemon juice or white vinegar. Let it sit for five minutes before using. This creates the acidity needed for tender biscuits. Alternatively, use Greek yogurt thinned with a splash of milk.
This chicken and biscuits recipe represents the very best of home cooking—nourishing, comforting, and deeply satisfying. Whether you’re cooking for your family on a weeknight or preparing a special dinner, this dish never fails to impress. The combination of creamy, flavorful filling and buttery, flaky biscuits creates something truly magical on the plate. Follow these detailed instructions, embrace the process, and you’ll create memories around your table that rival any restaurant experience. Your guests will be asking for this recipe for years to come.


