
Easy Christmas Candy? Grandma’s Secret Recipe
Every holiday season, families gather around the kitchen table with anticipation, waiting for that one special treat that makes Christmas unforgettable. For generations, my grandmother has been the keeper of a deceptively simple yet absolutely magical Christmas candy recipe that transforms basic pantry ingredients into pure holiday joy. What makes this recipe truly special isn’t just the taste—it’s the memories, the ease, and the way it brings everyone together in the kitchen.
This grandmother’s secret Christmas candy recipe has been passed down through our family for decades, and now I’m thrilled to share it with you. The beauty of this candy lies in its simplicity; you don’t need fancy equipment, culinary degrees, or exotic ingredients. What you do need is about thirty minutes, a candy thermometer, and a willingness to create something that will have your family asking for seconds (and thirds). Whether you’re a seasoned baker or someone who avoids the kitchen, this recipe welcomes all skill levels.
Why This Christmas Candy Recipe Stands Out
In a world overflowing with complicated dessert recipes and time-consuming holiday treats, this Christmas candy recipe breaks the mold. My grandmother always said that the best recipes are those that don’t require you to be a professional chef. This candy proves her wisdom time and again.
The magic of this recipe lies in understanding the science behind candy-making. When you combine sugar with butter and cream at the right temperature, you create a chemical reaction that transforms these simple ingredients into something with an incredible texture and flavor profile. The recipe relies on the soft-ball stage of candy-making, which is one of the most forgiving techniques for beginners.
What sets this apart from other easy Christmas candy recipes is the perfect balance of buttery richness and delicate sweetness. Unlike some candies that taste one-dimensional or overly sweet, this grandmother’s creation has depth and sophistication. The texture is creamy yet firm enough to hold its shape, making it perfect for gift boxes or holiday platters.
Additionally, this recipe doesn’t require any special ingredients or hard-to-find components. Everything can be found in your local grocery store, and most ingredients are likely already in your pantry. This accessibility makes it an ideal choice for last-minute holiday preparations or spontaneous candy-making sessions with family.
Ingredients You’ll Need
The beauty of this grandmother’s secret recipe is its simplicity. Here’s exactly what you’ll need:
- 2 cups granulated sugar – This is the foundation of your candy
- 1 cup heavy cream – Whole cream creates the silky texture
- 1/2 cup unsalted butter – Quality butter makes all the difference
- 1/4 cup light corn syrup – Prevents crystallization and creates smoothness
- 1 teaspoon vanilla extract – Enhances the overall flavor
- 1/4 teaspoon sea salt – Balances sweetness and adds complexity
- Optional toppings: chopped nuts, cocoa powder, or sprinkles
The ingredient list is intentionally short because quality matters more than quantity. When you’re working with so few components, each one needs to be the best version of itself. Use fresh cream that hasn’t been sitting in your refrigerator for weeks, and choose butter that you’d actually want to eat on toast. These small choices create noticeably better results.
If you’re making Christmas candy for gifting, consider having parchment paper, a candy thermometer, and a shallow baking dish ready before you start. This preparation prevents scrambling mid-recipe.
Step-by-Step Instructions
Now for the part you’ve been waiting for—the actual process of creating this magical candy. Follow these steps carefully, and you’ll have perfect results every time.
Step 1: Prepare Your Equipment
Before you begin, line a 9×9 inch baking dish with parchment paper, leaving some overhang on the sides for easy removal. Place your candy thermometer within reach and have all ingredients measured and ready. This preparation step, called mise en place by professional chefs, ensures you won’t be caught off guard once the cooking begins.
Step 2: Combine Your Base Ingredients
In a heavy-bottomed saucepan, combine the sugar, cream, butter, and corn syrup. Use medium heat and stir constantly until the mixture comes together. The butter will melt, the sugar will dissolve, and you’ll see the mixture become smooth and unified. This usually takes about 3-4 minutes. Don’t skip the stirring—it prevents the sugar from crystallizing on the sides of the pan.
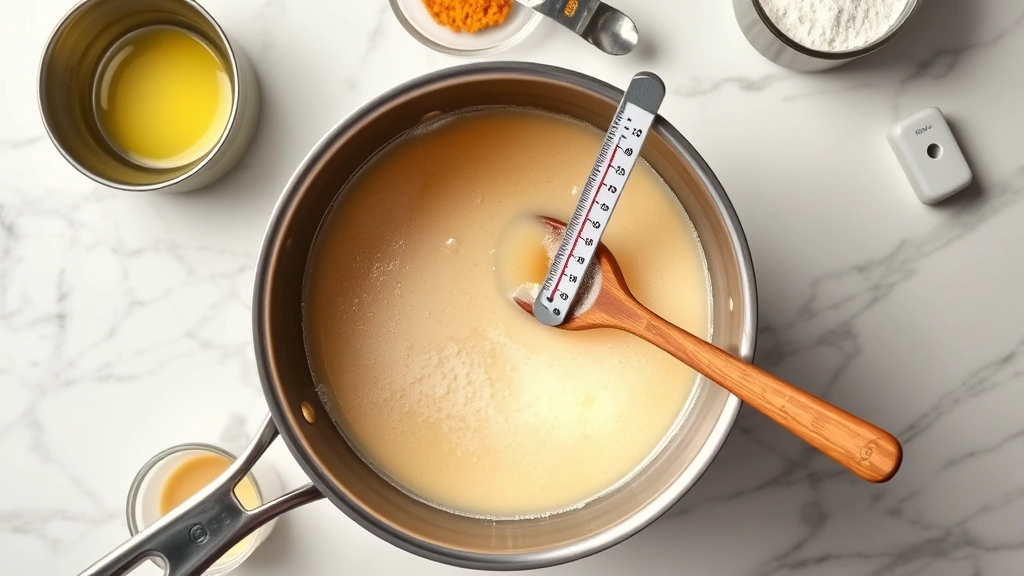
Step 3: Monitor the Temperature
Once your mixture is smooth, stop stirring and insert your candy thermometer. Increase the heat to medium-high and let the mixture cook without stirring. You’re looking for the soft-ball stage, which is 235-245°F. This temperature range is forgiving for beginners because it creates a creamy texture that’s not too hard and not too soft.
While you’re waiting for the temperature to rise, resist the urge to stir. Stirring can cause unwanted crystallization. Instead, watch the thermometer and practice patience. This step usually takes 8-12 minutes depending on your stovetop’s power.
Step 4: The Critical Addition
Once your mixture reaches the soft-ball stage, remove it from heat immediately. Add the vanilla extract and sea salt, stirring gently to combine. The mixture will bubble slightly—this is normal and expected. Let it cool for about 2-3 minutes without stirring.
Step 5: Create the Texture
This is where grandmother’s secret technique comes in. Using a wooden spoon or sturdy spatula, beat the mixture vigorously for about 2-3 minutes. You’ll notice the candy beginning to thicken and lose its glossy sheen. This beating action incorporates air and creates the creamy, fudgy texture that makes this candy so special. When the mixture becomes thick enough that you can see the bottom of the pan briefly when you pull the spoon through, it’s ready.
Step 6: Pour and Set
Quickly pour the mixture into your prepared baking dish. Work fast but carefully—the candy hardens as it cools. Smooth the top with a buttered spatula if desired. Let it cool at room temperature for at least 4 hours, or preferably overnight, before cutting.
Step 7: Cut and Store
Once completely cool, use the parchment paper overhang to lift the candy from the pan. Place it on a cutting board and cut into small squares using a sharp knife (dipping it in hot water between cuts helps). Store in an airtight container with parchment paper between layers to prevent sticking.
For a professional presentation when making easy Christmas candy gifts, consider dipping half of each piece in melted chocolate or rolling edges in chopped nuts. This adds visual appeal and makes the candy feel even more special.
Troubleshooting Common Candy-Making Mistakes
Even with careful attention, candy-making can present challenges. Here’s how to handle common issues:
Candy Turned Out Too Hard
If your candy is rock-hard instead of creamy, your cooking temperature was too high. The next batch should be removed from heat at 240°F instead of 245°F. Hard candy can still be salvaged by breaking it into smaller pieces and wrapping individually, creating a brittle-style candy.
Candy Remained Too Soft or Sticky
Conversely, if your candy is too soft, you didn’t reach the soft-ball stage. Your thermometer might be inaccurate, or your heat source might be too low. Invest in a reliable candy thermometer—it’s one of the best tools for accurate candy temperature measurement.
Grainy or Crystallized Texture
This usually means sugar crystals formed during cooking. Next time, ensure you’re not stirring after the mixture reaches a boil, and wipe down the sides of the pan with a damp pastry brush if sugar crystals form. You can also use a small amount of corn syrup to prevent crystallization.
Candy Didn’t Set Properly
If your candy is still soft after 24 hours, the humidity in your kitchen might be affecting it. Store it in an airtight container in a cool place, and consider using a desiccant packet inside the container to absorb moisture.
Storage and Gifting Ideas
Part of what makes this Christmas candy recipe so special is how beautifully it stores and travels. Unlike some delicate holiday treats, this candy is sturdy enough to ship to distant relatives or pack into gift boxes.
Short-Term Storage
For storage up to two weeks, keep your candy in an airtight container at room temperature. Parchment paper between layers prevents pieces from sticking together. A cool, dry pantry is ideal—avoid warm kitchens or areas near appliances that generate heat.
Long-Term Storage
This candy actually freezes beautifully for up to three months. Layer it with parchment in a freezer-safe container. Thaw at room temperature for about an hour before serving. The candy maintains its texture and flavor perfectly after freezing.
Gifting Presentation
Transform your homemade candy into memorable gifts by packaging it thoughtfully. Use clear cellophane bags tied with ribbon, vintage tins lined with tissue paper, or simple kraft boxes with personalized labels. Including a handwritten note about the recipe creates an emotional connection that store-bought candy can’t match.
Consider creating a Christmas candy gift box combining this recipe with other homemade treats. When paired with homemade sauces or homemade ice cream, you create a truly special gift set.
Variations to Try
Once you’ve mastered the basic recipe, grandmother always encouraged experimentation. Here are variations that work beautifully:
Chocolate Version
Add 2 tablespoons of unsweetened cocoa powder to your mixture after removing it from heat. This creates a rich, chocolate candy that feels decadent. You can also dip finished pieces in melted chocolate for added luxury.
Maple Walnut Variation
Replace vanilla extract with 1/2 teaspoon maple extract and fold in 1/2 cup finely chopped toasted walnuts before pouring into the pan. This variation is particularly popular during autumn and winter months.
Spiced Holiday Version
Add 1/2 teaspoon ground cinnamon, 1/4 teaspoon ground cloves, and 1/8 teaspoon ground nutmeg along with the vanilla. This creates a festive flavor profile that screams Christmas.
Salted Caramel Twist
Increase the sea salt to 1/2 teaspoon and add 1/4 cup of caramel sauce to your mixture. This creates a sophisticated candy with complex flavors that appeals to adults.
Coffee Lover’s Edition
Dissolve 1 tablespoon of instant coffee in your cream before combining with other ingredients. This subtle variation creates depth and sophistication that coffee enthusiasts will appreciate.

The beauty of understanding the base recipe is that you can customize it endlessly. Once you understand how the ingredients work together, you’re free to experiment with flavors that resonate with your family’s preferences.
When making easy Christmas candy recipes for the first time, stick with the original recipe. Once you’ve made it successfully, you’ll have the confidence to try variations knowing exactly what to expect.
FAQ
How long does this Christmas candy last?
When stored properly in an airtight container at room temperature, this candy lasts 2-3 weeks. In the freezer, it maintains quality for up to three months. The key is protecting it from moisture and temperature fluctuations.
Can I make this recipe in a slow cooker?
While you could use alternative cooking methods, a slow cooker isn’t ideal for candy-making because temperature control is crucial. A traditional saucepan with a candy thermometer gives you the precision this recipe requires.
What if I don’t have a candy thermometer?
A candy thermometer is essential for this recipe’s success. They’re inexpensive and widely available. Without one, you’re relying on guesswork, which leads to inconsistent results. However, if you’re in a pinch, the cold water test can help: drop a small amount of hot candy into cold water and check if it forms a soft ball.
Is this recipe safe for young children to help make?
This recipe involves hot sugar syrup that can cause serious burns. Supervise children closely and assign them tasks like measuring ingredients or decorating finished candy. The cooking portion should be handled by adults only.
Can I double this recipe?
Yes, but monitor the temperature carefully. Larger batches take longer to reach the soft-ball stage and may cook unevenly. Use a heavy-bottomed saucepan and ensure your thermometer is positioned correctly to get accurate readings.
Why did my candy separate or become grainy?
This typically happens when the mixture is stirred after cooking begins or when sugar crystals form on the pan sides. Use a damp pastry brush to wipe down the sides, and avoid stirring once the mixture reaches a boil.
What’s the best way to cut the candy?
Use a sharp knife dipped in hot water between cuts for clean, smooth edges. Work quickly before the candy hardens completely. If it hardens before you finish cutting, let it sit at room temperature for a few minutes to soften slightly.
Can I add food coloring to this candy?
Gel food coloring works better than liquid varieties since liquid coloring can affect the candy’s moisture content. Add a tiny amount after removing the mixture from heat and stir thoroughly to distribute color evenly.
Is this recipe gluten-free?
Yes! All the base ingredients are naturally gluten-free. Just verify that your vanilla extract is gluten-free if anyone in your family has celiac disease or gluten sensitivity.
How do I prevent the candy from sticking to my cutting board?
Dust your cutting board lightly with powdered sugar or cocoa powder before placing the candy on it. You can also use parchment paper on your cutting board for easy cleanup.


