Making deer jerky at home is one of the most rewarding ways to preserve and enjoy wild game. Whether you’re a seasoned hunter or new to processing venison, this comprehensive guide walks you through every step of creating tender, flavorful jerky that rivals any store-bought alternative. The process combines traditional curing methods with modern food safety practices to ensure your jerky is both delicious and safe to eat.
Deer jerky offers hunters a practical solution for utilizing their harvest while creating a protein-packed snack that stores well and tastes incredible. Unlike commercial jerky made from beef, venison jerky has a distinctive lean quality and rich flavor that many enthusiasts prefer. With the right technique, proper seasoning, and careful attention to drying times, you’ll produce jerky that keeps for weeks and impresses family and friends.
Selecting and Preparing Your Venison
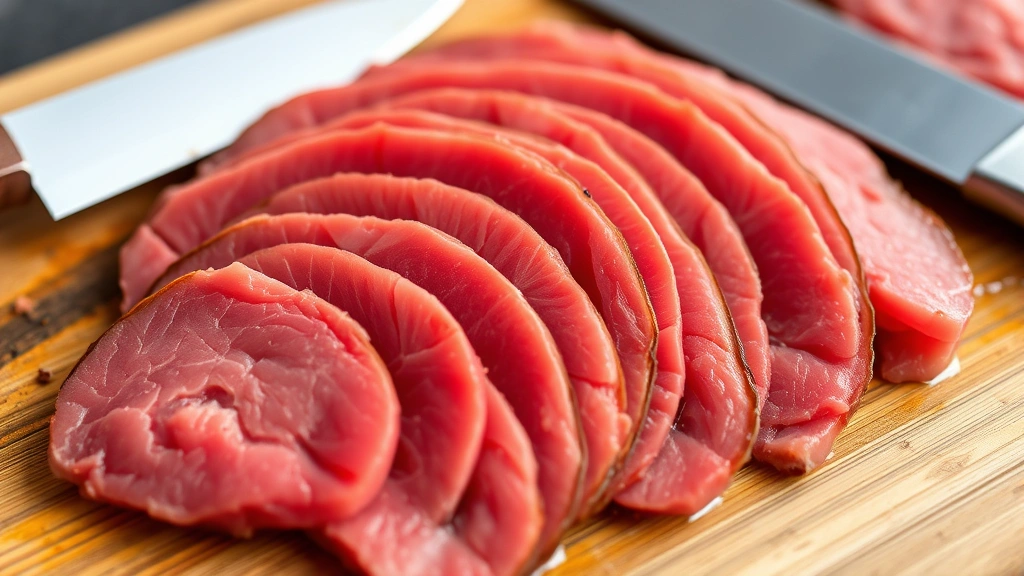
The foundation of excellent deer jerky begins with selecting the right cut of meat. The best venison for jerky comes from the hindquarters, specifically the backstrap and round steaks. These muscle groups contain long, parallel muscle fibers that slice cleanly and dry evenly. Avoid using meat from the neck, shoulders, or heavily-worked areas, as these contain more connective tissue and won’t produce the tender jerky texture you’re aiming for.
When processing your deer, trim away all visible fat, silver skin, and connective tissue. Fat becomes rancid quickly during storage and can give your jerky an off-flavor. The silver skin—that thin, silvery membrane covering muscles—is tough and chewy, so remove it completely using a sharp knife. This preparation step takes time but directly impacts the quality of your finished product.
Partially freezing your venison makes slicing significantly easier. Place trimmed meat in the freezer for 2-3 hours until it’s firm but not completely frozen solid. This consistency allows you to make uniform slices without the meat tearing or crumbling. For the best texture, slice against the grain at approximately ¼-inch thickness. Slicing against the grain creates shorter muscle fibers that become more tender during the drying process, while thinner slices dry faster and more evenly.
If you’re working with fresh venison immediately after the hunt, ensure the meat has been properly field-dressed and kept clean. If using frozen venison, thaw it completely in the refrigerator before slicing to maintain food safety and ensure even drying.
Essential Equipment and Tools
While you can make jerky using several different methods, having the right equipment ensures consistent results. A food dehydrator with temperature control is the most reliable option for home jerky production. Look for models that maintain temperatures between 160°F and 180°F, with multiple trays for batch processing. Quality dehydrators distribute heat evenly, preventing some pieces from overdrying while others remain moist.
If you don’t have a dehydrator, an oven works acceptably when set to its lowest temperature setting with the door propped slightly open. The challenge with oven drying is maintaining consistent, low heat—most ovens struggle to stay below 200°F. A meat slicer, whether manual or electric, makes preparing uniform slices much easier and faster than using a knife, though a sharp chef’s knife works if you’re careful and patient.
Additional useful tools include:
- Sharp knives for trimming and slicing
- Cutting board dedicated to raw meat
- Mixing bowls for marinades and curing mixtures
- Measuring spoons and cups for precise seasoning
- Paper towels for patting meat dry
- Dehydrator trays or oven racks lined with parchment paper
- Airtight containers or vacuum-seal bags for storage
- Meat thermometer for monitoring doneness
Many hunters also appreciate having a vacuum sealer, which extends jerky shelf life significantly by removing oxygen that contributes to spoilage and rancidity.
Curing and Seasoning Your Jerky
The curing process serves two critical purposes: it adds flavor and it helps preserve the meat by drawing out moisture and inhibiting bacterial growth. The most effective curing agent is salt, which should comprise about 5-7% of the meat’s weight. For every pound of venison, use approximately ¾ to 1 teaspoon of salt. This might seem like a lot, but much of it will be drawn out during the drying process.
A basic jerky cure combines salt, sugar, and spices. The sugar balances salt’s intensity and contributes to the jerky’s appealing color and texture. Try this classic venison jerky seasoning:
- 1 pound sliced venison
- 2 teaspoons salt
- 1 teaspoon brown sugar
- ½ teaspoon black pepper
- ¼ teaspoon garlic powder
- ¼ teaspoon onion powder
- ¼ teaspoon paprika
- Pinch of cayenne pepper (optional, for heat)
For those interested in exploring flavor variations, consider making homemade sauces as marinade bases. You can also experiment with spicy sauce recipes for a bold flavor profile.
Mix your cure ingredients thoroughly before applying to meat. The most effective method is to place sliced venison in a large bowl or resealable bag, sprinkle the cure mixture evenly over the meat, and massage it in thoroughly. Ensure every piece is coated, then cover and refrigerate for 8-12 hours. During this time, the cure draws moisture from the meat while flavors penetrate the muscle fibers.
After curing, remove the jerky from the refrigerator and pat each piece dry with paper towels. This removes excess moisture and cure residue that would otherwise drip during drying. Some hunters prefer to rinse the meat briefly under cool water before patting dry, which reduces saltiness if desired.
Additional seasoning variations worth trying include:
- Teriyaki style: Add soy sauce, ginger, and a touch of sesame oil to your cure
- Smoky barbecue: Incorporate smoked paprika, liquid smoke, and Worcestershire sauce
- Spicy heat: Increase cayenne pepper or add jalapeño powder and habanero seasoning
- Sweet and tangy: Add apple cider vinegar and maple syrup to the cure mixture
Drying Methods and Timing
The drying stage is where your venison transforms into finished jerky. Temperature control is crucial—too hot and the outside dries before the inside, trapping moisture that leads to spoilage; too cool and drying takes excessively long, allowing bacterial growth. The ideal drying temperature is 160°F to 170°F.
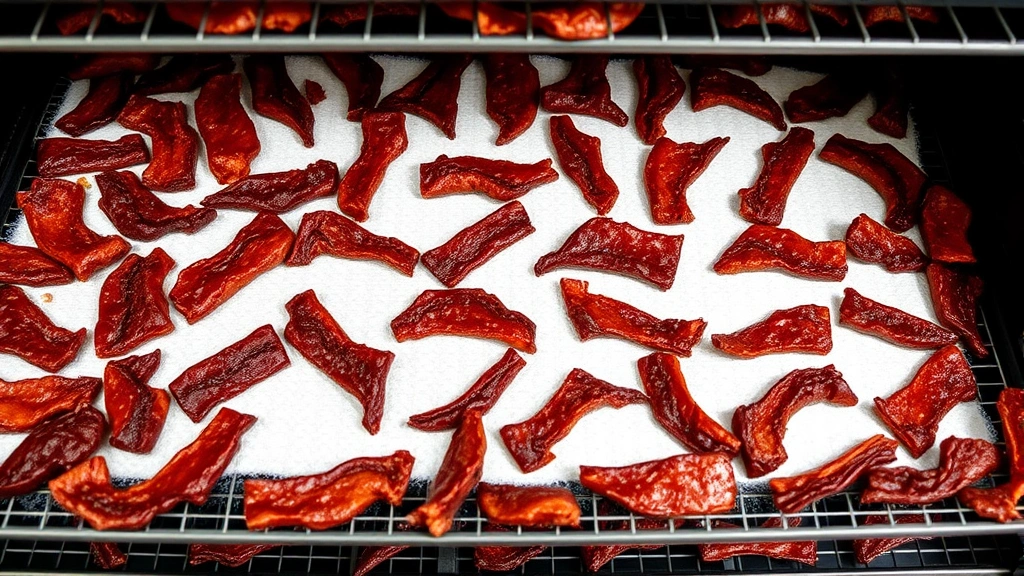
Dehydrator Method: Arrange cured venison pieces on dehydrator trays in a single layer, ensuring pieces don’t overlap. Set temperature to 165°F. Jerky typically dries in 4-8 hours depending on slice thickness, air circulation, and humidity. Start checking pieces after 4 hours. Properly dried jerky bends without breaking but doesn’t release moisture when squeezed. It should have a slight chew rather than being brittle.
Oven Method: Preheat your oven to 175°F and position racks in the upper and middle positions. Line racks with parchment paper and arrange venison pieces in a single layer. Prop the oven door open 2-3 inches to allow moisture to escape. Drying typically takes 6-10 hours. Rotate trays halfway through for even drying. Use an oven thermometer to ensure consistent temperature, as most ovens fluctuate considerably.
Smoker Method: For enhanced flavor, some hunters use a smoker set to 160°F with minimal smoke. Use mild woods like apple or cherry that complement venison without overpowering it. This method requires careful temperature management but produces exceptional results.
Testing doneness is straightforward. Properly dried jerky should bend without snapping and show no moisture when pressed. If moisture beads appear when you squeeze a piece, continue drying. If the jerky snaps cleanly in half, it’s overdried and may become tough. The goal is that perfect middle ground—tender but shelf-stable.
Once drying is complete, allow jerky to cool to room temperature before handling. This prevents condensation from forming, which would reintroduce moisture. Many jerky makers perform a conditioning step: place finished jerky in an airtight container for 24 hours, shaking occasionally. This distributes remaining moisture evenly throughout the batch, preventing some pieces from being overly dry while others remain slightly moist.
Storage and Shelf Life
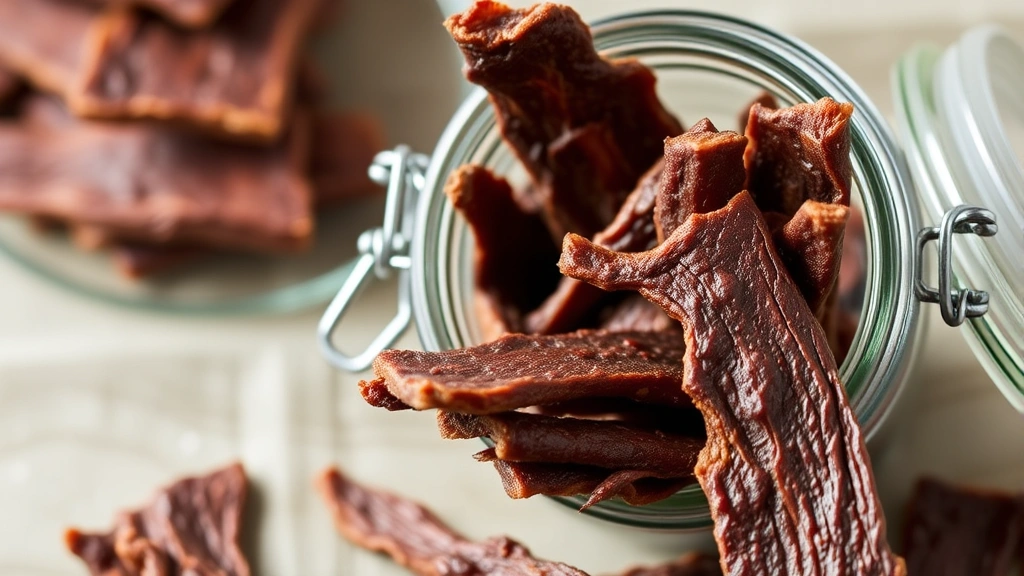
Proper storage directly impacts how long your jerky remains fresh and flavorful. Airtight containers are essential—oxygen accelerates spoilage and causes fat oxidation, which creates off-flavors. Glass jars with tight-sealing lids, resealable plastic bags, or vacuum-sealed packages all work well. Vacuum sealing provides the longest shelf life by removing virtually all oxygen.
Store jerky in a cool, dark location away from direct sunlight. An unheated closet, pantry, or basement works better than a kitchen counter. Temperatures should ideally remain below 70°F. In these conditions, properly dried venison jerky keeps for 2-4 weeks. For longer storage, refrigerate jerky in airtight containers for up to 3 months, or freeze it for up to 6 months.
Signs that jerky has spoiled include visible mold, off-odors, or a rancid taste. Properly dried jerky with no moisture pockets rarely develops mold, but any signs of spoilage mean the batch should be discarded.
Many hunters make large batches during hunting season and store jerky frozen for consumption throughout the year. This approach ensures a steady supply of homemade jerky while maximizing the value of your harvest. For complementary snacks, consider pairing your jerky with fresh summer salads or hearty main dishes like slow cooker chili.
Beyond simple storage, consider how you’ll use your jerky. Some hunters reserve premium cuts for eating as snacks, while using tougher cuts for shredded applications or adding to soups and stews. Jerky pieces can be rehydrated and incorporated into various dishes, extending your harvest’s utility.
FAQ
Can I make deer jerky without curing salt?
While possible, using curing salt significantly improves safety and shelf life. Salt inhibits bacterial growth and helps preserve moisture control. If avoiding salt entirely, reduce drying time and store jerky in the refrigerator or freezer rather than at room temperature.
What’s the difference between curing salt and regular table salt?
Curing salt (also called pink salt or Prague Powder) contains sodium nitrite, which prevents botulism and enhances color and flavor. Regular table salt works for basic preservation but lacks these additional benefits. For jerky, either works, though curing salt produces superior results.
How do I know if my jerky is done drying?
Finished jerky bends without breaking and shows no moisture when pressed or squeezed. There should be no beads of moisture visible on the surface. The texture should be chewy but not tough or brittle.
Can I use a smoker to make venison jerky?
Yes, smokers work excellently for jerky. Set temperature to 160°F and use mild smoke woods. The smoking process adds flavor while drying the meat. Monitor temperature carefully, as smokers can fluctuate more than dehydrators.
Is venison jerky safe to eat raw?
Properly dried jerky with adequate salt content and no moisture pockets is safe at room temperature. The combination of salt, low moisture, and acid (if included) creates an inhospitable environment for harmful bacteria. However, if you’re concerned about safety, heating jerky briefly in a 160°F oven before consumption provides additional assurance.
Can I make jerky from ground venison?
Ground venison jerky requires different handling. Mix ground meat with cure ingredients, form into thin patties or use jerky gun attachments to create uniform shapes. Drying takes slightly less time than whole-muscle jerky. Ground venison jerky is more prone to spoilage, so refrigerate or freeze storage is recommended.
What’s the best way to rehydrate jerky for cooking?
Soak jerky pieces in warm broth, water, or wine for 15-30 minutes until they reach desired softness. Use the rehydration liquid in your cooking to retain flavors. Alternatively, add jerky directly to soups or stews where it will rehydrate during cooking.
Can I add liquid smoke to my jerky cure?
Yes, liquid smoke adds authentic smoky flavor without requiring a smoker. Use 1-2 teaspoons per pound of meat, mixed into your cure. Be cautious with quantity, as liquid smoke is concentrated and can overpower other flavors if overused.


