Levain Cookie Recipe: Bakery-Approved Method
Levain cookies represent the pinnacle of artisanal baking—those thick, chewy masterpieces with crispy edges and gooey centers that seem impossibly delicious. Originally popularized by New York’s renowned Levain Bakery, these cookies have become a benchmark for what home bakers aspire to create. The magic lies not in complicated techniques, but in understanding fermentation, proper ingredient ratios, and precise timing.
This comprehensive guide reveals the exact methods used by professional bakers to achieve that coveted texture and depth of flavor. Whether you’re a seasoned baker or attempting your first batch, you’ll learn the science behind each step and how to troubleshoot common issues. The secret involves a slow fermentation process that develops complex flavors impossible to achieve with standard cookie recipes.
Understanding Levain Fermentation
Levain cookies differ fundamentally from standard cookies because they incorporate a pre-fermented dough component called a levain. This isn’t just another ingredient—it’s a living, breathing culture of flour and water that develops wild yeast and beneficial bacteria over several hours. The fermentation process breaks down flour proteins and starches, creating a more complex flavor profile and superior texture.
When you use a levain in your cookie dough similar to bread-making techniques, you’re essentially allowing the dough to age gracefully. This slow fermentation produces organic acids that enhance flavor, improve digestibility, and contribute to that signature tender crumb. Professional bakers understand that patience is the most valuable ingredient in their arsenal.
The levain creates several desirable effects: it develops glutenin and gliadin networks naturally, increases extensibility, and generates subtle fermented notes that distinguish these cookies from their unfermented counterparts. The longer the fermentation, the more pronounced these characteristics become, though there’s a balance point beyond which flavors become overly sour.
Essential Ingredients and Ratios
Creating authentic levain cookies requires precise measurements and quality ingredients. Here’s what you’ll need:
- Bread flour: 320g (provides structure and gluten development)
- Unsalted butter: 170g (room temperature for proper creaming)
- Brown sugar: 150g (moisture and caramel notes)
- Granulated sugar: 100g (sweetness and spread)
- Eggs: 2 large (binding and moisture)
- Vanilla extract: 1 teaspoon (flavor enhancement)
- Sea salt: 1.5 teaspoons (flavor balance)
- Baking soda: 0.5 teaspoon (lift and browning)
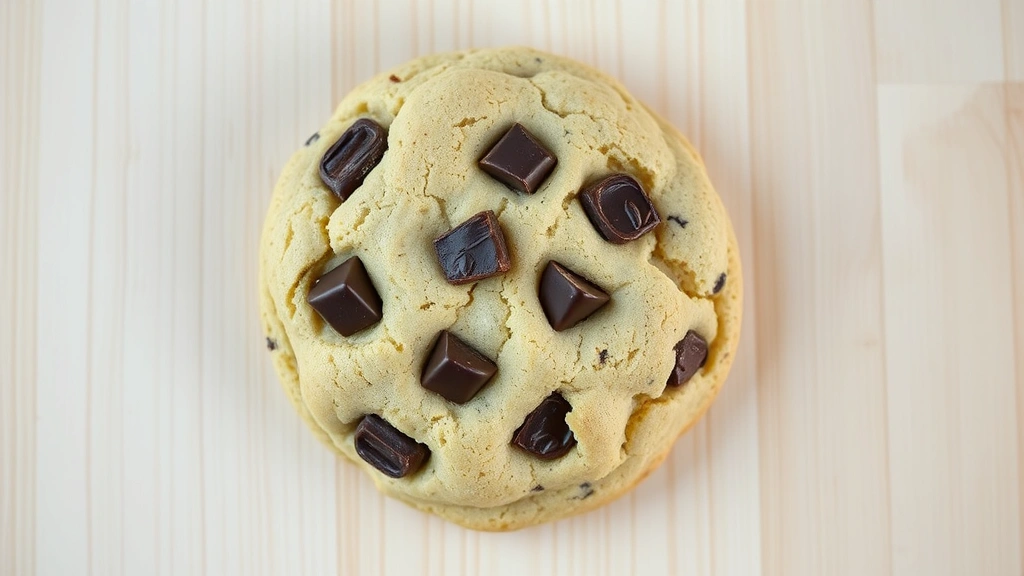
- Chocolate chips or chunks: 200g (dark chocolate preferred)
- Walnuts or pecans: 150g (optional but traditional)
The levain component requires just two ingredients: 150g bread flour and 150g filtered water. These combine during the fermentation phase to create your active culture. Water quality matters—chlorinated tap water can inhibit fermentation, so filtered or bottled water produces better results.
Temperature control throughout the process ensures consistent fermentation. Room temperature should ideally stay between 68-72°F. Warmer kitchens accelerate fermentation, while cooler environments slow it down. Understanding this relationship helps you adjust timing based on your specific conditions.
Step-by-Step Recipe Instructions
Phase One: Creating Your Levain (8-12 hours ahead)
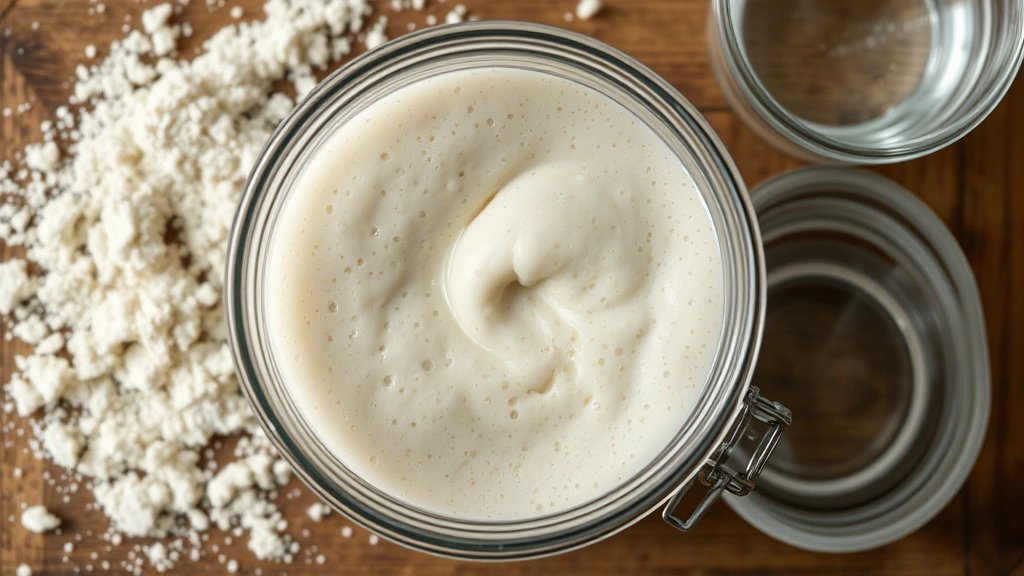
- Combine 150g bread flour and 150g filtered water in a clean glass jar
- Stir vigorously for one minute until fully incorporated
- Cover loosely with cheesecloth or a coffee filter secured with a rubber band
- Allow to sit at room temperature for 8-12 hours
- The levain should become bubbly and develop a pleasant fermented aroma
- It’s ready when it reaches peak activity (slightly domed on top with visible bubbles)
Phase Two: Making the Dough
- Cream together 170g softened butter with 150g brown sugar for 3-4 minutes
- Add 100g granulated sugar and cream for another minute
- Beat in 2 large eggs one at a time, ensuring full incorporation
- Add 1 teaspoon vanilla extract and mix until combined
- In a separate bowl, whisk together 320g bread flour, 1.5 teaspoons salt, and 0.5 teaspoon baking soda
- Gently fold the dry ingredients into the wet mixture
- Add your active levain (all of it) and fold until just combined
- Fold in 200g chocolate chunks and 150g nuts
The dough at this stage should feel slightly wet and shaggy—this is correct. Resist the urge to overmix, as this develops too much gluten and creates tough cookies.
Mixing and Dough Development
The mixing method significantly impacts final texture. Unlike traditional cookies that rely on creaming for structure, levain cookies benefit from a gentler approach. The fermentation already provides structure through natural gluten development, so aggressive mixing becomes counterproductive.
Use a stand mixer on low speed or mix by hand with a wooden spoon. The goal is incorporation, not aeration. When adding the levain, fold it in using a spatula rather than mixing with a paddle attachment. This preserves the delicate structure you’ve built through fermentation.
The dough should feel cohesive but slightly loose—almost like a thick, chunky batter. This texture is intentional. During fermentation, the dough will firm up and develop better structure. If your dough feels too dry, add water one tablespoon at a time. If it’s too wet, incorporate flour gradually.
Once fully mixed, divide the dough into 12 equal portions (approximately 80-85g each). Use a kitchen scale for consistency. Consistency in dough weight ensures uniform baking and prevents some cookies from over-baking while others remain underdone.
Fermentation Timeline
After portioning your dough, the real magic happens during the fermentation phase. This is where levain cookies develop their distinctive character and superior texture. The timeline varies based on ambient temperature, but here’s the professional approach:
Room Temperature Fermentation (4-6 hours): Place portioned dough balls on a parchment-lined baking sheet. Cover loosely with plastic wrap or a large bowl. At room temperature, fermentation occurs relatively quickly. You’ll notice the dough balls gradually increase in size and develop visible surface cracks. This is excellent—it indicates active fermentation.
Cold Fermentation (12-48 hours): Many professional bakers prefer cold fermentation in a refrigerator. This slower process develops more complex flavors and creates superior texture. Place your dough balls in an airtight container and refrigerate. They’ll ferment slowly over 12-48 hours, developing deeper flavor and better structure. Most bakers find 24-36 hours optimal.
Combination Method: Some bakers use both: 4 hours at room temperature followed by refrigeration. This accelerates initial fermentation while allowing extended cold development. The cookies develop exceptional depth with this method.
Temperature dramatically affects fermentation speed. At 70°F, dough ferments in about 4-6 hours. At 65°F, expect 8-12 hours. At 40°F (refrigerator), fermentation slows dramatically but continues steadily. Understanding your specific kitchen temperature helps you predict timing accurately.
Shaping and Baking Techniques
After fermentation, your dough balls have likely increased in size and developed a slightly domed appearance. This is perfect. Don’t reshape them—bake them as they are. The fermentation-driven structure is delicate and reshaping can collapse it.
Preheat your oven to 375°F. If using cold fermented dough directly from the refrigerator, add 2-3 minutes to baking time. The dough temperature affects how quickly cookies set.
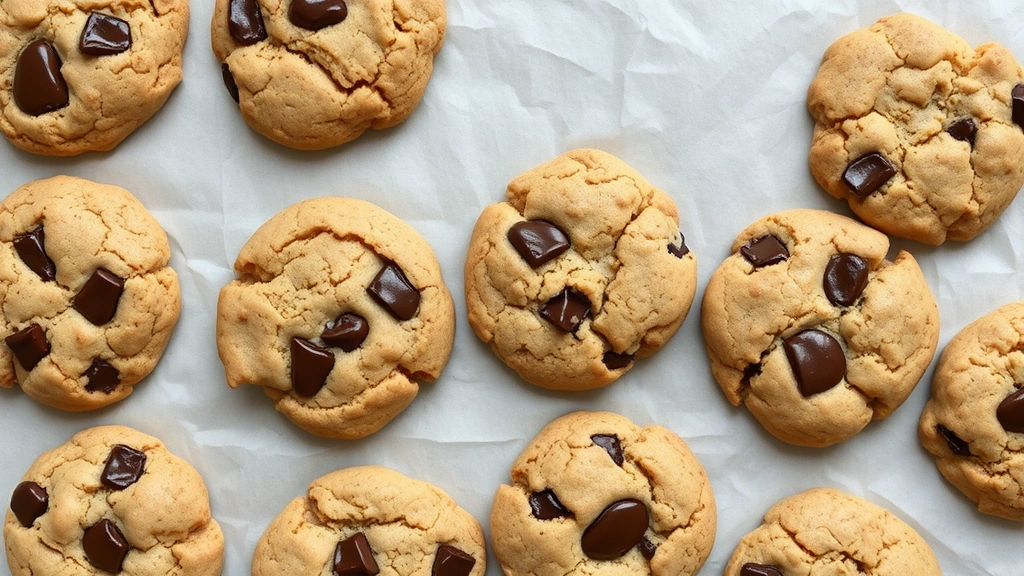
Arrange fermented dough balls on parchment-lined baking sheets, spacing them at least 3 inches apart. These cookies spread significantly, and proper spacing prevents them from merging together. Bake for 14-16 minutes if starting from room temperature, or 16-18 minutes if baking directly from the refrigerator.
The cookies are done when the edges appear set and slightly golden, but the centers still jiggle slightly when you gently shake the pan. This seems underbaked, but it’s intentional. Residual heat continues cooking the centers as they cool, resulting in that perfect chewy interior with crispy edges.
Remove from the oven and allow cookies to rest on the baking sheet for 3-4 minutes before transferring to a cooling rack. This resting period is crucial—it allows the structure to set without becoming brittle. After cooling completely, store in an airtight container with a piece of bread to maintain moisture.
Troubleshooting Common Problems
Cookies Spread Too Much: This indicates insufficient gluten development or over-fermentation. Reduce fermentation time by 2-4 hours, or ensure your room temperature isn’t too warm. Alternatively, chill dough balls for 30 minutes before baking.
Cookies Are Too Cake-Like: You’ve likely overbaked them. Remove them when the centers still appear slightly underdone. The residual heat is doing important work. Also check that your levain was at peak activity—under-fermented dough produces denser cookies.
Levain Isn’t Bubbling: Your fermentation starter may need more time, or your kitchen might be too cold. Ensure you’re using filtered water and that your flour is fresh. If the levain smells sour but shows no bubbles, it’s still active—proceed with baking.
Dough Is Too Wet: This often happens when using room temperature fermentation in humid climates. Incorporate flour one tablespoon at a time until you reach the correct consistency. Alternatively, use shorter fermentation times.
Cookies Are Too Dense: Under-fermentation is the likely culprit. Extend fermentation time, ensuring your levain reaches peak activity before mixing it into the dough. Also verify that you’re not over-mixing the dough, which can develop excessive gluten.
Remember that quality comfort food starts with proper technique, and levain cookies exemplify this principle perfectly. Every step matters.
Flavor Variations and Mix-ins
Once you’ve mastered the basic technique, endless variations await. The levain base is versatile enough to support numerous flavor profiles while maintaining that signature texture.
Classic Chocolate Chip: Use a combination of dark chocolate chunks (70% cacao) and semi-sweet chips for complexity. Add 1 teaspoon of sea salt to the dry ingredients to enhance chocolate notes.
Brown Butter Variation: Brown your butter before creaming it with sugar. This adds nutty depth that complements the fermented notes beautifully. Reduce baking soda slightly to 0.25 teaspoons since brown butter is more prone to spreading.
Espresso and Chocolate: Add 1 tablespoon of espresso powder to the dry ingredients. The coffee enhances chocolate flavor without making the cookies taste like coffee. This pairs excellently with dark chocolate chunks.
Salted Caramel: Reduce brown sugar to 120g and add 100g dulce de leche to the wet ingredients. Fold in chocolate chips and finish each unbaked cookie ball with a sprinkle of fleur de sel before baking.
Cinnamon Swirl: Mix 2 teaspoons cinnamon with 30g brown sugar. After portioning dough, create a small indent in each ball and fill with the cinnamon mixture. Top with a few chocolate chips.
Nutty Variations: Toast your nuts before adding them to enhance flavor. Hazelnuts, macadamia nuts, and pistachios all work beautifully. Consider using 150g toasted nuts instead of chocolate for a completely different profile.
Vanilla Bean: Replace vanilla extract with 1 vanilla bean pod, scraped. Add the seeds to your wet ingredients. This creates spectacular visual appeal and subtle, sophisticated flavor.
Each variation should maintain the core levain fermentation process—that’s what makes these cookies special. The mix-ins are secondary to the fundamental technique that creates the texture and depth.
FAQ
How long do levain cookies stay fresh?
Properly stored in an airtight container with a piece of bread, levain cookies maintain excellent texture for 5-7 days. The bread helps maintain humidity. You can also freeze unbaked dough balls for up to 3 months, baking them directly from frozen (adding 3-4 minutes to bake time).
Can I skip the fermentation process?
Technically yes, but you’ll lose the distinctive flavor and superior texture that define levain cookies. You could mix the levain directly into the dough without fermentation, but you’d be creating a standard cookie with a slightly different texture. The fermentation is what makes these cookies special.
What if I don’t have bread flour?
All-purpose flour works as a substitute, though results won’t be quite as dramatic. Bread flour’s higher protein content (12-14% versus 10-12% in all-purpose) contributes to better structure and chewiness. If using all-purpose, reduce total flour by 10g since it has slightly less protein.
Can I use instant yeast instead of a levain?
This creates a different product entirely. Instant yeast fermentation is faster and produces different flavor compounds than wild fermentation. For authentic levain cookies, the slow fermentation process is essential. You could experiment with 0.125 teaspoons instant yeast mixed into your dough, but results would be significantly different.
Why do my cookies always spread too much?
Several factors cause excessive spreading: over-fermentation, warm dough temperature, insufficient salt, or too much sugar. Try reducing fermentation time by 2-4 hours, chilling dough before baking, or ensuring your salt measurement is accurate. Also verify your oven temperature with an oven thermometer—inaccurate temperature causes spreading issues.
Is it normal for the levain to smell sour?
Absolutely. A pleasantly sour aroma indicates healthy fermentation. The bacteria and yeast are producing lactic and acetic acids. If it smells unpleasant (like nail polish or chemicals), something has gone wrong. Discard and start fresh with new ingredients.
How do I know when my levain is ready?
Peak activity occurs when the levain is slightly domed on top with visible bubbles throughout. It should roughly double in volume and smell pleasantly fermented. If you’re uncertain, it’s better to use it slightly before peak than after peak activity has declined. You can also do the float test: drop a small spoonful in water—if it floats, it’s ready.


