DIY Poultry Seasoning Blend: Grandma’s Secret Recipe
There’s something magical about opening your spice cabinet and discovering the perfect seasoning blend already waiting for you. My grandmother kept her poultry seasoning in a vintage glass jar on the top shelf, and I watched her use it on everything from roasted chicken to turkey, stuffing, and even vegetables. The secret wasn’t just the ingredients—it was the care she took in blending them together. Today, I’m sharing her time-tested formula that transforms ordinary poultry into something extraordinary.
Making your own poultry seasoning at home is easier than you’d think, and the flavor is incomparably fresher than store-bought versions. Commercial blends often contain fillers and lose potency over time, but when you create your own homemade poultry seasoning recipe, you control every element. You’ll use whole spices that you toast and grind yourself, capturing aromatic oils that mass-produced versions simply cannot match. This guide walks you through every step, from selecting the finest ingredients to storing your blend properly.
Why Make Your Own Poultry Seasoning
The advantages of creating a homemade spice blend extend far beyond simple economics. When you blend your own seasoning, you’re making a conscious choice about quality and freshness. Store-bought versions sit on shelves for months, sometimes years, gradually losing their volatile aromatic compounds. By contrast, your freshly ground blend maintains peak potency for weeks.
Cost-effectiveness is another compelling reason. Buying individual spices in bulk costs significantly less than purchasing pre-mixed blends, especially if you cook regularly. A single jar of poultry seasoning might cost three to five dollars, while the individual spices needed to make the same amount cost less than two dollars combined. Over a year of cooking, these savings accumulate substantially.
Perhaps most importantly, making your own blend allows you to customize the flavor profile to match your preferences. Some cooks prefer more sage, others want additional thyme. You might increase the black pepper for extra heat or reduce the salt content for dietary reasons. This flexibility is impossible with commercial products.
Essential Ingredients Breakdown
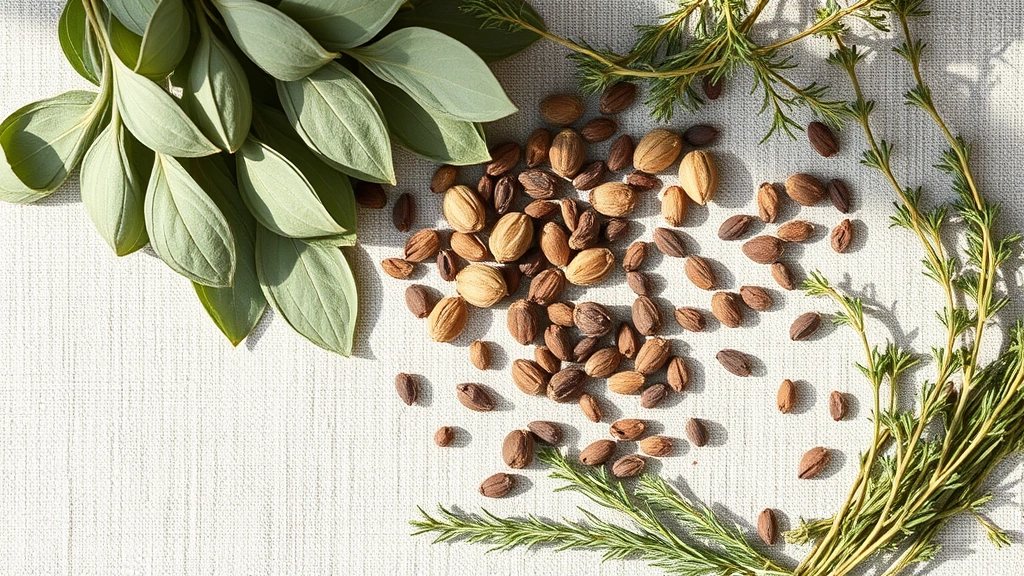
Grandma’s secret started with understanding what each ingredient contributes to the final blend. The foundation begins with sage, which provides the characteristic earthy, slightly peppery flavor that defines poultry seasoning. Sage is the dominant note, comprising roughly thirty to forty percent of the mixture by volume.
Thyme comes next, adding a subtle minty-herbal dimension that complements sage beautifully. Use dried thyme, as fresh thyme contains too much moisture and won’t store properly in a dry blend. Thyme contributes approximately twenty-five to thirty percent of your mixture.
Marjoram introduces a gentle, sweet herbaceous quality that prevents the blend from becoming too intense. This often-overlooked herb is what separates good poultry seasoning from exceptional versions. Include about fifteen to twenty percent marjoram in your blend.
The remaining components include black pepper for warmth and bite, dried rosemary for piney notes, and dried oregano for depth. Some versions include a touch of ground nutmeg or dried celery seed for complexity. Sea salt rounds out the mixture, though you can reduce or eliminate it if you prefer a salt-free option.
When sourcing ingredients, visit specialty spice shops or reputable online retailers. Look for vibrant colors and strong aromas—dull, musty-smelling spices have already lost significant potency. Penzey’s Spices and The Spice House are excellent sources for high-quality dried herbs and spices.
Step-by-Step Preparation Method
Begin by gathering all your ingredients in one location. You’ll need:
- 3 tablespoons dried sage leaves
- 2 tablespoons dried thyme
- 1.5 tablespoons dried marjoram
- 1 tablespoon black peppercorns
- 1 tablespoon dried rosemary
- 1 teaspoon dried oregano
- 0.5 teaspoon ground nutmeg
- 0.5 teaspoon dried celery seed
- 1 tablespoon sea salt (optional)
These measurements yield approximately half a cup of finished seasoning—perfect for storing in a small glass jar. If you want to make a larger batch, simply double or triple all quantities proportionally.
The first step involves measuring your dried herbs. Use a kitchen scale for precision if possible, though measuring spoons work fine for most home cooks. Spread each ingredient on a clean, dry work surface and visually inspect for any debris or discolored pieces. Dried herbs sometimes contain small twigs or stones from processing, so this quick check prevents unpleasant surprises.
Next, prepare your work station. You’ll need a dry skillet or small saucepan, a spice grinder or mortar and pestle, and airtight storage containers. Ensure everything is completely dry—any moisture will cause your spices to clump and potentially mold.
Toasting and Grinding Techniques
This is where the magic happens. Toasting your spices before grinding releases essential oils and deepens their flavors dramatically. Heat your skillet over medium heat for one minute until it’s warm but not smoking.
Add your peppercorns, rosemary, and celery seed first—these harder ingredients benefit most from toasting. Toast for approximately two to three minutes, shaking the pan occasionally to prevent burning. You’ll notice the aroma intensify significantly. Once fragrant, add the sage, thyme, marjoram, and oregano. Continue toasting for another minute, stirring constantly with a wooden spoon.
Remove the skillet from heat immediately when you smell a rich, concentrated herbal aroma. Do not over-toast—burnt spices taste acrid and ruin your entire batch. If you accidentally burn them, start over rather than salvage the batch. The difference in flavor quality justifies beginning again.
Transfer your toasted spices to a plate and let them cool completely for five to ten minutes. This cooling period is essential because hot spices will release moisture as they cool, which can create clumping. Once cooled, add the nutmeg and salt.
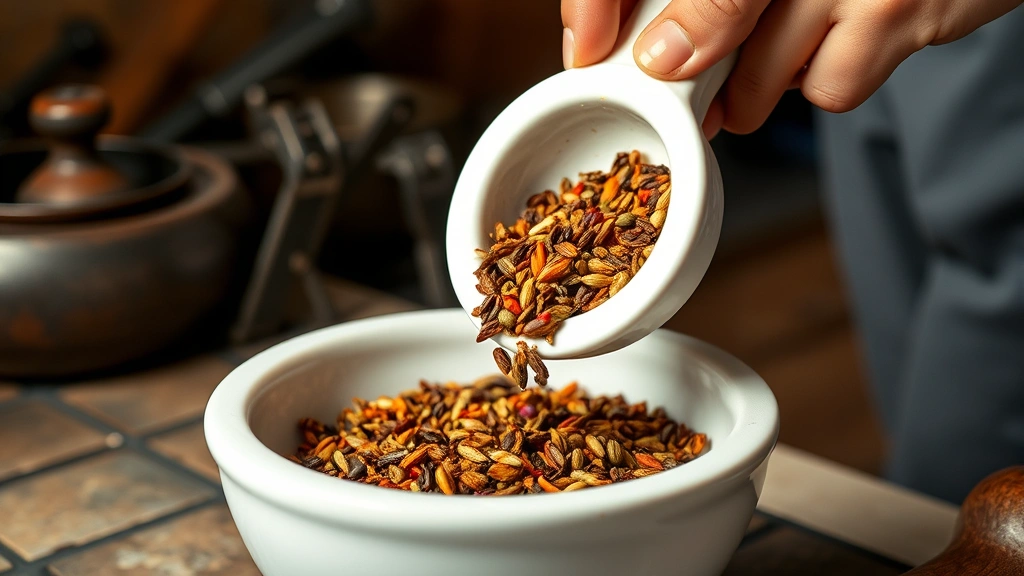
Now comes grinding. If you own an electric spice grinder, pulse the cooled spices in short bursts until you reach your desired consistency. Some cooks prefer a finer powder, while others like slightly coarser texture with visible herb pieces. For a more rustic blend similar to Grandma’s version, pulse just until the larger pieces break down but herbs remain somewhat visible.
If using a mortar and pestle, grind in small batches, working the pestle in circular motions while applying downward pressure. This method takes longer but gives you complete control over texture and allows you to feel the spices releasing their oils. Many experienced cooks prefer this traditional approach for superior flavor development.
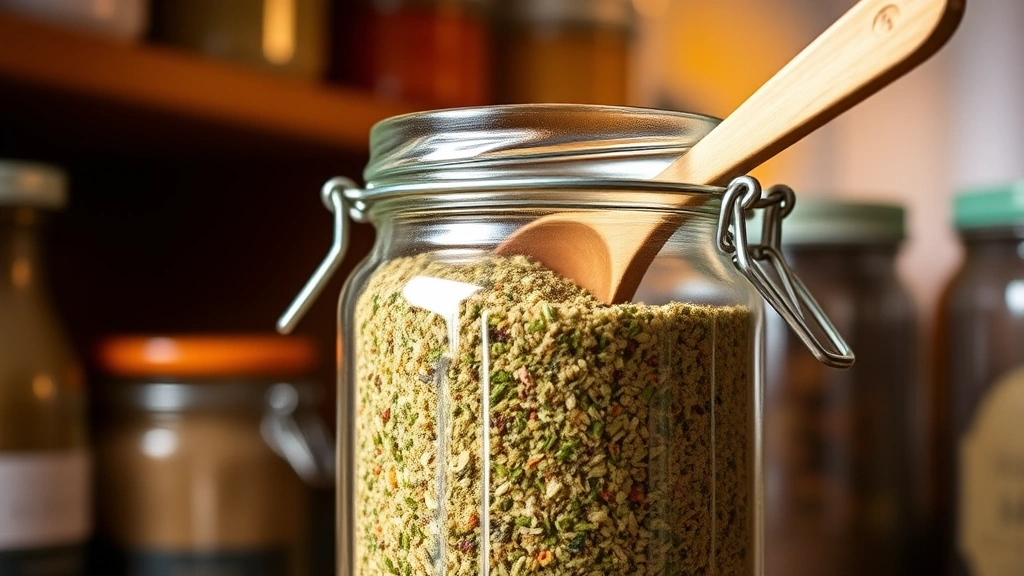
Transfer your ground blend to a clean, dry glass jar with an airtight lid. Shake vigorously for one minute to ensure ingredients distribute evenly throughout. Label your jar with the date and contents—you’ll want to use this blend within six months for optimal flavor.
Storage and Shelf Life
Proper storage makes the difference between a blend that stays potent for months and one that becomes stale within weeks. Glass containers with airtight seals are ideal—they protect your seasoning from light, moisture, and air exposure. Avoid plastic containers, which can absorb odors and allow subtle flavor loss over time.
Store your poultry seasoning in a cool, dark place away from direct sunlight and heat sources. The spice rack directly above your stove, while convenient, exposes your blend to heat and humidity that significantly reduce shelf life. Instead, choose a cabinet away from cooking areas, or better yet, a pantry shelf.
Your homemade blend remains fresh and potent for approximately four to six months when stored properly. After six months, the volatile aromatic compounds gradually diminish, and the flavor becomes muted. This is why making smaller batches more frequently provides better results than creating large quantities.
To test if your blend has lost potency, open the jar and smell the contents. If the aroma is weak or musty, it’s time to make a fresh batch. You can still use older seasoning, but you may need to increase quantities slightly to achieve the same flavor impact.
Creative Uses Beyond Poultry
While poultry seasoning obviously enhances chicken, turkey, and other birds, its versatility extends far beyond traditional applications. This blend works beautifully in homemade pasta sauce, adding herbaceous depth that store-bought versions lack. Add one-quarter to one-half teaspoon to your next batch of tomato-based sauce.
Vegetable dishes benefit tremendously from poultry seasoning. Roasted root vegetables, Brussels sprouts, and cauliflower all develop richer, more complex flavors when seasoned with this blend. The sage particularly complements earthy vegetables like sweet potatoes and parsnips.
Consider using poultry seasoning in quick pasta dishes or creamy soups. A pinch added to butternut squash soup creates surprising depth, while it enhances cream-based poultry soups beautifully. Some adventurous cooks even add a small amount to bread doughs and savory muffins for subtle herbaceous notes.
Meat-based dishes beyond poultry also benefit from this seasoning. Ground turkey, chicken sausage, and even pork take on delicious complexity when seasoned with your blend. Use it in meatballs, burgers, or as a rub for pork chops.
The possibilities truly expand once you understand how each component flavor works. Experiment with small amounts in various dishes, adjusting quantities based on your preferences and the specific recipe requirements.
Troubleshooting Your Blend
Sometimes even careful preparation results in less-than-perfect batches. Understanding common issues helps you avoid them in future attempts.
Problem: Your blend tastes too salty. Solution: You may have added too much salt, or your sea salt was particularly coarse. In future batches, reduce salt to one-half teaspoon or eliminate it entirely. Remember that many recipes add additional salt separately, so a salt-free base blend offers more flexibility.
Problem: The seasoning tastes musty or off-flavor. Solution: Your spices may have been stale before blending, or moisture contaminated your mixture during storage. Purchase fresh spices from reputable sources and ensure all equipment is completely dry before starting. Store in airtight glass containers away from humidity.
Problem: Your blend separates, with herbs settling to the bottom. Solution: This is normal and happens because different ingredients have different densities. Simply shake the jar before each use to redistribute ingredients evenly.
Problem: The seasoning tastes too strong or overpowering. Solution: You may have over-toasted your spices or ground them too finely. For future batches, reduce toasting time and aim for a slightly coarser texture. Alternatively, reduce the sage proportion slightly and increase milder herbs like marjoram.
Problem: Your blend lacks the flavor punch you expected. Solution: Your spices were likely stale before blending. Buy fresh ingredients and toast them longer (but be careful not to burn them). Ensure you’re using whole spices that you grind yourself rather than pre-ground versions.
FAQ
Can I use fresh herbs instead of dried?
Fresh herbs contain significantly more moisture and will mold in dry storage. If you prefer fresh flavors, use fresh herbs in your cooking immediately, but for a shelf-stable blend, dried herbs are essential. You can make fresh herb blends for immediate use, but store them in the refrigerator and use within a few days.
Should I include salt in my poultry seasoning blend?
This is purely a matter of preference. Including salt makes the blend convenient for quick seasoning, but salt-free versions offer more flexibility since you can adjust salt levels in individual recipes. Many experienced cooks prefer salt-free blends for this reason. You can always add salt separately when cooking.
How much poultry seasoning should I use per pound of poultry?
For a standard roasted chicken, use approximately one-quarter to one-half teaspoon per pound, mixed into butter or oil and rubbed under the skin and over the exterior. For stuffing, use one to two teaspoons per cup of bread cubes. Always start with less and adjust to taste, as you can always add more but cannot remove seasoning once added.
Can I make this blend in a coffee grinder?
Yes, but dedicate a grinder exclusively to spices. Coffee residue will contaminate your seasoning blend and affect its flavor. If you only have one grinder, grind your spices first, then clean thoroughly before grinding coffee.
What’s the difference between poultry seasoning and Italian seasoning?
Poultry seasoning emphasizes sage and thyme with subtle other herbs, creating a savory profile perfect for birds and stuffing. Italian seasoning typically features oregano, basil, and marjoram in equal proportions, creating a Mediterranean flavor profile better suited to tomato-based dishes and Italian cuisine. While they share some ingredients, their proportions and intended uses differ significantly.
Can I double or triple this recipe?
Absolutely. Simply multiply all ingredient quantities by two or three. The process remains identical—toast, cool, grind, and store. Larger batches require slightly longer toasting times, so watch carefully and stir frequently to prevent burning.
Where can I find the best quality dried herbs?
Specialty spice shops, farmers markets, and online retailers like Frontier Co-op offer exceptional quality. Look for vibrant colors and strong aromas. Avoid bulk bins with slow turnover, as these spices are often stale. Serious Eats offers detailed spice sourcing guides and quality evaluations.
How do I know if my spices are fresh before buying?
Open the container and smell—truly fresh spices have strong, immediate aromas. Check the color; vibrant greens and rich browns indicate freshness, while faded or greyish colors suggest age. Examine packaging for damage or signs of moisture. Reputable retailers rotate stock frequently and can tell you when items were received.


