
There’s something magical about a frosting that tastes like it came straight from a grandmother’s kitchen—rich, buttery, and perfectly balanced. This easy frosting recipe has been passed down through generations, and today I’m sharing Grandma’s secret with you. Whether you’re frosting a simple vanilla cake, decorating cupcakes, or topping freshly baked cookies, this versatile frosting works beautifully every time.
What makes this recipe so special isn’t just the ingredients—it’s the technique. Grandma understood that frosting isn’t about complicated steps or fancy equipment. It’s about using quality butter, proper mixing methods, and a little patience. In this guide, I’ll walk you through exactly how to create this beloved frosting, share Grandma’s insider tips, and show you how to customize it for any dessert.
The beauty of this recipe lies in its simplicity. With just a few pantry staples, you’ll have frosting that’s smooth, spreadable, and absolutely delicious. Let’s dive into the secrets that make this an easy frosting recipe that families have cherished for decades.
Grandma’s Secret Frosting Ingredients
The foundation of this easy frosting recipe starts with understanding each ingredient’s role. Grandma always said that good frosting begins with good butter—and she was absolutely right. Room temperature butter is essential because it creams properly and creates that light, fluffy texture that makes frosting so appealing.
Here’s what you’ll need for a standard batch:
- 1 cup (2 sticks) unsalted butter – Room temperature is crucial. Cold butter won’t cream properly, and melted butter creates a greasy frosting.
- 3-4 cups powdered sugar – Also called confectioners’ sugar, this dissolves smoothly into the frosting. Don’t substitute granulated sugar, as it creates a gritty texture.
- 1/4 teaspoon salt – This enhances sweetness and balances flavors. Grandma never skipped this ingredient.
- 1-2 teaspoons vanilla extract – Pure vanilla extract, not imitation, makes a noticeable difference in the final flavor.
- 2-3 tablespoons heavy cream or milk – This adjusts the consistency to your preferred spreading thickness.
Grandma’s secret was always about ingredient quality. She invested in real butter, pure vanilla, and fresh powdered sugar. These aren’t expensive upgrades, but they transform your frosting from good to exceptional. The combination creates a frosting that’s neither too sweet nor too rich—it’s perfectly balanced.
When selecting butter, look for unsalted varieties so you can control the salt content. Salted butter can make your frosting overly salty, especially if you’re already adding salt to the recipe. Room temperature butter is non-negotiable; it should be soft enough to leave an indent when you press your finger into it, but not so soft that it’s greasy.
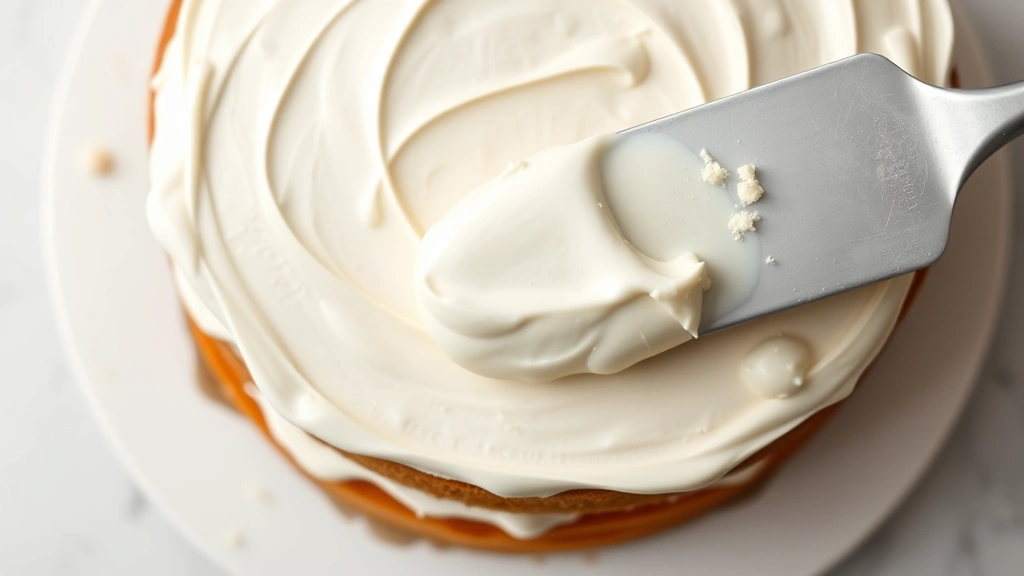
Step-by-Step Frosting Instructions
Making this easy frosting recipe is straightforward when you follow Grandma’s method. The key is patience and proper technique. Here’s exactly how to do it:
- Prepare your ingredients. Cut your butter into smaller pieces and let it sit on the counter for 15-20 minutes. This ensures even creaming. Sift your powdered sugar to remove lumps—this prevents grainy frosting.
- Cream the butter. Using an electric mixer on medium speed, beat the butter for 2-3 minutes until it’s pale and fluffy. Grandma used a hand mixer, but a stand mixer works beautifully too. This step is crucial because it incorporates air into the frosting, creating that light texture.
- Add powdered sugar gradually. With the mixer running on low speed, add 1 cup of powdered sugar at a time. Mix for about 30 seconds after each addition. This prevents powdered sugar from flying everywhere and ensures even incorporation.
- Add salt and vanilla. Once you’ve added 3 cups of powdered sugar, add the salt and vanilla extract. Mix well on medium speed for about 1 minute.
- Adjust consistency. Add heavy cream or milk one tablespoon at a time until you reach your desired consistency. For spreading, you want frosting that holds its shape but isn’t stiff. For piping, you might want it slightly thicker.
- Final mixing. Beat on medium-high speed for 1-2 minutes to incorporate air and create a silky texture.
The entire process takes about 10-15 minutes. Grandma’s trick was never rushing this step. She’d beat the frosting longer than most recipes suggest, creating an incredibly light and fluffy result. The more you mix, the more air you incorporate, and the better the texture becomes.
One thing Grandma always emphasized: taste as you go. After adding the vanilla, take a small spoonful and taste it. You might prefer it sweeter or less sweet. You can always add more powdered sugar if needed, but you can’t remove it once it’s mixed in. This is how Grandma customized her frosting to her exact preferences every single time.
Grandma’s Pro Tips for Perfect Frosting
Beyond the basic recipe, Grandma had several tricks that elevated her frosting to legendary status. These tips transform a good frosting into an unforgettable one:
Temperature Control: Always work with room temperature butter. If your kitchen is warm, chill your mixing bowl beforehand. If your frosting becomes too soft during mixing, refrigerate it for 10-15 minutes and continue. Grandma kept her kitchen cool while frosting cakes for this exact reason.
Sift Your Powdered Sugar: This cannot be overstated. Lumpy powdered sugar creates lumpy frosting. Grandma had a dedicated sifter that she used exclusively for this purpose. Even pre-sifted powdered sugar benefits from a second sifting.
Use Quality Vanilla: The difference between imitation and pure vanilla extract is dramatic. Grandma would buy pure vanilla in bulk and store it in a cool, dark place. This investment in quality ingredients made her frosting taste noticeably better.
Don’t Overmix: While some mixing is good, excessive mixing can make frosting greasy and deflate the air you’ve incorporated. Mix until combined and smooth, then stop. Grandma’s rule was to stop while the frosting still looked slightly fluffy.
Add Liquid Gradually: Too much milk or cream makes frosting runny. It’s easier to add more liquid than to remove it. Grandma would add cream one teaspoon at a time near the end, checking consistency frequently.
If you’re frosting cakes, consider that homemade baked goods taste better with homemade frosting. The same care you put into baking deserves the same care in frosting selection.
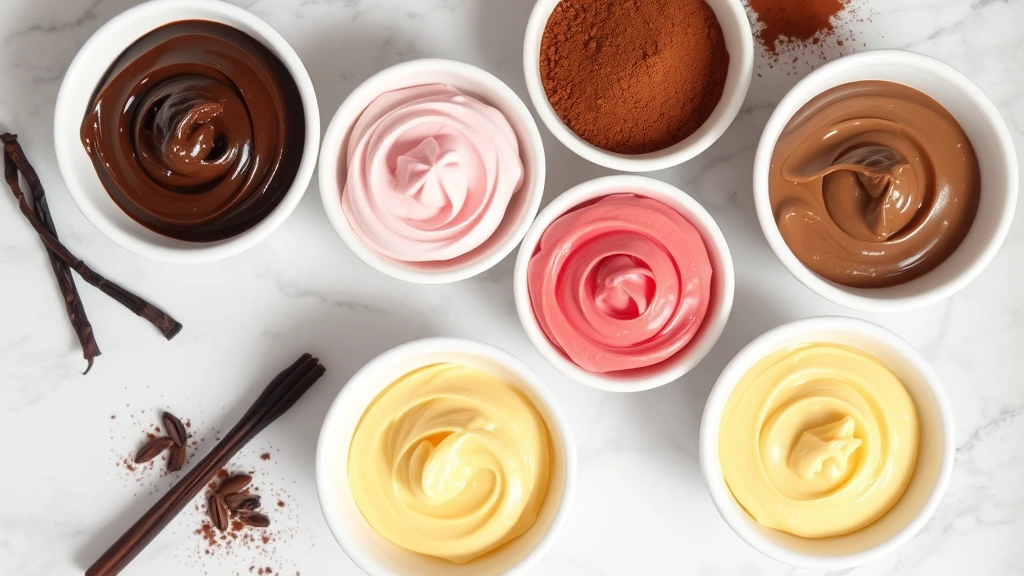
Flavor Variations and Customizations
While Grandma’s basic frosting is perfect as-is, she loved experimenting with flavors. Here are her favorite variations of this easy frosting recipe:
Chocolate Frosting: Add 1/3 cup unsweetened cocoa powder and reduce powdered sugar to 2.5-3 cups. Sift the cocoa powder with the powdered sugar to prevent lumps. Add an extra tablespoon of heavy cream since cocoa powder absorbs moisture.
Cream Cheese Frosting: Replace 4 ounces of butter with cream cheese (room temperature). This creates a tangier frosting perfect for red velvet or carrot cake. The cream cheese adds a subtle richness that Grandma adored.
Lemon Frosting: Replace vanilla with 2 tablespoons fresh lemon juice and 1 tablespoon lemon zest. Reduce the heavy cream to 1 tablespoon since lemon juice adds liquid. This frosting pairs beautifully with vanilla or almond cakes.
Almond Frosting: Add 1/2 teaspoon almond extract along with the vanilla (use only 1 teaspoon vanilla when doing this). The almond extract creates a sophisticated flavor that works wonderfully on simple cakes.
Coffee Frosting: Dissolve 2 tablespoons instant espresso powder in 1 tablespoon hot water, then cool slightly. Add this to your frosting instead of some of the heavy cream. Coffee lovers will adore this variation.
Brown Butter Frosting: Grandma’s most advanced technique involved browning the butter first. Melt the butter in a saucepan over medium heat, swirling occasionally until it turns golden brown (about 8-10 minutes). Cool completely, then proceed with the recipe. The nutty flavor is absolutely extraordinary.
When decorating artisan breads or specialty desserts, consider how the frosting flavor complements your base recipe. Grandma always tasted a small piece of her cake before choosing the frosting flavor.
Storage and Make-Ahead Guide
One of the best aspects of this easy frosting recipe is how well it stores. Grandma often made frosting days in advance, which helped her manage her baking schedule.
Room Temperature Storage: Frosting can sit at room temperature for up to 2 hours after making. If your kitchen is particularly warm, store it in a cool place or re-refrigerate if it becomes too soft for piping.
Refrigerator Storage: Covered frosting lasts 2 weeks in the refrigerator. Use an airtight container or cover your frosting bowl tightly with plastic wrap. Before using, let it sit at room temperature for 15-20 minutes, then re-whip briefly to restore fluffiness.
Freezer Storage: Frosting freezes beautifully for up to 3 months. Place it in an airtight container or freeze it in dollops on a baking sheet, then transfer to freezer bags. Thaw overnight in the refrigerator, then bring to room temperature and re-whip.
Make-Ahead Strategy: Grandma often made frosting the day before she needed it. This allowed her to focus on cake baking on the actual day. She’d refrigerate the frosting, then bring it to room temperature and give it a quick whip with the mixer before frosting her cakes.
Frosting Cakes in Advance: You can frost cakes 1-2 days ahead. Store the frosted cake covered in the refrigerator. Remove it 30 minutes before serving to bring it to room temperature. The frosting actually sets better when given time in the cold.
Troubleshooting Common Frosting Problems
Even with Grandma’s methods, sometimes frosting doesn’t cooperate. Here’s how to fix common issues:
Frosting is Too Soft: This usually means your butter was too warm or you added too much liquid. Refrigerate the frosting for 15-20 minutes and try again. If it’s still too soft, add more powdered sugar, 1 tablespoon at a time, mixing well between additions.
Frosting is Too Stiff: Add liquid gradually—start with 1/2 teaspoon of heavy cream or milk, mix well, and assess. Repeat until you reach desired consistency. Grandma kept a small measuring spoon specifically for this adjustment.
Frosting is Grainy or Lumpy: This happens when powdered sugar isn’t sifted properly or when butter temperature is inconsistent. You can sometimes fix this by gently warming the frosting (place the bowl over a pot of warm water for 30 seconds) and re-mixing. For future batches, sift your powdered sugar twice.
Frosting Separates or Looks Curdled: This occurs when ingredients are at very different temperatures. Stop mixing, let everything come to room temperature, and start over with one ingredient at a time. Alternatively, add 1 tablespoon of powdered sugar and mix gently.
Frosting Tastes Too Sweet: Add a tiny pinch of salt (1/8 teaspoon) and mix well. You can also add 1/4 teaspoon of lemon juice or a tiny amount of vanilla to balance sweetness. Grandma would sometimes add a whisper of almond extract to complex sweetness.
Frosting Tastes Buttery or Rich: This is actually difficult to fix once made. For future batches, use slightly less butter or add a bit more powdered sugar. Some people prefer rich frosting, so this might not be a problem for you!
When pairing frosting with your baked goods, remember that lighter cakes need lighter frostings, while denser cakes can handle richer, more substantial frosting. Grandma understood this balance intuitively.
FAQ
Can I make this frosting without an electric mixer?
Yes! Grandma made this frosting by hand for years. It takes about 15-20 minutes of vigorous hand mixing with a wooden spoon or whisk, but it works. The result is just as delicious, though slightly less fluffy. Hand mixing develops character, as Grandma would say.
What’s the difference between this frosting and buttercream?
This frosting is essentially an American-style buttercream, which is butter-based and creamed with powdered sugar. It’s different from Italian meringue buttercream (which uses egg whites) or Swiss meringue buttercream (which uses egg whites heated over water). Grandma’s version is simpler and more forgiving for home bakers.
How much frosting do I need for a standard layer cake?
This recipe makes about 3 cups of frosting, which is enough to frost and fill a standard 8 or 9-inch two-layer cake with a thin crumb coat and final layer. For thicker frosting layers or a three-layer cake, double the recipe.
Can I use salted butter instead of unsalted?
You can, but reduce the salt in the recipe to 1/8 teaspoon or omit it entirely. Salted butter contains varying amounts of salt depending on the brand, making it difficult to control the final flavor. Grandma always used unsalted for this reason.
Is this frosting suitable for piping?
Absolutely! This frosting pipes beautifully. For piping, you might want it slightly stiffer than for spreading, so use slightly less cream or milk. Chill it for 15-20 minutes before piping if it seems too soft.
Can I add food coloring to this frosting?
Yes! Use gel food coloring rather than liquid, as liquid coloring can make the frosting too wet. Add coloring drop by drop until you reach your desired shade. Grandma loved tinting frosting for special occasions.
What if I need to frost a cake immediately after baking?
Make sure your cake is completely cool before frosting—warm cakes melt frosting. You can frost the cake while the frosting is still soft, but it will be messier than working with slightly chilled frosting. Grandma would refrigerate her cakes for 30 minutes before frosting for the cleanest results.
Can I double this recipe?
Yes, doubling works perfectly. Just multiply all ingredients by two. Mixing time might be slightly longer, but the method remains the same. Grandma often doubled batches for large events.
How long does frosted cake last?
Frosted cakes stay fresh for 2-3 days covered at room temperature, or up to 5 days refrigerated. Frosting acts as a preservative, so frosted cakes last longer than unfrosted ones. Store covered to prevent drying out.
Can I use this frosting on cookies?
Definitely! This frosting works beautifully on cookies. You might want to make it slightly stiffer for decorative piping on cookies. Grandma loved frosting sugar cookies with this recipe, sometimes thinning it slightly with milk to create a smooth coating.


