Gluten-Free Pizza Dough? Tested & Tasty Recipe
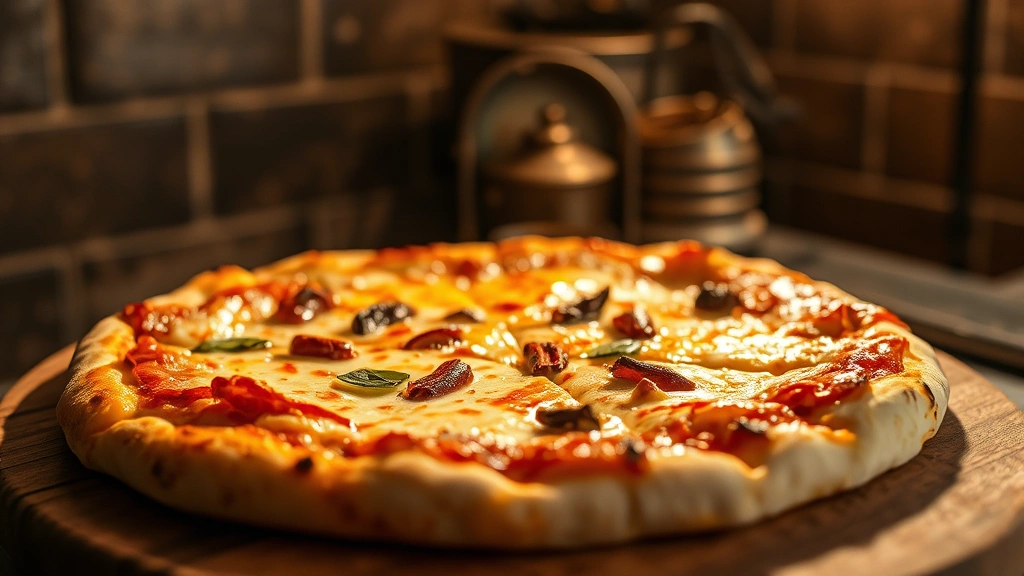
Making pizza at home becomes challenging when you need to avoid gluten, but it doesn’t have to mean sacrificing flavor or texture. After testing dozens of combinations and techniques, we’ve developed a gluten-free pizza dough recipe that rivals traditional wheat-based versions in every way. This dough achieves that perfect balance of crispy crust, chewy interior, and authentic pizza taste without any gluten-containing ingredients.
Whether you’re managing celiac disease, non-celiac gluten sensitivity, or simply exploring alternative grains, this recipe delivers consistent results every single time. The secret lies in understanding how gluten-free flours behave differently, using the right binding agents, and employing proven techniques that professional bakers use in dedicated gluten-free kitchens. You’ll discover that gluten-free pizza dough can be just as delicious as the conventional kind.
Why Gluten-Free Pizza Matters
The gluten-free movement isn’t just a trend—it’s a dietary necessity for millions of people worldwide. Approximately 1 in 100 people have celiac disease, and many more experience non-celiac gluten sensitivity or choose gluten-free diets for various health reasons. Pizza, being one of the world’s most beloved foods, shouldn’t be off-limits for anyone.
Traditional pizza dough relies on gluten’s unique properties: elasticity, structure, and the ability to trap gas bubbles during fermentation. When you remove gluten, you lose these natural properties, which is why many early gluten-free pizza attempts resulted in dense, crumbly, or overly thick crusts. Modern gluten-free baking science has evolved dramatically, and we now understand how to replicate gluten’s structural role using alternative flours, binders, and hydration techniques.
This tested recipe incorporates insights from King Arthur Baking Company, one of the most respected names in gluten-free baking science, combined with practical home-baker adjustments. The result is a gluten-free pizza dough that maintains authentic pizza characteristics while being completely safe for gluten-free diets.
Understanding Gluten-Free Flours
The foundation of successful gluten-free pizza dough is choosing the right flour blend. Unlike wheat flour, which is straightforward, gluten-free flours each bring different properties to your dough. Understanding these differences transforms your baking results.
Brown Rice Flour provides a neutral flavor and moderate structure. It’s less dense than white rice flour and works well as a base flour in blends. Brown rice flour absorbs slightly less water, so you may need to adjust hydration accordingly.
Tapioca Starch creates chewiness and elasticity—the qualities we’re trying to replicate from gluten. It also helps achieve that desirable crispy exterior. However, tapioca starch alone creates a gluey texture, which is why it must be balanced with other flours.
Potato Starch lightens the dough and increases rise. It absorbs more water than other starches, so start conservatively and adjust gradually. Potato starch contributes to that airy, open crumb structure we want in pizza.
Sorghum Flour adds nutritional value with its rich mineral content and contributes a subtle, slightly sweet flavor. It also improves browning and crust development. Some people find sorghum slightly bitter, so use it in moderation (no more than 20% of your flour blend).
Xanthan Gum or Psyllium Husk replaces gluten’s binding function. Xanthan gum is more common and creates better elasticity, while psyllium husk adds fiber and creates slightly different texture. Choose one, not both.
For this recipe, we recommend using a commercial gluten-free all-purpose flour blend like Bob’s Red Mill 1-to-1 or King Arthur Gluten-Free Measure for Measure as your base, which already contains optimized flour combinations and xanthan gum. This simplifies the process while maintaining excellent results.
Ingredients Breakdown
For the Dough (makes two 12-inch pizzas):
- 2 cups (280g) gluten-free all-purpose flour blend
- 1 tablespoon (12g) instant dry yeast
- 1 tablespoon (12g) sugar or honey
- 1½ teaspoons (9g) salt
- 2 tablespoons (30ml) extra virgin olive oil
- ¾ cup (180ml) warm water (110°F/43°C)
- 1 teaspoon (5g) apple cider vinegar
- ½ teaspoon (2g) xanthan gum (only if your flour blend doesn’t contain it)
Why Each Ingredient Matters:
The warm water temperature is crucial—too hot and you’ll kill the yeast; too cold and fermentation stalls. A kitchen thermometer takes the guesswork out of this critical step. The apple cider vinegar strengthens the dough structure by providing acidity that helps bind proteins and starches more effectively, mimicking what gluten does naturally.
Sugar feeds the yeast and promotes browning through the Maillard reaction, creating that beautiful golden crust. Honey works equally well and adds subtle sweetness. Olive oil contributes richness and helps achieve a tender crumb while preventing excessive sticking.
Salt regulates yeast activity, prevents over-fermentation, and enhances flavor. Never skip it or reduce it significantly. The xanthan gum addition is only necessary if your flour blend doesn’t already contain it—double-check your package label to avoid doubling up, which would make the dough too gummy.
Step-by-Step Instructions
Step 1: Activate Your Yeast
In a small bowl, combine ¾ cup warm water (110°F/43°C), 1 tablespoon sugar, and 1 tablespoon instant dry yeast. Stir gently and let sit for 5-10 minutes until foamy. This “blooming” stage confirms your yeast is alive and active. If no foam develops, your yeast is dead—start over with fresh yeast.
Step 2: Combine Dry Ingredients
In a large mixing bowl, whisk together 2 cups gluten-free flour blend, 1½ teaspoons salt, and ½ teaspoon xanthan gum (if needed). Whisking aerates the flour and distributes salt evenly, preventing dry pockets in your finished dough. This step takes just one minute but significantly improves results.
Step 3: Mix the Dough
Create a well in the center of your dry ingredients. Pour in the activated yeast mixture and 2 tablespoons olive oil plus 1 teaspoon apple cider vinegar. Using a sturdy wooden spoon or electric mixer with a paddle attachment, mix for 2-3 minutes until a shaggy dough forms. Gluten-free dough won’t develop the smooth, elastic texture of wheat dough—expect a thicker, slightly sticky consistency.
Step 4: Rest and Hydrate (Autolyse)
Let the dough rest uncovered for 10 minutes. This allows the flour to fully hydrate and helps starches gelatinize, improving structure. After 10 minutes, the dough should look less shaggy and slightly more cohesive.
Step 5: Knead and Develop
If using an electric mixer, continue mixing on medium speed for 5-7 minutes. If mixing by hand, stir vigorously for 3-5 minutes using a sturdy spoon. The dough should appear smooth and slightly glossy, pulling away from the bowl’s sides. Unlike wheat dough, gluten-free dough won’t become elastic—focus on achieving a uniform, smooth texture.
Step 6: First Rise (Bulk Fermentation)
Transfer dough to a lightly oiled bowl, turning to coat all sides. Cover with plastic wrap or a damp kitchen towel. Let rise at room temperature (68-72°F) for 60-90 minutes until roughly doubled in size. Warmer kitchens may require only 60 minutes, while cooler environments need up to 90 minutes. You can also use the low-carb dinner recipes time frame as a guide—if you’re planning dinner around 6 PM, start your dough around 3-4 PM.
Step 7: Divide and Shape
Turn dough onto a lightly floured surface and divide in half. Shape each portion into a rough ball. Let rest for 5 minutes—this relaxes the gluten-free flour network and makes shaping easier.
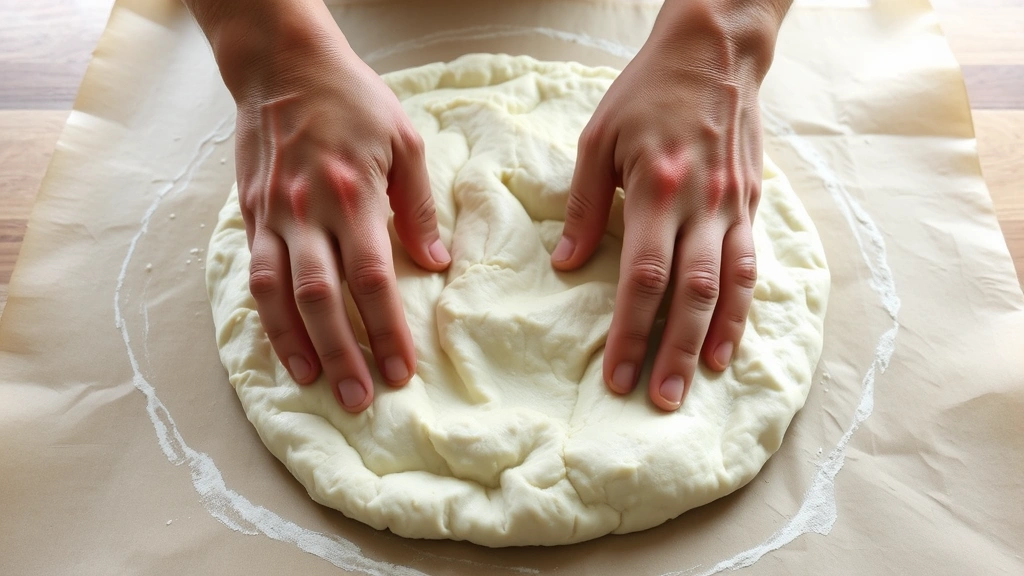
Step 8: Final Shaping
Working with one dough ball at a time, gently stretch into a 12-inch circle. Gluten-free dough is more delicate than wheat dough, so use gentle pressure and let gravity help stretch it. If dough springs back, let it rest for 2-3 minutes and try again. Transfer shaped dough to parchment paper on a pizza peel or baking sheet.
Step 9: Second Rise (Optional but Recommended)
Let shaped dough rest for 20-30 minutes. This second rise creates a lighter, airier crumb. For thicker, breadier crust, extend to 45 minutes. For thin crust, skip this step and proceed directly to topping and baking.
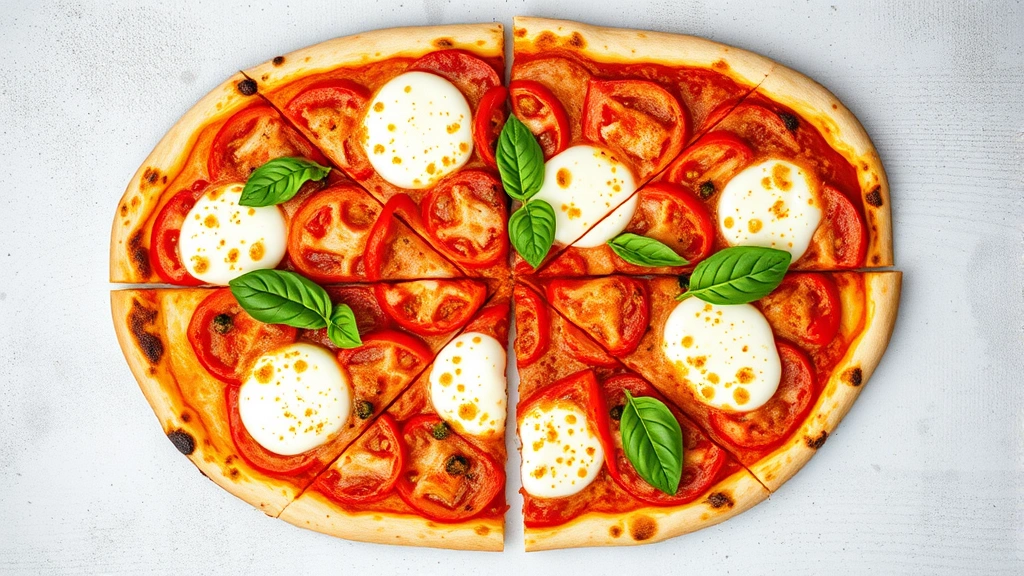
Step 10: Top and Bake
Preheat oven to 475°F (245°C) for at least 20 minutes. Add your desired toppings—sauce, cheese, vegetables, proteins. Bake for 12-15 minutes until crust is golden brown and cheese is melted and bubbly. Gluten-free crusts brown faster than wheat crusts, so watch carefully during the final minutes to prevent over-browning.
Step 11: Cool Slightly
Remove pizza from oven and let rest for 3-5 minutes before slicing. This allows the crumb structure to set, preventing the crust from falling apart when cut. Slice with a pizza cutter or sharp knife.
Troubleshooting Common Issues
Dough Too Sticky: Gluten-free dough is naturally stickier than wheat dough. If you can’t work with it, add 1 tablespoon flour at a time until manageable. Resist the urge to add too much flour, which creates dense pizza.
Dough Won’t Rise: Check yeast expiration date and water temperature. Yeast dies above 120°F or in cold water below 100°F. Ensure your kitchen is reasonably warm (above 65°F). If still struggling, try room temperature fermentation or place dough in a turned-off oven with the light on.
Crust Too Dense: This indicates under-fermentation or too little water. Increase first rise time by 15-20 minutes. Alternatively, add 1-2 tablespoons more water to your next batch. Dense crust also results from over-kneading—mix only until uniform, not longer.
Crust Too Dry: Gluten-free crusts can dry out quickly. Brush finished crust with olive oil or garlic butter immediately after baking. Store leftover pizza in an airtight container with a paper towel to absorb excess moisture.
Crust Spreading Too Much: Your dough might be too warm or over-fermented. Reduce first rise time or place dough in a cooler location. Ensure your shaped dough rests on parchment paper before baking—this prevents spreading on hot pizza stone.
Crust Not Browning: Increase oven temperature by 25°F or extend baking time by 2-3 minutes. Brush crust with egg wash (1 egg beaten with 1 tablespoon water) before baking for enhanced browning. Ensure oven is fully preheated.
Gummy Interior: This indicates too much xanthan gum or under-baking. Verify your flour blend contains xanthan gum before adding more. Bake an additional 2-3 minutes, ensuring the center reaches an internal temperature of 200°F (93°C).
Creative Variations
Once you master the basic gluten-free pizza dough recipe, experiment with variations that suit your preferences and dietary goals.
Cauliower Crust Blend: Replace 25% of flour with riced cauliflower (finely processed and moisture removed). This reduces carbohydrates and adds vegetables. The crust will be slightly more delicate, so handle gently and reduce baking time by 1-2 minutes.
Herb-Infused Dough: Add 1 teaspoon Italian seasoning, ½ teaspoon garlic powder, and ¼ teaspoon red pepper flakes to dry ingredients. This creates a flavorful base that requires less sauce.
Thicker, Focaccia-Style Crust: Increase water to ¾ cup plus 2 tablespoons and let dough rise in an oiled 9×13-inch baking pan instead of shaping into circles. Press gently into pan after second rise. Top with dimples created by poking with your fingertips. Drizzle with olive oil and sea salt before baking.
Cauliflower Pizza Base: For those following low-carb dinner recipes, try a cauliflower pizza crust. Pulse raw cauliflower in food processor, microwave 5 minutes to remove moisture, mix with eggs and cheese, and press into pizza shape before baking at 425°F for 15 minutes.
Whole Grain Boost: Combine gluten-free all-purpose flour with ¼ cup certified gluten-free oat flour and ¼ cup buckwheat flour (despite its name, buckwheat is gluten-free). This increases fiber and nutrition. Reduce water slightly as whole grains absorb more liquid.
Sourdough-Style Fermentation: If you maintain a gluten-free sourdough starter, replace ½ cup flour and ½ cup water with ¾ cup active starter. Reduce instant yeast to ½ teaspoon. Extend first rise to 2-3 hours for deeper flavor development.
Dairy-Free Version: This recipe is already dairy-free. For gluten and dairy free recipes, ensure your toppings don’t contain hidden dairy. Use dairy-free cheese (cashew-based or store-bought alternatives) and dairy-free pesto or oil-based sauces.
Storage and Make-Ahead Tips
Refrigerator Storage: After shaping, wrap each pizza dough circle tightly in plastic wrap and refrigerate for up to 48 hours. Cold fermentation develops flavor and makes the dough easier to handle. Remove from refrigerator 30 minutes before baking, then top and bake as usual.
Freezer Storage: Freeze shaped dough on a baking sheet for 2 hours, then transfer to freezer bags. Freeze for up to 3 months. Thaw overnight in the refrigerator, then let come to room temperature (30-45 minutes) before topping and baking. This method works exceptionally well.
Bulk Dough Storage: After the first rise, divide dough into portions, wrap individually, and freeze. Thaw overnight in the refrigerator, shape, and proceed with second rise and baking. This allows you to make fresh pizza whenever desired without starting from scratch.
Pre-Baked Crust Storage: Bake crusts 90% of the way (until lightly golden but not fully cooked), cool completely, wrap tightly, and freeze for up to 1 month. To serve, top with desired ingredients and bake at 425°F for 8-10 minutes until cheese melts and crust is golden.
Leftover Pizza Storage: Store in an airtight container with parchment between slices for up to 3 days. Reheat in a 375°F oven for 10 minutes for best results. Microwaving makes the crust tough and rubbery.
FAQ
Can I Use All-Purpose Wheat Flour If I’m Not Gluten-Free?
Yes, but adjust your technique. Wheat dough requires less water (reduce to ½ cup) and develops differently. Mix for 8-10 minutes to develop gluten network. The result will be chewier and more elastic. Baking time remains the same.
What’s the Difference Between Certified Gluten-Free and Regular Gluten-Free Flour?
Certified gluten-free flour has been tested to contain less than 20 parts per million of gluten, meeting FDA standards. For those with celiac disease, certified gluten-free is essential. Others may use non-certified gluten-free blends. Always check labels for certification if needed.
Can I Make This Dough Without a Stand Mixer?
Absolutely. Hand-mixing takes slightly longer (5-7 minutes vigorous stirring with a sturdy wooden spoon) but produces identical results. Gluten-free dough is more forgiving than wheat dough regarding mixing method.
Why Does My Gluten-Free Pizza Crust Crumble?
Crumbling indicates insufficient binding or under-fermentation. Ensure your flour blend contains xanthan gum. Verify you’re not adding extra xanthan gum beyond what’s in the blend. Allow adequate fermentation time. If crumbling persists, your dough might need slightly more water—add ½ tablespoon at a time.
How Do I Achieve a Crispy Crust?
Use a preheated pizza stone or steel in the oven’s lower third. Bake at 475°F or higher. Brush crust with olive oil before baking. Ensure second rise isn’t too long (20-30 minutes maximum for thin crust). Remove pizza to a wire rack immediately after baking to prevent steam from making the bottom soggy.
Is This Dough Suitable for Thick-Crust or Detroit-Style Pizza?
Yes. Use the focaccia-style variation mentioned earlier. Press dough into an oiled 9×13-inch pan, let rise 30-45 minutes, top generously, and bake at 450°F for 18-20 minutes. Detroit-style pizza has cheese going to the edges, creating crispy, caramelized cheese borders—gluten-free dough handles this beautifully.
Can I Use This Dough for Other Applications Like Breadsticks or Calzones?
Yes. For breadsticks, shape into thin strips, brush with garlic oil, and bake at 425°F for 12-15 minutes. For calzones, divide dough into 4 portions, shape into circles, fill with desired ingredients, fold in half, seal edges with a fork, and bake at 400°F for 15-18 minutes until golden.
Why Should I Use Apple Cider Vinegar?
Apple cider vinegar’s acidity strengthens the gluten-free flour network by helping starches and proteins bond more effectively. It also enhances browning and adds subtle complexity to flavor. You can substitute white vinegar or lemon juice, though apple cider vinegar is preferred.
What External Resources Help Master Gluten-Free Baking?
Explore The Celiac Disease Foundation for certified recipes and research. King Arthur’s Gluten-Free Baking Guide provides scientific explanations. Serious Eats offers detailed technique articles. Gluten-Free on a Shoestring features tested recipes and troubleshooting advice.
How Does This Dough Compare to Store-Bought Gluten-Free Pizza Crusts?
Homemade dough offers superior flavor, better texture control, and cost savings. Most store-bought crusts contain preservatives and stabilizers. Homemade dough ferments naturally, developing complex flavors impossible in commercial products. The slight extra effort yields dramatically better pizza.


