Great Northern Beans Recipe: Grandma’s Favorite Comfort Food
Great northern beans hold a special place in American home cooking, especially in the kitchens of grandmothers who knew how to stretch ingredients and create meals that nourished both body and soul. These creamy, mild-flavored beans have been a staple for generations, appearing in everything from hearty soups to elegant side dishes. My grandmother’s recipe for great northern beans is the kind of dish that fills your kitchen with warmth and brings everyone to the dinner table with anticipation.
What makes this great northern beans recipe so beloved is its simplicity combined with deep, satisfying flavor. The beans themselves are versatile enough to pair with smoker recipes for a barbecue twist, or they can stand alone as a vegetarian centerpiece. Whether you’re cooking for a family gathering or a quiet weeknight dinner, this recipe delivers comfort in every spoonful. Let me share grandmother’s secrets that have made this dish a family treasure.
Why Great Northern Beans Are Special
Great northern beans are larger than navy beans but smaller than cannellini beans, making them the perfect middle ground for many dishes. Their creamy texture when cooked and mild, slightly nutty flavor make them incredibly forgiving for home cooks. Unlike some bean varieties that can turn mushy or remain stubbornly hard, great northern beans cook evenly and maintain their shape beautifully.
The nutritional profile of these beans is impressive. They’re packed with protein, fiber, and essential minerals like iron and magnesium. Grandmother understood that beans were nature’s perfect food—affordable, nutritious, and capable of transforming simple pantry staples into memorable meals. When you cook great northern beans from scratch, you’re not just following a recipe; you’re participating in a cooking tradition that spans generations and cultures.
These beans absorb flavors wonderfully, which is why they work so well in this family recipe. Whether you add smoky bacon, aromatic vegetables, or herbs from your garden, the beans welcome each ingredient like an old friend. This adaptability is what makes them perfect for both traditional preparations and modern twists.
Ingredients You’ll Need
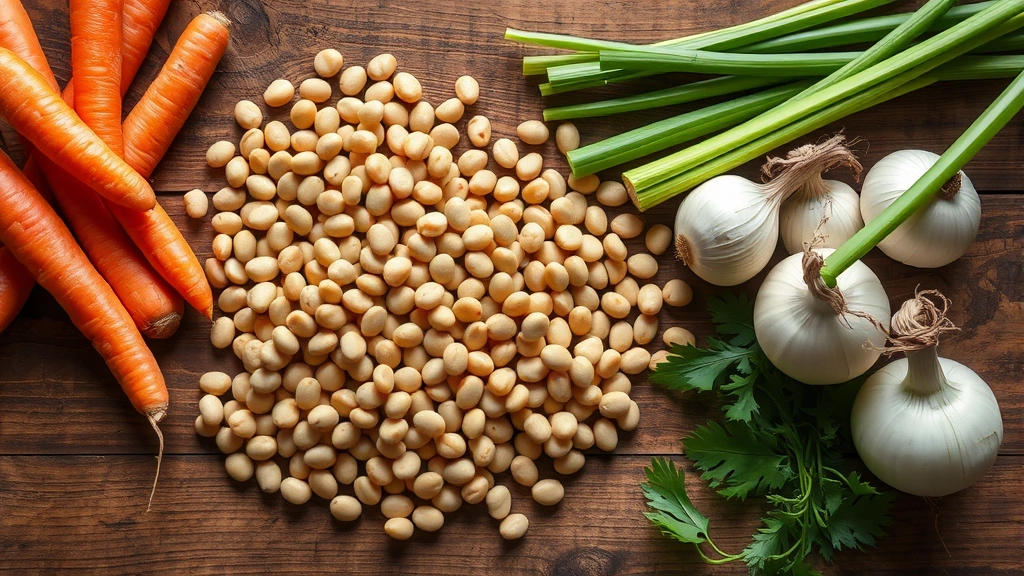
Grandmother’s recipe is refreshingly straightforward, requiring ingredients that most home cooks already have on hand:
- 2 pounds dried great northern beans (about 4-5 cups dried)
- 8 cups chicken or vegetable broth, or use beef bone broth for extra depth
- 4 ounces bacon, chopped (optional but recommended)
- 1 large yellow onion, diced
- 3 cloves garlic, minced
- 2 large carrots, chopped
- 2 celery stalks, chopped
- 2 bay leaves
- 1 teaspoon dried thyme
- 1 teaspoon dried rosemary
- Salt and black pepper to taste
- 2 tablespoons butter
- Red pepper flakes (optional, for heat)
The beauty of this recipe is that you likely won’t need to make a special shopping trip. If you don’t have bacon, the beans are equally delicious without it. The combination of thyme and rosemary creates the signature flavor profile that makes this dish instantly recognizable as grandmother’s version.
Preparation and Soaking Methods
Before cooking, great northern beans require preparation. Spread your dried beans on a clean surface and pick through them carefully, removing any small stones or discolored beans. This step only takes a few minutes but prevents unpleasant surprises during dinner.
Soaking is the next crucial step. Grandmother preferred the overnight soak method: place your picked beans in a large pot, cover with cold water (about 3 inches above the beans), and let them sit overnight at room temperature. This method allows the beans to absorb moisture gradually and makes them cook more evenly. In the morning, drain the soaking water and rinse the beans thoroughly under cold running water.
If you’re short on time, use the quick soak method: place beans in a pot, cover with water, bring to a boil, and let boil for 2 minutes. Remove from heat, cover, and let sit for 1 hour. Drain and rinse just as you would with the overnight method. While not quite as effective as overnight soaking, this method still produces excellent results.
Why soak? Soaking reduces cooking time, minimizes digestive discomfort, and helps the beans cook more uniformly. Some home cooks skip soaking, which is fine—your beans will simply take longer to cook. Grandmother always soaked, and her beans were always tender and perfect.
Step-by-Step Cooking Instructions
Step 1: Prepare Your Aromatics
Heat a large Dutch oven or heavy-bottomed pot over medium heat. If using bacon, add it and cook until crispy, about 5-7 minutes. Remove with a slotted spoon and set aside, leaving about 2 tablespoons of bacon fat in the pot. Add your diced onion and cook until softened and fragrant, about 3-4 minutes. Stir in the minced garlic and cook for another minute until the raw garlic smell disappears.
Step 2: Add Vegetables and Build Flavor
Add your chopped carrots and celery to the pot. These vegetables form the flavor foundation—what culinary professionals call mirepoix. Stir everything together and let it cook for 3-4 minutes, allowing the vegetables to begin releasing their flavors. This technique, which you can learn more about from Serious Eats’ cooking technique guides, is fundamental to building depth in bean dishes.
Step 3: Add Beans and Broth
Add your drained, soaked beans to the pot, stirring to combine with the vegetables. Pour in your broth—whether chicken, vegetable, or beef bone broth. The broth should cover the beans by about 2 inches. Bring everything to a boil, then immediately reduce heat to low.
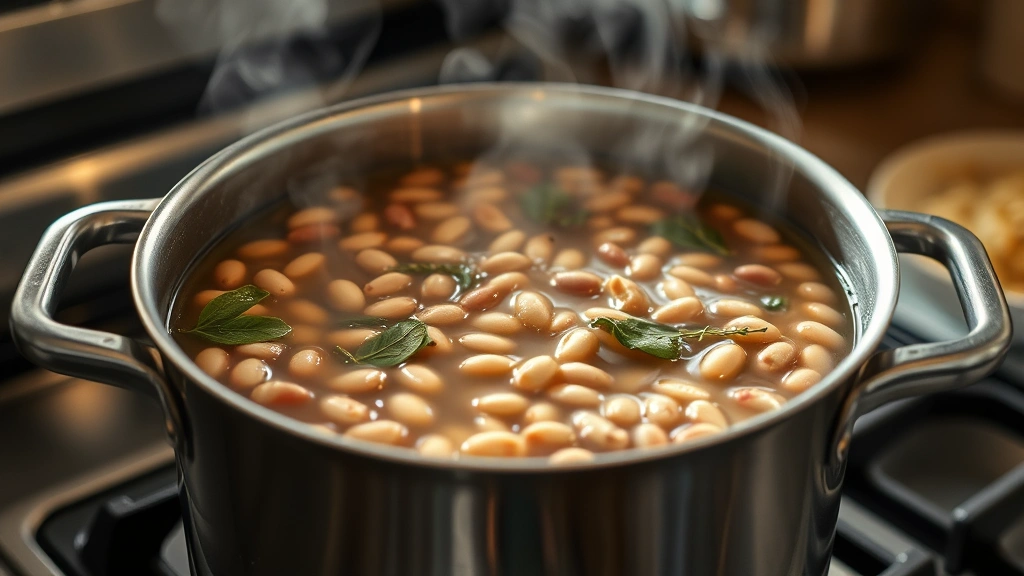
Step 4: Season and Simmer
Add bay leaves, thyme, and rosemary. If you set aside bacon earlier, add it back now. Season with salt and pepper—start conservatively, as you can always add more. Cover the pot partially (leave the lid slightly ajar) and let it simmer gently for 1.5 to 2.5 hours, depending on the age of your dried beans and your altitude. Older beans take longer; high-altitude cooking requires more time as well.
Step 5: Test for Doneness
Begin testing beans after 1.5 hours. They should be creamy and tender enough to break easily between your fingers or with a spoon, but not so soft they fall apart. The broth should reduce slightly and thicken as the beans release their starches. If the broth seems too thin after cooking, you can simmer uncovered for the final 15-20 minutes to reduce it further.
Step 6: Final Adjustments
Remove bay leaves and taste carefully. Add additional salt, pepper, or herbs as needed. Stir in butter for richness—this is grandmother’s secret touch that elevates the dish from good to memorable. If desired, add red pepper flakes for a subtle heat that complements without overpowering.
Flavor Variations and Additions
While grandmother’s original recipe is perfect as-is, this dish welcomes experimentation. Here are variations that maintain the spirit of the original:
Smoky Version: Add 1 teaspoon smoked paprika and increase bacon to 6 ounces. This variation pairs beautifully with smoker recipes at your next barbecue. You can also add a smoked ham bone during cooking for incredible depth.
Italian-Inspired: Replace thyme and rosemary with Italian seasoning, add diced tomatoes (about 1 cup), and finish with fresh basil and a drizzle of good olive oil. This version complements homemade pasta sauce beautifully for a complete Italian meal.
Creamy Version: After the beans are cooked, remove 2 cups of beans with some broth, blend until smooth, and return to the pot. This creates a naturally creamy texture without added cream.
Southwestern Twist: Add cumin, chili powder, and diced jalapeños. Finish with lime juice and fresh cilantro. Serve alongside cornbread for a complete meal.
White Wine Addition: Replace 1 cup of broth with dry white wine added after the vegetables have cooked. The wine adds acidity that brightens all the flavors.
Serving Suggestions
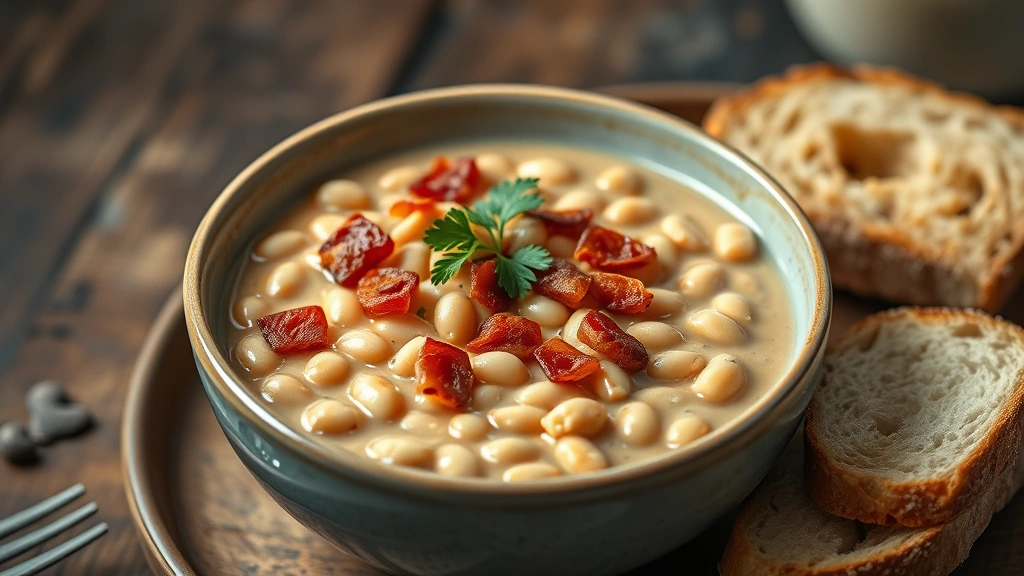
Great northern beans are wonderfully versatile at the table. Serve them as a side dish alongside roasted meats or fish. Pair them with warm easy homemade bread recipes to soak up every drop of the flavorful broth. For a vegetarian main course, serve over rice or alongside roasted vegetables.
Top with crispy bacon bits, fresh parsley, and a drizzle of quality olive oil for restaurant-quality presentation. Grandmother often served hers in wide, shallow bowls with crusty bread on the side—perfect for both the beans and the broth.
For a more elegant presentation, consider serving in a bread bowl made from Dutch oven bread recipes. The bread soaks up the delicious broth while providing an edible vessel that impresses guests.
Cold leftovers can be transformed into a salad: toss with vinaigrette, diced vegetables, and fresh herbs for a completely different meal that’s equally satisfying.
Storage and Make-Ahead Tips
One of the greatest advantages of this recipe is that it actually tastes better the next day as flavors meld and deepen. Store cooled beans in an airtight container in the refrigerator for up to 5 days. The broth will thicken further as it cools due to the gelatin released by the beans.
For freezing, transfer cooled beans to freezer-safe containers or bags, leaving about an inch of headspace. Properly stored, frozen beans maintain quality for up to 3 months. Thaw overnight in the refrigerator and reheat gently on the stovetop, adding a splash of broth if needed.
This recipe is perfect for batch cooking. Make a double batch and freeze half for nights when you want homemade comfort food without the cooking time. Grandmother always made extra—she understood that good food deserves to be shared and that having some on hand means you’re always prepared for unexpected guests.
For make-ahead convenience, you can prepare the aromatics and vegetables the day before, storing them in separate containers. On cooking day, simply add them to your pot with the soaked beans and broth, reducing active cooking time significantly.
FAQ
Can I use canned great northern beans instead of dried?
Yes, absolutely. Use about 8-10 cans (15 ounces each) of great northern beans, drained and rinsed. Since they’re already cooked, add them during the last 30 minutes of cooking, giving them time to absorb the flavors without becoming mushy. Reduce the simmering time significantly—your final dish will be ready in about 45 minutes total.
Why are my beans still hard after cooking for hours?
Hard beans usually indicate very old dried beans or insufficient soaking. Older beans take longer to cook and may never become completely tender. Always check the expiration date when purchasing dried beans. Ensure you’ve soaked them properly for at least 8 hours or used the quick soak method. If using older beans, add 30 minutes to your cooking time and check periodically.
Can I cook these beans in a slow cooker?
Absolutely. After soaking and preparing your aromatics as directed, transfer everything to a slow cooker with the broth. Cook on low for 6-8 hours or high for 3-4 hours. Slow cooking actually enhances the flavor development, making this an excellent hands-off method that produces restaurant-quality results.
What’s the difference between great northern beans and other white beans?
Great northern beans are larger than navy beans but smaller than cannellini beans. Navy beans are smaller and cook faster, making them ideal for baked beans. Cannellini beans are larger and creamier, perfect for Italian dishes. For this recipe specifically, great northern beans provide the ideal balance of cooking time, texture, and flavor absorption.
How do I reduce the gas-producing properties of beans?
Proper soaking is your first defense—it removes oligosaccharides that cause digestive discomfort. After soaking, drain the water completely. During cooking, you can add a piece of kombu (seaweed) or a tablespoon of apple cider vinegar, both of which help break down complex sugars. Eating beans regularly also helps your digestive system adapt more easily.
Can I use vegetable broth instead of chicken broth?
Yes, vegetable broth creates an equally delicious vegetarian version. For even more depth, try using beef bone broth for a richer flavor profile. The type of broth you choose allows you to customize the final flavor to match your preferences and dietary needs.
What if I don’t have all the vegetables listed?
The onion and garlic are essential for flavor development. The carrots and celery are traditional and highly recommended, but if you’re missing one, you can substitute or omit. The herbs are flexible too—if you only have one, use it alone. This recipe is forgiving; grandmother often made it with whatever vegetables she had on hand.


