Fluffy Hawaiian Rolls? Grandma’s Secret Recipe
There’s something magical about biting into a warm Hawaiian roll fresh from the oven. The soft, pillowy texture melts in your mouth, and that subtle sweetness transports you straight to a tropical paradise. For years, people have asked me the secret behind my grandmother’s legendary Hawaiian rolls, and today, I’m finally sharing the complete recipe and techniques that make these rolls absolutely irresistible.
My grandmother brought this recipe from Hawaii in the 1970s, and it has been perfected through decades of family gatherings, holiday dinners, and countless batches. The magic isn’t just in the ingredients—it’s in understanding how each component works together to create that signature fluffy, slightly sweet texture that makes Hawaiian rolls so distinctive. Whether you’re preparing for a special occasion or simply craving homemade rolls, this guide will walk you through every step.
What sets these rolls apart from standard dinner rolls is the combination of pineapple juice, sweetened condensed milk, and butter, which creates an incredibly tender crumb structure. The dough requires patience and proper technique, but once you master this recipe, you’ll never want store-bought rolls again.
Ingredients You’ll Need
Creating authentic Hawaiian rolls starts with quality ingredients. My grandmother always insisted on using real ingredients rather than shortcuts, and that commitment to quality is what makes these rolls exceptional.
- Bread flour: 4 cups (use quality bread flour for better gluten development)
- Pineapple juice: ¾ cup (fresh or pure juice, no additives)
- Sweetened condensed milk: ½ cup (this is crucial for the signature sweetness)
- Butter: 4 tablespoons, melted (unsalted is preferred)
- Egg: 1 large (room temperature)
- Active dry yeast: 2¼ teaspoons (one packet)
- Salt: 1½ teaspoons
- Sugar: 2 tablespoons (for the dough)
- Butter for brushing: 2 tablespoons melted (for finishing)
The combination of pineapple juice and sweetened condensed milk is what distinguishes Hawaiian rolls from other enriched dough recipes. The pineapple juice adds a subtle tang and moisture, while the sweetened condensed milk provides richness and helps achieve that signature tender crumb. If you’re interested in exploring other enriched dough recipes, check out our collection of easy cooking methods that can complement your baking routine.
Preparation and Dough Making
The foundation of perfect Hawaiian rolls lies in proper dough preparation. This isn’t a recipe to rush—taking your time ensures the best results.
Step 1: Activate Your Yeast
Begin by warming your pineapple juice to approximately 110°F (43°C). This temperature is ideal for activating yeast without killing the living cultures. Pour the warm pineapple juice into a large mixing bowl and sprinkle the active dry yeast over the surface. Add 1 tablespoon of the sugar and let it sit for about 5 minutes. You should see a foamy layer developing on top—this indicates your yeast is alive and ready to work.
Step 2: Combine Wet Ingredients
Once your yeast mixture is foamy, add the sweetened condensed milk, melted butter, and egg to the bowl. Whisk these ingredients together thoroughly until well combined. The mixture should be smooth and homogeneous. This step is important because it ensures the sweetness and richness are evenly distributed throughout the dough.
Step 3: Incorporate Dry Ingredients
In a separate bowl, whisk together 4 cups of bread flour, 1½ teaspoons of salt, and the remaining 1 tablespoon of sugar. Gradually add the dry ingredients to the wet mixture, stirring with a wooden spoon or the dough hook of your stand mixer. Mix until a shaggy dough forms—this should take about 2-3 minutes.
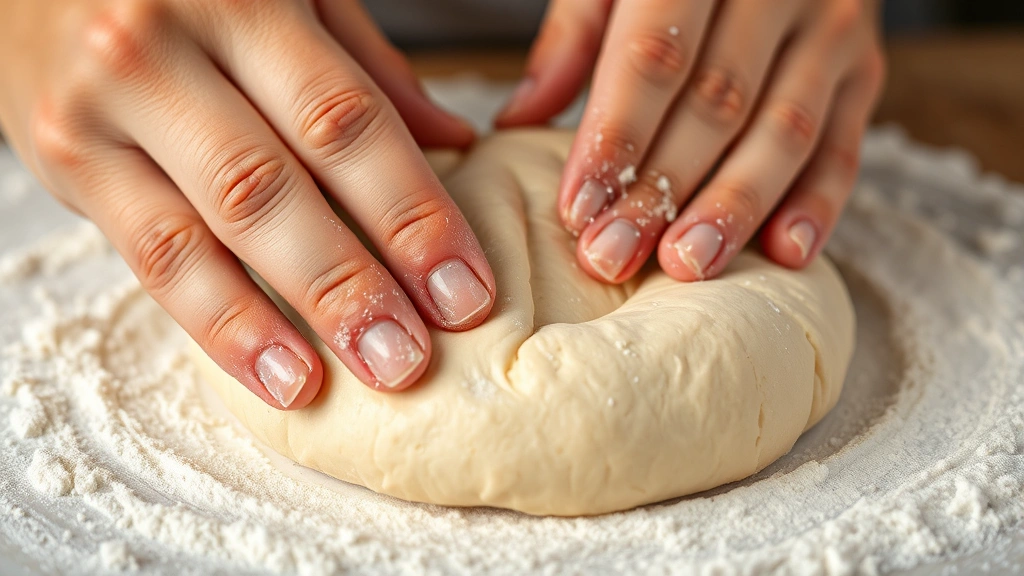
Step 4: Knead the Dough
This is where your dough transforms. If using a stand mixer with a dough hook, knead on medium speed for 8-10 minutes until the dough becomes smooth, elastic, and slightly sticky but manageable. If kneading by hand, work the dough on a lightly floured surface for 10-12 minutes. You’ll know it’s ready when you can stretch a small piece of dough thin enough to see light through it without it tearing (the windowpane test). The dough should be soft and have a slight sheen to it.
At this stage, many bakers make the mistake of adding too much flour. Resist this urge—Hawaiian roll dough should be slightly sticky. This moisture is what creates the fluffy interior texture you’re after.
The Rising Process
Proper rising is absolutely critical to achieving those cloud-like rolls that melt in your mouth. This is where patience becomes your greatest asset.
First Rise (Bulk Fermentation)
Lightly oil a large bowl and place your kneaded dough inside, turning it to coat all sides with oil. Cover the bowl with a damp kitchen towel or plastic wrap. Place it in a warm, draft-free location—ideally around 75-80°F (24-27°C). Your dough needs to rise until it has doubled in size, which typically takes 1½ to 2 hours depending on room temperature.
To test if your dough has risen enough, gently press your finger about ½ inch into the dough. If the indentation slowly springs back but doesn’t completely disappear, the dough is ready for the next stage. If it springs back completely, it needs more time. If it doesn’t spring back at all, it may have overproofed.
Understanding Fermentation
During this rising period, yeast cells are actively consuming sugars and producing carbon dioxide gas, which creates the air pockets that make the rolls fluffy. The enzymes in the dough are also breaking down proteins and starches, developing flavor and improving digestibility. This is why rushing this step compromises the final product.
If your kitchen is cold, you can create a warm environment by turning on your oven to 200°F for 2 minutes, then turning it off. Place the bowl inside the slightly warm oven with the door cracked open. This creates an ideal proofing environment without the risk of overheating.
Shaping Your Rolls
Once your dough has doubled, it’s time to shape. This step requires a gentle touch to maintain all those air bubbles you’ve worked so hard to develop.
Dividing the Dough
Turn your risen dough out onto a lightly floured surface. Using a bench scraper or sharp knife, divide the dough into 12 equal pieces. A kitchen scale is helpful here—each piece should weigh approximately 2.5 ounces. If you don’t have a scale, divide the dough in half, then quarters, then into thirds.
Pre-shaping
Take each piece and gently pull the edges toward the center, creating surface tension. Place it seam-side down on your work surface and let it rest for about 5 minutes. This intermediate rest allows the gluten to relax, making the final shaping easier and preventing the dough from shrinking back.
Final Shaping
After the rest period, shape each piece into a smooth ball. To do this, place your hands around the dough ball and gently roll it toward you in a circular motion, creating a tight, smooth surface. The key is creating enough surface tension that the roll will rise upward rather than spreading outward during the second rise.
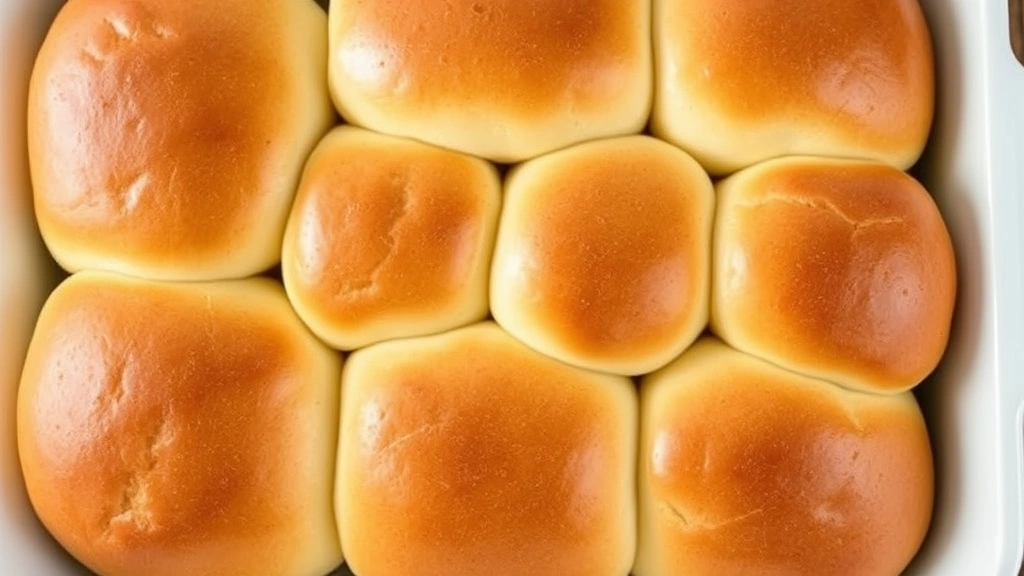
Arranging in the Pan
Place your shaped rolls seam-side down into a greased 9×13-inch baking pan. They should be close together but not touching yet. Cover the pan with a damp towel and let them rise for another 45 minutes to 1 hour, until they’re puffy and just barely touching each other. This second rise is crucial—it’s what creates that signature light, airy crumb.
Baking to Perfection
The final stage is where your beautiful rolls transform into golden-brown masterpieces.
Preheating
About 15 minutes before your rolls finish their second rise, preheat your oven to 375°F (190°C). An oven thermometer is invaluable here—many home ovens run hot or cold, and proper temperature is essential for even browning.
The Bake
Once your rolls have completed their second rise and look puffy and pillowy, place the pan in your preheated oven. Bake for 18-22 minutes, until the tops are golden brown and the rolls sound hollow when gently tapped. If the tops are browning too quickly, you can loosely tent the pan with aluminum foil for the last 5 minutes.
Finishing Touches
Remove the rolls from the oven and immediately brush the warm rolls with melted butter. This creates a beautiful sheen and adds richness. For extra flavor, you can sprinkle a tiny pinch of sea salt on top before the butter sets, though my grandmother preferred them plain.
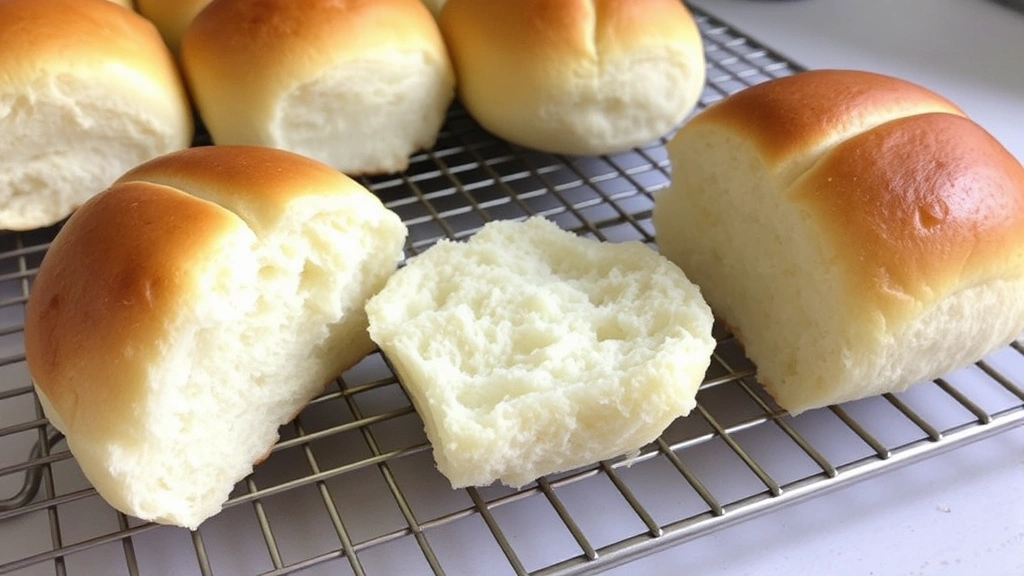
Let the rolls cool in the pan for about 5 minutes before serving. They’ll continue to cook slightly from residual heat, and this cooling period allows the structure to set properly. After 5 minutes, you can turn them out onto a wire rack if desired, though they’re absolutely delicious served right from the pan.
Pro Tips for Success
Over the years, I’ve learned several tricks that elevate these rolls from good to extraordinary.
Temperature Control
Temperature is perhaps the most important factor in bread baking. Invest in a reliable instant-read thermometer for measuring water and dough temperatures. Proper fermentation temperatures lead to better flavor development and more consistent results. If you’re interested in precise cooking techniques, explore our sous vide cooking methods to understand temperature precision in cooking.
Using Bread Flour
All-purpose flour will work, but bread flour’s higher protein content creates stronger gluten networks, resulting in better rise and structure. The extra protein makes a noticeable difference in the final texture of your rolls.
Don’t Skip the Second Rise
Many home bakers rush to the oven after shaping, but the second rise is what creates that signature light, fluffy interior. This rise should be visible—your rolls should look noticeably puffier in the pan.
Egg Wash Alternative
For an even shinier finish, you can brush the rolls with an egg wash (1 egg beaten with 1 tablespoon water) about 5 minutes before they’re done baking. This creates a beautiful golden-brown exterior. However, my grandmother preferred the simple butter finish, which creates a more subtle appearance while maintaining incredible flavor.
Storage and Reheating
Store cooled rolls in an airtight container at room temperature for up to 2 days. To refresh them, wrap in foil and warm in a 300°F oven for 10 minutes. You can also freeze baked rolls for up to 3 months—thaw at room temperature and reheat as described above. For an interesting twist on bread-based meals, check out our Trader Joe’s recipes that incorporate quality bread products.
Make-Ahead Option
You can prepare the dough through the first rise, punch it down, and refrigerate it overnight. The next day, shape the rolls and proceed with the second rise and baking. Cold fermentation actually improves flavor, as the longer fermentation develops more complex tastes.
Understanding Your Oven
Every oven has its quirks. If you consistently find your rolls browning too quickly, your oven likely runs hot. If they’re pale, it may run cool. Adjust your oven temperature by 25°F accordingly after your first batch. Professional bakers rely on resources like King Arthur Baking Company for detailed baking science information that can help troubleshoot oven issues.
FAQ
Why are my rolls dense instead of fluffy?
Dense rolls typically result from one of three issues: insufficient kneading (weak gluten network), skipping or shortening the rising periods, or using old yeast. Ensure your yeast is fresh (check the expiration date), knead until the dough passes the windowpane test, and allow full rising times. Temperature also matters—if your kitchen is cold, rising takes longer.
Can I make these rolls without a stand mixer?
Absolutely! Hand kneading takes about 12-15 minutes instead of 8-10 minutes, but the results are identical. Many experienced bakers prefer hand kneading because they can feel when the dough reaches proper development. It’s also a meditative process that connects you to bread-making traditions.
What if I don’t have pineapple juice?
While pineapple juice is essential to authentic Hawaiian rolls, you can substitute with equal parts orange juice or a mixture of orange and lemon juice. The flavor profile will be slightly different, but you’ll still get excellent rolls. Mango juice also works beautifully. However, I strongly recommend finding pineapple juice to experience the authentic recipe—it’s worth the effort.
How do I know if my dough has overproofed?
Overproofed dough won’t spring back when poked, and it may have a slightly deflated appearance. The rolls may also collapse during baking or spread too much. If you suspect overproofing, you can still bake them—they’ll taste fine but may be slightly less fluffy. To prevent this, use the poke test and watch for visual cues of doubling rather than relying solely on time.
Can I use instant yeast instead of active dry yeast?
Yes, instant yeast (also called bread machine yeast) works perfectly and may actually reduce rising time slightly by 10-15 minutes. Use the same amount specified in the recipe. The main difference is particle size—instant yeast has finer particles that hydrate more quickly.
Why should rolls be brushed with butter immediately after baking?
Brushing warm rolls with butter serves multiple purposes: it adds richness and flavor, creates a beautiful sheen, helps prevent the crust from hardening too quickly, and adds moisture that keeps the rolls tender longer. Timing matters—apply butter while rolls are hot so it melts into the surface.
Can these rolls be frozen before baking?
Yes! After shaping, you can freeze the rolls on a baking sheet, then transfer them to a freezer bag for up to 3 months. To bake, thaw them in the refrigerator overnight, then let them come to room temperature and complete their second rise before baking normally. This is incredibly convenient for holiday entertaining.
What’s the difference between this and store-bought Hawaiian rolls?
Homemade rolls are incomparably superior in texture, flavor, and freshness. Store-bought rolls contain preservatives, dough conditioners, and often use high-fructose corn syrup instead of real ingredients. Homemade rolls have a tender crumb, complex flavor from proper fermentation, and that unmistakable warmth of fresh-baked bread. Once you’ve made them yourself, you’ll understand why my grandmother never bought commercial rolls.
For additional insights into bread science and fermentation, visit Serious Eats, which offers detailed explanations of baking chemistry and techniques. You might also explore Cultured Whole Food for information about fermentation processes that enhance bread flavor and nutrition.


