Juicy Turkey Tenderloin? Chef’s Secret Recipe
Turkey tenderloin is one of the most underrated cuts in the poultry world. While whole turkeys dominate holiday tables and chicken breasts claim everyday dinner spots, turkey tenderloins remain a culinary gem waiting to be discovered. This lean, delicate meat offers incredible versatility and, when prepared correctly, delivers juiciness that rivals any premium protein. The secret lies not in complicated techniques, but in understanding the meat’s unique properties and applying chef-tested methods that lock in moisture while building complex flavors.
Many home cooks struggle with turkey tenderloin because they treat it like chicken breast, resulting in dry, disappointing meals. The reality is that turkey tenderloin requires a different approach—one that respects its leanness while celebrating its subtle, delicate flavor profile. This comprehensive guide reveals the professional techniques that transform turkey tenderloin into restaurant-quality dishes that keep your guests asking for the recipe.
Understanding Turkey Tenderloin Structure
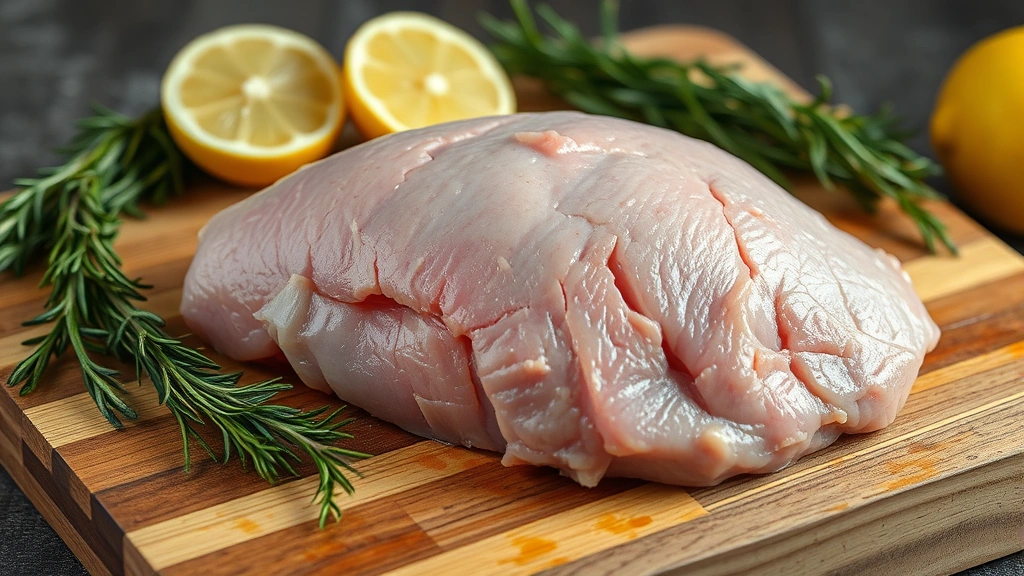
Before mastering the cooking techniques, you need to understand what you’re working with. Turkey tenderloin is a long, cylindrical muscle located along the breastbone, beneath the main breast meat. This muscle does minimal work on the bird, resulting in incredibly tender meat with a fine-grained texture. However, this same lack of activity means minimal intramuscular fat—the marbling that keeps meat juicy during cooking.
The tenderloin typically weighs between 8 to 12 ounces per bird, making it perfect for individual portions or small family meals. Its uniform shape and consistent thickness make it ideal for even cooking, a significant advantage over irregular chicken breasts. The meat’s natural tenderness means you can achieve a perfectly seared crust without worrying about toughness from extended cooking times, unlike tougher cuts that require longer braising.
Understanding this structure explains why traditional poultry cooking methods sometimes fail. Turkey tenderloin needs moisture retention strategies that work with its lean composition rather than against it. This is where professional chefs employ multiple techniques simultaneously—brining, precise temperature control, and proper resting work together synergistically to produce exceptional results.
The Brining Method: Foundation of Juiciness
Brining is the single most important step for ensuring juicy turkey tenderloin. This process involves submerging the meat in a salt solution that penetrates the muscle fibers, allowing them to retain more moisture during cooking. The science is straightforward: salt breaks down proteins and allows muscle fibers to hold onto water molecules more effectively. A properly brined tenderloin can retain up to 15% more moisture than unbrine meat.
Basic Brine Formula:
- 1 cup kosher salt
- 1 cup brown sugar
- 2 quarts water
- 6-8 whole black peppercorns
- 4-5 fresh thyme sprigs
- 3-4 bay leaves
- 4-5 garlic cloves, crushed
- 1 tablespoon red pepper flakes (optional)
Brining Process:
- Combine water, salt, and sugar in a large pot. Heat until salt and sugar dissolve completely, stirring occasionally. This takes about 5-7 minutes over medium heat.
- Add all aromatics—peppercorns, thyme, bay leaves, and garlic. Simmer for 2 minutes to release flavors.
- Remove from heat and let cool to room temperature. This step is crucial; hot brine will cook the exterior before the salt penetrates.
- Transfer brine to a large container and refrigerate until completely cold, at least 2 hours.
- Submerge turkey tenderloins completely in cold brine. Use a plate or small bowl to keep meat fully submerged.
- Brine for 8-12 hours. Overnight brining is ideal but avoid exceeding 16 hours, as over-brining can make meat mushy.
- Remove tenderloins from brine and pat completely dry with paper towels. Moisture on the surface prevents browning.
Many cooks skip brining, assuming it’s unnecessary for such tender meat. This is a critical mistake. Brining addresses the leanness issue directly, ensuring moisture retention throughout the cooking process. The flavor benefits are equally important—the salt solution carries aromatics into the meat, creating depth that surface seasoning alone cannot achieve.
Temperature Control: The Game Changer
Precise temperature control separates mediocre turkey tenderloin from exceptional dishes. The biggest mistake home cooks make is cooking at too high a temperature for too long, resulting in overcooking the exterior while the interior remains undercooked. Professional kitchens use two-zone cooking or sous vide methods to prevent this problem.
Target Internal Temperature: 160-165°F (71-74°C). Turkey reaches food-safe temperatures at 165°F, but many chefs prefer pulling at 160°F, as the meat continues cooking during resting. This ensures maximum juiciness without safety concerns.
The Reverse Sear Method (Recommended):
- Preheat oven to 275°F (135°C). This low temperature allows gentle, even cooking.
- Place a meat thermometer probe in the thickest part of the tenderloin, ensuring the tip doesn’t touch bone or pan.
- Cook tenderloins in a shallow roasting pan for 15-20 minutes, until internal temperature reaches 155°F (68°C). Cooking time varies based on thickness.
- Remove from oven and let rest on a cutting board for 5 minutes.
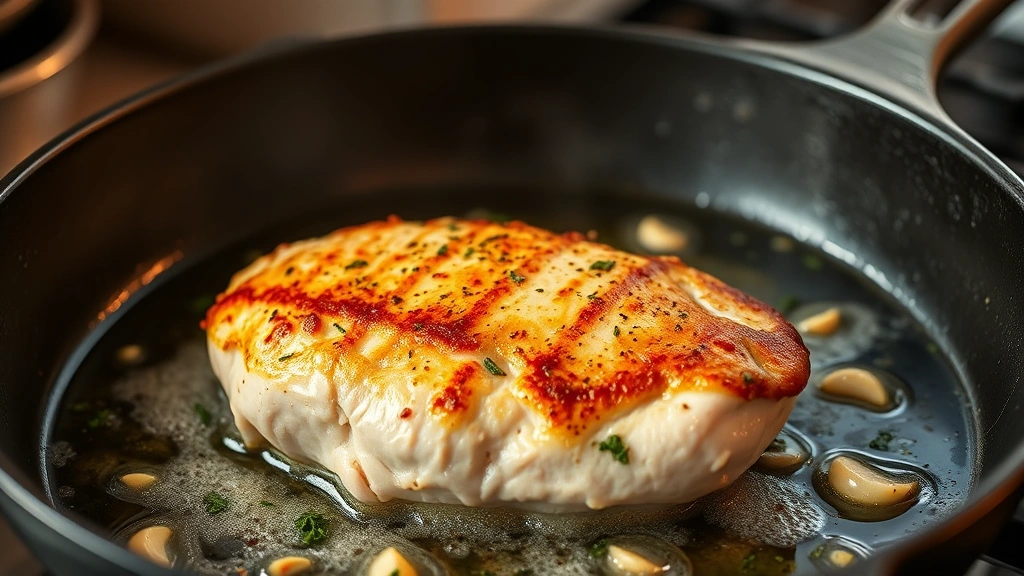
- Heat a cast iron skillet or heavy-bottomed pan over medium-high heat until smoking hot. You can learn more about how to cook with cast iron for optimal searing results.
- Add 2 tablespoons butter and 1 tablespoon olive oil to the pan. The combination provides better browning than oil alone.
- Sear tenderloins for 1-2 minutes per side until deeply browned. Internal temperature will rise to 160-165°F during searing.
- Transfer to a clean cutting board and rest for 5-7 minutes before slicing.
This method is superior to traditional high-temperature searing because it cooks the meat gently first, then applies intense heat only for browning. This prevents the common problem of overcooked exteriors surrounding undercooked centers. The result is perfectly pink, juicy meat throughout with a gorgeous caramelized crust.
Pan-Searing Technique for Perfect Crust
The final sear is where turkey tenderloin transforms from good to exceptional. Many cooks rush this step or fail to get the pan hot enough, resulting in pale, unappetizing meat. A proper sear requires patience and attention to detail.
Searing Best Practices:
- Pat meat completely dry: Any surface moisture prevents browning through steam creation. Use paper towels to remove every drop.
- Season immediately before searing: Salt draws out moisture, so season only 2-3 minutes before searing, after patting dry.
- Use adequate fat: A combination of butter and oil provides the Maillard reaction foundation. Aim for ¼ inch of fat in the pan.
- Don’t move the meat: Resist the urge to flip or move tenderloins during searing. Let them sit undisturbed for 60-90 seconds to develop a proper crust.
- Flip only once: After the first side develops a dark brown crust, flip and sear the second side for 60 seconds.
- Baste with butter: During the final 30 seconds, tilt the pan and baste the meat with foaming butter. This adds richness and promotes even browning.
The key to perfect searing is understanding that browning is a chemical reaction requiring high heat and dry surfaces. Even slight moisture or inadequate heat prevents proper browning. Professional kitchens achieve this by heating pans until they’re nearly smoking and ensuring meat is completely dry.
Flavor Combinations That Elevate Turkey
Turkey’s delicate flavor profile makes it an ideal canvas for various flavor combinations. Unlike stronger meats that can overpower delicate sauces, turkey tenderloin complements everything from Asian-inspired preparations to Mediterranean herb blends.
Mediterranean Herb Rub:
- 2 tablespoons fresh rosemary, finely chopped
- 1 tablespoon fresh thyme, finely chopped
- 1 tablespoon garlic, minced
- 2 teaspoons lemon zest
- 1 teaspoon kosher salt
- ½ teaspoon black pepper
- 2 tablespoons olive oil
This combination works beautifully with turkey’s subtle flavor. The fresh herbs add brightness while garlic and lemon zest provide aromatic depth. Apply the rub after brining and patting dry, just before cooking begins.
Asian-Inspired Glaze:
- 3 tablespoons soy sauce
- 2 tablespoons honey
- 1 tablespoon rice vinegar
- 1 tablespoon sesame oil
- 2 teaspoons grated ginger
- 2 garlic cloves, minced
- 1 teaspoon Dijon mustard
Brush this glaze on turkey tenderloins during the final 5 minutes of oven cooking. The honey caramelizes, creating a glossy, flavorful exterior. This preparation pairs excellently with rice-based sides, similar to approaches used in shrimp recipes with rice, adapting those flavor principles to poultry.
Spice-Crusted Preparation:
Create a curry powder recipe blend or use store-bought curry powder combined with smoked paprika, cumin, and a touch of cayenne. Mix with olive oil to form a paste and apply to tenderloins before cooking. The warmth of curry complements turkey’s delicate flavor without overwhelming it.
Consider preparing a remoulade recipe as an accompaniment. The tangy, creamy sauce provides an elegant finishing touch that elevates simple roasted turkey tenderloin into restaurant-quality fare. The richness of remoulade balances turkey’s leanness perfectly.
Resting Period: The Final Secret
This step is so critical that professional chefs consider it non-negotiable, yet home cooks frequently skip it. Resting allows carryover cooking to finish gently while meat fibers relax, reabsorbing juices that were driven toward the center during cooking. Cutting immediately releases these precious juices onto the plate, leaving meat dry.
Resting Protocol:
- Remove turkey tenderloins from heat when internal temperature reaches 160°F (71°C).
- Transfer to a warm cutting board. Warm boards prevent heat loss and promote gentle carryover cooking.
- Tent loosely with aluminum foil. This maintains warmth while allowing steam to escape, preventing condensation that would soften the crust.
- Rest for 5-7 minutes. This duration allows carryover temperature rise to 165°F while giving fibers time to relax.
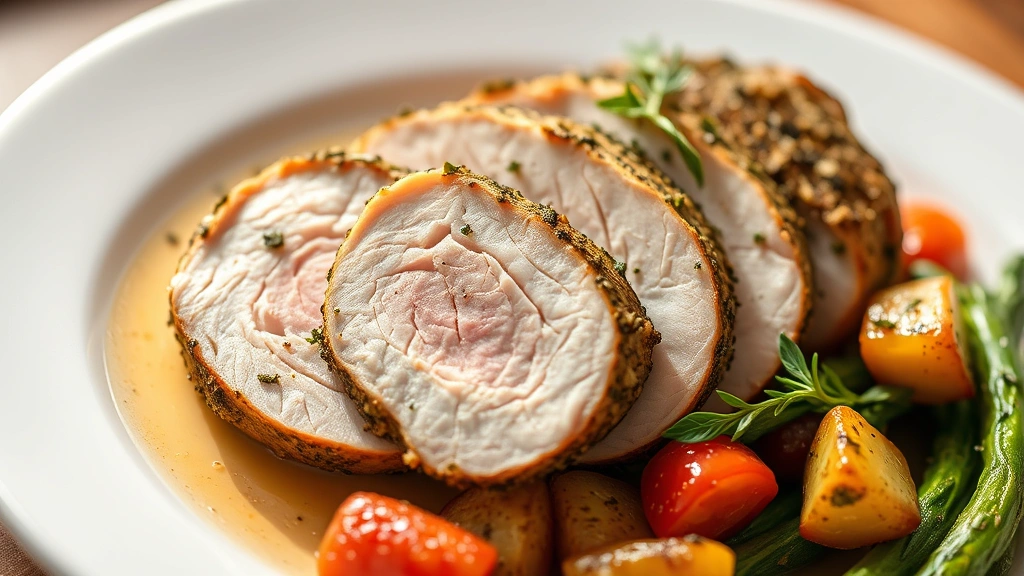
- Slice against the grain using a sharp knife. Cutting against the grain severs muscle fibers, creating a more tender bite.
The resting period is where moisture retention truly happens. Muscle fibers relax and reabsorb juices, ensuring every bite is succulent. Skipping this step or rushing it results in dry meat regardless of how perfectly you cooked it. Professional kitchens protect this step religiously, understanding that perfect cooking means nothing without proper resting.
Advanced Cooking Methods
Sous Vide Method:
For ultimate precision, sous vide cooking produces consistently perfect results. Vacuum-seal brined turkey tenderloins and cook in a 145°F (63°C) water bath for 45-60 minutes. The meat reaches perfect doneness throughout with no overcooking. Finish with a 2-minute sear in a screaming hot pan for crust development. This method guarantees juiciness because meat never exceeds target temperature.
Butter-Poaching Method:
This classical French technique involves cooking turkey tenderloins in butter at low temperature. Heat 8 tablespoons butter with aromatics (shallots, thyme, bay leaf) to 180°F (82°C). Submerge brined tenderloins and maintain temperature for 20-25 minutes. The gentle heat and fat create incredibly moist, delicate meat. Finish with a quick sear for browning. This method is ideal for special occasions when texture is paramount.
Smoking Method:
Turkey tenderloin takes beautifully to smoking. Use a smoker set to 225°F (107°C) with mild wood (apple or cherry). Smoke brined tenderloins for 30-40 minutes until internal temperature reaches 160°F. The smoke imparts subtle flavor without overwhelming the delicate meat. This approach works wonderfully for outdoor entertaining and creates impressive presentation.
Each method has distinct advantages. The reverse sear offers best flavor development, sous vide guarantees consistency, butter-poaching maximizes tenderness, and smoking creates unique flavor profiles. Choose based on your equipment and desired outcome.
Pairing Suggestions:
Turkey tenderloin’s versatility extends to accompaniments. Try serving with preparations similar to chicken pad thai recipe adaptations, using turkey instead of chicken for leaner protein. Alternatively, create bang bang shrimp recipe variations with turkey tenderloins, substituting the shrimp with sliced cooked tenderloin tossed in the signature spicy mayo sauce.
FAQ
How long should turkey tenderloin brine?
Optimal brining time is 8-12 hours. Overnight brining is ideal, allowing salt to penetrate fully while developing flavor. Avoid exceeding 16 hours, as extended brining can result in mushy texture from over-hydration. For quick preparation, even 4-6 hours provides noticeable improvement over unbrine meat.
Can I freeze brined turkey tenderloin?
Yes, brined turkey tenderloin freezes excellently. Pat completely dry after brining, wrap tightly in plastic wrap and aluminum foil, and freeze for up to 3 months. Thaw in the refrigerator overnight before cooking. The brining benefits persist through freezing and thawing, so you can brine in advance and cook whenever convenient.
What’s the difference between turkey tenderloin and turkey breast?
Turkey tenderloin is a specific muscle located beneath the main breast meat, smaller and more tender. Turkey breast refers to the entire pectoral muscle, much larger and sometimes less tender. Tenderloin is ideal for individual portions and quick cooking, while breast is better for feeding crowds or making sliced deli meat.
Why is my turkey tenderloin dry despite following these methods?
The most common causes are inadequate brining time, cooking to excessive internal temperature (above 165°F), and skipping the resting period. Ensure you brine for at least 8 hours, use a meat thermometer to prevent overcooking, and rest for 5-7 minutes before slicing. Any deviation from these three steps directly impacts juiciness.
Can I use these methods for turkey breast instead?
Absolutely. These techniques work for turkey breast, though cooking time increases due to larger size. A 2-pound turkey breast requires approximately 30-40 minutes in a 275°F oven, depending on thickness. All other principles—brining, temperature control, searing, and resting—apply identically. Slice against the grain for optimal tenderness.
What’s the best sauce for turkey tenderloin?
Turkey’s delicate flavor pairs beautifully with pan sauces. After searing, deglaze the pan with chicken stock or white wine, reduce by half, and mount with butter. Add fresh herbs like thyme or tarragon for sophistication. Alternatively, the remoulade mentioned earlier provides creamy richness, or simple chimichurri offers bright, herbaceous contrast.
How do I know when turkey tenderloin is done?
Use an instant-read meat thermometer inserted into the thickest part without touching bone or pan. Target 160-165°F for food safety and optimal juiciness. At 160°F, carryover cooking during resting brings temperature to safe levels while maintaining moisture. Never rely on color alone; meat can appear cooked while remaining undercooked internally.
Can I cook turkey tenderloin without brining?
Technically yes, but the results suffer significantly. Without brining, turkey tenderloin’s leanness becomes apparent, resulting in drier meat. If time prevents brining, apply a dry brine using salt 4-6 hours before cooking. Sprinkle kosher salt evenly on all sides, refrigerate uncovered, then cook as directed. This provides some moisture-retention benefits without liquid brining.


