No Bean Chili Recipe? Chef’s Favorite!
Bean-free chili might sound unconventional, but this hearty, meat-forward version is a chef’s secret weapon for maximum flavor and satisfying texture. Whether you’re avoiding legumes due to dietary preferences, digestive sensitivities, or simply want to showcase premium ground meat, this chili recipe no beans delivers restaurant-quality results in your home kitchen. The key lies in building deep, complex flavors through slow-cooked beef, carefully balanced spices, and a medley of vegetables that replace the traditional legume structure.
This no-bean chili has become a favorite among culinary professionals because it allows the quality of your ingredients to shine through without competing with bean textures or flavors. By eliminating beans, you create space for a richer, more concentrated beef flavor that develops during the long simmer. The result is a chili that’s simultaneously lighter on the stomach yet more satisfying on the palate—perfect for game day gatherings, casual weeknight dinners, or meal prep sessions.
Why Skip the Beans?
Bean-free chili offers numerous advantages that extend beyond personal preference. Many home cooks discover that removing beans creates a chili with superior depth and richness. Without beans absorbing spices and broth, your seasonings maintain their potency throughout the cooking process. This approach also significantly reduces the cooking time—no need to pre-soak or account for bean tenderness variables.
From a nutritional standpoint, bean-free chili concentrates the protein content through beef while reducing carbohydrates, making it ideal for those following low-carb dietary approaches. The absence of beans also eliminates common digestive complaints associated with legumes, allowing more people to enjoy a generous bowl without discomfort. Additionally, this style of chili pairs exceptionally well with comfort food recipes and hearty sides.
Essential Ingredients for No Bean Chili
Creating an authentic no-bean chili requires attention to ingredient quality and balance. Here’s what you’ll need for a 6-8 serving batch:
- Ground beef: 2.5 pounds of 80/20 blend provides optimal fat content for flavor and texture
- Beef broth: 4 cups of quality broth forms the savory foundation
- Diced tomatoes: Two 28-ounce cans of fire-roasted tomatoes add depth and acidity
- Tomato paste: 3 tablespoons concentrate the tomato flavor
- Onions: 2 large yellow onions, diced, provide aromatic sweetness
- Bell peppers: 2 red or poblano peppers add sweetness and body
- Garlic: 6-8 cloves, minced, for aromatic complexity
- Chili powder: 4-5 tablespoons of quality chili powder (not chili seasoning mix)
- Cumin: 2 teaspoons for warm, earthy notes
- Paprika: 1 tablespoon for subtle sweetness and color
- Oregano: 1 teaspoon of dried oregano
- Cayenne pepper: ½ teaspoon, adjusted to taste preference
- Worcestershire sauce: 1 tablespoon for umami depth
- Olive oil: 2 tablespoons for browning meat
- Salt and black pepper: To taste throughout cooking
The quality of your chili powder makes an enormous difference. Avoid pre-mixed chili seasoning packets, which contain salt, sugar, and fillers that limit your control over the final flavor profile. Instead, seek out pure chili powder from reputable spice suppliers or specialty cooking retailers.
Step-by-Step Cooking Instructions
Preparation Phase (15 minutes): Begin by dicing your onions and bell peppers into ¼-inch pieces—this size ensures even cooking and proper distribution throughout the chili. Mince your garlic finely to release maximum flavor compounds. Have all spices measured and ready before you start cooking; this practice, called mise en place, prevents scrambling and ensures consistent seasoning.
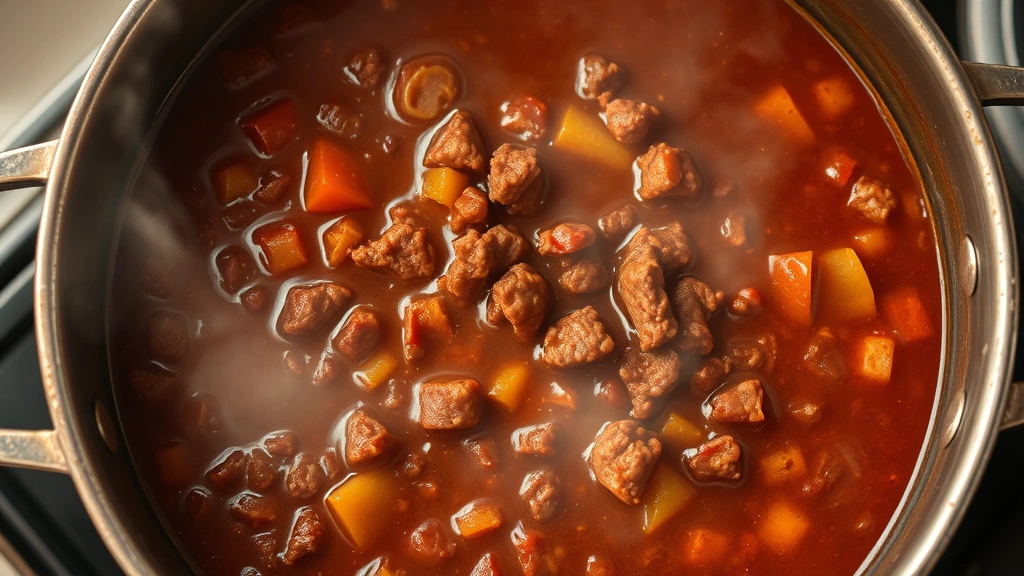
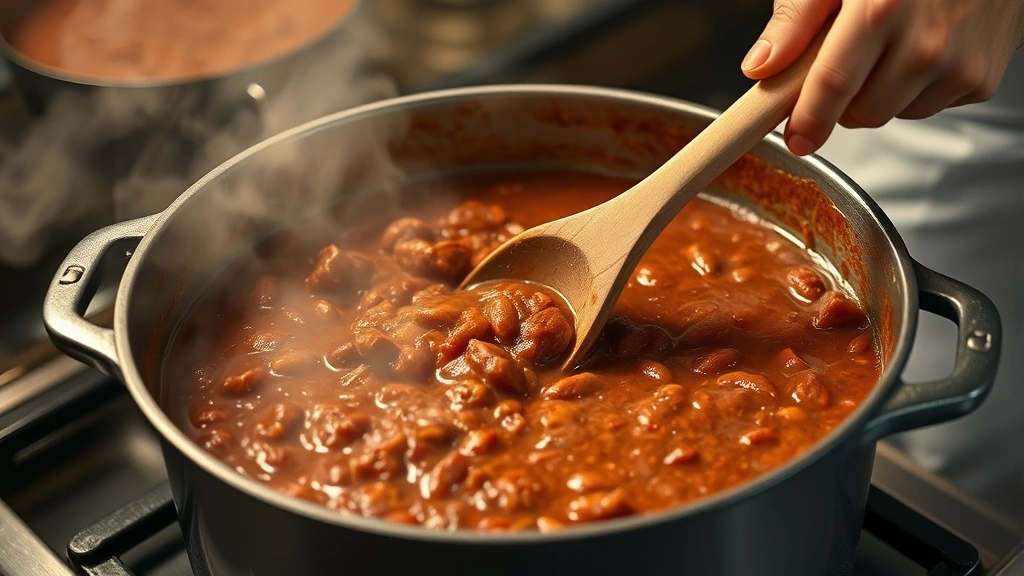
Browning the Meat (10 minutes): Heat olive oil in a large, heavy-bottomed pot or Dutch oven over medium-high heat. Once shimmering, add your ground beef in batches, breaking it into small pieces with a wooden spoon. Avoid overcrowding the pot, which creates steam and prevents proper browning. The goal is achieving deep brown color on the meat, which develops complex flavors through the Maillard reaction. Once browned, drain excess fat if desired, leaving about 1-2 tablespoons for flavor.
Building Aromatic Base (8 minutes): Add diced onions to the browned beef and cook for 3-4 minutes until translucent and fragrant. Stir in minced garlic and cook for another minute until aromatic. This step creates the flavor foundation that supports everything else in your chili.
Spice Blooming (2 minutes): Add chili powder, cumin, paprika, oregano, and cayenne pepper directly to the meat mixture. Stir constantly for 1-2 minutes—this brief cooking period, called blooming, releases essential oils from dried spices and intensifies their flavors dramatically. You’ll notice the aroma becoming more complex and inviting.
Adding Wet Ingredients (5 minutes): Stir in tomato paste, coating all the meat and spices. Cook for 1-2 minutes to deepen the tomato flavor. Pour in beef broth and add both cans of diced tomatoes with their juices. Add Worcestershire sauce for umami depth. Bring the mixture to a gentle boil, stirring occasionally.
Long Simmer (2.5-3 hours): Reduce heat to low and add bell peppers. Partially cover the pot with a lid, leaving it slightly ajar to allow some liquid reduction. Simmer for 2.5 to 3 hours, stirring every 20-30 minutes. The extended cooking time allows flavors to meld, meat to become incredibly tender, and the sauce to thicken naturally. The chili is ready when the liquid has reduced by about one-third and the flavors taste rich and balanced rather than raw or sharp.
Taste and adjust seasonings in the final 15 minutes. Add more salt, cayenne, or chili powder as needed. Remember that flavors will continue developing even after cooking stops, so slightly under-season is better than over-seasoning.
Flavor-Building Techniques from Professional Chefs
Professional chefs elevate their no-bean chili through several advanced techniques. Layered spicing involves adding spices at different cooking stages rather than all at once. Add half your chili powder during the blooming phase and the remainder during the final 30 minutes—this creates complexity that single-addition spicing cannot achieve.
Umami reinforcement deepens savory notes through multiple sources. Beyond Worcestershire sauce, consider adding a small square of dark chocolate (just ½ ounce) during the final hour of cooking. The cocoa solids complement chili spices beautifully while remaining completely undetectable as chocolate. This technique is particularly popular among culinary institute trained chefs.
The char technique adds subtle smokiness without using smoked meat. Directly char your bell peppers over a gas flame or under a broiler until blackened, then peel away the charred skin before dicing. This process concentrates pepper flavor and adds a sophisticated depth that raw peppers cannot provide.
Acid balancing prevents chili from becoming one-dimensional and heavy. The canned tomatoes provide natural acidity, but taste your finished chili critically. If it feels flat, add 1-2 teaspoons of red wine vinegar or lime juice to brighten flavors and create better overall perception of spice.
Consider consulting serious culinary resources for additional technique refinement and scientific explanations of cooking processes.
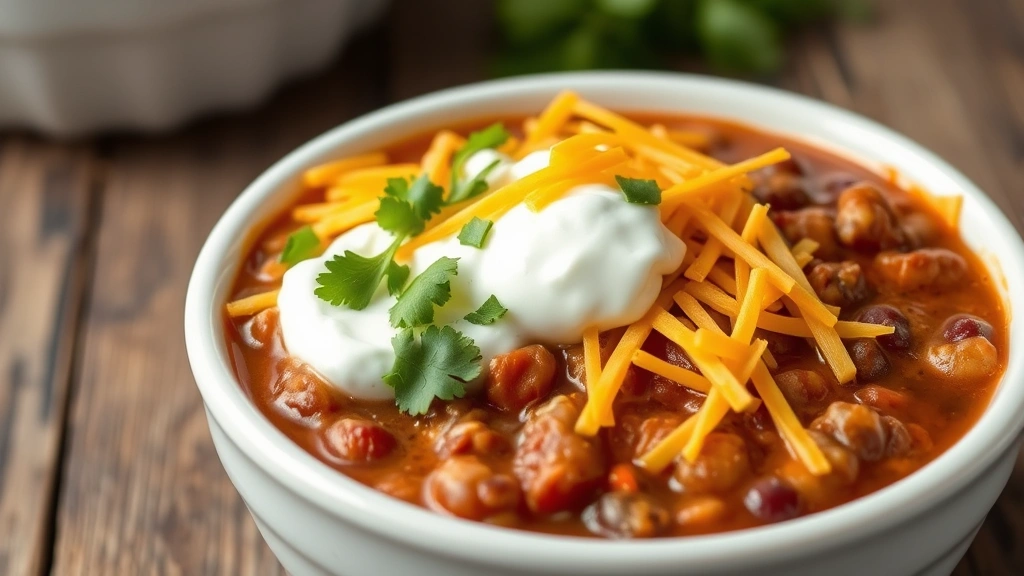
Topping Ideas and Serving Suggestions
The beauty of no-bean chili lies in its versatility with toppings and accompaniments. Create a toppings bar with multiple options so guests can customize their bowls:
- Shredded sharp cheddar cheese—adds creamy richness and slight tang
- Sour cream—cools spice and adds luxurious texture
- Diced white onions—provides fresh crunch and bite
- Jalapeño slices—amplifies heat for those who enjoy it
- Fresh cilantro—adds herbaceous brightness
- Lime wedges—squeeze over for acid and freshness
- Crispy tortilla strips—creates satisfying texture contrast
- Avocado slices—offers creamy richness and healthy fats
Serve your no-bean chili over various bases depending on your preference. A simple bowl with toppings works perfectly for those watching carbohydrates. For heartier appetites, ladle chili over cornbread, rice, or baked potatoes. This preparation also pairs wonderfully with grilled proteins when served as a side dish or topping.
For entertaining, this chili works beautifully as part of a comfort food recipes spread alongside cornbread, coleslaw, and pickled vegetables.
Storage and Make-Ahead Tips
One of the greatest advantages of chili is its make-ahead friendly nature. Properly stored, no-bean chili keeps for 3-4 days in the refrigerator in an airtight container. The flavors actually improve after a day or two as spices continue melding and developing.
For freezing, allow chili to cool completely before transferring to freezer-safe containers or bags, leaving ½-inch headspace for expansion. Properly frozen chili maintains quality for 2-3 months. Thaw overnight in the refrigerator and reheat gently on the stovetop over medium heat, stirring occasionally and adding a splash of beef broth if the mixture seems too thick.
The no-bean format actually freezes better than traditional bean chili because there’s no risk of beans becoming mushy upon thawing and reheating. This makes it an excellent candidate for batch cooking and portioning into individual containers for quick meals throughout the month.
For meal prep purposes, portion chili into containers with space for toppings added fresh at serving time. This prevents toppings from becoming soggy and maintains optimal texture and flavor when you’re ready to eat.
FAQ
Can I make this chili in a slow cooker?
Absolutely! Brown your meat and sauté aromatics and spices as directed in the pot on the stovetop. Transfer everything to a slow cooker with the liquids and cook on low for 6-8 hours. Slow cooking actually benefits this recipe by allowing even more flavor development, though you’ll want to add bell peppers during the final hour to prevent them from becoming mushy.
What if I don’t have fire-roasted tomatoes?
Regular canned diced tomatoes work perfectly well. To compensate for the subtle smokiness of fire-roasted varieties, add ¼ teaspoon of smoked paprika instead of regular paprika. The flavor profile will be slightly different but equally delicious.
How can I make this chili less spicy?
Reduce the cayenne pepper to ¼ teaspoon and use milder chili powder varieties. Add a pinch of sugar or honey during cooking to balance heat with sweetness. Serve with generous sour cream and cheese, which both help cool spice perception.
Can I use ground turkey or chicken instead of beef?
You can, though the flavor will be lighter and less rich. If using poultry, increase the Worcestershire sauce to 1.5 tablespoons and consider adding ½ ounce of dark chocolate to compensate for the umami depth that beef provides naturally. Use chicken or vegetable broth instead of beef broth.
Why is my chili watery?
Ensure your pot lid is only partially covering it, allowing steam to escape and liquid to reduce. If you’ve already finished cooking and the consistency isn’t right, simmer uncovered for an additional 20-30 minutes. Conversely, if your chili becomes too thick, simply stir in additional broth, ¼ cup at a time.
Should I brown the meat in batches?
Yes, definitely. Crowding the pot drops the temperature and creates steam rather than the dry heat needed for proper browning. Work in 2-3 batches depending on your pot size, allowing each batch to develop a deep brown color before removing and adding the next batch.
What spice brands do chefs recommend?
Look for specialty spice retailers like Penzey’s Spices or local spice shops that focus on freshness and quality. The flavor difference between fresh, quality spices and supermarket varieties that have been sitting on shelves for months is genuinely dramatic and worth the investment.


