Chocolate Truffles Recipe: Pastry Chef’s Guide
Creating homemade chocolate truffles is one of the most rewarding culinary experiences you can undertake in your kitchen. These elegant confections, with their velvety centers and sophisticated coatings, transform simple ingredients into restaurant-quality treats that impress family and guests alike. Whether you’re a seasoned baker or a curious home cook, mastering the art of chocolate truffle-making opens doors to endless flavor variations and creative expressions.
The beauty of chocolate truffles lies in their deceptive simplicity. With just a few quality ingredients and proper technique, you can craft decadent spheres that rival those from high-end chocolatiers. This comprehensive guide walks you through every step, from selecting premium chocolate to achieving that signature smooth, glossy finish that makes truffles irresistible.
Choosing Your Chocolate
The foundation of exceptional chocolate truffles begins with selecting high-quality chocolate. Professional pastry chefs consistently emphasize that chocolate quality directly impacts your final product’s taste, texture, and appearance. Look for chocolate with cocoa butter rather than vegetable oils, as this ensures proper tempering and that luxurious melt-in-your-mouth sensation.
For dark chocolate truffles, aim for varieties containing 60-85% cocoa solids. This range provides deep chocolate flavor without excessive bitterness. Milk chocolate truffles work beautifully with 30-40% cocoa content, offering creamier, sweeter profiles. White chocolate, technically not chocolate but cocoa butter-based, creates elegant truffles with subtle vanilla notes. Consider sourcing from specialty chocolate suppliers or reputable brands that list cocoa butter as the primary fat ingredient.
Temperature-sensitive chocolate requires proper handling. Purchase chocolate in block or wafer form rather than chips, which often contain additives that complicate tempering. If you’re new to truffle-making, start with easy fudge recipe techniques to understand chocolate behavior before advancing to more complex tempering methods.
Essential Ingredients and Equipment
Beyond chocolate, you’ll need surprisingly few ingredients to create stunning truffles. Heavy cream forms the ganache base—use full-fat varieties with at least 36% butterfat for optimal richness. Butter adds smoothness and helps achieve that signature truffle texture. A touch of vanilla extract or liqueur enhances complexity, while salt balances sweetness and heightens chocolate flavor.
For coating options, consider cocoa powder, which provides an elegant matte finish and authentic chocolate flavor. Tempered chocolate creates glossy shells, while chopped nuts, sprinkles, or edible gold leaf add visual appeal and textural interest. Many bakers incorporate streusel topping recipe concepts, using crushed ingredients for decorative finishes.
Equipment matters significantly for achieving professional results. You’ll need:
- Thermometer (preferably digital for precise temperature control)
- Double boiler or heat-proof bowl over simmering water
- Whisk and rubber spatula
- Piping bag or small ice cream scoop
- Baking sheets lined with parchment paper
- Chocolate dipping fork or two-pronged fork
- Shallow bowls for coatings
A marble slab or silicone mat helps cool ganache evenly, while an immersion blender creates silky-smooth textures. Invest in an accurate kitchen scale—baking by weight ensures consistency across batches.
Making the Ganache Base
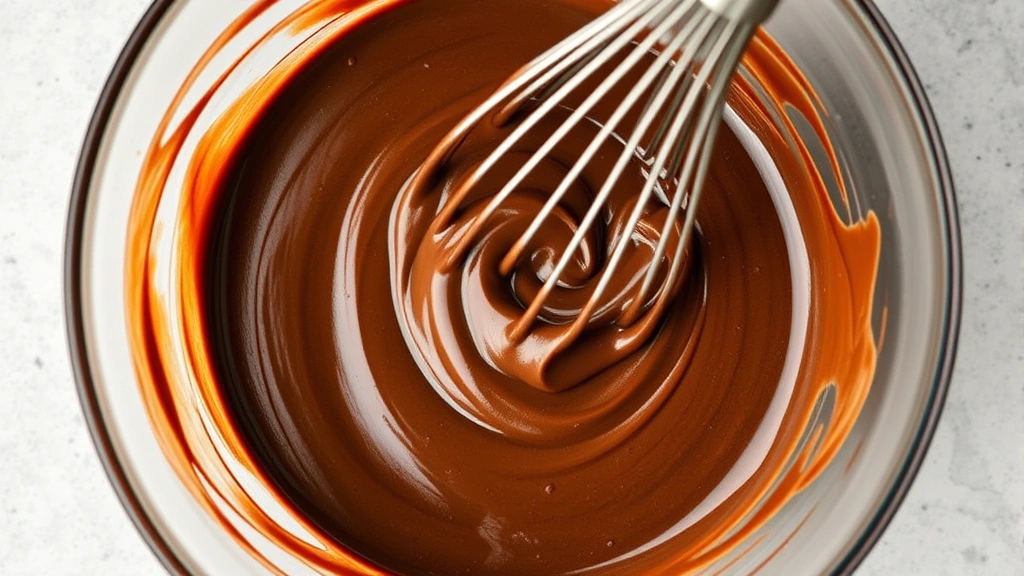
Ganache—the creamy chocolate center—is where truffle magic happens. The basic formula involves heating cream, pouring it over chopped chocolate, and allowing residual heat to melt the chocolate gently. This method prevents overheating, which damages chocolate’s flavor and texture.
Begin by chopping your chocolate finely, creating uniform pieces that melt evenly. Heat cream to just below boiling—you’ll see small bubbles forming at the edges. Pour hot cream over chocolate and let it sit undisturbed for 30-60 seconds, allowing heat to penetrate throughout. Gently whisk from the center outward, incorporating cream and chocolate slowly. Rushing this process creates grainy texture rather than smooth ganache.
For a 1:1 ratio, use equal weights of chocolate and cream. If you prefer firmer truffles, increase chocolate to 2:1. Add softened butter—typically 1-2 tablespoons per 8 ounces chocolate—whisking until fully incorporated. The butter creates that silky mouthfeel and helps prevent ganache from setting too hard.
Pour finished ganache onto a parchment-lined baking sheet, spreading to about ½-inch thickness. Cover with plastic wrap to prevent skin formation, then refrigerate 2-4 hours until firm enough to scoop but still pliable. Temperature control is crucial; too cold and ganache becomes brittle, too warm and it’s unworkable.
Shaping and Chilling Truffles
Once ganache reaches the proper consistency, shaping begins. Using a small ice cream scoop or melon baller ensures uniform sizes, which look more professional and cook evenly when dipped. Work quickly—ganache softens rapidly at room temperature. If it becomes too soft, return it to the refrigerator for 15-20 minutes.
Scoop ganache onto a parchment-lined tray, spacing pieces about an inch apart. This intermediate chilling step, lasting 30 minutes to 2 hours, firms centers enough to handle without deforming during coating. Some pastry chefs prefer rolling ganache between their palms to create perfectly smooth spheres, though this requires practice and cool hands.
For elegant presentation, consider shaping some truffles into quenelles or irregular shapes rather than uniform balls. This technique, common in fine dining, suggests artisanal craftsmanship. Chill shaped ganache thoroughly before coating—at least 4 hours or overnight—ensuring centers maintain integrity during the dipping process.
Coating Techniques
Coating transforms ganache centers into finished truffles. Tempering chocolate creates a professional appearance with snap and shine, though this requires precision. Alternatively, untempered chocolate coating works beautifully when set quickly in the refrigerator.
For temering, follow the seeding method: melt two-thirds of your chocolate gently to 113-122°F (45-50°C). Remove from heat and add chopped unmelted chocolate, stirring until temperature drops to 80-82°F (26-28°C). Gently reheat to 88-90°F (31-32°C) for dark chocolate, 86-88°F (30-31°C) for milk chocolate. This process aligns cocoa butter crystals, creating glossy, snapping coatings.
Using a chocolate dipping fork or two-pronged fork, submerge each chilled ganache sphere into tempered chocolate. Lift carefully, tapping the fork against the bowl’s rim to remove excess coating. Place on parchment paper and allow to set at room temperature for 1-2 hours, or refrigerate for 15-20 minutes.
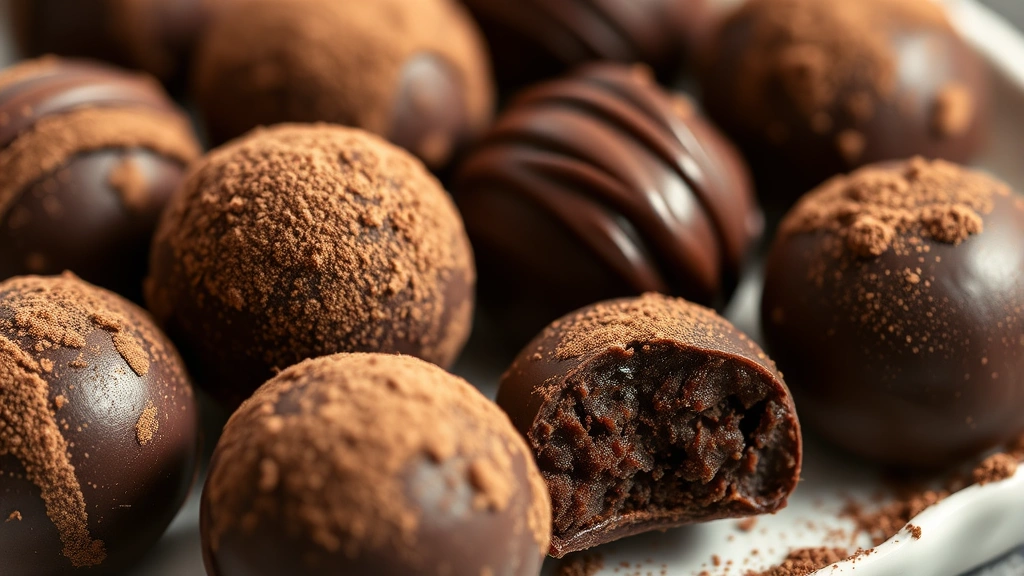
For simpler cocoa powder coating, skip chocolate entirely. Roll slightly-softened ganache spheres in unsweetened cocoa powder mixed with powdered sugar, creating a rustic, elegant finish reminiscent of traditional French truffles. This method requires no tempering and produces stunning results with minimal effort.
Understanding proper coating technique prevents common issues. If chocolate coating cracks, your ganache was too cold. If it slides off, chocolate temperature was too high or ganache too warm. Practice improves consistency and confidence.
Flavor Variations
Once you master basic chocolate truffles, countless flavor adventures await. The ganache base accommodates infinite variations through extract additions, liqueur infusions, and complementary ingredients.
Espresso truffles incorporate instant espresso powder dissolved in cream before heating, intensifying chocolate notes with subtle bitterness. Raspberry truffles use freeze-dried raspberries blended into ganache or create fruit coulis centers. Lavender-infused cream adds floral sophistication, while Earl Grey tea steeped in cream creates complex, aromatic centers.
Liqueur additions—Cointreau, Grand Marnier, Frangelico, Bailey’s Irish Cream—contribute sophisticated flavor profiles. Use 1-2 tablespoons per batch, reducing cream slightly to maintain proper consistency. Spiced truffles incorporate cinnamon, cayenne, or cardamom, creating warming sensations that complement chocolate’s richness.
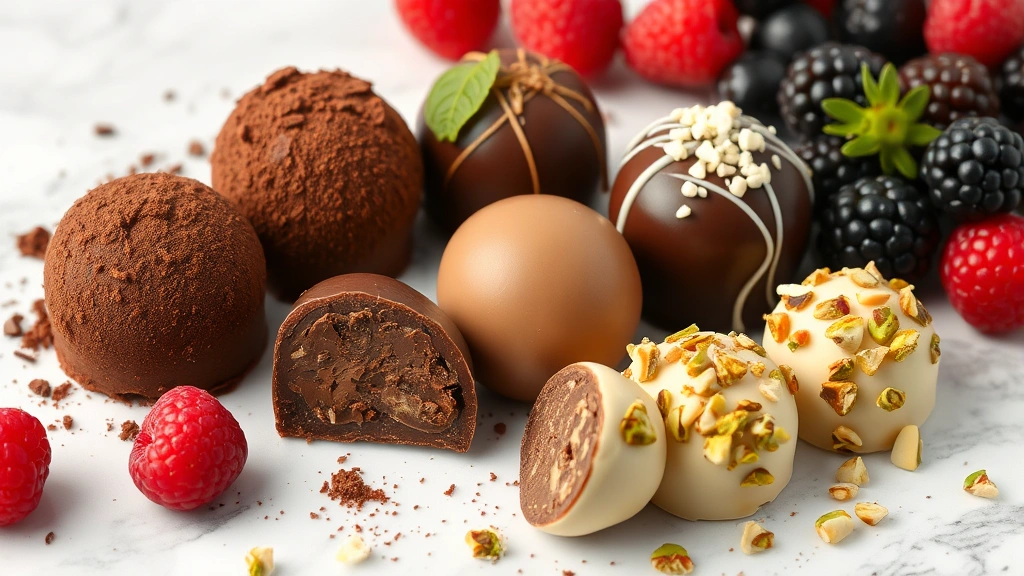
Consider creating a truffle flight with varied coatings and flavors. Pair dark chocolate ganache with cocoa powder coating, milk chocolate with crushed pistachios, and white chocolate with freeze-dried strawberries. This presentation technique demonstrates your mastery and provides tasting variety.
For special occasions, explore how to make homemade sauces that complement truffles, such as chocolate coulis or fruit reductions for serving alongside.
Storage and Shelf Life
Proper storage extends your truffles’ lifespan and maintains quality. In airtight containers at room temperature (65-70°F), truffles remain fresh for 2-3 weeks. Cooler environments extend this to 4-6 weeks. Avoid refrigeration unless temperatures exceed 75°F, as moisture and cold damage chocolate coatings and cause bloom—those gray streaks indicating cocoa butter separation.
Freeze uncoated ganache for up to 3 months, coating after thawing. Finished truffles freeze well for 2-3 months when properly wrapped. Thaw at room temperature away from humidity, allowing 1-2 hours before serving. Never expose frozen truffles to sudden temperature changes, which causes condensation and coating damage.
Store truffles in single layers separated by parchment paper within airtight containers. Include silica packets to absorb excess moisture, particularly in humid climates. Keep away from strong-smelling foods, as chocolate readily absorbs odors. Properly stored truffles maintain texture and flavor, delivering impressive results even weeks after creation.
Creating homemade truffles becomes easier with experience, and storage knowledge ensures your efforts produce lasting enjoyment. Whether gifting to loved ones or preserving for future indulgence, these techniques preserve quality and freshness.
FAQ
What’s the difference between chocolate truffles and bonbons?
Truffles feature ganache centers with simple coatings—chocolate, cocoa powder, or nuts. Bonbons encompass wider categories including ganache, fondant, caramel, and fruit centers with more elaborate decorative coatings. Truffles are technically a bonbon subset, though the terms often distinguish by coating simplicity.
Can I make truffles without tempering chocolate?
Absolutely. Untempered chocolate coating sets quickly when refrigerated, creating smooth finishes without tempering complexity. While tempered chocolate provides superior snap and shine, untempered alternatives work beautifully for home preparation. Refrigerate dipped truffles for 15-20 minutes until coating hardens.
How do I prevent my ganache from being too soft or too hard?
Temperature control and ingredient ratios determine consistency. For softer truffles, use higher cream ratios or reduce chilling time. For firmer versions, increase chocolate ratio or chill longer. Using room-temperature ingredients and maintaining proper chocolate melting temperatures also prevents consistency issues.
What causes grainy ganache texture?
Grainy ganache results from overheating chocolate, adding cold cream to hot chocolate, or whisking too vigorously. Melt chocolate gently below 120°F, heat cream to just below boiling, and whisk slowly from center outward. If graininess occurs, strain ganache through fine mesh before cooling.
Can I add fillings inside truffles?
Yes, though this requires advanced technique. Create smaller ganache spheres, indent centers with your thumb, add filling like caramel or nut butter, seal with additional ganache, and coat. This method requires practice but creates impressive multi-layer truffles.
How far in advance can I make truffles for gifting?
Make uncoated ganache up to one week ahead, storing in airtight containers. Shape and coat truffles 2-3 days before gifting for optimal freshness. Package in decorative boxes with parchment separation, including storage instructions for recipients.


