Easy Bagel Recipe: Home Baker Approved!
Making bagels at home might seem intimidating, but this easy bagel recipe proves that anyone can master this beloved breakfast staple in their own kitchen. Unlike bread that requires extensive kneading or pastries demanding precision, bagels follow a straightforward process that yields professional-quality results. The magic lies in understanding a few key techniques: proper dough hydration, adequate resting time, and the crucial boiling step that gives bagels their signature chewy texture and shiny exterior.
This home baker-approved method has been tested countless times and delivers consistent, delicious results every single time. Whether you’re looking to impress your family with warm, fresh bagels on Sunday morning or want to understand the science behind this iconic New York breakfast item, you’ll find everything you need here. The best part? You likely have all the ingredients in your pantry right now, and you don’t need any special equipment beyond what’s already in your kitchen.
Why Make Homemade Bagels
Store-bought bagels often disappoint. They’re either too dense, too soft, or they’ve been sitting under heat lamps losing their appeal. When you make bagels at home, you control every variable: the flour quality, the hydration level, the fermentation time, and exactly how long they boil. This means you can create bagels that are perfectly chewy inside with a crispy exterior that actually cracks slightly when you bite into it—just like authentic New York bagels.
Beyond taste, homemade bagels are more economical. A dozen store-bought bagels might cost $8-12, while making them at home costs just a few dollars in ingredients. Plus, your kitchen will smell absolutely incredible while they’re baking. There’s something deeply satisfying about pulling a tray of golden, glossy bagels from your oven knowing you created them from scratch.
Understanding bagel-making also teaches you valuable baking fundamentals. You’ll learn about gluten development, dough hydration, and how boiling affects dough chemistry. These skills transfer directly to other bread projects, from complementary grain dishes to artisan breads. Many home bakers find that once they’ve conquered bagels, other yeast-based recipes become much less intimidating.
Ingredients You’ll Need
The beauty of bagels is their simplicity. You need just five basic ingredients, most of which you probably already have:
- All-purpose flour: 3.5 cups (420g) – bread flour works even better if you have it, as it develops more gluten
- Warm water: 1.25 cups (300ml) – this creates the proper dough hydration for chewy bagels
- Instant yeast: 1.5 teaspoons (7g) – don’t use expired yeast, as it won’t activate properly
- Salt: 1.5 teaspoons (9g) – sea salt or kosher salt both work well
- Sugar or honey: 2 tablespoons (25g) – this feeds the yeast and adds slight sweetness
For boiling, you’ll also need:
- Water: 2 quarts minimum
- Baking soda: 1 tablespoon – this raises the pH level and creates that distinctive bagel crust
Optional toppings include sesame seeds, poppy seeds, everything seasoning, coarse salt, or nothing at all. Many purists prefer plain bagels so the subtle flavor of the dough shines through. If you’re planning to enjoy your bagels with hearty toppings like coleslaw, plain bagels provide the best canvas.
Step-by-Step Instructions
Making the Dough
Start by combining your warm water (around 110°F or 43°C) with instant yeast and sugar in a large mixing bowl. Let this sit for about 5 minutes—you should see it become foamy and smell yeasty. This “bloom” proves your yeast is alive and ready to work. If it doesn’t foam, your yeast is dead and you’ll need to start over with fresh yeast.
Once your yeast mixture is foamy, add all your flour and salt. Mix everything together using a wooden spoon or your hands until you have a shaggy dough. Don’t worry if it looks rough at this stage. This dough will be much stiffer than typical bread dough—that’s intentional and creates the dense, chewy crumb you want.
Now comes the kneading. Transfer your dough to an unfloured work surface and knead for about 10 minutes. Use the heel of your hand to push the dough away from you, fold it back over itself, rotate it a quarter turn, and repeat. Your arms will get a workout, but this develops the gluten network that gives bagels their characteristic chew. After 10 minutes, your dough should be smooth, elastic, and slightly tacky but not sticky.
First Rise
Place your kneaded dough in a lightly oiled bowl, turning it once to coat all sides. Cover with a damp kitchen towel or plastic wrap and let it rise at room temperature for about 1 hour, until it increases in size by roughly 50%. You want it puffy but not completely doubled—bagel dough rises more slowly than regular bread dough because of its density and low hydration.
During this time, you can prep your work area and get your baking sheets ready. Line them with parchment paper and lightly dust with flour or cornmeal to prevent sticking.
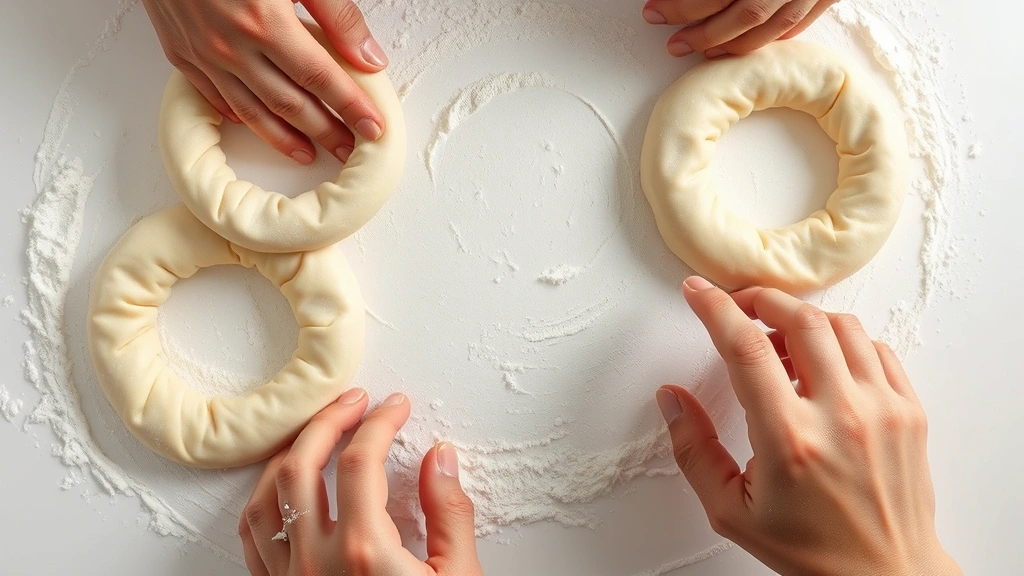
Shaping the Bagels
Turn your risen dough out onto a lightly floured surface and divide it into 8 equal pieces. If you want perfectly uniform bagels, weigh each piece—they should be about 90-100g each. Roll each piece into a tight ball, then let them rest uncovered for about 5 minutes. This rest is crucial because it relaxes the gluten and makes shaping much easier.
To shape each bagel, poke a hole in the center of a dough ball with your thumb. Gradually stretch and widen the hole until you have a ring shape with a 2-3 inch hole in the middle. The dough should be relatively even thickness all around. Place each shaped bagel on your prepared baking sheet. At this point, they should look like little dough donuts.
Cover your shaped bagels with a damp towel and let them proof for 30-40 minutes at room temperature. They’ll puff up slightly but shouldn’t double in size. This is your second rise, and it’s shorter than the first because you want bagels with a relatively tight crumb. If you prefer a lighter, airier bagel, extend this rise to 45-60 minutes.
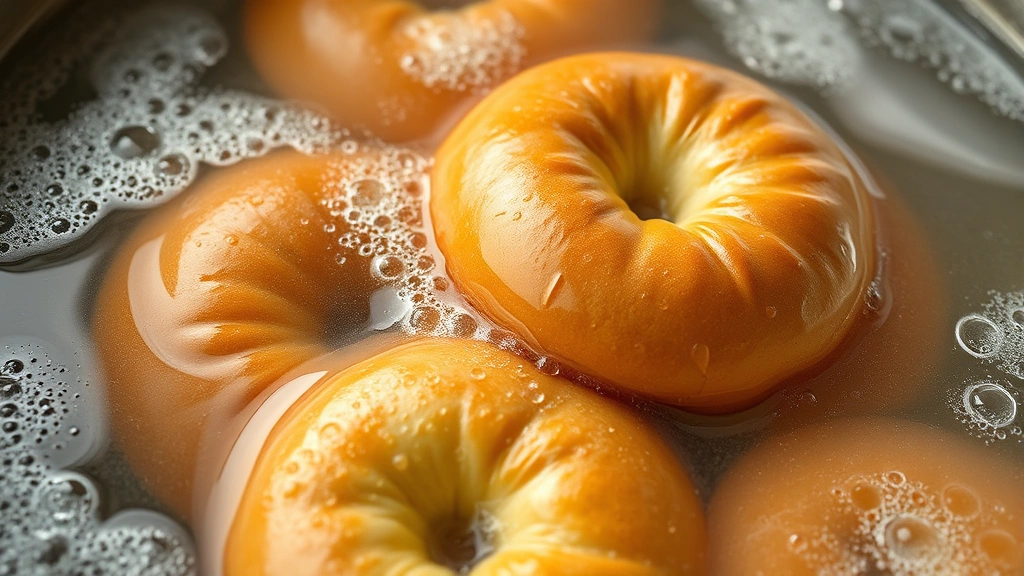
Boiling and Baking
This is where bagels become truly special. About 20 minutes before you’re ready to bake, preheat your oven to 425°F (220°C). Simultaneously, bring a large pot of water to a rolling boil—you need enough water that your bagels can float freely. Add 1 tablespoon of baking soda to the water. You’ll notice the water becomes slightly cloudy and may foam a bit—this is normal.
Working in batches so you don’t overcrowd the pot, carefully drop bagels into the boiling water. They should sink initially, then float to the surface within 30-60 seconds. Once they float, let them boil for exactly 1 minute on the first side, then flip them and boil for 1 minute on the other side. Some bagel makers prefer 30 seconds per side for a thinner crust, while others do 2 minutes per side for a thicker, chewier crust. This is where you can customize based on your preference.
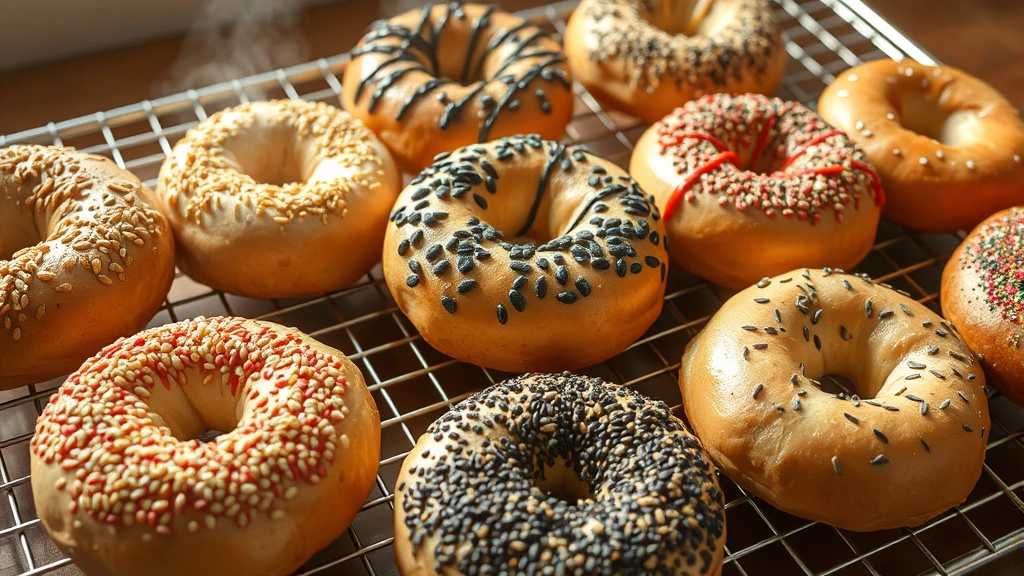
Remove each bagel from the water using a slotted spoon and place it back on your parchment-lined baking sheet. If you want toppings, add them immediately while the bagel surface is still wet—the moisture helps everything stick. Sprinkle generously with your chosen toppings or leave plain.
Once all bagels are boiled and topped, place the baking sheet in your preheated oven. Bake for 20-25 minutes until the bagels are deep golden brown. They should look shiny and slightly cracked on top. The bagels are done when they’re firm on the outside and sound slightly hollow when you tap them. This is a crucial indicator—underbaked bagels will be gummy inside.
Remove from the oven and let the bagels cool on the baking sheet for 5 minutes, then transfer them to a wire cooling rack. They’ll continue to firm up as they cool. Resist the urge to eat one immediately—they’re extremely hot inside and will be much better if you let them cool to room temperature first.
Flavor Variations
Once you’ve mastered the basic easy bagel recipe, you can experiment with flavors. The most common approach is adding ingredients to the dough itself rather than just toppings. Here are some popular variations:
- Everything Bagels: Mix everything seasoning (garlic, onion, sesame, poppy seeds, salt) directly into the dough before the first rise, then top with more seasoning before baking
- Whole Wheat Bagels: Replace up to 25% of the all-purpose flour with whole wheat flour for more fiber and nutty flavor
- Cinnamon Raisin: Add 1 teaspoon of cinnamon and 1 cup of raisins to the dough after it’s mixed
- Asiago Cheese: Fold in 1 cup of shredded Asiago cheese and 1 teaspoon of Italian seasoning during the final minute of kneading
- Jalapeño Cheddar: Mix in 1 cup shredded sharp cheddar and 3-4 diced jalapeños for a spicy kick
For sweet variations, you might pair your bagels with dishes like summer salads for a light brunch, or enjoy them alongside savory sides. The versatility of homemade bagels makes them perfect for any meal of the day.
Storage and Reheating
Fresh bagels are best enjoyed the day they’re made, but they store well for several days. Once completely cooled, place bagels in an airtight container or resealable bag at room temperature. They’ll stay fresh for up to 3 days. For longer storage, freeze bagels in a freezer-safe bag for up to 3 months.
To reheat a room-temperature bagel, slice it in half and toast it in a toaster or toaster oven for 2-3 minutes until warmed through and slightly crispy on the cut sides. You can also wrap a frozen bagel in foil and heat it in a 350°F oven for about 15 minutes. Avoid microwaving bagels if possible—they’ll become rubbery. If you must microwave, wrap in a damp paper towel and heat for just 15-20 seconds.
Sliced and toasted bagels pair beautifully with traditional toppings like cream cheese and lox, or you can get creative with roasted red potatoes and fresh herbs for a more substantial breakfast. Bagels also work wonderfully as sandwich bases—try them with filet mignon steak and arugula for an elegant lunch option.
Troubleshooting Tips
Bagels are too dense or gummy inside: This usually means they didn’t bake long enough or your oven temperature was too low. Use an oven thermometer to verify accuracy, and bake until they’re deep golden brown and sound hollow when tapped. Also check that you’re not over-proofing—the second rise should be just 30-40 minutes.
Bagels have large holes or tunnels: This indicates over-proofing during the second rise. Reduce the proofing time to 25-30 minutes, and make sure your bagels are only puffing up slightly, not doubling in size. Also ensure you’re shaping them tightly enough.
Bagels are too soft or bread-like: You might be using too much water or not kneading enough. Measure your water carefully—1.25 cups is precise. Knead for the full 10 minutes to develop proper gluten. Also verify your flour type; bread flour creates chewier bagels than all-purpose.
Bagels don’t have a shiny exterior: Make sure you’re boiling them properly—the baking soda in the water is essential for that signature shine and crust. Also, don’t skip the toppings or at least brush them with an egg wash before baking to create shine.
Bagels stick to the baking sheet: Use parchment paper or cornmeal to prevent sticking. Make sure your bagels aren’t sitting in water—remove them promptly from the boiling water and place them on a lined sheet.
Dough is too sticky to handle: Your water temperature might be too warm, activating the yeast too quickly. Use water around 110°F (43°C). If dough still seems too wet, add another tablespoon of flour at a time during kneading until it reaches the right consistency—stiff but not dry.
FAQ
Can I make bagel dough the night before?
Yes! You can make the dough and refrigerate it overnight. After mixing and kneading, place it in an oiled bowl, cover, and refrigerate for up to 24 hours. The cold fermentation actually develops more flavor. The next day, let it come to room temperature (about 30 minutes), then proceed with shaping and the second rise.
What’s the difference between boiling and steaming bagels?
Boiling creates that dense, chewy crust and helps the bagels rise in the water. The baking soda in boiling water raises the pH and creates browning. Steaming produces softer bagels that are more bread-like. Boiling is the traditional method and creates superior texture and flavor.
Can I use active dry yeast instead of instant yeast?
Yes, but use the same weight (7g) or slightly more (1.75 teaspoons). Active dry yeast has larger particles, so you need marginally more. Let it bloom for an extra minute or two before adding flour. Both will work fine in this recipe.
Why do my bagels taste yeasty?
Over-fermentation causes this. Reduce your first rise to 45 minutes instead of 1 hour, or use cooler water (around 100°F instead of 110°F) to slow fermentation. Also ensure you’re using the exact amount of yeast—too much yeast creates excessive fermentation.
Can I add baking soda directly to the dough instead of boiling water?
No—baking soda needs to be in the boiling water to be effective. It raises the pH of the water, which allows the bagel crust to brown better and develop properly. Adding it to the dough would affect the rise and texture negatively.
How do I know when bagels are fully baked?
Look for deep golden brown color and tap the bottom—it should sound hollow and feel firm. Cut one in half and check the interior; it should be dense but not gummy. If the inside is still doughy, bake another 5 minutes and check again.
What if I don’t have a stand mixer?
This recipe is perfect for hand-mixing. Everything comes together easily in a bowl, and kneading by hand takes about 10 minutes. You don’t need any special equipment—just your hands, a bowl, and a baking sheet.
Can I make mini bagels or extra-large bagels?
Absolutely! Divide your dough into more pieces for mini bagels (12-16 pieces) or fewer pieces for larger bagels (4-6 pieces). Adjust boiling time slightly—mini bagels need only 30 seconds per side, while larger ones might need 1.5 minutes per side. Adjust baking time accordingly too.


