Easy Icing Recipe: Baker’s Favorite Guide to Perfect Frosting Every Time
Whether you’re decorating a birthday cake, frosting cupcakes for a party, or topping your favorite dessert, an easy icing recipe is an essential skill every baker should master. The beauty of homemade icing lies in its simplicity—with just a few basic ingredients and minimal effort, you can create silky-smooth frosting that tastes infinitely better than store-bought alternatives. This guide walks you through everything you need to know about making foolproof icing that professionals and home bakers love.
The secret to perfect icing isn’t complicated techniques or rare ingredients. Instead, it’s understanding the fundamentals: proper ingredient ratios, temperature control, and mixing methods. Once you grasp these basics, you’ll be able to whip up stunning frosting in minutes, whether you prefer classic buttercream, cream cheese frosting, or whipped varieties. Let’s explore how to create bakery-quality icing right in your own kitchen.
Classic Buttercream Icing
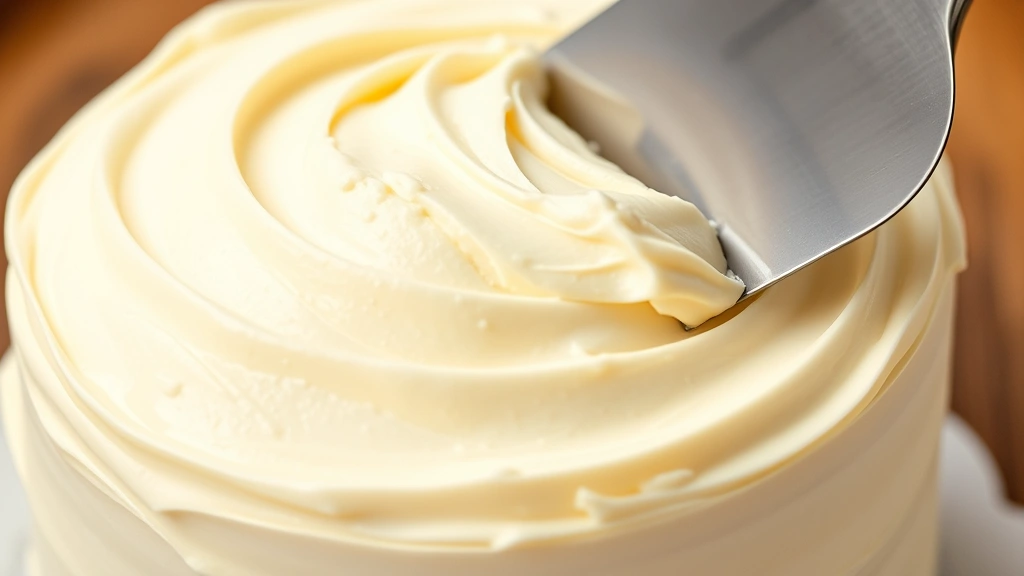
The most beloved easy icing recipe among bakers is undoubtedly classic American buttercream. This versatile frosting requires only four ingredients: butter, powdered sugar, milk, and vanilla extract. The beauty of this recipe lies in its forgiving nature—even novice bakers can achieve professional results with minimal practice.
Ingredients:
- 1 cup (2 sticks) unsalted butter, softened to room temperature
- 3-4 cups powdered sugar, sifted
- 2-3 tablespoons whole milk or heavy cream
- 1 teaspoon vanilla extract
- Pinch of salt
Step-by-Step Instructions:
- Prepare your butter: Cut softened butter into small cubes and place in a large mixing bowl. Using an electric mixer on medium speed, beat the butter for 1-2 minutes until it becomes pale and fluffy. This aeration is crucial for achieving light, spreadable frosting.
- Gradually add powdered sugar: Sift your powdered sugar directly into the bowl to prevent lumps. Add it one cup at a time, beating on low speed after each addition. This prevents powdered sugar clouds from escaping your mixer.
- Adjust consistency: Once all sugar is incorporated, add milk one tablespoon at a time while beating. Add just enough to reach your desired consistency—thicker for piping, looser for spreading.
- Flavor and finish: Add vanilla extract and a tiny pinch of salt. Beat on medium-high speed for 2-3 minutes until the frosting becomes light, fluffy, and spreadable.
This basic buttercream works beautifully on layer cakes, and you can easily customize it by adding different extracts, cocoa powder, or food coloring. For chocolate buttercream, simply add 3-4 tablespoons of unsweetened cocoa powder and reduce milk slightly. The cream cheese dip recipes on our site also demonstrate how versatile dairy-based frostings can be when you understand the fundamentals.
Temperature is absolutely critical when working with buttercream. Your butter must be genuinely soft but not melted. If it’s too cold, you’ll struggle to incorporate the sugar smoothly. If it’s too warm, your frosting will become greasy and separate. The ideal room temperature for butter is 65-70°F (18-21°C). On hot days, you can refrigerate your finished frosting for 15 minutes before use.
Cream Cheese Frosting Variations
For a tangy, sophisticated frosting, cream cheese variants are unbeatable. These frostings pair beautifully with spiced cakes, carrot cake, and red velvet desserts. The tanginess cuts through rich cakes perfectly, creating balanced flavor profiles that keep guests coming back for more bites.
Classic Cream Cheese Frosting:
- 8 oz cream cheese, softened
- ½ cup (1 stick) unsalted butter, softened
- 2-3 cups powdered sugar, sifted
- 1 teaspoon vanilla extract
- ¼ teaspoon salt
Preparation Method:
- Beat softened cream cheese in your mixing bowl for 1 minute until smooth and creamy. Scrape down bowl sides frequently.
- Add softened butter in small pieces, beating until fully incorporated and light.
- Gradually add sifted powdered sugar, one cup at a time, beating on low speed.
- Add vanilla extract and salt, then beat on medium-high speed for 2 minutes until fluffy.
One crucial difference between cream cheese frosting and buttercream: cream cheese frosting requires refrigeration. Unlike pure buttercream, the dairy content means it can spoil if left at room temperature for extended periods. Keep decorated cakes in the refrigerator until serving time, removing them 30-45 minutes beforehand to allow frosting to soften slightly.
For those interested in exploring other cream cheese applications, our cream cheese dip recipes showcase how this ingredient works across different culinary applications. The principles of balancing richness with complementary flavors apply across both sweet and savory dishes.
Mascarpone Cream Cheese Blend: For an ultra-luxurious version, replace half the cream cheese with mascarpone cheese. This creates an incredibly smooth, almost mousse-like texture that’s absolutely divine on delicate cakes. Reduce the powdered sugar slightly since mascarpone is naturally sweeter than regular cream cheese.
Swiss Meringue Buttercream
If you’re ready to elevate your frosting game, Swiss meringue buttercream represents the pinnacle of professional baking. This silky, stable frosting is what pastry chefs use for competition cakes. While slightly more involved than American buttercream, it’s absolutely worth mastering for special occasions.
Ingredients:
- 4 large egg whites (room temperature)
- 1 cup granulated sugar
- 1 pound (4 sticks) unsalted butter, cubed and softened
- 1 teaspoon vanilla extract
- Pinch of salt
Detailed Instructions:
- Create the meringue base: In a heatproof mixing bowl, combine egg whites and granulated sugar. Place the bowl over a pot of gently simmering water (double boiler setup), ensuring the bowl bottom doesn’t touch the water.
- Heat to safe temperature: Whisk constantly for 5-7 minutes until the mixture reaches 160°F (71°C) on an instant-read thermometer. This temperature pasteurizes the eggs, making them safe for consumption. The mixture should feel hot and the sugar should be completely dissolved.
- Whip to stiff peaks: Transfer the heated mixture to your electric mixer bowl. Whip on high speed for 8-10 minutes until you achieve stiff, glossy peaks. The mixture should triple in volume and become completely cool.
- Add butter gradually: With the mixer running on medium speed, add softened butter one tablespoon at a time. This process takes patience—add butter too quickly and your frosting will break. If it looks curdled or separated, don’t panic. Continue mixing and add a tablespoon of powdered sugar, then resume adding butter.
- Final adjustments: Once all butter is incorporated, beat in vanilla extract and salt. Mix for an additional 2-3 minutes until silky smooth.
Swiss meringue buttercream has a higher melting point than American buttercream, making it ideal for warm weather events and for creating intricate piped decorations. It’s also more stable for tiered cakes, providing better support for heavy upper tiers. However, it does contain raw egg whites before heating, so always use pasteurized eggs or follow the heating process carefully.
Understanding proper cooking techniques and food science principles helps demystify why Swiss meringue buttercream behaves differently than American buttercream. The science of emulsification is fascinating and directly impacts your frosting’s texture and stability.
Whipped Cream Frosting
For lighter, airier frosting options, whipped cream frostings provide elegance without heaviness. These work beautifully on fruit-forward desserts, light sponge cakes, and summer gatherings. While less stable than buttercream frostings, they’re perfect for same-day decorating.
Simple Whipped Cream Frosting:
- 2 cups heavy whipping cream, very cold
- 3 tablespoons powdered sugar
- 1 teaspoon vanilla extract
- ¼ teaspoon salt
Chill your mixing bowl and beaters in the freezer for 10 minutes before starting. Pour cold cream into the bowl and begin whipping on medium-high speed. Watch carefully—whipping cream transitions quickly from soft peaks to stiff peaks to grainy butter if over-whipped. Once soft peaks form, add powdered sugar, vanilla, and salt. Continue whipping until stiff peaks form, but stop immediately when you reach the desired consistency.
Stabilized Whipped Cream: For frosting that holds up for several hours, add 2 tablespoons of cream cheese to your whipped cream mixture. The cream cheese stabilizes the whipped cream without adding noticeable flavor, extending your working time significantly. This hybrid approach gives you the lightness of whipped cream with the stability of cream cheese.
Whipped cream frostings taste absolutely luxurious but require careful handling. They’re best applied shortly before serving and stored in cool conditions. For outdoor summer events, whipped cream frostings may not be your best choice unless you have reliable shade and cool temperatures.
Troubleshooting Common Issues
Even experienced bakers encounter frosting problems occasionally. Understanding what causes common issues helps you prevent them or fix them quickly.
Grainy or Gritty Texture: This typically indicates insufficiently sifted powdered sugar or undissolved sugar crystals. Always sift powdered sugar before adding to your frosting. If graininess occurs, strain the frosting through a fine-mesh sieve, or beat it longer to help dissolve remaining crystals. Some bakers prefer using superfine powdered sugar specifically for frosting to minimize this issue.
Too Soft or Runny: Your frosting likely needs less liquid or more powdered sugar. Add powdered sugar one tablespoon at a time, beating well between additions. Also verify your butter was truly softened—if it’s too warm, your frosting will be overly soft. Refrigerate for 15-20 minutes to firm up, then beat again before using.
Too Stiff or Difficult to Spread: This means you’ve added too much powdered sugar or not enough liquid. Add milk or cream one teaspoon at a time while beating. Some bakers prefer using heavy cream instead of milk for richness when loosening frosting. Alternatively, soften your frosting by beating it for several minutes at room temperature.
Separated or Curdled Appearance: This happens when temperatures aren’t balanced—typically when cold powdered sugar meets warm butter. Ensure all ingredients are at room temperature before mixing. If separation occurs, keep beating; often it will come back together. If it doesn’t, try adding a tablespoon of milk and beating on high speed for several minutes.
Frosting Tastes Too Sweet: Reduce powdered sugar slightly and add a pinch more salt to balance sweetness. Some bakers add ¼ teaspoon of baking soda to neutralize sweetness slightly. You can also increase vanilla extract or add different extracts like almond or lemon for more complex flavor profiles.
Storage and Make-Ahead Tips
One of the greatest advantages of mastering an easy icing recipe is the ability to prepare frosting well in advance. Proper storage extends your frosting’s life significantly, reducing last-minute stress.
Refrigerator Storage: Most frostings keep beautifully in the refrigerator for up to two weeks in an airtight container. Buttercream, cream cheese frosting, and Swiss meringue buttercream all refrigerate well. Before using refrigerated frosting, allow it to come to room temperature (about 30 minutes on the counter), then beat it for a minute or two to restore its fluffy texture.
Freezer Storage: Frosting can be frozen for up to three months. Place it in an airtight container or freezer bag, removing as much air as possible. Thaw overnight in the refrigerator before using. After thawing, let it reach room temperature and beat briefly to restore texture.
Frosted Cake Storage: Fully frosted cakes can be refrigerated for 3-4 days (buttercream and Swiss meringue) or 2-3 days (cream cheese frosting). Cover cakes loosely with plastic wrap to prevent them from absorbing refrigerator odors. Remove from refrigeration 30-45 minutes before serving to allow frosting to soften slightly and flavors to develop.
Make-Ahead Strategy: For maximum convenience, prepare frosting 2-3 days before your event. Store it in the refrigerator, then decorate your cakes on the day of serving. This approach gives you flexibility and reduces day-of stress. If you’re decorating frosted cakes for an event like a casual chipotle bowl gathering or formal dinner, having frosting prepared beforehand is invaluable.
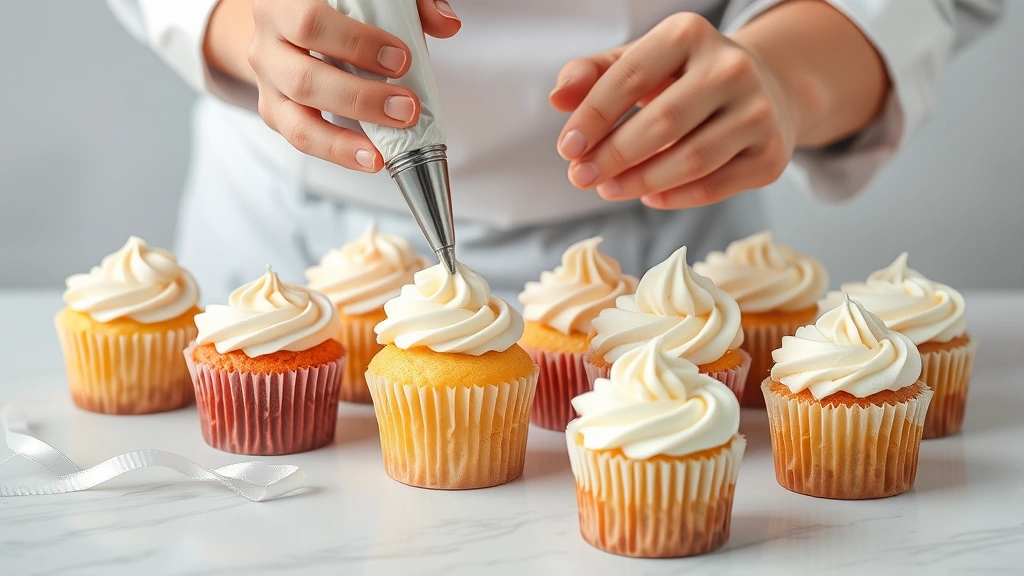
For complex piped decorations, practice piping 2-3 days ahead using your prepared frosting. Piped decorations can be frozen on a parchment-lined baking sheet, then transferred to your cake on serving day. This technique is especially useful for wedding cakes and competition-level desserts.
FAQ
Can I use salted butter in my frosting?
While technically possible, unsalted butter is strongly recommended. Using salted butter makes it impossible to control the salt content in your frosting precisely. If you only have salted butter available, reduce the salt in the recipe to just a tiny pinch.
What’s the difference between powdered sugar and confectioners’ sugar?
They’re the same thing! Powdered sugar, confectioners’ sugar, and icing sugar are all identical products—sugar ground into an extremely fine powder with cornstarch added to prevent clumping.
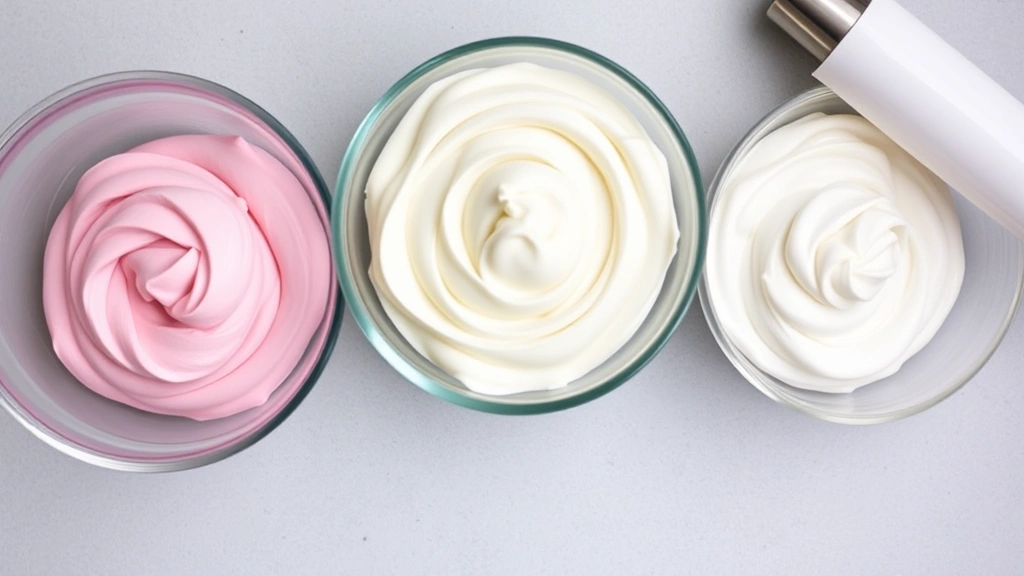
How do I get bright, vibrant colors in my frosting?
Use gel or liquid food coloring rather than traditional food coloring. Gel colors provide more intense hues without thinning your frosting. Add coloring a tiny bit at a time, mixing thoroughly, since gel colors are very concentrated.
Can I make frosting without powdered sugar?
Not easily with traditional recipes. Granulated sugar doesn’t dissolve smoothly in frosting, creating that gritty texture no one enjoys. Powdered sugar’s fine texture and cornstarch content are essential for smooth frosting. Some specialty recipes using meringue can use granulated sugar, but this requires cooking the sugar properly.
Is homemade frosting really better than store-bought?
Absolutely, for taste and texture. Homemade frosting contains real butter, real cream cheese, and simple ingredients you recognize. Store-bought frosting often contains hydrogenated oils, artificial flavors, and excessive additives. Once you taste homemade frosting, the commercial versions taste noticeably waxy by comparison.
How far in advance can I frost a cake?
For buttercream and Swiss meringue buttercream, you can frost cakes up to 3-4 days ahead. Cream cheese frosting-covered cakes should be eaten within 2-3 days. Whipped cream frosting should be applied no more than a few hours before serving.
What if my frosting breaks while mixing?
Don’t panic! A broken frosting looks curdled or separated but often comes back together. Continue beating on high speed for several minutes. If it still looks broken, add a tablespoon of powdered sugar or milk and keep beating. The emulsification usually restores itself with continued mixing.
Mastering an easy icing recipe transforms your baking from good to exceptional. Whether you choose classic buttercream for everyday cakes, cream cheese frosting for spiced desserts, or Swiss meringue buttercream for special occasions, these fundamental recipes serve as your foundation. With practice and attention to detail, you’ll develop the confidence to create bakery-quality frosting consistently. Explore professional baking resources to deepen your understanding, and don’t hesitate to experiment with flavor variations once you’ve mastered the basics. Your desserts deserve frosting that tastes as good as it looks, and homemade frosting delivers exactly that.


