How to Boil Eggs Perfectly: Chef’s Guide
Boiling eggs seems like one of the simplest cooking tasks, yet it remains one of the most commonly botched techniques in home kitchens. Whether you’re aiming for a perfectly jammy yolk, a fully cooked hard-boiled egg, or something in between, mastering the egg boil recipe requires understanding a few fundamental principles that separate amateur results from professional-quality outcomes. This comprehensive guide will walk you through every variable that affects your final product, from water temperature and cooking time to cooling methods and storage solutions.
The beauty of boiling eggs lies in its simplicity combined with its precision. Unlike many cooking techniques that rely on feel, experience, or subjective judgment, boiling eggs is governed by science. When you understand the chemistry of egg proteins and how heat transforms them, you’ll never overcook or undercook an egg again. Whether you’re preparing a summer salad recipes that demands perfectly soft-boiled eggs or creating a protein-rich snack, this guide will ensure consistent, restaurant-quality results every single time.
Understanding Egg Structure and Heat
Before diving into the mechanics of boiling, it’s essential to understand what happens inside an egg as it heats. An egg consists of three main components: the shell, the white (albumen), and the yolk. Each component has a different protein structure and responds to heat at different temperatures, which is why timing is absolutely critical.
The egg white begins to set at approximately 140°F (60°C), while the yolk’s exterior begins coagulating around 149°F (65°C). The yolk’s center remains liquid until it reaches roughly 158°F (70°C) to 160°F (71°C). This temperature gradient is what allows chefs to create the perfect soft-boiled egg with a runny yolk encased in set whites. Understanding these temperatures helps you predict exactly what texture you’ll achieve with any given cooking time.
Water temperature significantly influences cooking speed. Hot water heats the egg more rapidly than cold water, which is why different methods produce different results even with the same total cooking time. Professional chefs often choose one method over another based on their specific needs—some prefer the predictability of the hot water method, while others favor the cold water method for easier peeling and more forgiving timing windows.
Essential Equipment and Ingredients
Successful egg boiling requires minimal equipment, but having the right tools makes a significant difference. You’ll need a sturdy pot large enough to hold your eggs in a single layer with room for water to cover them by about an inch. Stainless steel or heavy-bottomed pots distribute heat more evenly than thin aluminum pots, which can create hot spots.
A reliable kitchen timer is non-negotiable. While experienced cooks might estimate time by feel or intuition, precision timing ensures consistency. Digital timers with alarm functions work best, though even a smartphone timer will suffice. An ice bath setup requires a separate bowl filled with ice and cold water—this stops the cooking process instantly and is crucial for achieving your desired doneness level.
Additional helpful tools include a slotted spoon for safely removing eggs from hot water, a kitchen scale for weighing eggs if you want extreme precision, and a soft brush or cloth for cleaning eggs before cooking. Some cooks prefer egg peelers or specialized tools, though most find a simple spoon works perfectly well. When preparing how to make homemade sauces that feature boiled eggs, you’ll appreciate the extra care taken in preparation.
For ingredients, use fresh eggs when possible, though older eggs actually peel more easily than very fresh ones because the membrane between the shell and white separates more readily. Room temperature eggs work best, as they’re less likely to crack when exposed to hot water. Water quality matters too—soft water produces better results than hard water, though the difference is minimal in most home kitchens.
The Cold Water Method
The cold water method, also called the cold start technique, begins with placing eggs in a pot and covering them with cold water. This method offers forgiving timing and typically results in easier-to-peel eggs because the temperature change causes the membrane to separate naturally from the white.
Step-by-step cold water process:
- Place room temperature or slightly cool eggs in a pot
- Cover eggs completely with cold water, adding about an inch of water above the eggs
- Place the pot on high heat and bring to a rolling boil
- Once boiling, remove the pot from heat and cover with a lid
- Let eggs sit in the hot water for your desired time (see doneness chart below)
- Transfer eggs immediately to an ice bath using a slotted spoon
- Allow eggs to cool for at least five minutes before peeling
This method works exceptionally well for hard-boiled eggs destined for summer salad recipes or meal prep. The gentle temperature transition reduces the likelihood of green rings forming around the yolk, which occurs when the yolk’s iron reacts with hydrogen sulfide in the egg white—a purely cosmetic issue but one that concerns many home cooks.
The cold water method also provides a wider margin for error. If you forget about your eggs for a few extra minutes, the results are far less catastrophic than with the hot water method. The covered pot maintains a relatively stable temperature, so timing isn’t as critical within a reasonable window.
The Hot Water Method
The hot water method, also called the hot start technique, involves bringing water to a boil first, then carefully adding room temperature eggs. Professional chefs often prefer this method because it offers more precise control over cooking time and produces more consistent results across multiple batches.
Step-by-step hot water process:
- Fill a pot with enough water to cover eggs by about an inch
- Bring water to a rolling boil over high heat
- Carefully lower room temperature eggs into the boiling water using a spoon
- Maintain a gentle boil throughout cooking (not a rolling boil, which can crack eggs)
- Set a timer for your desired doneness level
- When time is complete, immediately transfer eggs to an ice bath
- Let cool for at least five minutes before peeling
This method starts cooking immediately, so timing is more critical. However, the precise moment you lower the eggs into boiling water marks the definitive start of cooking, eliminating the variable of how long it takes water to reach boiling temperature. This consistency appeals to cooks who value reproducibility.
The hot water method may produce slightly tougher peeling experiences because the rapid temperature change can cause the shell to adhere more firmly to the white. However, proper cooling technique largely mitigates this issue. When preparing dishes like blank recipe book entries, document which method you used for reference.
Doneness Levels Explained
The beauty of boiling eggs is that you can achieve virtually any doneness level by adjusting cooking time. Here’s a comprehensive guide to timing for medium-sized eggs using both methods:
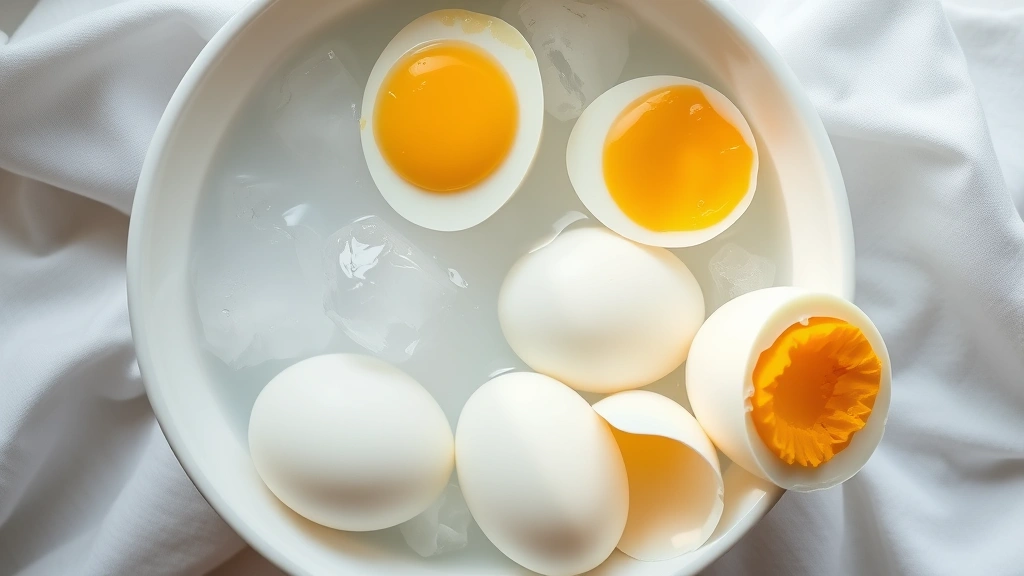
Soft-boiled (runny yolk, set whites): Cold water method requires 4-6 minutes of sitting time after removing from heat. Hot water method requires 4-6 minutes of active boiling. The result is whites that are fully set while the yolk remains completely liquid in the center.
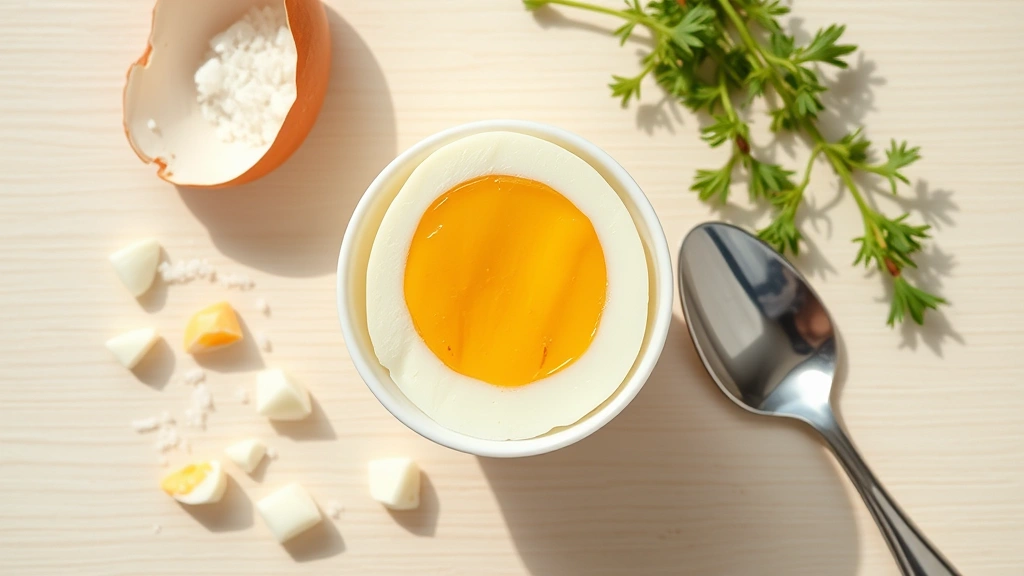
Medium-boiled (jammy yolk, set whites): Cold water method requires 8-10 minutes of sitting time. Hot water method requires 8-10 minutes of boiling. This produces the Instagram-famous jammy egg with a creamy, partially set yolk that flows slightly when cut.
Hard-boiled (fully cooked yolk, set whites): Cold water method requires 12-14 minutes of sitting time. Hot water method requires 12-14 minutes of boiling. The entire egg is completely set, making it ideal for chopping into summer salad recipes or storing for meal prep.
These times assume medium eggs (approximately 50 grams each). Larger eggs require an additional 30 seconds to 1 minute per size increase, while smaller eggs need 30 seconds less per size decrease. Altitude also affects cooking times—at higher elevations, add approximately 5% to your cooking time for every 1,000 feet above sea level.
Cooling and Peeling Techniques
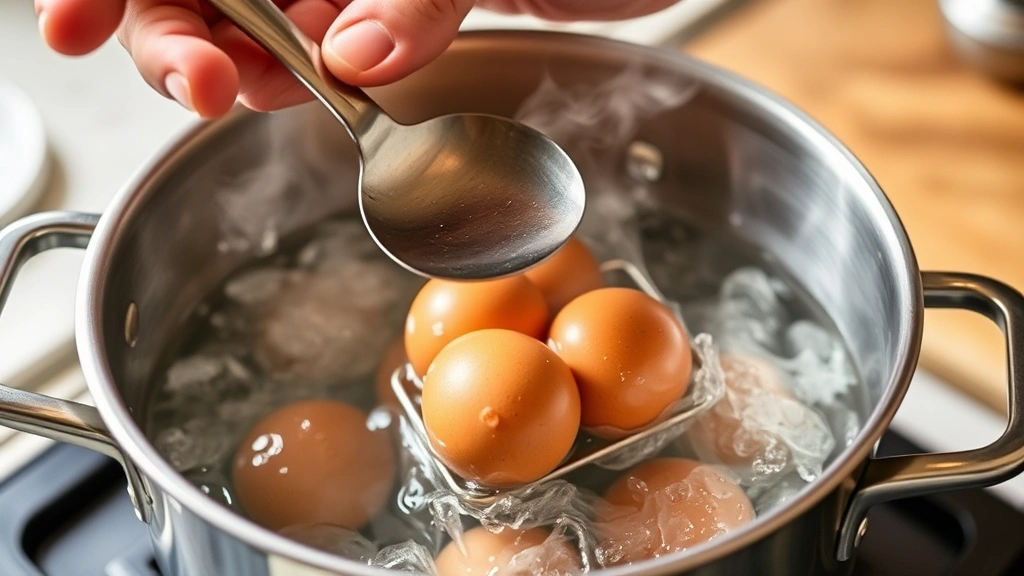
Proper cooling is absolutely essential for achieving your desired doneness level and making peeling easier. When you remove eggs from hot water and plunge them into an ice bath, you halt the cooking process immediately. Without this crucial step, carryover cooking continues, potentially overcooking your egg.
Professional cooling technique: Prepare your ice bath before you begin cooking. Use a bowl filled with ice and cold water—the water should be as cold as possible. When eggs are done cooking, immediately transfer them to the ice bath using a slotted spoon. Let them sit for at least 5 minutes, preferably 10-15 minutes for easier peeling. The longer cooling time allows the egg white to contract slightly, separating from the membrane more completely.
Peeling method for maximum success: Gently crack the egg shell all over by rolling it on a hard surface or tapping it against the counter. Start peeling from the wider end where the air pocket sits, as this creates a natural separation point. Work under cool running water if possible—the water helps separate the membrane from the white. Peel slowly and deliberately rather than aggressively, as rushing often tears the white.
Some cooks swear by specific peeling tricks: adding baking soda to the cooking water, using vinegar, or even steaming eggs instead of boiling them. While these methods have their advocates, the most reliable approach remains proper cooling and patient hand-peeling. If you’re preparing eggs for how to make homemade sushi, careful peeling becomes even more important for presentation purposes.
Storage and Food Safety
Properly boiled and cooled eggs keep well in the refrigerator for up to one week, making them excellent for meal prep. Store unpeeled eggs in an airtight container on a shelf (not in the door, which experiences temperature fluctuations). The shell protects the egg and prevents it from absorbing odors from other foods.
Peeled eggs should be stored in an airtight container covered with a damp paper towel to prevent drying. Some cooks prefer storing them in water, which keeps them moist but should be changed daily. Peeled eggs remain safe for about 3-4 days, slightly shorter than unpeeled eggs.
Never store eggs at room temperature for more than two hours. If you’ve boiled eggs and aren’t immediately cooling them, get them into cold water or the refrigerator as quickly as possible. When in doubt about freshness, discard the eggs—foodborne illness risks aren’t worth the minimal cost of an egg.
For healthy crock pot recipes that might incorporate boiled eggs, ensure you’re using eggs stored within the safe window and always trust your senses—if an egg smells off or looks discolored, don’t use it.
Troubleshooting Common Issues
Green ring around the yolk: This occurs when the yolk’s iron reacts with hydrogen sulfide in the white, typically from overcooking. Solution: Reduce cooking time by 1-2 minutes or ensure immediate ice bath cooling. This is purely cosmetic and completely safe to eat.
Eggs crack during cooking: Cracks usually result from temperature shock. Solution: Use room temperature eggs, bring water to a boil gradually, or use the cold water method which has gentler temperature transitions. If using the hot water method, lower eggs slowly and gently.
Difficult peeling: Very fresh eggs are notoriously difficult to peel because the membrane hasn’t separated from the white. Solution: Use older eggs (7-10 days old) or extend cooling time to 15+ minutes. Some cooks add a teaspoon of baking soda to cooking water, though results vary.
Rubbery whites: Overcooking causes whites to become tough and rubbery. Solution: Reduce cooking time, use more precise timing, and ensure your ice bath is truly cold. A proper ice bath is essential for stopping carryover cooking.
Runny whites when expecting hard-boiled: Insufficient cooking time. Solution: Add 1-2 minutes to your next batch. Remember that timing varies based on egg size and altitude, so adjust accordingly.
Yolk too cooked when you wanted jammy: Excessive cooking time or inadequate cooling. Solution: Reduce cooking time by 1-2 minutes and ensure immediate ice bath immersion. The ice bath is non-negotiable for precision.
FAQ
Can I boil eggs in advance for meal prep?
Absolutely. Boil eggs up to 7 days in advance and store unpeeled in the refrigerator. Peel them within 24 hours of eating for best quality. This makes eggs perfect for adding to blank recipe book meal plans throughout the week.
Why did my eggs crack while cooking?
Cracks usually result from temperature shock when cold eggs meet boiling water too quickly. Use the cold water method, bring water to boil gradually, or let eggs sit at room temperature for 5-10 minutes before cooking. Lower eggs gently into boiling water rather than dropping them.
How do I know when eggs are done without a timer?
While a timer is ideal, you can estimate: soft-boiled takes about 6-7 minutes from boiling, medium takes 9-10 minutes, and hard-boiled takes 13-14 minutes. However, precise timing is important, so using a timer is strongly recommended.
Can I reuse the water for boiling multiple batches?
Yes, you can reuse water for subsequent batches within the same cooking session. However, you’ll need to bring it back to a boil and adjust timing slightly as the water temperature may be lower. For best results, use fresh water for each batch.
What’s the difference between boiling and steaming eggs?
Steaming uses steam rather than direct water contact and often produces easier-to-peel eggs. Steaming times are similar to boiling times, but steam cooking may be slightly faster. Both methods produce identical results in terms of doneness levels.
Are there any tricks for peeling eggs more easily?
The best approach is using older eggs (7-10 days old), cooling thoroughly for 10-15 minutes, and peeling under cool running water. Start from the wider end where the air pocket provides a natural separation point. Patience beats aggressive peeling.
Can I boil eggs with the shells still wet?
Yes, wet shells don’t affect cooking. However, ensure the eggs are clean before cooking. Rinse them under cool water and pat dry if desired, though this isn’t strictly necessary.
How do altitude changes affect boiling time?
At higher elevations, water boils at lower temperatures, so cooking takes longer. Add approximately 5% to your cooking time for every 1,000 feet above sea level. This means at 5,000 feet elevation, you might add 25% to standard cooking times.


