Crispy Fries in Ninja Air Fryer? Tried & True Recipe
There’s nothing quite like perfectly crispy fries—golden on the outside, fluffy on the inside, and absolutely irresistible. The challenge? Achieving that restaurant-quality result at home without a deep fryer or gallons of oil. Enter the Ninja Air Fryer, a game-changing kitchen appliance that delivers exceptional crispiness with minimal effort and virtually no mess. After countless batches and countless taste tests, we’ve perfected the ultimate method for making crispy fries in your Ninja Air Fryer that will rival any takeout joint.
The secret to exceptional air fryer fries lies in understanding the science behind the cooking process, selecting the right potatoes, and mastering a few key techniques. Your Ninja Air Fryer uses rapid air circulation technology to create a crispy exterior while keeping the interior tender and delicious. With the right approach, you’ll achieve fries that are consistently excellent every single time you make them. This comprehensive guide walks you through everything you need to know, from potato selection through plating.
Why Ninja Air Fryer Makes Perfect Fries
The Ninja Air Fryer has earned its reputation as one of the most reliable appliances for achieving crispy results. Unlike traditional deep frying, which requires maintaining precise oil temperatures and creates significant cleanup challenges, the Ninja Air Fryer uses convection heating to circulate hot air at high speeds around your food. This creates the Maillard reaction—the chemical process that produces that coveted golden-brown color and complex flavors—without submerging food in oil.
What makes Ninja Air Fryers particularly effective for fries is their powerful heating element and optimized basket design. The perforated basket allows air to flow underneath and around each fry, ensuring even cooking and maximum crispiness. The temperature range, typically reaching up to 400°F, provides the intense heat necessary to achieve that perfect exterior texture. Additionally, Ninja’s basket capacity is generous enough to cook substantial portions without overcrowding, which is crucial for consistent results.
Another advantage is the precision control these appliances offer. You can set exact temperatures and cooking times, eliminating the guesswork involved with traditional frying methods. This consistency means you can replicate your success batch after batch, making weeknight dinners and entertaining guests infinitely easier.
Choosing the Right Potatoes
The foundation of exceptional fries begins with selecting appropriate potatoes. Not all potatoes are created equal, and understanding the differences will dramatically impact your results. Potatoes fall into three main categories: starchy, waxy, and all-purpose.
Starchy Potatoes are your best choice for crispy air fryer fries. Russet potatoes are the gold standard, containing approximately 20% starch and lower moisture content. This high starch-to-water ratio means they’ll develop a crispy exterior while maintaining a fluffy interior. Burbank and Norkotah russets are particularly excellent varieties.
Waxy Potatoes like red potatoes and fingerlings contain more moisture and less starch, making them better suited for applications where you want creamier texture, such as potato salads or casseroles. They tend to become soggy rather than crispy in the air fryer.
All-Purpose Potatoes like Yukon golds fall between the two extremes. While they’ll work adequately, they won’t deliver the superior crispiness that russets provide. For the absolute best results, stick with russet potatoes.
When selecting potatoes, choose ones that are firm with no soft spots, sprouting eyes, or green discoloration. Medium to large russets are ideal—they’re easier to cut into uniform pieces and yield better texture than smaller potatoes. Purchase potatoes a few days before cooking if possible; storing them at room temperature allows their starches to develop further, enhancing crispiness.
Preparation and Cutting Techniques
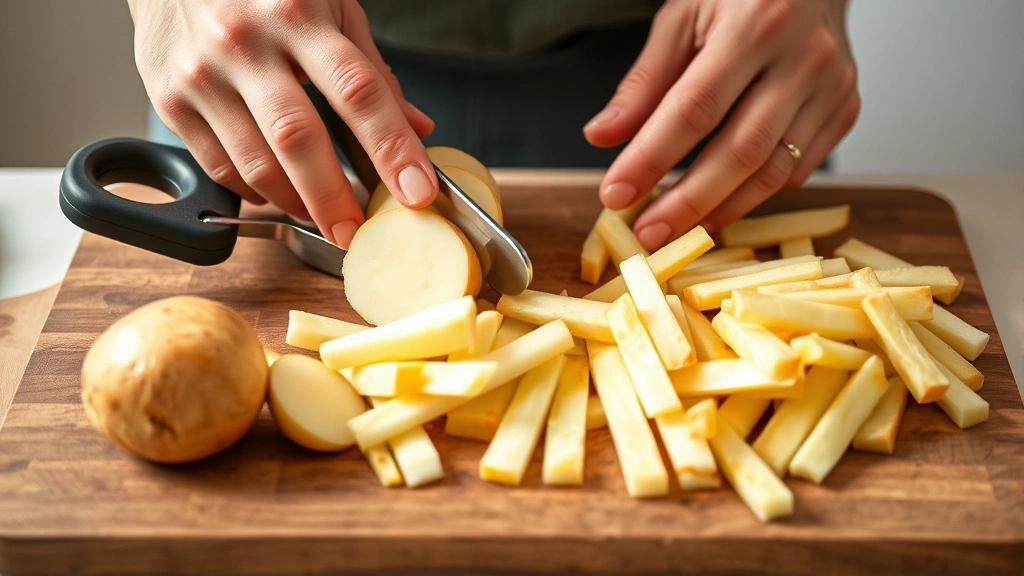
Proper preparation is non-negotiable for achieving consistently crispy fries. Start by rinsing your potatoes thoroughly under cold water to remove surface starch and dirt. Use a vegetable brush to gently scrub them clean. Don’t peel russet potatoes for classic fries—the skin adds nutrients, texture, and visual appeal.
Pat the potatoes completely dry with paper towels. Moisture is the enemy of crispiness, so this step is absolutely essential. Any residual water will create steam during cooking, resulting in soggy rather than crispy fries.
Cutting Consistency is crucial for even cooking. Cut your potatoes into fries approximately ¼ inch thick and ⅛ inch wide. A sharp knife or mandoline slicer works best. Aim for uniform sizing—thinner fries cook faster and become crispier, while thicker fries stay fluffier inside. Consistency ensures all fries finish cooking simultaneously.
Once cut, place your fries in a large bowl of cold water and let them soak for at least 30 minutes, or up to 4 hours. This soaking process removes excess surface starch, which would otherwise create a gummy coating. After soaking, drain thoroughly and pat completely dry again with paper towels or a clean kitchen towel.
Some cooks advocate for a brief pre-cook in boiling water (2-3 minutes) before air frying. This parboiling step partially cooks the interior, ensuring a fluffy center while allowing the exterior to crisp during air frying. While optional, this technique elevates your results significantly, particularly if you prefer thicker-cut steak fries.
Seasoning Your Fries
The right seasoning transforms fries from good to unforgettable. The timing and method of seasoning matter tremendously. After patting your fries dry, transfer them to a large bowl and drizzle with just enough oil to coat lightly—approximately 1 to 2 tablespoons per pound of potatoes. Toss thoroughly to ensure every fry receives a thin, even coating. This oil is essential; it facilitates the Maillard reaction and contributes to crispiness.
Classic Salt and Pepper remains the gold standard. Use fine sea salt or kosher salt, adding it immediately after tossing with oil so it adheres properly. Freshly ground black pepper adds subtle complexity.
Garlic Parmesan Fries are absolutely spectacular. After cooking, toss hot fries with minced fresh garlic, finely grated Parmesan cheese, fresh parsley, and a touch of black pepper. The heat of the fries will slightly wilt the herbs and create an aromatic coating.
Cajun Spiced Fries bring exciting heat. Mix paprika, cayenne pepper, garlic powder, onion powder, dried oregano, and thyme into your salt before tossing with the potatoes. These fries pair beautifully with appetizers and casual entertaining.
Truffle Oil Fries create an elegant side dish. Use truffle-infused oil instead of regular oil, then finish with fleur de sel and fresh cracked pepper. This elevated version impresses dinner guests.
Never salt your fries before air frying. Salt draws moisture to the surface, which inhibits crisping. Always season after cooking for maximum crispiness.
The Cooking Process Step by Step
Step 1: Preheat Your Ninja Air Fryer
Preheat your Ninja Air Fryer to 400°F for 3-5 minutes. This ensures the heating element reaches optimal temperature before your fries enter, which is crucial for immediately creating that crispy exterior.
Step 2: Arrange Fries in the Basket
Spread your prepared fries in a single layer in the air fryer basket. This is critical—overcrowding prevents air circulation and results in uneven cooking and soggy spots. If you have a large batch, cook in two separate batches rather than compromising quality. The fries can touch but shouldn’t overlap significantly.
Step 3: Set Temperature and Time
Set your Ninja Air Fryer to 400°F and begin cooking for 15 minutes. For thinner-cut fries, 12-14 minutes may suffice. For thicker steak fries, 16-18 minutes might be necessary. The exact time depends on your specific Ninja model, fry thickness, and batch size.
Step 4: Shake the Basket
Halfway through cooking (around the 7-8 minute mark), pause the air fryer and shake the basket vigorously. This ensures even air exposure and prevents fries from sticking together. Some fries may stick slightly to the basket—this is normal and doesn’t affect quality. A quick shake redistributes them.
Step 5: Check for Doneness
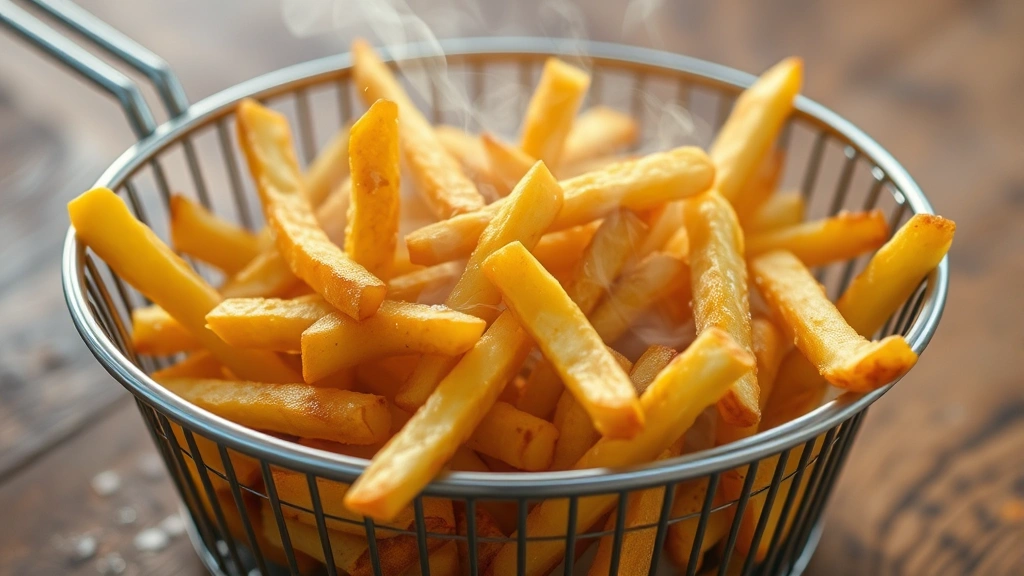
At the 15-minute mark, check your fries. They should be golden brown and crispy on the outside. If they’re still pale, continue cooking for 2-3 more minutes. The exterior should be deeply golden but not darkened to brown (unless you prefer extra crispiness). The interior should be tender when pierced with a fork.
Step 6: Remove and Season
Transfer your fries immediately to a serving bowl or plate. Season immediately while they’re hot, as this is when salt and seasonings adhere best. Toss gently to distribute seasonings evenly.
Step 7: Serve Immediately
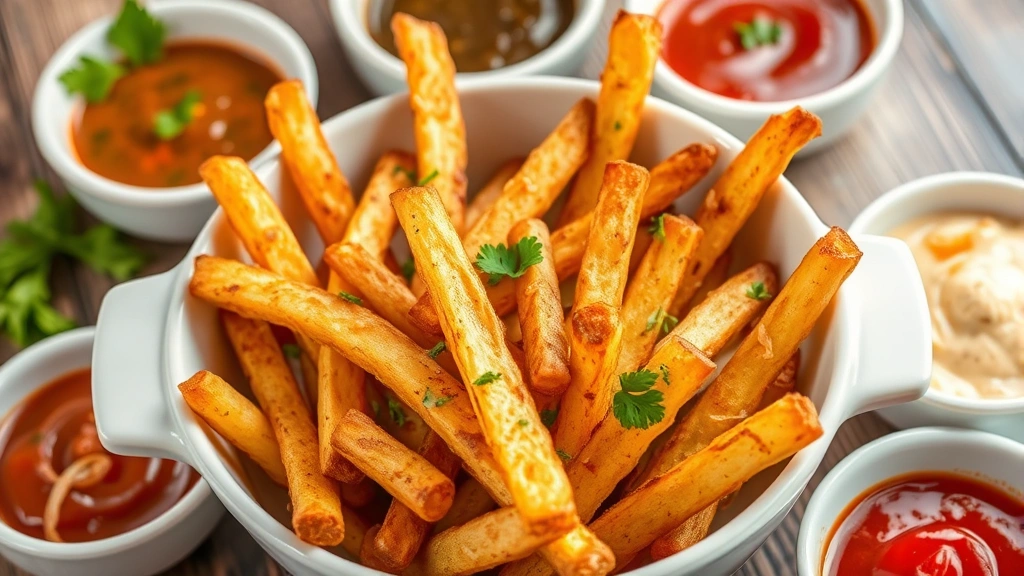
Air fryer fries are best enjoyed immediately after cooking while they’re at peak crispiness. Serve with your favorite dipping sauces, alongside burgers, or as a standalone snack.
Troubleshooting Common Issues
Problem: Fries Are Soggy
Soggy fries typically result from insufficient drying after soaking or overcrowding the basket. Ensure you’ve patted fries completely dry and cook in a single layer without overlapping. Additionally, verify you’re not adding oil excessively—more oil doesn’t mean crispier fries. Also confirm your air fryer is preheated adequately; cold air fryers won’t crisp fries properly.
Problem: Fries Are Burning While Interior Is Still Raw
This indicates uneven cooking, typically caused by inconsistent fry sizing or excessive heat. Ensure all fries are cut uniformly. If your Ninja runs hot, reduce temperature to 390°F and extend cooking time slightly. Alternatively, consider parboiling thicker-cut fries before air frying.
Problem: Fries Stick to the Basket
A light coating of cooking spray on the basket before adding fries prevents sticking. Alternatively, ensure adequate oil coating on the fries themselves. Shaking the basket halfway through cooking also prevents sticking.
Problem: Inconsistent Results Between Batches
This usually indicates inconsistent potato selection, cutting size, or drying. Standardize your process: use the same potato variety, cut to identical dimensions, and dry thoroughly every time. Keep cooking times consistent and always preheat.
Exciting Fries Variations
Once you’ve mastered basic crispy fries, explore these delicious variations to keep your meals exciting.
Waffle Fries
Using a mandoline with waffle blade attachment, cut potatoes into waffle-patterned pieces. These cook slightly faster and offer increased surface area for crispiness and seasoning adhesion. Follow the same cooking process, reducing time by 1-2 minutes.
Sweet Potato Fries
Sweet potatoes require slightly different handling. Cut them slightly thicker than regular fries (approximately ⅜ inch) and increase cooking time to 18-20 minutes at 400°F. They won’t achieve quite the same crispiness as russet fries but offer a naturally sweet, delicious alternative. These pair wonderfully with corn-based appetizers.
Loaded Fries
After cooking and seasoning basic fries, top with bacon bits, sharp cheddar cheese, sour cream, chives, and jalapeños for loaded fries reminiscent of your favorite restaurant. Cook bacon in the air fryer first (8-10 minutes at 400°F), then crumble and combine with fries.
Curly Fries
Use a spiral vegetable slicer to create curly fries. These cook faster (12-14 minutes) due to their shape and offer fun texture variation. Children particularly enjoy the playful appearance.
Herb-Infused Fries
Toss cooked fries with fresh herbs like rosemary, thyme, or oregano, combined with garlic-infused oil. These sophisticated fries complement elegant entrees beautifully.
Serving and Storage Tips
Optimal Serving Practices
Serve fries immediately after cooking for maximum crispiness. Transfer to a serving vessel lined with paper towels if you want to absorb excess oil. Offer a variety of dipping sauces: classic ketchup, garlic aioli, sriracha mayo, ranch dressing, or malt vinegar. Consider offering fries alongside sliders and other casual entertaining favorites for a complete experience.
Storage Guidelines
Leftover fries can be refrigerated in an airtight container for up to 3 days, though they’ll gradually lose crispiness. Reheat in your Ninja Air Fryer at 350°F for 3-5 minutes to restore crispiness. Alternatively, reheat in a regular oven at 375°F for 8-10 minutes.
Fries don’t freeze well after cooking, as the texture becomes compromised. However, you can freeze raw cut potatoes (after soaking and drying) in a freezer bag for up to 2 months. Cook frozen fries directly from the freezer, adding 3-4 minutes to the cooking time.
Make-Ahead Strategies
Prepare and soak potatoes several hours in advance, then refrigerate in a covered container. Pat dry just before cooking. This allows you to have delicious fresh fries ready in 20 minutes, perfect for busy weeknights.
For entertaining, cut and soak potatoes the morning of your event. Store in the refrigerator until cooking time. This preparation significantly reduces last-minute kitchen stress.
FAQ
Can I use frozen store-bought fries in my Ninja Air Fryer?
Absolutely! Frozen fries work well in Ninja Air Fryers. Cook at 400°F for 12-15 minutes (depending on thickness), shaking the basket halfway through. You may need to add 2-3 minutes beyond package directions. They won’t be quite as crispy as fresh homemade fries, but they’re convenient and still delicious.
What’s the best oil to use for air fryer fries?
Use oils with high smoke points: vegetable oil, canola oil, peanut oil, or avocado oil all work excellently. Avoid olive oil and butter, which have lower smoke points and can create smoke at air fryer temperatures. For flavor variations, try truffle oil, garlic-infused oil, or sesame oil in small amounts.
How much oil should I use?
Use just 1-2 tablespoons per pound of potatoes. The goal is a thin, even coating, not heavy saturation. Less oil than traditional frying is one of the air fryer’s greatest advantages. Too much oil can actually inhibit crispiness.
Can I cook multiple batches of fries simultaneously?
No, avoid stacking or overcrowding. Cook one batch at a time for optimal air circulation and crispiness. Overcrowded batches result in uneven cooking and soggy fries. If time is limited, cook two batches back-to-back—the second batch can cook while you season and eat the first.
Why are my fries sometimes crispy and sometimes soggy?
Inconsistency usually stems from variable potato drying, uneven cutting, basket overcrowding, or inconsistent preheating. Standardize every step: cut identically, dry thoroughly, cook in single layers, and always preheat. Consistency in process yields consistent results.
Are air fryer fries healthier than deep-fried fries?
Yes, significantly. Air fryer fries contain approximately 75% less oil than traditional deep-fried versions, reducing overall fat and calorie content while maintaining superior crispiness. For individuals monitoring fat intake or seeking healthier cooking methods, air fryer fries offer an excellent compromise between indulgence and nutrition.
Can I add seasonings before cooking?
While you can add seasonings before cooking, they won’t adhere as effectively as when added to hot fries after cooking. If you prefer pre-seasoning, toss fries with oil and seasonings immediately before cooking, ensuring even distribution. However, salt specifically should always be added after cooking to prevent moisture loss.
What potato varieties should I avoid?
Avoid waxy potatoes like red potatoes, fingerlings, and new potatoes. Their high moisture content results in soggy rather than crispy fries. Stick with starchy russet potatoes for consistently exceptional results. All-purpose potatoes like Yukon golds work acceptably but don’t deliver superior crispiness.
How do I prevent fries from browning too quickly on the outside while remaining raw inside?
Ensure uniform cutting first. If fries are inconsistently sized, thinner pieces brown before thicker pieces cook through. Additionally, consider parboiling thicker-cut fries for 2-3 minutes before air frying. For your specific Ninja model, you might also slightly reduce temperature to 390°F and extend cooking time by 2-3 minutes.
Can I make fries in my Ninja without any oil?
While technically possible, the results won’t be optimal. Oil facilitates the Maillard reaction that creates that coveted golden-brown color and crispy texture. Even a light coating (1 tablespoon per pound) significantly improves results. The amount is minimal compared to traditional frying, making it a worthwhile trade-off for superior texture and flavor.
What dipping sauces pair best with air fryer fries?
Classic ketchup never disappoints, but explore garlic aioli, sriracha mayo, malt vinegar, ranch dressing, chipotle crema, or curry-spiced yogurt sauce. For Greek yogurt-based sauces, combine Greek yogurt with fresh herbs, garlic, lemon juice, and salt for a protein-rich, tangy option. Experiment to discover your personal favorites.
Can I use this method for other vegetables?
Absolutely! The same technique works beautifully for sweet potato fries, zucchini fries, carrot fries, and parsnip fries. Adjust cooking times based on thickness and vegetable density. Root vegetables typically require 15-18 minutes, while softer vegetables like zucchini need only 10-12 minutes at 400°F.
Mastering crispy fries in your Ninja Air Fryer opens endless possibilities for delicious home cooking. With the techniques outlined in this guide, you’ll consistently achieve restaurant-quality results that impress family and friends. From classic salt and pepper to creative variations, you now possess the knowledge to make exceptional fries any time you desire. Start with the basic recipe, practice the techniques, and soon you’ll be confidently creating crispy fries that rival your favorite restaurants—all in the comfort of your own kitchen.


