Dutch Oven Chicken Delight: Family Favorite Recipe
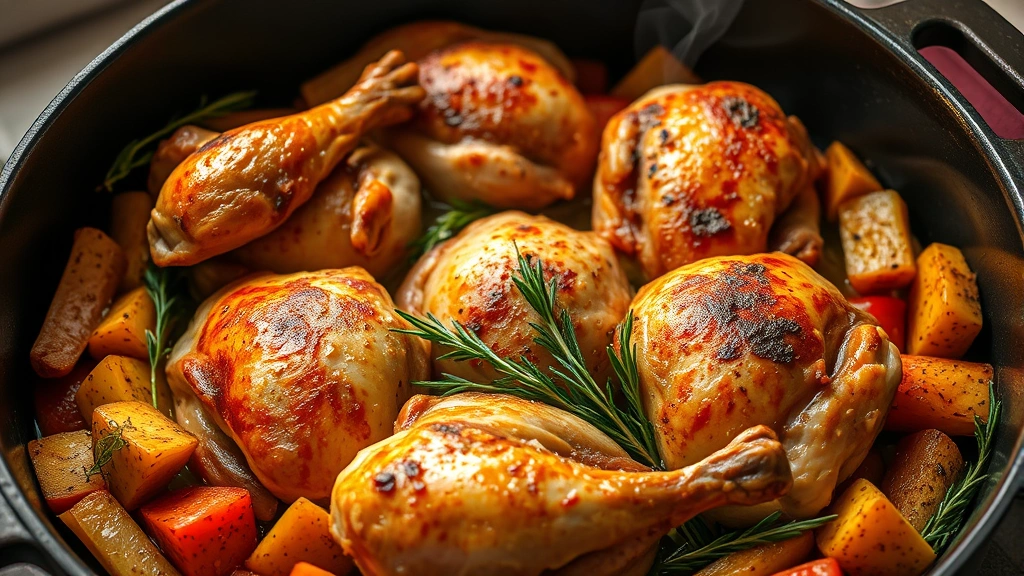
There’s something magical about lifting the lid off a Dutch oven to reveal perfectly tender chicken surrounded by aromatic vegetables and rich, savory sauce. This Dutch oven chicken delight has become a staple in countless kitchens because it delivers restaurant-quality results with minimal effort. Whether you’re cooking for a weeknight dinner or impressing guests at a special gathering, this one-pot wonder combines simplicity with sophistication.
Dutch oven cooking is an ancient technique that has stood the test of time, and for good reason. The heavy cast iron construction distributes heat evenly, creating an ideal environment for braising chicken until it’s fall-apart tender. This recipe for chicken in a Dutch oven proves that you don’t need complicated techniques or exotic ingredients to create something truly memorable. The beauty lies in allowing quality ingredients to shine while the Dutch oven does the heavy lifting.
What makes this dish particularly appealing is its versatility. You can adapt it based on what’s in your pantry, the season, or your family’s preferences. Pair it with Yukon Gold potato recipes for a complete meal, or serve alongside crusty bread for soaking up every drop of sauce.
Why Cook Chicken in a Dutch Oven?
Dutch ovens have earned their place as kitchen essentials for several compelling reasons. The thick walls and heavy lid create an environment where moisture is retained, preventing chicken from drying out during the cooking process. This is particularly important when braising, as the chicken essentially steams in its own juices while absorbing flavors from aromatics, herbs, and broth.
The even heat distribution means you won’t have hot spots that cook the chicken unevenly. Additionally, Dutch ovens transition seamlessly from stovetop to oven, eliminating the need to transfer ingredients between cookware. This not only reduces cleanup but also preserves all those flavorful browned bits stuck to the bottom of the pot—what chefs call the fond, which becomes the foundation of your sauce.
Investing in a quality Dutch oven is investing in decades of reliable cooking. These vessels improve with age and use, developing seasoning that enhances flavor. Unlike many kitchen gadgets that lose relevance, a Dutch oven becomes more valuable over time. For those interested in exploring more one-pot dishes, vegetarian crockpot recipes offer similar convenience with different cooking methods.
Ingredients You’ll Need
This recipe for chicken in a Dutch oven serves 6-8 people and requires straightforward ingredients that most home cooks already have on hand:
- 4-5 pounds bone-in, skin-on chicken pieces (thighs, drumsticks, and breasts work beautifully)
- 3 tablespoons olive oil for browning
- 1 large onion, roughly chopped
- 4-5 cloves garlic, minced
- 2 cups chicken broth (homemade or quality store-bought)
- 1 cup dry white wine (optional but recommended)
- 3-4 medium carrots, cut into thick chunks
- 4-5 medium potatoes (Yukon gold or red potatoes work well)
- 2 bay leaves
- 1 tablespoon fresh thyme (or 1 teaspoon dried)
- 1 tablespoon fresh rosemary (or 1 teaspoon dried)
- Salt and black pepper to taste
- 1 tablespoon Dijon mustard (optional, adds depth)
- 2 tablespoons cornstarch (if you prefer a thicker sauce)
- Fresh parsley for garnish
The quality of your ingredients directly impacts the final dish. Choose chicken pieces with skin intact, as the skin protects the meat during cooking and renders into flavorful fat. Using fresh herbs rather than dried intensifies the aromatic profile, though dried herbs work in a pinch.
Preparation Steps
Success in Dutch oven cooking begins with proper preparation. Mise en place—having all ingredients prepped and ready—ensures a smooth cooking process without scrambling mid-recipe.
Step 1: Prepare Your Ingredients
Pat the chicken pieces dry with paper towels. Moisture on the surface prevents proper browning, so this step is crucial. Chop your onion into large chunks rather than fine pieces; they’ll soften during cooking and break down naturally. Cut carrots into thick 2-inch pieces and potatoes into 1.5-inch chunks. Aim for uniform sizing so everything cooks at the same rate. Mince your garlic fresh rather than using pre-minced garlic, which has diminished flavor and aroma.
Step 2: Season the Chicken
Generously season both sides of each chicken piece with salt and pepper. Don’t be timid—this is your primary seasoning opportunity. Let the seasoned chicken sit at room temperature for 15-20 minutes. This allows the salt to penetrate the meat, enhancing flavor throughout rather than just on the surface.
Step 3: Preheat Your Dutch Oven
Place your Dutch oven over medium-high heat and allow it to preheat for 2-3 minutes. Add the olive oil, swirling to coat the bottom evenly. You’ll know the oil is ready when it shimmers and moves freely across the surface.
The Cooking Process
This Dutch oven chicken delight unfolds through several distinct phases, each building flavor and texture.
Phase 1: Browning the Chicken
Working in batches to avoid crowding, carefully place chicken pieces skin-side down in the hot oil. Resist the urge to move them around; let them sit undisturbed for 4-5 minutes until the skin turns golden brown and begins rendering fat. Flip each piece and brown the other side for 3-4 minutes. Transfer browned chicken to a clean plate. This browning process, called the Maillard reaction, develops complex flavors that form the foundation of your sauce. For a deeper understanding of cooking techniques, Culinary School Central offers comprehensive guides on fundamental cooking methods.
Phase 2: Building Aromatic Base
In the same pot with the rendered chicken fat, add your chopped onion and cook for 3-4 minutes, stirring occasionally, until it begins to soften and turn translucent. Add minced garlic and cook for another minute until fragrant. This aromatic base—onion, garlic, and fat—becomes the flavor foundation for your entire dish.
Phase 3: Deglazing and Sauce Building
Pour in the white wine (or additional broth if you prefer not to use wine) and use a wooden spoon to scrape up all those browned bits stuck to the bottom of the pot. This fond contains concentrated flavor and should completely dissolve into the liquid. Add the chicken broth, bay leaves, thyme, and rosemary. Stir in the Dijon mustard if using. Return the browned chicken pieces to the pot, nestling them among the aromatics.
Phase 4: Adding Vegetables
Distribute the carrot and potato chunks around the chicken. These vegetables will cook in the braising liquid, absorbing flavors while contributing their own sweetness and earthiness to the dish. The potatoes also help thicken the sauce naturally as their starches leach into the liquid.
Phase 5: Braising
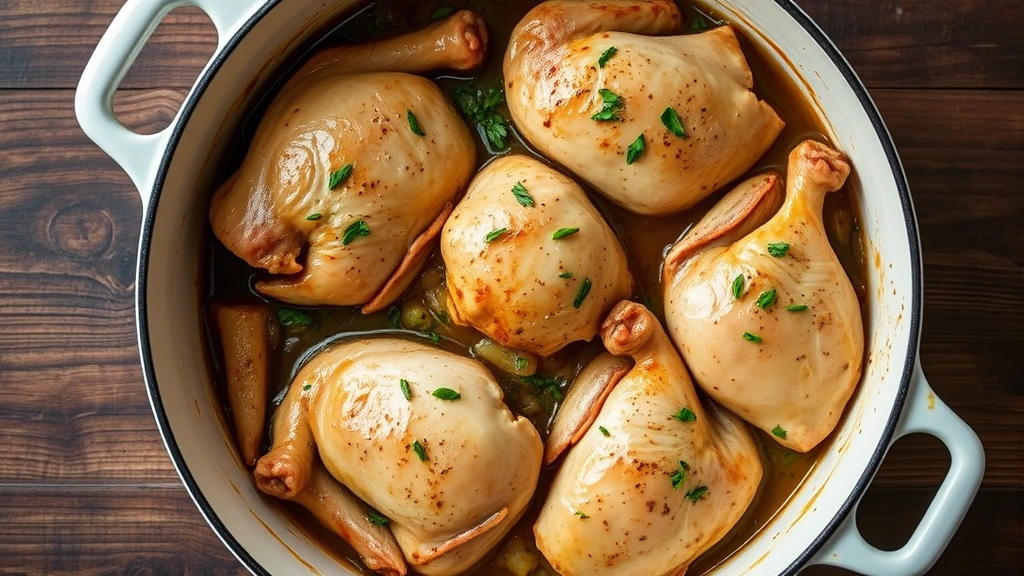
Bring the liquid to a gentle simmer on the stovetop, then cover with the Dutch oven lid and transfer to a preheated 375°F oven. Braise for 45-60 minutes, depending on the size of your chicken pieces. Thighs and drumsticks require the full time; breasts may be done in 40 minutes. The chicken is ready when the meat pulls easily from the bone and reaches an internal temperature of 165°F.
If you prefer a thicker sauce, mix the cornstarch with 2 tablespoons cold water to create a slurry. Remove the pot from the oven, place on the stovetop over medium heat, and stir in the cornstarch mixture. Simmer for 2-3 minutes until the sauce thickens to your desired consistency.

Delicious Variations
The beauty of this recipe for chicken in a Dutch oven lies in its adaptability. Consider these variations based on your preferences and available ingredients:
Mediterranean Version
Replace thyme and rosemary with oregano and basil. Add sun-dried tomatoes, Kalamata olives, and fresh lemon juice. This variation pairs wonderfully with crusty bread for soaking up the vibrant sauce.
Autumn Harvest
Substitute some potatoes with butternut squash chunks and add apple cider instead of white wine. Include sage instead of thyme. This version captures fall flavors perfectly and connects beautifully with fall recipes that celebrate seasonal produce.
Creamy Version
After braising, remove the chicken and vegetables to a serving dish. Stir heavy cream into the pan sauce over low heat, creating a silky, luxurious sauce. Add a splash of brandy for sophistication.
Spanish-Inspired
Use smoked paprika as a primary spice, add chorizo slices, and incorporate saffron-infused broth. Include bell peppers with the other vegetables for color and sweetness.
Asian Fusion
Replace white wine with sake or rice wine. Use ginger and garlic as aromatics, add soy sauce to the broth, and include bok choy or snap peas as vegetables. Garnish with sesame seeds and scallions.
Serving Suggestions
Presentation elevates any dish, and this Dutch oven chicken delight deserves an attractive presentation:
Classic Plating
Ladle the chicken and sauce into wide bowls or shallow plates, arranging vegetables artfully around the meat. Garnish with fresh parsley and a crack of fresh pepper. This presentation showcases the beauty of the dish while keeping everything warm.
Potato Pairings
Serve alongside roasted red potatoes recipe for a double-potato meal, or try Mississippi mud potatoes recipe for a more indulgent side. Alternatively, serve over creamy mashed potatoes or egg noodles to catch every drop of sauce.
Bread and Sides
Crusty bread is essential for soaking up the sauce. Consider making easy homemade bread recipes to accompany this dish. A simple green salad or roasted green beans provide lightness and color contrast to the rich braised chicken.
Wine Pairing
If you used white wine in the recipe, continue that theme with a medium-bodied white like Pinot Grigio or Sauvignon Blanc. For red wine versions, a light Pinot Noir complements the braised chicken beautifully without overpowering the delicate flavors.
Storage and Make-Ahead Tips
Refrigerator Storage
This dish actually improves with time as flavors meld and deepen. Store in an airtight container for up to 4 days. The rendered fat from the chicken will solidify on top during refrigeration, which actually helps preserve the dish and keeps it moist when reheating.
Freezing
Dutch oven chicken freezes beautifully for up to 3 months. Cool completely before transferring to freezer-safe containers, leaving some headspace for expansion. Thaw overnight in the refrigerator before reheating gently on the stovetop or in a 325°F oven until warmed through.
Make-Ahead Strategy
Prepare the dish completely the night before and refrigerate. On serving day, simply reheat gently in a 325°F oven for 20-30 minutes until warmed throughout. This makes entertaining stress-free, as your main course is already prepared.
Partial Prep
Brown the chicken and prepare aromatics the morning of cooking. Store chicken in the refrigerator and aromatics separately. Complete the dish in the evening, which takes about 10 minutes of active time before braising.
FAQ
Can I use boneless, skinless chicken breasts?
While possible, bone-in, skin-on pieces are strongly recommended. The bones contribute gelatin and flavor to the braising liquid, while skin protects the meat from drying out. Boneless breasts tend to become dry and stringy during the long cooking time. If using boneless breasts, reduce braising time to 25-30 minutes and monitor closely.
What if I don’t have white wine?
Simply increase the chicken broth to 3 cups total. The wine adds acidity and complexity, but the dish works without it. Alternatively, use apple cider, chicken broth with a splash of vinegar, or even beer for different flavor profiles.
How do I know when the chicken is done?
Use a meat thermometer to check that the thickest part of the thigh reaches 165°F. Additionally, the meat should pull easily from the bone with minimal resistance. Don’t rely solely on color, as braised chicken can appear pale despite being fully cooked.
Can I make this in a slow cooker?
Yes, but the results differ slightly. Skip the browning step (or brown on the stovetop first) and combine everything in the slow cooker. Cook on low for 6-8 hours or high for 3-4 hours. You’ll lose the golden-brown exterior, but the flavor remains excellent. For slow cooker recipes, explore vegetarian crockpot recipes for inspiration on adapting techniques.
Should I cover the Dutch oven while braising?
Yes, absolutely. The lid traps steam, keeping the chicken moist and preventing excessive evaporation of braising liquid. This is crucial for achieving tender results.
Can I add cream to this recipe?
Definitely. After braising, remove chicken and vegetables, then stir in 1 cup heavy cream over low heat. This creates a luxurious sauce. Avoid boiling the cream, as high temperatures can cause it to separate.
What’s the best Dutch oven size for this recipe?
A 5-6 quart Dutch oven is ideal. This provides enough capacity for the chicken, vegetables, and braising liquid while maintaining proper proportions for even cooking. Smaller Dutch ovens may cause overcrowding; larger ones may result in thin sauce.
How can I make this recipe healthier?
Remove the skin before eating to reduce fat content. Use skinless chicken pieces if preferred, though this affects texture. Increase the proportion of vegetables to chicken. Use low-sodium broth and reduce salt. The braising method is inherently healthy, as it requires minimal added fat and preserves nutrients in the vegetables.
Can I use a different oven temperature?
Yes, with time adjustments. At 325°F, braise for 60-75 minutes. At 400°F, reduce to 35-45 minutes. Lower temperatures produce more tender results and allow flavors to develop more fully. Higher temperatures cook faster but may result in less tender meat.
What if my sauce is too thin?
Create a cornstarch slurry by mixing 1 tablespoon cornstarch with 2 tablespoons cold water. Stir into the simmering sauce and cook for 2-3 minutes until thickened. Alternatively, simmer uncovered on the stovetop for 10-15 minutes to reduce and concentrate the sauce naturally.


