Table of Contents
Introduction
There’s something magical about the smell of fresh bread wafting through your kitchen. You know that moment—when you walk into a bakery and that warm, yeasty aroma just hits you? Well, you can create that same experience right at home. And trust me, once you start baking your own bread, store-bought loaves will never taste quite the same.
Here’s the thing about homemade bread: it’s fresher, tastier, and way more satisfying than anything you’ll find on supermarket shelves. Plus, you get to control exactly what goes into it. Many people think bread baking is this complicated, time-consuming process that requires years of training. (I used to think that too!) But the reality is much simpler. With just a few basic ingredients and some straightforward techniques, you can whip up incredible loaves that’ll have your family asking, “Where did you learn to bake like this?” If you’re looking for some tried-and-true recipes to get started, check out these easy homemade bread recipes that work every single time.
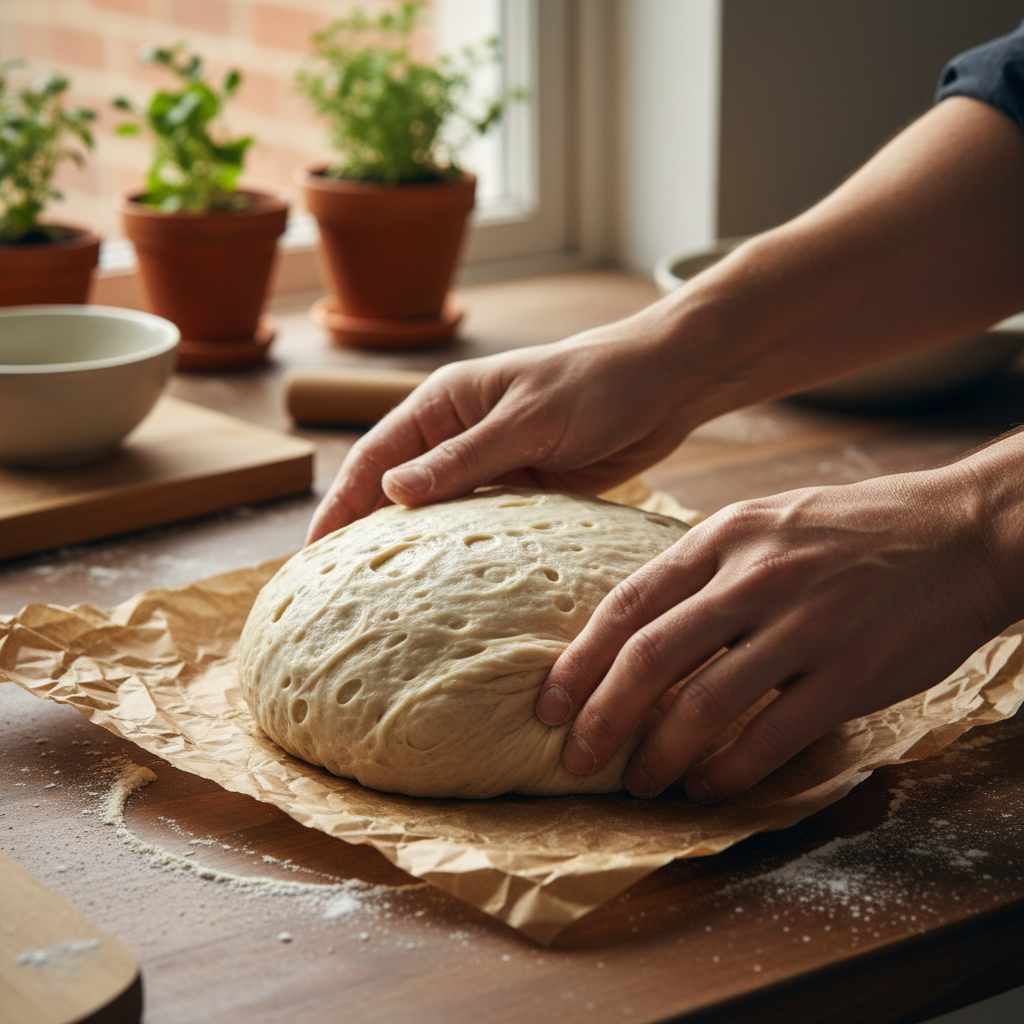
What I love most about bread baking is how it connects you to your food in a way that’s almost lost in our fast-paced world. There’s something deeply satisfying about mixing flour, water, yeast, and salt—ingredients our ancestors have been using for thousands of years—and watching them transform into something nourishing. The kneading process? It’s like meditation for your hands. And waiting for the dough to rise teaches you patience in the best way possible. As you get more comfortable with the basics, you’ll start picking up on subtle cues—how the dough should feel, when it’s perfectly proofed, the exact moment to pull it from the oven. Want to dive deeper into the fundamentals? This guide on how to make homemade bread breaks down everything you need to know.
Now, if you’re someone who cares about eating healthier (and who doesn’t these days?), homemade bread opens up a whole world of possibilities. You can experiment with whole grains, ancient flours, seeds, nuts—whatever your heart desires. Take whole wheat flour, for example. Not only does it add this wonderful, nutty flavor and hearty texture, but you’re also getting more fiber and nutrients than you’d ever find in processed bread. The key is learning how to adjust your technique when working with different flours and ingredients. Understanding the science behind whole grain benefits can really help you make smarter choices for your homemade loaves.
What You’ll Learn in This Guide
Ready to become a bread-baking pro? This guide covers everything you need to go from complete beginner to confident home baker. No fancy equipment required—just enthusiasm and a willingness to get your hands a little floury.
- Basic Ingredients Explained: We’ll break down the essential building blocks of bread—flour types, yeast varieties, the role of salt and water, plus those fun extras that add flavor and personality to your loaves.
- Step-by-Step Bread Making Techniques: From mixing and kneading to timing those rises perfectly, you’ll learn the hands-on skills that make the difference between okay bread and absolutely amazing bread.
- Easy Homemade Bread Recipes: Start with foolproof recipes like no-knead bread (yes, it’s a real thing!), classic white bread that rivals any bakery, and wholesome whole wheat options that actually taste good.
- Tips for Success and Storage: Learn the common mistakes that trip up beginners, how to keep your bread fresh longer, and simple tricks that’ll have you baking like you’ve been doing it for years.
As we work through this together, you’ll start to understand why bakers talk about bread like it’s alive—because in many ways, it is. The yeast is working, the gluten is developing, the flavors are building. It’s pretty amazing when you think about it. You’ll pick up tips on choosing quality ingredients (spoiler: it makes a huge difference), learn when to use active dry versus instant yeast, and discover how different flours behave. Whether you’re planning to bake for your family’s daily meals, special occasions, or just because you love the process, this knowledge will give you the confidence to experiment and create. And if you’re looking for more healthy recipe inspiration to pair with your homemade bread, you might enjoy browsing these best healthy food recipes.
I’ve designed this guide to be as approachable as possible—no intimidating jargon or complicated techniques that’ll leave you confused. We’ll cover the essential tools (most of which you probably already have), walk through each step of the process, and I’ll share the kind of practical tips that only come from making lots of bread over the years. You’ll learn how to troubleshoot when things don’t go quite as planned (and they sometimes won’t—that’s part of the learning process!), plus storage tricks that’ll keep your bread tasting fresh for days. Before you dive in, though, it might help to read up on how to start baking with confidence so you feel prepared for this delicious adventure.
So, are you ready to fill your kitchen with the incredible aroma of fresh bread? By the time you finish this guide, you’ll have all the skills and knowledge you need to bake loaves that’ll make your neighbors jealous. Let’s roll up our sleeves and start creating some bread magic!
Now that we’ve covered the basics, let’s get our hands dirty with the real fun stuff—the techniques and recipes that turn flour, water, and yeast into something magical. Here’s the thing about bread making: once you understand how these simple ingredients work together, you’ll find yourself experimenting and creating loaves that are uniquely yours. From getting the perfect knead to nailing that first rise, we’re going to walk through everything you need to know to avoid the common mistakes that trip up new bakers. Plus, I’ll share some tricks for keeping your homemade bread fresh and delicious for days (because let’s be honest, nothing beats that fresh-baked taste).
Simple Bread Making Techniques and Tips for Success
Let’s start with the fundamentals that make or break your bread. Kneading isn’t just about working out your frustrations (though it’s great for that too)—it’s actually developing the gluten network that gives your bread its structure and that satisfying chew. Get this wrong, and you’ll end up with a dense brick instead of a fluffy loaf. Then there’s the rising phase, or what bakers call proofing. This is where the magic happens: your yeast comes alive, feasting on sugars and creating those tiny gas bubbles that make bread light and airy. The trick? Finding that sweet spot of warmth without turning your kitchen into a sauna.
Your oven is where dreams come true or die a tragic death. Temperature matters—a lot. Too hot and you’ll get a burnt crust with raw dough inside. Too cool and your bread will be pale and sad. The good news? There’s a simple test that’ll save you every time: tap the bottom of your loaf. If it sounds hollow, you’re golden. If it thuds like a paperweight, give it a few more minutes. And here’s something that changed my bread game completely: following proven recipes when you’re starting out. Trust me, once you nail the basics, then you can go wild with your own creations.
Key Aspects of Bread Making Techniques
Here are the game-changing techniques that will level up your bread baking:
- Kneading Techniques: Think of kneading as a gentle workout for your dough—fold, push, turn, repeat. You want to develop that stretchy, elastic texture without beating it to death (tough bread is nobody’s friend). Can’t handle all that kneading? No-knead recipes are your best friend—they let time do the work while you binge-watch your favorite show.
- Rising Environment: Your dough is basically a living thing that needs just the right conditions to thrive. Aim for around 75-80°F—think cozy, not tropical. I like to use the top of my preheated oven or even inside with just the light on. Cover with a damp towel or plastic wrap because nobody likes crusty, dried-out dough.
- Baking Temperature and Time: Start hot (around 425°F) to get that gorgeous crust, then adjust as needed. Sourdough lovers, here’s a pro tip: toss a pan of water in the bottom of your oven for the first 15 minutes. That steam creates an incredible crust that’ll make you feel like a bakery pro.
- Checking Doneness: Beyond the hollow-tap test, grab a thermometer if you want to be absolutely sure—your bread’s internal temp should hit 190-200°F. Look for that deep golden color too. Trust your eyes and ears; they rarely lie when it comes to bread.
Once you’ve got these techniques down pat, the world of bread recipes opens up before you. Start simple, build confidence, and then let your creativity run wild. There’s nothing quite like the satisfaction of pulling a perfect loaf from your own oven.
Popular Easy Homemade Bread Recipes and Storage Tips
Ready to choose your first adventure? No-knead bread is like the gateway drug of bread making—minimal effort, maximum reward. It’s perfect for busy people who still want that homemade magic. Just mix, wait, and bake. Classic white bread is another winner, giving you that soft, pillowy texture that’s perfect for everything from morning toast to midnight snacks. Want to feel a bit healthier? Whole wheat bread brings more nutrition to the table, though it does require a little extra patience and water since those whole grains are thirstier than their refined cousins.
Now, let’s talk about keeping your beautiful bread fresh—because stale bread is a tragedy that’s completely preventable. Skip the fridge (I know, counterintuitive, right?). Cold actually speeds up staling. Instead, wrap your loaf in a clean kitchen towel or stash it in a bread box. Room temperature is your friend here. Planning to save some for later? Slice it up and freeze individual portions. You’ll thank yourself when you can grab a piece straight from the freezer for instant toast.
Key Elements of Homemade Bread Recipes and Storage
Here’s what you need to know to nail your recipes and keep that bread fresh:
- No-Knead Bread Benefits: This is bread making for the modern world—let time and moisture do the heavy lifting while you live your life. The result? A crusty, hole-filled interior that looks like it came from a fancy bakery. Just follow the ratios religiously; this is one time when precision pays off.
- Basic White Bread Tips: Use bread flour if you can find it (the extra protein makes stronger gluten), but all-purpose works fine too. Mix thoroughly, knead until the dough feels smooth and elastic, and watch those rising times like a hawk. Over-proofed dough is like an overinflated balloon—it’ll collapse on you.
- Whole Wheat Adjustments: Whole wheat flour is the thirsty cousin of white flour—it needs more water and takes its sweet time rising. Be patient and add a bit more liquid than you think you need. Your reward will be a hearty, nutty loaf that actually has some nutritional value.
- Storage and Freshness Maintenance: Room temperature wrapped in breathable fabric keeps that crust crispy and the inside soft. For longer storage, slice and freeze—you can toast straight from frozen, and it tastes almost as good as fresh. Almost.
The beauty of bread making lies in the experimentation. Once you’ve mastered these basics, every loaf becomes a chance to try something new. For more inspiration and detailed step-by-step guides, check out these easy homemade bread recipes and learn how to make homemade bread with expert tips that’ll take your baking to the next level.

Here’s the thing about baking bread at home—it’s way more doable than you think. You literally need four ingredients: flour, yeast, water, and salt. That’s it. Yet somehow, mixing these together and watching them transform into golden, crusty loaves that make your whole house smell incredible? Pure magic. And yes, there’s definitely some technique involved (kneading takes practice, and timing matters), but honestly? The learning curve is part of the fun.
Once you nail down the basics, a whole world opens up. Classic white bread for the kids’ sandwiches. Dense, nutty whole wheat that actually tastes good. Maybe some herbs thrown in, or seeds, or whatever sounds interesting that week. Your family’s preferences become your playground. The best part? You know exactly what’s going into each loaf—no mystery ingredients or preservatives. Just real food that happens to taste amazing.
Now, let’s talk about keeping that bread fresh—because nobody likes stale homemade bread (such a waste!). A simple kitchen towel works wonders for short-term storage. Planning ahead? Slice and freeze portions. Your future self will thank you when you’re pulling fresh slices from the freezer on busy mornings. It’s these little tricks that make homemade bread actually practical, not just a weekend hobby.
Ready to dive in? Start with our easy homemade bread recipes—they’re seriously beginner-friendly and won’t leave you guessing. Want to get really good at this? Check out our detailed guide on how to make homemade bread for those pro tips that make all the difference. And since you’re already thinking about real food, why not browse our best healthy food recipes to pair with your fresh bread? Speaking of healthy choices, maintaining a balanced diet becomes so much easier when you’re making wholesome food from scratch.
Look, bread baking isn’t just about the end result (though warm, fresh bread is pretty hard to beat). It’s about slowing down, working with your hands, and creating something real in a world full of shortcuts. Your kitchen’s about to become a much more interesting place. Trust me—once you pull that first loaf from the oven, you’ll be hooked.
Frequently Asked Questions
-
How long does it take to make homemade bread?
- Most recipes take about 2-3 hours start to finish, but don’t panic—you’re not actively working the whole time. It’s mostly waiting for the dough to do its thing while you go about your day.
-
Do I need special equipment to make bread at home?
- Nope! Just basic stuff you probably already have: mixing bowls, a wooden spoon, and your oven. Sure, fancy equipment exists, but your hands and standard kitchen tools work perfectly fine.
-
Can I use whole wheat flour instead of all-purpose?
- Absolutely, but heads up—whole wheat flour drinks up more water and takes longer to rise. Start with a 50/50 mix if you’re new to this, then experiment from there.