Ultimate Biscoff Cheesecake: Baker Approved Recipe
Biscoff cheesecake represents the pinnacle of indulgence for anyone who loves the caramel-spiced complexity of Biscoff cookies combined with creamy, rich cheesecake. This baker-approved recipe has been refined through countless kitchen tests to deliver the perfect balance of crunch, creaminess, and that signature Biscoff flavor that keeps people coming back for more. Whether you’re preparing this for a special occasion or simply treating yourself to an elevated dessert, this comprehensive guide will walk you through every step with professional techniques and baker insights.
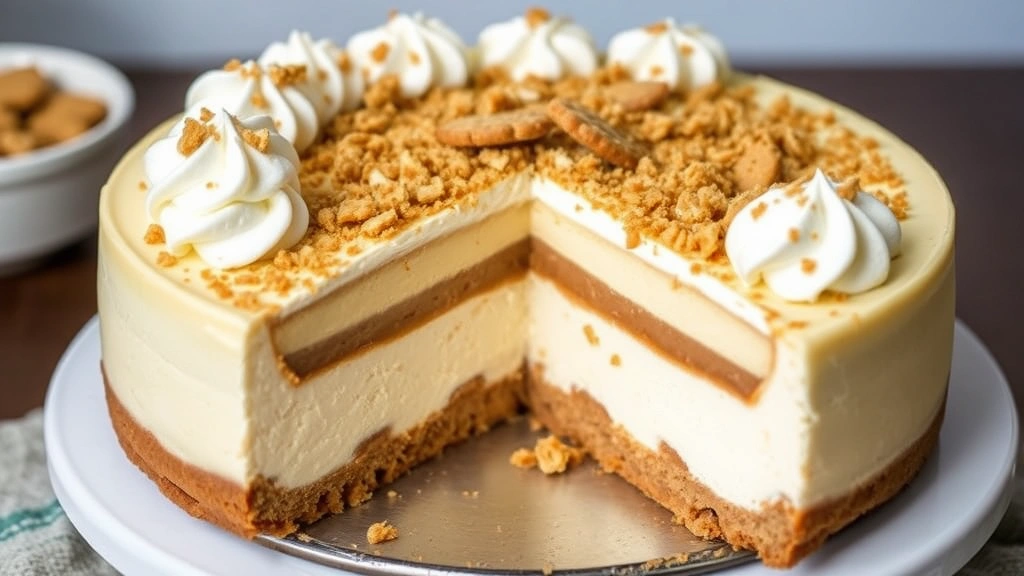
What makes this Biscoff cheesecake recipe stand out from others is the layered approach to flavor development. We’re not just sprinkling Biscoff crumbs on top—we’re infusing the filling with Biscoff spread, creating a crust that’s entirely made from crushed Biscoff cookies, and finishing with a Biscoff cookie crumb topping that adds textural contrast. The result is a dessert that’s greater than the sum of its parts, with each bite delivering consistent Biscoff flavor throughout.
Ingredients You’ll Need
The foundation of any excellent biscoff cheesecake recipe starts with quality ingredients. Don’t skip on the cream cheese—you’ll want full-fat, room temperature cream cheese for the smoothest texture. Here’s exactly what you need:
For the Crust:
- 2 cups (200g) Biscoff cookies, finely crushed
- 6 tablespoons (85g) unsalted butter, melted
- 2 tablespoons (25g) granulated sugar
- 1/4 teaspoon fine sea salt
For the Cheesecake Filling:
- 32 ounces (900g) cream cheese, room temperature
- 1 cup (200g) granulated sugar
- 1/2 cup (120ml) Biscoff spread (or cookie butter)
- 1/4 cup (60ml) sour cream, room temperature
- 3 large eggs, room temperature
- 2 tablespoons (16g) all-purpose flour
- 1 teaspoon vanilla extract
- 1/2 teaspoon ground cinnamon
- 1/4 teaspoon ground ginger
- Pinch of nutmeg
For the Topping:
- 1 cup (100g) Biscoff cookies, crushed into medium pieces
- 3 tablespoons (45g) Biscoff spread
- 2 tablespoons (28g) unsalted butter
- Pinch of sea salt
Making the Perfect Biscoff Crust
The crust is your first opportunity to make a statement with this biscoff cheesecake recipe. A proper crust provides structural integrity and prevents the dreaded soggy bottom that can plague amateur cheesecake bakers.
Start by preheating your oven to 325°F (163°C). Line the bottom of a 9-inch springform pan with parchment paper, then wrap the outside of the pan with heavy-duty aluminum foil, extending it up the sides. This prevents water from seeping into your cheesecake during the water bath process.
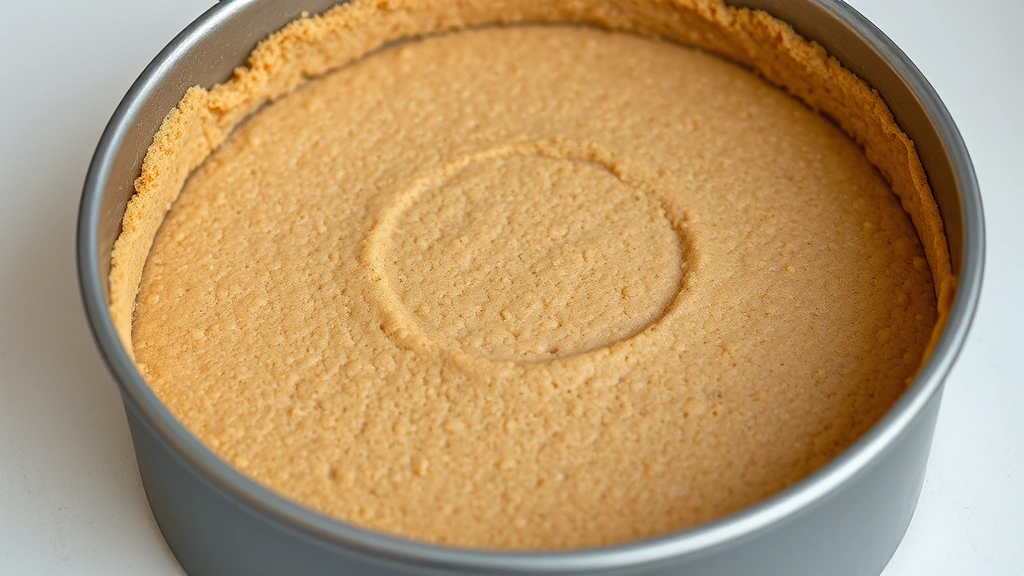
Crush your Biscoff cookies into fine crumbs—you’re aiming for a texture similar to breadcrumbs, not powder. Combine the crushed cookies, melted butter, sugar, and salt in a medium bowl, stirring until the mixture resembles wet sand. The butter should distribute evenly throughout, and when you squeeze a handful, it should hold together.
Press this mixture firmly into the bottom of your prepared pan using the bottom of a measuring cup. Create an even layer about 1/4 inch thick. You can also press the mixture slightly up the sides of the pan for added stability and flavor. Bake this crust for 8-10 minutes until it’s set but not browned—this is called a “blind bake” and prevents the crust from becoming soggy.
Remove the crust from the oven and let it cool while you prepare the filling. The crust should be slightly cooled but still warm when you pour the filling over it, which helps create a seal and better integration of flavors.
Preparing the Creamy Cheesecake Filling
This is where the magic happens. The filling is the heart of your biscoff cheesecake recipe, and proper technique ensures a smooth, crack-free result.
Place your room-temperature cream cheese in the bowl of an electric mixer fitted with the paddle attachment. Beat on medium-low speed for about 2 minutes, scraping down the bowl frequently, until the cream cheese is smooth and creamy. This step is crucial—cold cream cheese will result in lumps, and overmixing will incorporate too much air, leading to cracks during baking.
Add the sugar gradually while continuing to beat on medium-low speed. Mix for approximately 3-4 minutes until well combined. The mixture should look pale and fluffy, but don’t overbeat. Scrape down the bowl frequently to ensure even incorporation.
Add the Biscoff spread and mix on low speed for about 1 minute. The spread should be evenly distributed throughout the filling. If your Biscoff spread is very thick, you can warm it slightly in the microwave (15-20 seconds) to make it more pourable.
With the mixer on low speed, add the sour cream and vanilla extract. Mix just until combined—about 30 seconds. Sour cream adds tanginess that balances the sweetness and improves texture.
Add the flour, cinnamon, ginger, and nutmeg. These spices complement the caramel notes in Biscoff cookies beautifully. Mix on low speed for just 15-20 seconds until the flour is barely incorporated. Overmixing at this stage introduces unnecessary air.
Finally, add the eggs one at a time, mixing on low speed for about 10-15 seconds after each addition. This is the most critical point—overmixing after adding eggs is the primary cause of cracks in cheesecake. You want just enough mixing to incorporate each egg, no more.
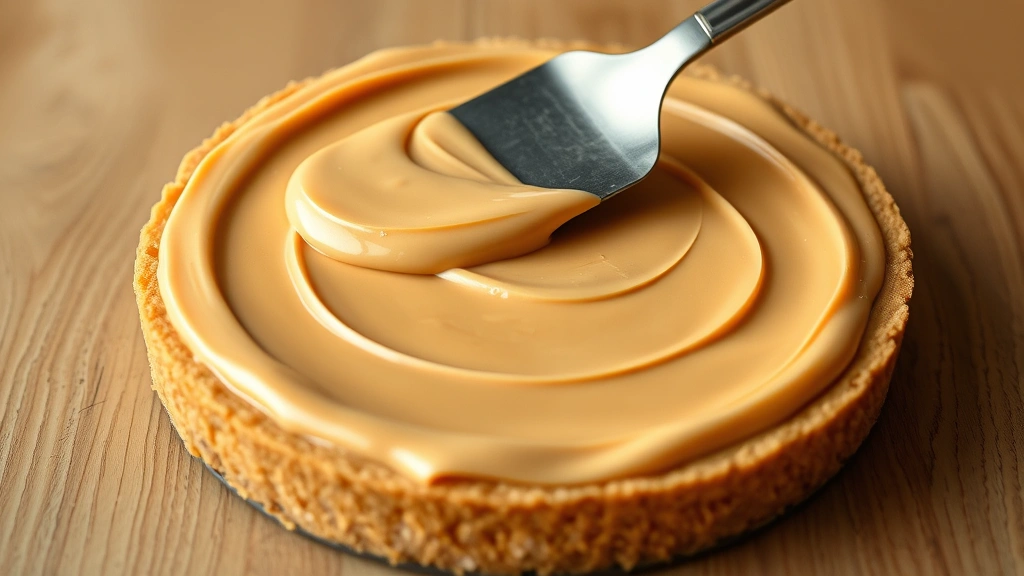
Pour the filling into your cooled crust, smoothing the top with an offset spatula or the back of a spoon.
Baking and Cooling Process
Proper baking and cooling are non-negotiable if you want a perfect biscoff cheesecake recipe. Many bakers fail here by rushing the cooling process.
Place your filled springform pan inside a larger roasting pan. Pour hot water into the roasting pan until it reaches halfway up the sides of the springform pan. This water bath provides gentle, even heat that prevents the cheesecake from baking too quickly on the outside while remaining underdone in the center.
Bake for 55-70 minutes. The cheesecake is done when the edges are set but the center still has a slight jiggle—about a 2-inch diameter circle in the very center should wobble slightly when you gently shake the pan. Don’t overbake; a cheesecake that appears fully set will be dry and dense.
Turn off the oven and crack the door open about 4 inches. Let the cheesecake sit in the cooling oven for 1 hour. This gradual temperature change prevents the sudden contraction that causes cracks.
Remove the cheesecake from the oven and let it cool at room temperature for another hour. Then refrigerate for at least 8 hours, preferably overnight. This extended cooling period allows the cheesecake to set properly and develop its full flavor.
Creating the Biscoff Topping
The topping adds texture and reinforces the Biscoff flavor profile of your cheesecake. This should be applied after the cheesecake has completely cooled and set.
Combine the Biscoff spread and butter in a small saucepan over low heat, stirring occasionally until melted and smooth—about 2 minutes. Remove from heat and let cool for 2-3 minutes.
Fold the crushed Biscoff cookies into the Biscoff-butter mixture along with the sea salt. The cookie pieces should be coated but still maintain some texture. You’re aiming for a consistency that will spread easily but hold its shape.
Spread this mixture evenly over the top of your chilled cheesecake. You can create a rustic, textured look by using the back of a spoon to create peaks and valleys, or smooth it for a more refined appearance. Some bakers prefer to preserve the topping by applying a thin layer of gelatin, which adds shine and prevents drying.
Return the topped cheesecake to the refrigerator for at least 2 hours before serving. This allows the topping to set and bond with the filling.
Baker Tips for Success
Professional bakers have learned countless lessons through trial and error. Here are the techniques that separate good cheesecakes from exceptional ones:
Room Temperature Ingredients: This cannot be overstated. Cold ingredients don’t blend smoothly, resulting in lumpy filling. Remove cream cheese, eggs, and sour cream from the refrigerator at least 1 hour before baking.
Don’t Skip the Water Bath: A water bath is essential for even baking. It’s not optional. The humid heat prevents the top from cracking and ensures even cooking throughout.
Invest in a Quality Springform Pan: A flimsy pan can leak, compromising your water bath. Spend the extra money on a sturdy, high-quality pan.
Use an Oven Thermometer: Oven temperatures vary significantly. An oven thermometer ensures your oven is actually at 325°F, not 340°F or 310°F, which would affect baking time and results.
Don’t Open the Oven Door: Every time you open the oven door, heat escapes and temperature drops. Resist the urge to peek. If you must check doneness, do it only in the final 10 minutes of baking.
Make a Test Cake First: If you’re new to biscoff cheesecake recipe making, consider baking a smaller 6-inch version first to understand your specific oven’s behavior.
Complement with Other Desserts: If serving at a gathering, consider pairing this rich cheesecake with lighter options. You might offer chocolate truffles or refreshing smoothies as palate cleansers.
Storage and Serving Guide
Proper storage ensures your biscoff cheesecake recipe remains delicious for days.
Refrigerator Storage: Cover the cheesecake loosely with plastic wrap (avoiding direct contact with the topping) and refrigerate for up to 5 days. The cheesecake actually improves slightly after 2-3 days as flavors meld.
Freezer Storage: Cheesecake freezes beautifully. Wrap the entire cheesecake (in its springform pan) tightly with plastic wrap, then foil. Freeze for up to 2 months. Thaw in the refrigerator overnight before serving. This food waste reduction approach allows you to bake ahead for parties or special occasions.
Serving: Remove the cheesecake from the refrigerator 10-15 minutes before serving. This allows the flavors to develop and the texture to soften slightly. Use a thin-bladed knife dipped in hot water and wiped clean between each slice for clean cuts.
Portion Size: This biscoff cheesecake recipe yields approximately 12-14 slices. Given its richness, this is generous—many people find one slice completely satisfying.
FAQ
Can I make this biscoff cheesecake recipe without a water bath?
Not recommended. The water bath is essential for preventing cracks and ensuring even baking. However, if you absolutely cannot use one, place a shallow pan of boiling water on the rack below the cheesecake. The results won’t be quite as reliable, but this is better than nothing.
What if my cheesecake cracks?
Don’t panic. Cracks can be covered with the Biscoff topping. Alternatively, you can cover cracks with a thin layer of sour cream mixed with a little sugar, or even a drizzle of melted Biscoff spread. Many bakers intentionally create a rustic aesthetic with visible cracks.
Can I substitute the Biscoff spread?
Biscoff spread is specifically designed for this recipe, but if unavailable, you could use cookie butter (which is essentially the same thing) or even a high-quality caramel sauce mixed with crushed Biscoff cookies. The flavor won’t be identical, but it will still be delicious.
How long does this cheesecake take to make?
Active preparation time is approximately 30-40 minutes. However, total time including baking and cooling is 10-12 hours minimum (including overnight refrigeration). Plan accordingly when making this for an event.
Why is my cheesecake dense and heavy?
Density typically results from overmixing the filling, especially after adding eggs. Mix on low speed and stop as soon as ingredients are just combined. Additionally, overbaking causes density—remember, the cheesecake should jiggle slightly in the center when done.
Can I make individual cheesecakes instead of one large one?
Yes, absolutely. Use a muffin tin lined with cupcake liners or ramekins. Reduce baking time to 20-25 minutes. Individual portions also make elegant desserts for plating and presentation.
What’s the best way to serve this biscoff cheesecake recipe?
Serve slices on chilled plates with a small dollop of whipped cream or crème fraîche. A sprinkle of crushed Biscoff cookies on the plate adds visual appeal. Some bakers enjoy a drizzle of caramel sauce or Biscoff spread warmed slightly for dipping.
Is this recipe suitable for dietary restrictions?
Traditional biscoff cheesecake contains dairy and eggs. However, you can find dairy-free cream cheese alternatives and egg substitutes (such as appleseed or aquafaba) that work reasonably well, though the texture will differ slightly from the original recipe.


