Table of Contents
Introduction
Let’s talk about chocolate truffles. You know those little round balls of pure heaven that practically melt on your tongue? The ones that make you close your eyes and forget about everything else for just a moment? Yeah, those. Made with rich chocolate and silky ganache, they’re basically edible perfection in bite-sized form. Ever wondered how to make these magical little treats yourself? Trust me—it’s easier than you think, and way more fun than buying them from a fancy shop.
Here’s the thing about making truffles: it’s not just about following steps in a recipe. It’s about understanding your ingredients and getting a feel for the process. Whether you’re planning something special for Valentine’s Day, want to impress your friends, or just need a weekend project that ends in chocolate (always a good choice), learning the basics opens up a whole world of flavor possibilities. If you’re someone who loves diving into homemade cooking, you might find that exploring homemade culinary techniques gives you that same satisfying feeling of creating something amazing from scratch. And honestly? Once you get comfortable with chocolate, you’ll probably want to try other sweet adventures—maybe some killer chocolate chip cookie recipes to round out your dessert game.
Now, I know what you’re thinking. “But aren’t truffles basically sugar bombs?” Fair question. While they’re definitely a treat (and should be enjoyed as such), there’s something to be said for using high-quality chocolate and natural flavorings. You’re in control of what goes in them, which is pretty cool. If you’re curious about how indulgent treats can fit into a balanced lifestyle, checking out resources on healthy nutrition plans might give you some perspective. Plus, pairing your truffle-making session with some relaxing herbal teas and their benefits could make for the perfect cozy afternoon.
Making chocolate truffles is part science, part art, and completely addictive once you get started. This guide will walk you through everything—from picking your chocolate (yes, it matters) to getting that perfect ganache consistency that makes or breaks the whole operation. Whether you’re a complete beginner or someone who’s tried before and ended up with chocolate soup (we’ve all been there), you’ll find what you need here to create truffles that actually look and taste like they came from a fancy chocolatier.
What You’ll Learn in This Guide
We’re going to cover everything you need to become a truffle-making machine. Here’s what’s coming your way:
- Understanding the Basics: What makes a truffle a truffle, and why these little spheres of joy have captured hearts everywhere. We’ll break down the key ingredients and techniques that create that signature smooth, rich texture everyone raves about.
- The Step-by-Step Process: We’ll walk through melting chocolate without turning it into a grainy mess, making ganache that’s actually the right consistency, shaping your truffles, and coating them with whatever flavors make your taste buds happy.
- Common Mistakes to Avoid: Let’s be real—chocolate can be temperamental. We’ll cover the most common ways things go wrong (like overheating your chocolate or ending up with ganache that won’t cooperate) and how to fix them or avoid them altogether.
- Storage and Serving Tips: How to keep your homemade truffles fresh and delicious, plus some ideas for when and how to serve these beauties—or package them up as gifts that’ll make you everyone’s favorite person.
Up next, we’ll get into the nitty-gritty of ingredients and tools. Then we’ll tackle the chocolate melting and ganache prep that forms the foundation of any great truffle. (And if you’re feeling ambitious about expanding your homemade repertoire, you might enjoy learning how to make homemade pasta too—there’s something magical about creating food from scratch.)
By the time we’re done here, you’ll not only know how to make truffles that taste incredible, but you’ll also have the confidence to get creative with flavors and techniques. So grab your apron and get ready to fall in love with chocolate all over again.
Ready to turn your kitchen into a mini chocolate factory? Let’s do this!
There’s something magical about chocolate truffles—that moment when you bite into one and discover that perfect, velvety center. It’s pure indulgence, and honestly? Making them at home is way more rewarding than you’d expect. You get to control every ingredient, experiment with flavors, and create something that rivals (or beats!) what you’d find at fancy chocolate shops. Want to know the secret? It all starts with understanding what you actually need and how to use it. So let’s dive in and turn your kitchen into a truffle-making paradise.
Ingredients and Tools Needed
Here’s the thing about truffle-making—your ingredients and tools can make or break the whole experience. I learned this the hard way when I first started (let’s just say my early attempts were… questionable). The chocolate you choose? That’s your foundation. Go cheap here, and you’ll taste it in every bite. You want chocolate with real depth and character, because that flavor is going to shine through everything else. Heavy cream creates that silky ganache center we’re after, while butter adds richness and that gorgeous shine that makes truffles look so tempting. Then come the fun parts—vanilla, a splash of liqueur, maybe some coffee. These aren’t just add-ons; they’re what make your truffles uniquely yours. If you’re curious about why ingredient quality matters so much, check out this guide on organic versus non-organic food—it really opened my eyes to how much difference quality ingredients can make.
Now, let’s talk tools. You don’t need a fancy kitchen setup, but having the right equipment makes everything so much easier. A double boiler (or even just a microwave-safe bowl) keeps your chocolate from turning into a burnt mess. Good mixing bowls and spatulas help you create ganache that’s actually smooth instead of lumpy. And truffle scoops? Game changer for getting consistent sizes. Trust me, once you start using proper tools, you’ll wonder how you ever managed without them. Speaking of ingredients that pack a punch, you might want to explore foods rich in antioxidants—premium chocolate varieties are actually loaded with these beneficial compounds.
Key Ingredients
Let’s break down what each ingredient brings to the party.
- High-Quality Chocolate: This is your star player. Look for chocolate with at least 60% cocoa content—it gives you that rich, complex flavor and smooth texture that makes people close their eyes and smile. Dark, milk, or white chocolate all work, so pick what makes you happy.
- Heavy Cream: The magic behind that creamy ganache center. It adds moisture and richness while taming any bitterness from dark chocolate. No substitutions here—you really need the fat content that heavy cream provides.
- Butter: Think of this as your secret weapon. It makes the ganache incredibly creamy and gives it that glossy finish that screams “professional.” Just a little goes a long way.
- Flavorings: Here’s where you get creative. Vanilla extract is classic, but coffee adds depth, and liqueurs like Grand Marnier? Pure elegance. These turn basic truffles into something special.
Essential Tools
The right tools turn a potentially messy process into something actually enjoyable.
- Double Boiler or Microwave-Safe Bowl: Chocolate is temperamental—too much heat and it goes grainy and bitter. Gentle, controlled melting is key, and these tools give you exactly that.
- Mixing Bowls: You’ll need different sizes for different stages. Having a variety on hand means you can work efficiently without constantly washing dishes.
- Spoons or Spatulas: Quality matters here. Good spatulas help you fold ingredients smoothly and scrape every last bit of chocolate from the bowl (because wasting chocolate is basically a crime).
- Truffle Molds or Scoops: These create uniform truffles that look professional and chill evenly. Plus, consistent sizing means they’ll all be ready at the same time.
With your ingredients and tools ready, you’re all set to start the actual truffle-making magic. Let’s walk through each step together.
Step-by-Step Instructions
Making chocolate truffles is like a little dance—each step flows into the next, and when you get the rhythm right, it’s incredibly satisfying. We start by melting chocolate with the care it deserves (no rushing here!), then create that dreamy ganache that forms the heart of each truffle. After it chills and firms up, we shape it into perfect little spheres and coat them in whatever strikes your fancy. The whole process is surprisingly meditative once you get the hang of it. If you’re interested in other homemade treats that require similar attention to texture and temperature, you might enjoy learning about how to make homemade ice cream—there are some interesting parallels in technique.
Want to get creative with your approach? Sometimes thinking outside the box with kitchen equipment can open up new possibilities. For instance, understanding how to use a pressure cooker might inspire some interesting modifications to traditional dessert techniques—though for truffles, we’re sticking with the tried-and-true methods that work beautifully.
Melting the Chocolate
This is where patience pays off—rush this step and you’ll regret it.
- Gentle Heat Application: Use your double boiler or microwave on low power, and stir frequently. Think of chocolate as delicate—it needs gentle coaxing, not aggressive heat. Burnt chocolate tastes awful and there’s no fixing it.
- Temperature Awareness: Keep it between 104-113°F (40-45°C). Go higher and your chocolate might separate or turn grainy. A kitchen thermometer is your friend here.
- Use Quality Chocolate: Splurge on couverture or premium baking chocolate. Cheap chocolate often has fillers that make it behave badly when melted. You’ll taste the difference, I promise.
- Avoid Moisture: Water is chocolate’s enemy. Even a tiny drop can make it seize up and become unusable. Keep everything bone dry.
Preparing the Ganache
This is where the magic happens—transforming simple ingredients into something luxurious.
- Heat Cream and Butter: Warm them until they’re just starting to bubble. This ensures they’ll blend seamlessly with your melted chocolate, creating that glossy, smooth ganache you’re after.
- Combine with Melted Chocolate: Pour the warm cream mixture over your melted chocolate and let it sit for a moment. This softens everything up before you stir—and when you do stir, be gentle and patient.
- Incorporate Flavorings: Now’s the time to add your vanilla, coffee, or that splash of liqueur. Stir it in while the ganache is still warm so the flavors distribute evenly.
- Chill Properly: Into the fridge it goes! You need it firm enough to shape but not rock-hard. A few hours usually does it, but check periodically—you want it to hold its shape when you scoop it.
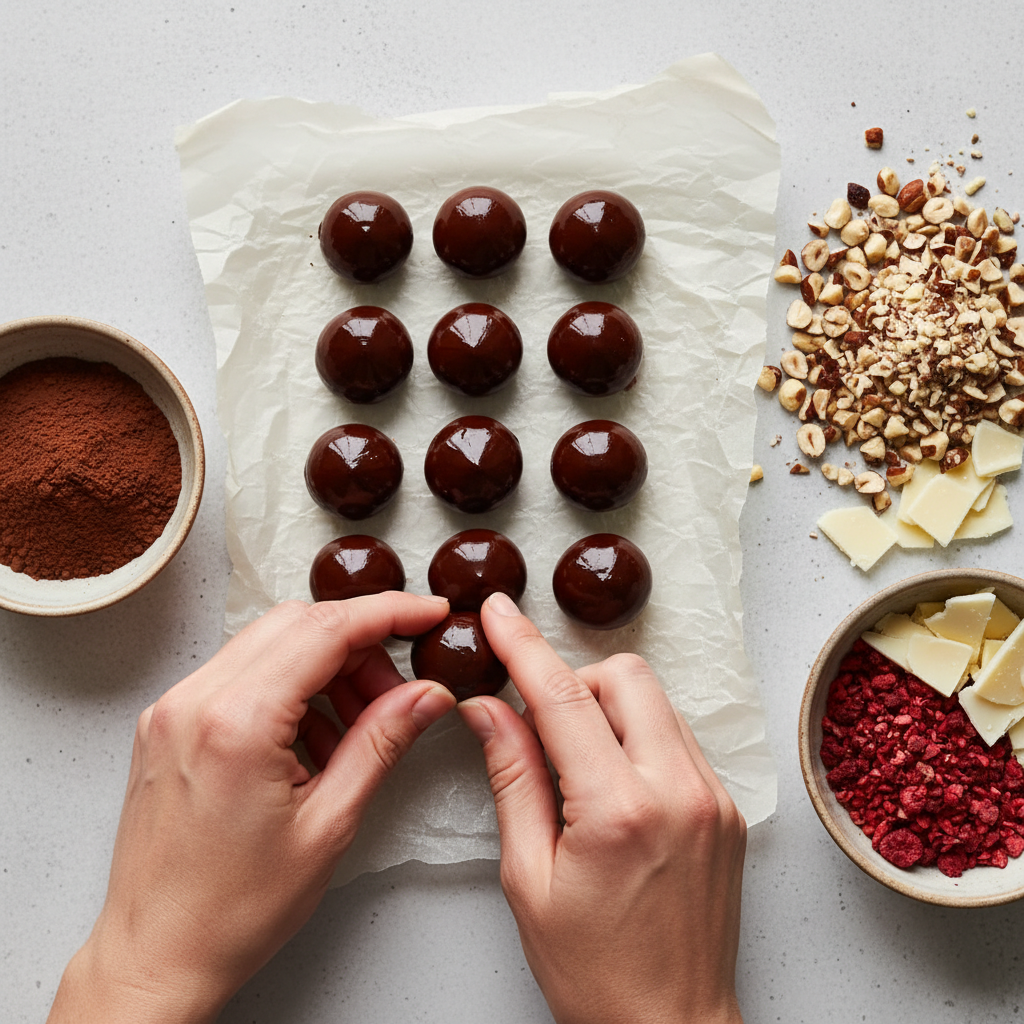
Shaping and Coating
The final touches that transform your ganache into proper truffles.
- Consistent Portioning: Use a small scoop or spoon to portion out equal amounts. Consistent sizing isn’t just about looks—it ensures even coating and makes for a more professional presentation.
- Rolling Technique: Work quickly but gently, rolling portions between your palms to form smooth spheres. If the ganache starts melting in your hands, pop it back in the fridge for a few minutes.
- Coating Options: This is where you can have fun. Cocoa powder is classic, chopped nuts add texture, and a dip in melted chocolate creates an elegant shell. Mix and match to your heart’s content.
- Storage Methods: Store your finished truffles in an airtight container in the fridge. They’ll keep for up to two weeks, though I’d be surprised if they last that long—they tend to disappear pretty quickly!

Making chocolate truffles at home? It’s honestly one of the most rewarding things you can do in your kitchen. There’s something magical about transforming simple ingredients—premium chocolate, heavy cream, a touch of butter—into these little spheres of pure indulgence. And here’s the best part: once you nail the basics (gentle melting, proper chilling, that perfect ganache consistency), you’ll wonder why you ever bought truffles from a store. The technique might seem fancy, but it’s really just about patience and good ingredients.
What I love most about homemade truffles is the creative freedom. Want to add a splash of bourbon? Go for it. Craving something with orange zest? Perfect. You’re in complete control of every flavor note, every texture. No weird preservatives or artificial anything—just pure, customizable chocolate bliss. Plus, you’ll avoid those rookie mistakes we covered (like overheating your chocolate or storing them wrong) that can turn your beautiful truffles into expensive disappointments.
Ready to take your chocolate game even further? There’s a whole world of ingredient knowledge that can elevate everything you make. Understanding organic versus non-organic food might change how you source your chocolate and cream. And if you’re curious about the health side of things, exploring foods rich in antioxidants could inspire some interesting truffle variations (dark chocolate is loaded with them, by the way). Feeling ambitious? Try pairing your truffle skills with how to make homemade ice cream—trust me, truffle ice cream is a game-changer. And for those looking to balance indulgent treats with nutritional goals, checking out nutrition for weight gain offers smart approaches to enjoying rich foods mindfully.
Here’s the thing about chocolate truffles: they’re not just candy. They’re little edible gifts you create with your own hands. Every time you roll that ganache, dust it with cocoa, or dip it in tempered chocolate, you’re practicing a craft that’s been perfected over centuries. Whether you’re making them for someone special or just treating yourself (no judgment here), each truffle represents something bigger—your willingness to slow down, create something beautiful, and savor the process. So grab that good chocolate and get started. Your kitchen is about to smell absolutely incredible.
Frequently Asked Questions
-
Can I use different types of chocolate for truffles?
- Yes, you can use dark, milk, or white chocolate depending on your taste preference and the flavor profile you want to achieve.
-
How should I store homemade truffles?
- Store truffles in an airtight container in the refrigerator to keep them fresh and maintain their texture.
-
Can I add flavors to chocolate truffles?
- Absolutely, adding extracts, liqueurs, or spices enhances the flavor and allows you to customize your truffles.
-
How long do chocolate truffles last?
- When stored properly, homemade chocolate truffles typically last up to two weeks.
-
Is it difficult to make chocolate truffles at home?
- No, with the right ingredients and clear steps, making chocolate truffles at home is quite manageable and enjoyable.