Perfect Cut Out Cookies? Grandma’s Secret Recipe for Tender, Flavorful Results
There’s something magical about cut out cookies that takes us straight back to childhood memories in grandma’s kitchen. The aroma of vanilla and butter filling the air, the satisfying snap of perfectly crisp edges, and the tender crumb that melts on your tongue—these are the hallmarks of truly exceptional cut out cookies. Whether you’re decorating sugar cookies for the holidays or creating whimsical shapes for a birthday celebration, mastering this classic recipe will elevate your baking game to professional levels.
My grandmother guarded her cut out cookie recipe like a culinary treasure, and after years of watching her work her magic, I finally understand why these cookies stand out from every other version. The secret isn’t just about the ingredients—though quality butter and pure vanilla certainly matter—it’s about understanding the science behind the dough, the precise techniques, and the patience required to achieve that perfect balance between crispy edges and tender centers.
In this comprehensive guide, I’m sharing grandma’s complete methodology for creating cut out cookies that will impress family and friends. From selecting the right flour to mastering the chilling process and decorating techniques, you’ll discover exactly why her cookies have been celebrated for generations.
The Essential Ingredients for Perfect Cut Out Cookies
Grandma always insisted that quality ingredients make the difference between ordinary and extraordinary cookies. Her cut out cookie recipe calls for simple, straightforward components, but each one plays a crucial role in achieving that perfect texture and flavor profile.
Butter is the foundation of exceptional cut out cookies. Use unsalted, high-quality butter at room temperature. Grandma preferred European-style butter with higher fat content because it produces richer flavor and superior texture. You’ll need one cup (two sticks) of butter for this recipe.
Granulated sugar provides sweetness and helps create the structure of your cookies. One and one-quarter cups of sugar gives you the perfect sweetness level without overwhelming the delicate vanilla flavor. The sugar also contributes to browning during baking.
Egg yolks are Grandma’s secret weapon. While many recipes use whole eggs, she uses only the yolks from two large eggs. This creates a richer, more tender crumb and contributes beautiful golden color to your cookies. The whites would add moisture and affect the texture negatively.
Pure vanilla extract is non-negotiable. Grandma never used imitation vanilla, and I follow her lead religiously. One and one-half teaspoons of pure vanilla extract provides that authentic, sophisticated flavor that makes people ask, “What’s in these cookies?”
All-purpose flour is your primary dry ingredient. Two and one-quarter cups of flour provides structure without being too dense. Grandma always measured her flour by spooning it into the measuring cup and leveling it off—never scooped directly from the bag, which compacts the flour.
Salt enhances all the other flavors in your dough. One-quarter teaspoon of fine sea salt might seem minimal, but it’s essential for bringing out the buttery, vanilla flavors that make these cookies special.
Baking powder gives you a subtle lift that creates the tender, slightly cake-like texture that distinguishes grandma’s cookies. One-half teaspoon is the perfect amount—more would make them too cake-like, less would make them too dense.

Understanding the Dough Science
Before we dive into the recipe, let’s understand what makes cut out cookies work. The dough needs to be firm enough to hold its shape when cut, yet tender enough to have a pleasant bite. This balance comes from understanding how ingredients interact.
Butter and sugar cream together to incorporate air into your dough. This aeration is crucial—it’s what gives your cookies their tender crumb. When you cream butter and sugar properly, you’re creating thousands of tiny air bubbles that expand during baking, resulting in cookies with a delicate texture rather than a dense, hockey-puck consistency.
The egg yolks act as both a binder and an emulsifier, helping to create a smooth, cohesive dough. They also add richness and help achieve that golden color during baking. This is why grandma specifically called for yolks rather than whole eggs—the whites would add too much moisture and affect the dough’s texture.
Chilling the dough is absolutely critical. This step allows the gluten to relax and the flavors to develop. It also makes the dough much easier to work with—warm dough is sticky and difficult to cut. Chilling also prevents excess spreading during baking, which helps your cookies maintain their shape and achieve crisp edges.
The ratio of flour to fat is carefully balanced. Too much flour creates dry, crumbly cookies; too little creates greasy, spread-prone dough. Grandma’s ratio produces dough that’s workable yet produces cookies with superior texture.
Mixing and Preparation Techniques
Now that you understand the science, let’s talk about execution. Grandma’s technique is methodical and precise, and following her steps exactly will yield the best results.
Step One: Prepare Your Ingredients
Before you start mixing, remove your butter from the refrigerator and let it sit at room temperature for about thirty minutes. It should be soft enough to press your finger into easily, but not so soft that it’s greasy or starting to melt. Room temperature butter creams much more effectively than cold butter, and it incorporates air more efficiently.
Measure all your dry ingredients and sift them together into a small bowl. Sifting isn’t strictly necessary, but Grandma always did it because it ensures even distribution of the baking powder and salt throughout your flour. This prevents pockets of baking powder that could create uneven rising.
Step Two: Cream Butter and Sugar
This is where the magic begins. Add your softened butter and granulated sugar to a large mixing bowl. Using an electric mixer on medium speed, beat for three to five minutes until the mixture is light, fluffy, and pale in color. This process is called “creaming,” and it’s absolutely essential for tender cookies.
You’ll know the mixture is ready when it’s noticeably lighter in color than when you started—it should look almost like frosting. This indicates that you’ve successfully incorporated air into the butter, which will create tender, delicate cookies. Don’t rush this step; proper creaming takes time.
Step Three: Incorporate Egg Yolks
Once your butter and sugar are properly creamed, add your egg yolks one at a time, beating well after each addition. Scrape down the sides of your bowl with a rubber spatula between additions to ensure everything is well combined. After both yolks are incorporated, add your vanilla extract and beat until the mixture is smooth and uniform.
Step Four: Combine Dry Ingredients
Reduce your mixer speed to low and gradually add your sifted dry ingredients. Mix just until the dough comes together—don’t overmix. Overmixing develops gluten, which makes cookies tough rather than tender. The dough should just barely come together when you switch off the mixer.
Divide your dough in half, wrap each portion in plastic wrap, and refrigerate for at least two hours, though overnight is ideal. This chilling period is crucial for developing flavor and making the dough easier to work with.
Chilling and Rolling Your Dough
Proper chilling and rolling technique directly impacts your final cookies. Grandma’s method ensures that your cookies maintain their shape and achieve the perfect texture.
Preparing Your Workspace
Remove one portion of dough from the refrigerator and let it sit at room temperature for five to ten minutes. It should be cold but pliable enough to roll. If it’s too cold, it will crack; if it’s too warm, it will be sticky and difficult to cut.
Lightly flour your work surface and your rolling pin. The key word here is “lightly”—too much flour makes the dough tough and dry. Grandma used just enough flour to prevent sticking, no more. She also liked to place parchment paper under her dough to minimize the flour needed.
Rolling Technique
Roll your dough to one-quarter inch thickness. This thickness is crucial—it’s thick enough to hold its shape and develop crisp edges, but thin enough to bake through evenly. Grandma used a wooden rolling pin and always rolled from the center outward, rotating the dough occasionally to maintain an even thickness.
If your dough becomes too warm and sticky while rolling, transfer it to the refrigerator for fifteen minutes to firm up. Working with slightly cold dough is much easier and produces better results than struggling with warm, sticky dough.
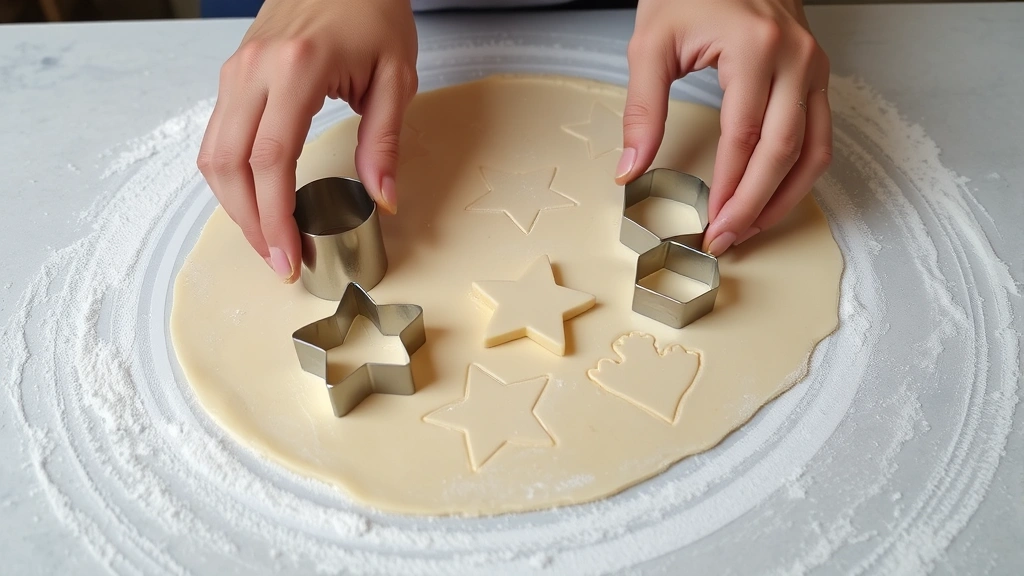
Cutting Your Cookies
Use cookie cutters that are sharp and well-made. Dull cutters compress the edges of your dough rather than cutting cleanly, which affects how your cookies bake. Grandma had a collection of vintage cutters that she treasured, and she kept them clean and dry.
Dip your cutter in flour before each cut to prevent sticking. Cut your shapes close together to minimize waste. Transfer your cut cookies to parchment-lined baking sheets using a thin spatula or pancake turner. If your cookies are too delicate to move, refrigerate the rolled dough for another fifteen minutes to firm it up.
Gather your scraps and re-roll them, but be aware that re-rolled dough produces slightly tougher cookies because the gluten has been developed. Grandma minimized re-rolling by cutting her shapes efficiently.
Cutting and Baking for Optimal Results
The baking process is where all your careful preparation comes together. Understanding your oven and monitoring your cookies closely ensures perfect results every time.
Preparing for Baking
Preheat your oven to 375°F (190°C) for at least fifteen minutes before baking. An oven thermometer is invaluable here—many home ovens run hot or cold, and accurate temperature is crucial for consistent results. Grandma always used an oven thermometer to verify her oven’s temperature.
Space your cut out cookies about one inch apart on parchment-lined baking sheets. They won’t spread much if you’ve chilled your dough properly, but giving them a little space ensures even baking and allows air to circulate underneath.
Baking Time and Temperature
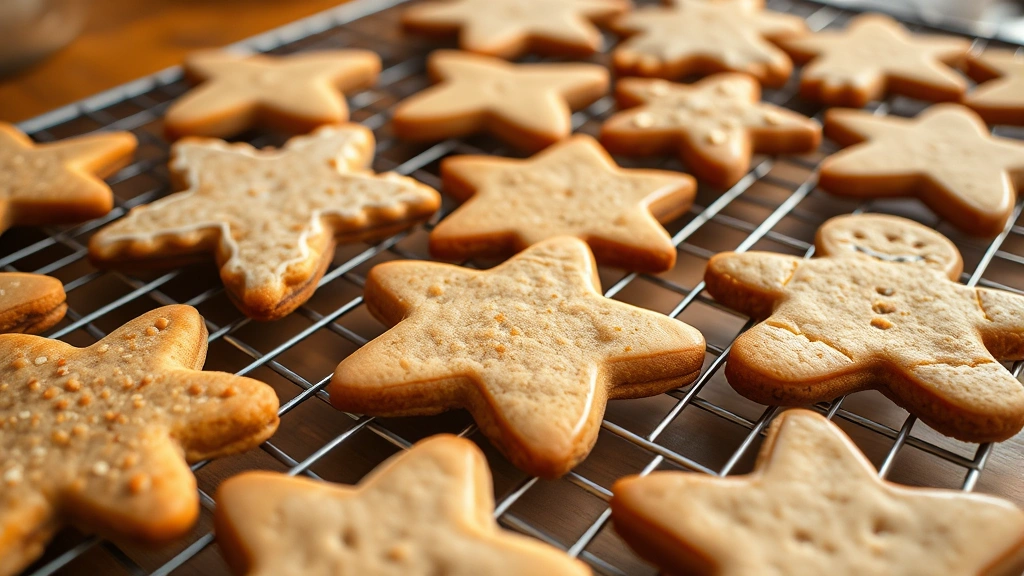
Bake your cookies for eight to ten minutes, depending on your oven and the size of your cookies. You’re looking for cookies that are set in the center but still pale, with just slightly golden edges. The edges should be noticeably darker than the centers, indicating that you’ve achieved that perfect balance between crispy edges and tender centers.
Don’t overbake! Grandma always said that slightly underbaked cookies taste better than slightly overbaked ones. If you remove them from the oven and they seem soft, don’t panic—they’ll continue cooking on the hot pan as they cool. They’ll firm up perfectly as they cool to room temperature.
Cooling Process
Let your cookies cool on the baking sheet for two minutes, then transfer them to a wire cooling rack. This two-minute rest allows them to firm up enough to handle without breaking, but not so long that they stick to the pan. The wire rack ensures air circulation underneath, which helps them cool evenly and maintain their crispness.
Allow your cookies to cool completely before decorating. Decorating warm cookies causes the icing to melt and run, while cool cookies provide a stable surface for beautiful decoration.
Decorating Your Cut Out Cookies
Once your cookies are baked and cooled, it’s time for the fun part—decoration! Grandma had several favorite methods for creating beautiful, professional-looking decorated cookies.
Royal Icing Basics
Royal icing is the classic choice for decorating cut out cookies. It dries hard and creates a beautiful, professional finish. To make royal icing, combine three cups of powdered sugar, two to three tablespoons of meringue powder (or pasteurized egg white powder), and three to four tablespoons of warm water. Beat until smooth and thick.
For flooding (covering large areas), thin your royal icing with additional water until it reaches the consistency of heavy cream. For piping details, keep it thicker. Grandma always made her royal icing in small batches and tinted different portions with food coloring to create beautiful designs.
Decoration Techniques
You can outline your cookies with thick royal icing using a piping bag fitted with a small round tip, then flood the center with thinner icing for a smooth, glossy finish. Allow each layer to dry before adding details on top.
Alternatively, you can simply spread thinned royal icing over your cookies and allow it to dry naturally for a smooth finish. Add sprinkles, edible glitter, or other decorations while the icing is still wet if you want them to stick.
Grandma also loved making marbled designs by dropping two colors of icing onto her cookies and dragging a toothpick through them to create beautiful patterns. This technique looks impressive but requires no special skills—just a steady hand and a little practice.
If you’re looking for festive variations, consider exploring fall recipes that incorporate seasonal flavors into cut out cookies, or create elaborate designs for special occasions.
Storage and Shelf Life
Proper storage ensures your cut out cookies stay fresh and delicious for days.
Short-Term Storage
Undecorated cookies can be stored in an airtight container at room temperature for up to one week. Grandma always separated layers with parchment paper to prevent them from sticking together. Decorated cookies with royal icing should also be stored in an airtight container, but keep them in a single layer or separated with parchment to prevent the icing from cracking.
Freezing Your Dough
Cut out cookie dough freezes beautifully. You can freeze the dough in portions, wrapped tightly in plastic wrap, for up to three months. When you’re ready to bake, simply thaw the dough in the refrigerator overnight, then roll and cut as usual. The flavors actually deepen slightly during freezing, making frozen-then-baked cookies taste wonderful.
You can also freeze already-cut cookies on baking sheets before baking. Once they’re frozen solid, transfer them to freezer bags and bake directly from frozen, adding an extra minute or two to the baking time.
Freezing Baked Cookies
Undecorated baked cookies freeze well for up to three months. Cool them completely, then layer them with parchment paper in freezer bags. Thaw at room temperature for about thirty minutes before decorating or eating. Decorated cookies can also be frozen, but allow them to thaw completely before unwrapping to prevent the icing from cracking due to condensation.
FAQ
Why are my cut out cookies spreading too much during baking?
Spreading indicates that your dough wasn’t chilled sufficiently or that your oven temperature is too high. Always chill your dough for at least two hours, preferably overnight. Verify your oven temperature with an oven thermometer. Also ensure you’re using the correct ratio of ingredients—too much butter or sugar will cause excessive spreading.
How do I prevent my cookies from cracking when I cut them?
Cracking occurs when your dough is too cold and brittle. Let chilled dough sit at room temperature for five to ten minutes before rolling. If your dough still cracks, it’s too cold—allow it a few more minutes to warm slightly. Using sharp cookie cutters also helps—dull cutters compress the dough rather than cutting cleanly, which can cause cracking.
Can I use margarine instead of butter?
While technically possible, margarine produces inferior results. Butter has superior flavor and creates better texture. Grandma was adamant about using real butter, and I completely agree. The difference in final product quality is noticeable and worth using real butter.
Why does my royal icing crack when it dries?
Cracking typically indicates that your icing is too thick. Royal icing should dry smooth and glossy, not cracked. Thin your icing slightly with water until it reaches the proper consistency. Also ensure that you’re using meringue powder or pasteurized egg white powder, not raw eggs, which won’t set properly.
How thick should I roll my cut out cookie dough?
One-quarter inch is ideal. This thickness allows your cookies to hold their shape while baking and ensures they bake through evenly. Thinner cookies will be crispier throughout; thicker cookies will have a softer center. Choose based on your texture preference, but one-quarter inch provides the best balance.
Can I make cut out cookies without egg yolks?
You can substitute one and one-half tablespoons of water mixed with one-half teaspoon of cornstarch for each egg yolk. However, the cookies won’t have the same richness or golden color. Grandma specifically used egg yolks for these reasons, so I recommend using them if possible.
How do I know when my cookies are perfectly baked?
Look for cookies that are set in the center but still pale, with slightly golden edges. The contrast between the pale center and golden edges indicates perfect baking. If you press the center gently, it should feel just barely firm. Remember that cookies continue cooking on the hot pan after you remove them from the oven.
What’s the best way to decorate cut out cookies?
Royal icing is the classic choice and creates professional-looking results. Outline your cookies with thick icing, then flood the center with thinner icing for a smooth finish. Allow it to dry completely before adding additional details. For simpler decoration, you can simply spread thinned icing over your cookies and add sprinkles while wet. Practice makes perfect—don’t be discouraged if your first attempts aren’t gallery-worthy.


