How to Make Ham Gravy: Grandma’s Recipe
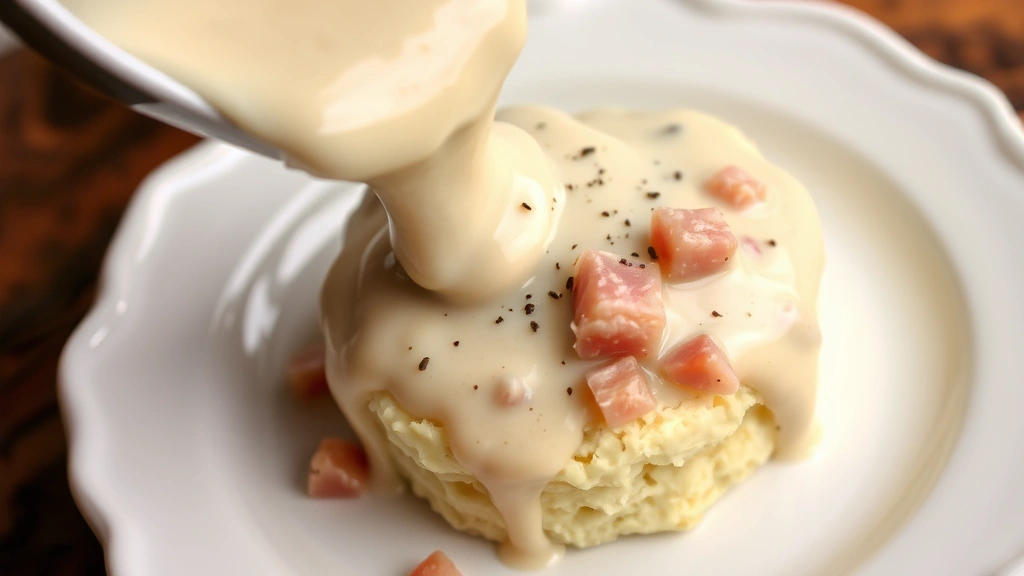
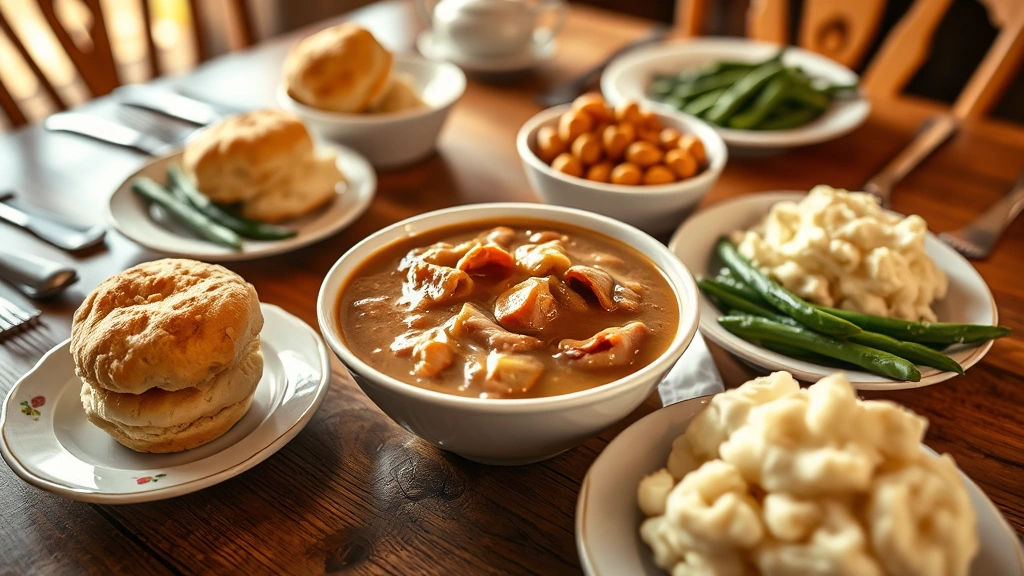
Ham gravy is one of those timeless comfort foods that brings families together around the dinner table. Whether you’re preparing a holiday feast or a simple Sunday dinner, this creamy, savory sauce transforms biscuits, mashed potatoes, and vegetables into something truly memorable. The beauty of ham gravy recipe lies in its simplicity—just a handful of pantry staples combine to create something restaurant-quality that tastes like it took hours to prepare.
My grandmother has been making this ham gravy for over fifty years, and her secret isn’t some exotic ingredient or complicated technique. It’s about understanding the fundamentals: how to render ham fat properly, build a roux with patience, and balance flavors so each spoonful is perfectly seasoned. This guide will walk you through her exact method, sharing the tips and tricks that have made this recipe a family favorite across generations.
The beauty of ham gravy is that it works year-round. Serve it over fall recipes featuring root vegetables, or pair it with grilled pork chop recipes for a delicious dinner. You can even drizzle it over biscuits at breakfast for a Southern-style morning treat.
Essential Ingredients
The foundation of excellent ham gravy starts with quality ingredients. You don’t need anything fancy, but each component plays a crucial role in developing the final flavor profile.
- Ham drippings or ham fat (4-5 tablespoons): This is the star of the show. When you cook ham, save those precious drippings from the pan. They contain concentrated ham flavor that store-bought broths simply cannot replicate. If you don’t have fresh drippings, rendered ham fat or even bacon fat works beautifully.
- All-purpose flour (4-5 tablespoons): This creates the roux that thickens your gravy. Make sure it’s fresh—old flour can create lumps.
- Whole milk (2 cups): Grandma always used whole milk for the richest texture. You can substitute with half-and-half for an even creamier version, or use 1 cup milk mixed with 1 cup ham or chicken broth for a lighter option.
- Ham broth or chicken broth (1 cup): This adds depth and extends the gravy slightly. If you have homemade ham broth from cooking your ham, use it. Otherwise, quality store-bought broth works fine.
- Diced ham (1/2 to 3/4 cup): Adds texture and bursts of salty, smoky flavor throughout the gravy.
- Salt and black pepper (to taste): Season carefully—ham is already salty, so you may need less than you think.
- Ground mustard (1/4 teaspoon, optional): A touch of mustard enhances ham flavor without making the gravy taste like mustard.
- Paprika (1/8 teaspoon, optional): Adds a subtle warmth and color.
Equipment You’ll Need
You don’t need specialty equipment for this recipe, but having the right tools makes the process smoother and prevents common mistakes.
- Heavy-bottomed skillet or saucepan: A 10-12 inch skillet is ideal. Heavy bottoms prevent scorching and ensure even heat distribution.
- Wooden spoon or silicone spatula: For stirring and scraping up those flavorful browned bits from the pan.
- Whisk: Essential for breaking up lumps as you add liquid. A wire whisk works better than a fork.
- Measuring spoons and cups: Accuracy matters when building a roux.
- Fine-mesh strainer (optional): If you want ultra-smooth gravy, strain it through a fine-mesh strainer after cooking.
Step-by-Step Instructions
Now for the heart of the matter—making the gravy itself. Follow these steps carefully, and you’ll have results that rival any restaurant.
Step 1: Heat Your Fat
Pour your ham drippings into your skillet over medium heat. If using ham fat, let it warm until it’s shimmering and fragrant, about 1-2 minutes. This step is crucial because cold fat won’t cook the flour evenly. The fat should be hot enough that when you add flour, it immediately begins to sizzle.
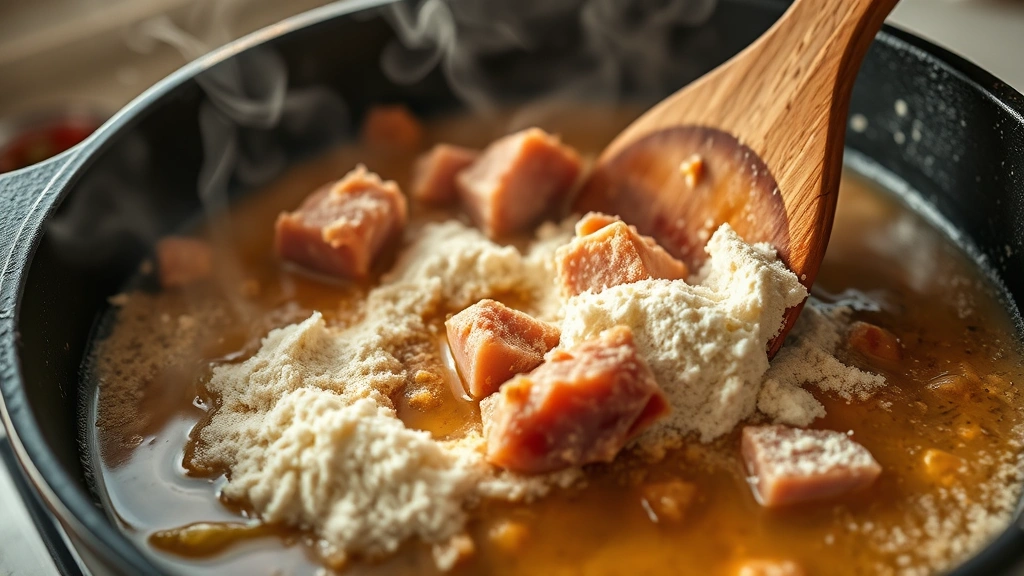
Step 2: Make the Roux
Sprinkle flour over the hot fat while whisking constantly. Continue whisking for 2-3 minutes, stirring frequently to ensure even cooking. Your roux should turn from pale to golden brown. This browning process develops deeper flavors and helps eliminate that raw flour taste. The color should resemble wet sand.
Don’t rush this step—many home cooks skip ahead too quickly. Grandma always said, “A good roux takes patience. You can’t hurry flavor.” If you notice any lumps forming, press them against the side of the pan with your wooden spoon.
Step 3: Add the Broth Gradually
Slowly pour in your ham broth while whisking vigorously. Add it in stages—about 1/4 cup at a time—whisking between additions. This gradual approach prevents lumps from forming. Your mixture should start out thick and gradually become thinner as you add more liquid. Continue until all the broth is incorporated and you have a smooth, thin sauce.
Step 4: Add the Milk
Now add your milk in the same gradual fashion, whisking constantly. The combination of broth and milk creates a beautiful color and rich flavor. As you add the milk, the gravy will lighten in color and become creamier in texture. Whisk until completely smooth—no lumps should be visible.
Step 5: Add the Ham and Seasonings
Stir in your diced ham, ground mustard, and paprika. Reduce heat to medium-low and let the gravy simmer gently for 3-5 minutes. This simmering time allows the flavors to meld together beautifully. You should see small bubbles breaking the surface, but not a rolling boil.
Step 6: Season to Taste
Taste your gravy carefully before adding salt. Remember that ham is already salty, and any broth you used likely contains sodium. Add salt in small pinches, tasting after each addition. Finish with freshly ground black pepper. The gravy should taste savory and balanced, with the ham flavor shining through.
Pro Tips and Tricks
Save those drippings: When you bake or cook ham, let the pan cool slightly, then pour the drippings into a container. Refrigerate overnight—the fat will solidify on top, making it easy to separate from the jelly below. This concentrated ham fat is liquid gold for gravy making.
Prevent lumps: The most common complaint about homemade gravy is lumps. The secret is patience. Never add all your liquid at once, and always whisk constantly. If lumps do form, press them against the side of the pan with your spoon, or strain the finished gravy through a fine-mesh sieve.
Adjust consistency: If your gravy is too thick, add milk or broth a tablespoon at a time while whisking. If it’s too thin, make a slurry by mixing 1 tablespoon cornstarch with 2 tablespoons cold water, then whisk it into the simmering gravy. Let it cook for 1 minute to thicken.
Temperature matters: Keep your gravy at a gentle simmer, never a rolling boil. High heat can cause the milk to break down and separate, creating a grainy texture. If you see this happening, remove from heat and whisk in a tablespoon of cold milk.
Timing your gravy: Make ham gravy just before serving for the best texture and temperature. However, if you need to make it ahead, keep it warm in a double boiler over barely simmering water. Stir occasionally and add milk if it thickens too much.
Flavor Variations
While Grandma’s classic recipe is perfect as-is, there are several delicious variations you can try. These work wonderfully when serving duck breast recipe or other poultry dishes.
Cajun-Style Ham Gravy
Add 1/2 teaspoon creole seasoning recipe spice blend, 1/4 teaspoon cayenne pepper, and 1/2 teaspoon garlic powder. This variation pairs beautifully with cajun seafood boil recipe for an interesting fusion meal.
Herb-Enhanced Gravy
Stir in 1 tablespoon fresh thyme and 1 teaspoon fresh sage during the simmering stage. If using dried herbs, reduce quantities by half. You can also reference how to preserve herbs: a complete guide to keep fresh herbs on hand year-round.
Smoky Bourbon Gravy
Add 2 tablespoons bourbon or whiskey after browning the roux, letting it simmer for 1 minute to cook off the alcohol. This adds depth and complexity. Finish with 1/4 teaspoon smoked paprika.
Roasted Garlic Variation
Mash 3-4 cloves of roasted garlic and whisk them in after adding the milk. This adds a mellow, sweet garlic flavor without overpowering the ham.
Storage and Reheating
Refrigerator storage: Ham gravy keeps beautifully in the refrigerator for up to 4 days. Pour it into an airtight container and cover tightly. The gravy will thicken as it cools due to the roux.
Freezing: You can freeze ham gravy for up to 3 months. Pour it into freezer bags or containers, leaving a little headspace for expansion. Thaw overnight in the refrigerator before reheating.
Reheating: Reheat gently in a saucepan over medium-low heat, stirring frequently. Add a splash of milk if the gravy has thickened too much during storage. Never microwave gravy, as it can become lumpy and separate. If reheating in a double boiler, you have more control over the temperature and can prevent scorching.
Make-ahead tip: You can prepare the roux up to 2 hours ahead. Let it cool completely, then cover and set aside. When ready to finish the gravy, reheat the roux gently before adding your liquids.
FAQ
Can I use turkey drippings instead of ham drippings?
Absolutely. Turkey drippings create a lighter, more neutral gravy that’s wonderful over mashed potatoes and biscuits. The technique remains exactly the same. You might want to add a bit of poultry seasoning or sage to enhance the turkey flavor.
What if I don’t have ham drippings?
Use rendered ham fat from a butcher counter, bacon fat, or even butter as a last resort. Bacon fat adds a smoky note that complements ham beautifully. If using butter, use 5 tablespoons since butter has more water content than fat.
Why is my gravy grainy or separated?
This usually happens when the milk breaks down from excessive heat. Remove from heat immediately and whisk in a tablespoon of cold milk. Return to very low heat and stir gently until smooth. In the future, maintain a gentle simmer rather than a boil.
Can I make this gravy dairy-free?
Yes. Use full-fat coconut milk or unsweetened oat milk instead of dairy milk. The texture will be slightly different, but it will still be delicious. Use the same proportions as you would with regular milk.
How much gravy does this recipe make?
This recipe yields approximately 3 cups of finished gravy, enough to serve 6-8 people generously. If you need more, simply double the recipe and increase cooking time by a minute or two.
Can I make this in advance for a holiday meal?
Completely. Make the gravy the day before and refrigerate in an airtight container. Reheat gently on the stovetop over medium-low heat, adding milk as needed to reach the desired consistency. This actually helps with holiday stress management since you have one fewer dish to prepare on the big day.
What’s the difference between gravy and sauce?
Gravy is traditionally made from meat drippings and thickened with a roux, while sauce might be made from other bases. Ham gravy is definitely a gravy because it’s built on ham drippings and roux. The rich, savory quality comes directly from those rendered meat drippings.
Can I add vegetables to the gravy?
You can, but they require special handling. Finely diced onions, celery, or bell peppers should be sautéed in the fat before adding flour. Cook them for 2-3 minutes until softened, then proceed with the roux. This prevents raw vegetable flavor from dominating the gravy.
Ham gravy represents more than just a condiment—it’s a connection to family traditions and simpler times. Grandma’s recipe has stood the test of time because it focuses on quality ingredients and proper technique rather than shortcuts or complicated methods. Whether you’re serving it at a holiday table or a casual weeknight dinner, this ham gravy recipe will elevate every plate it touches. Start with this classic version, then feel free to experiment with the variations once you’ve mastered the fundamentals. Happy cooking!


