How to Sauté Green Beans? Chef’s Secret Tips
Sautéing green beans is one of the most fundamental yet transformative cooking techniques that separates home cooks from seasoned chefs. When done correctly, this simple method produces vibrant, tender-crisp vegetables with a delicate caramelization that enhances their natural sweetness and earthy flavor profile. The beauty of sautéing lies in its versatility—whether you’re preparing a weeknight side dish or impressing guests at a dinner party, mastering this technique opens endless possibilities for flavor combinations and presentations.
Green beans, scientifically known as Phaseolus vulgaris, contain compounds that become more bioavailable when exposed to heat, making sautéed preparations not only delicious but also nutritionally superior to raw consumption. The Maillard reaction that occurs during sautéing creates complex flavors and aromas that elevate this humble vegetable into something truly special. In this comprehensive guide, we’ll explore the professional techniques, ingredient selection, timing strategies, and creative variations that will transform your green bean dishes from ordinary to extraordinary.
Selecting and Preparing Your Green Beans
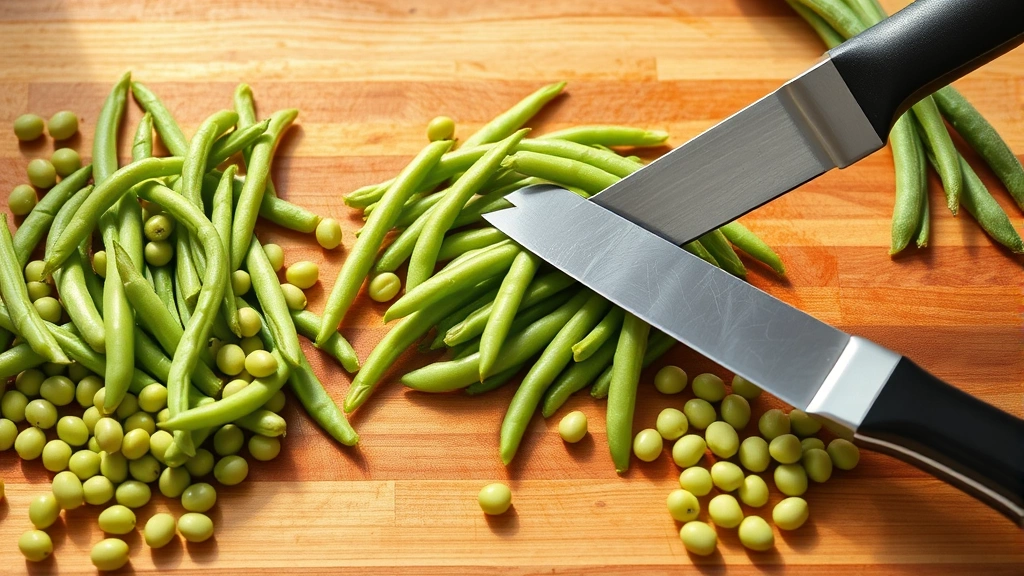
The foundation of exceptional sautéed green beans begins at the market. Look for beans that are bright green, firm, and snap cleanly when bent. Avoid any that appear limp, yellowed, or have brown spots, as these indicate age and diminished nutritional value. The ideal bean should measure approximately 4-5 inches in length—not too thin, which risks becoming mushy, and not too thick, which may have tough strings and larger seeds inside.
When you bring your green beans home, store them unwashed in a perforated plastic bag in your refrigerator’s vegetable crisper drawer. They’ll maintain optimal freshness for up to five days. Before cooking, rinse them under cool running water and pat completely dry with paper towels or a clean kitchen cloth. Moisture is the enemy of proper browning and can cause splattering in the hot pan. This preparation step is critical and separates professional results from mediocre outcomes.
Trimming requires attention to detail. Using a sharp knife or kitchen shears, remove the stem end (approximately ¼ inch) where the bean connects to the plant. Some chefs prefer to remove the tail end as well, though this is optional. For uniform cooking, try to keep all beans roughly the same length and thickness. If you’re working with beans of varying sizes, consider cutting the thicker ones lengthwise to ensure even cooking throughout your batch.
Essential Equipment and Heat Management
Your choice of cookware dramatically impacts the final result. A 12-inch stainless steel skillet or carbon steel wok provides superior heat distribution and browning compared to non-stick surfaces. Non-stick pans, while convenient for cleanup, don’t generate the necessary surface temperature for proper caramelization. Cast iron works beautifully once properly seasoned, retaining and distributing heat evenly throughout the cooking process.
Heat management is absolutely fundamental. Medium-high to high heat is essential for achieving that coveted golden-brown exterior while maintaining a crisp-tender interior. The pan should be preheated for 2-3 minutes before adding oil. To test readiness, carefully hold your hand about 4 inches above the surface—you should feel significant heat. Alternatively, add a small piece of vegetable to the oil; it should immediately sizzle and dance across the surface.
Fat selection influences both flavor and performance. Extra virgin olive oil adds fruity, herbaceous notes but has a lower smoke point (around 375°F). For high-heat sautéing, consider using refined olive oil, avocado oil, or vegetable oil, which can handle temperatures up to 450°F. Many professional chefs use a combination: a neutral oil for cooking and a finishing drizzle of premium olive oil for flavor enhancement after cooking.
The Basic Sautéing Technique
Begin by heating 2-3 tablespoons of oil in your preheated skillet over medium-high heat. When the oil shimmers and moves freely across the pan surface, you’re ready to add the beans. Working in a single layer prevents overcrowding, which causes steaming rather than sautéing. If necessary, work in batches—patience yields superior results.
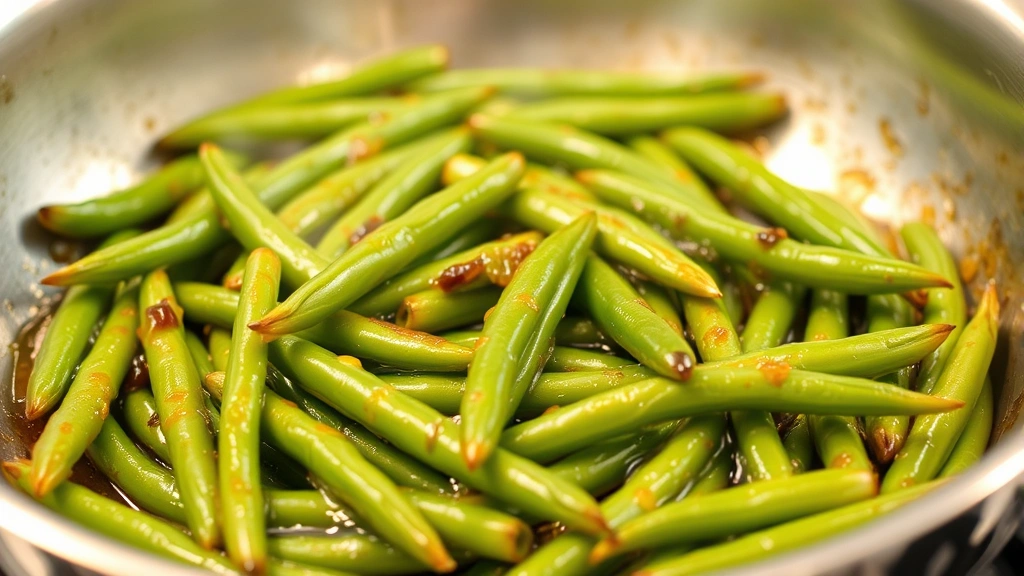
Add your prepared green beans to the hot oil and resist the urge to stir immediately. Let them sit undisturbed for 2-3 minutes, allowing the bottom surfaces to develop a golden-brown crust. This initial stage is crucial for flavor development. You should hear an appetizing sizzle; if the sound diminishes, your heat may be too low.
After this initial searing phase, stir the beans every 1-2 minutes, rotating them to ensure all surfaces contact the hot pan. Continue cooking for 6-8 minutes total, depending on bean thickness and your desired texture. The beans should develop scattered brown spots and feel tender when pierced with a fork, yet still maintain a slight resistance—this is the coveted crisp-tender texture that distinguishes professional preparations.
Season with kosher salt and freshly ground black pepper during the final minute of cooking. This timing allows the salt to adhere to the hot vegetables without drawing out excessive moisture. Taste and adjust seasoning as needed. Transfer finished beans to a warm serving dish immediately to prevent carryover cooking, which can transform crisp-tender into soft and mushy.
Flavor Combinations and Variations
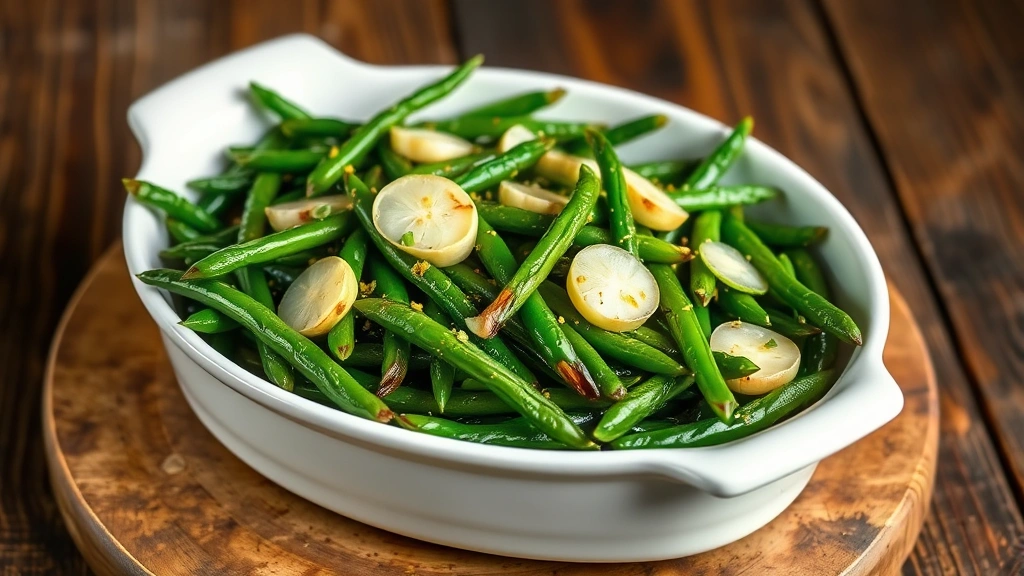
Classic French preparation calls for sautéing beans with thinly sliced garlic and finishing with a squeeze of fresh lemon juice. Add the garlic during the last 2 minutes of cooking to prevent burning, then finish with a tablespoon of cold butter and bright citrus for an elegant, restaurant-quality side dish. This approach pairs beautifully with fish, poultry, and lighter meat preparations.
For Asian-inspired variations, incorporate minced fresh ginger, soy sauce, and sesame oil. Add ginger with the garlic during the final cooking stage, then finish with a drizzle of dark sesame oil and a sprinkle of sesame seeds. This preparation complements stir-fries and Asian noodle dishes perfectly.
Mediterranean versions feature diced tomatoes, Kalamata olives, and fresh herbs like oregano and basil. Add the tomatoes when the beans reach desired tenderness, allowing them to warm through without falling apart. This variation celebrates the flavors of the region and pairs exceptionally well with homemade sauces and grilled vegetables.
Creamy preparations involve finishing the beans with a splash of heavy cream or crème fraîche combined with Dijon mustard and fresh tarragon. This luxurious variation transforms simple green beans into an elegant side worthy of special occasions. The acid from the mustard brightens the richness of the cream beautifully.
For those seeking healthy food options, simply finish with garlic, a touch of quality olive oil, and fresh herbs. This approach highlights the vegetable’s natural flavor while maintaining nutritional integrity and supporting food waste reduction through minimal ingredients.
Timing and Texture Mastery
Understanding the relationship between cooking time and desired texture is essential for consistent results. Fresh, thin green beans may reach perfect crisp-tender doneness in just 5-6 minutes, while thicker, older beans might require 8-10 minutes. Environmental factors like humidity, altitude, and your specific stove’s BTU output all influence cooking time, so developing a feel for doneness through experience is invaluable.
The visual cues matter tremendously. As beans cook, they transition from bright green to a deeper, more saturated green color. You should notice scattered brown spots developing on the surface—these indicate proper caramelization and flavor development. If your beans remain uniformly green with no browning after 8 minutes, increase your heat; you’re likely steaming rather than sautéing.
Professional chefs rely on texture testing. Pierce a bean with a fork or knife tip at the 6-minute mark. The vegetable should offer slight resistance but yield easily to pressure. If it’s still quite firm and snaps rather than bends, continue cooking. If it’s soft throughout with no resistance, you’ve slightly overcooked—though this is still acceptable for some preparations. Aim for that perfect middle ground where the exterior is tender but the interior maintains structural integrity.
Chef’s Pro Tips for Restaurant-Quality Results
Mise en place—preparing all ingredients before cooking—is fundamental to professional kitchen success. Have your trimmed, dried beans ready, garlic minced, herbs chopped, and salt and pepper within arm’s reach. This preparation prevents scrambling once cooking begins and ensures consistent, controlled results.
Invest in a high-quality instant-read thermometer if you’re serious about precision. While not necessary for green beans specifically, understanding your pan’s actual temperature rather than guessing based on feel develops your overall cooking intuition. Many professional kitchens maintain pan temperatures between 400-425°F for optimal vegetable sautéing.
Consider blanching-and-shocking as a pre-cooking step for large batches or if you need to prepare beans in advance. Boil them for 3-4 minutes until bright green and partially tender, then immediately plunge into ice water to stop cooking. Pat dry completely before sautéing. This technique guarantees even cooking and allows you to prepare the vegetables earlier in your service without sacrificing quality.
Finishing fats are the secret weapon of professional chefs. A small knob of cold butter stirred in during the final 30 seconds creates a glossy, luxurious coating that elevates presentation and mouthfeel. This technique, called monter au beurre, is simple yet transforms the dish noticeably.
Tasting constantly throughout cooking develops your palate and allows for real-time adjustments. Professional kitchens taste every dish before plating. Keep a small tasting spoon dedicated to sampling, allowing you to evaluate seasoning, texture, and overall balance continuously.
Common Mistakes to Avoid
Overcrowding the pan remains the most frequent error among home cooks. When beans overlap and stack, they steam rather than sauté. The moisture they release creates a humid environment that prevents browning and produces a dull, grayish color. Always work in batches if necessary—the extra few minutes yields dramatically superior results.
Insufficient heat is the second most common problem. Many home cooks use medium heat, believing it provides better control. In reality, proper sautéing demands medium-high to high heat. The oil should shimmer visibly, and beans should sizzle immediately upon contact. If your pan isn’t hot enough, increase the heat rather than compensating with longer cooking times.
Stirring too frequently prevents proper crust development. Resist the temptation to constantly move and agitate the beans. Let them sit for 2-3 minutes initially, then stir every 1-2 minutes thereafter. This patience allows the Maillard reaction to occur, developing complex flavors and attractive browning.
Adding salt too early draws moisture from the beans through osmosis, preventing browning and creating a steamed texture. Always season during the final minute of cooking. This timing ensures even distribution while allowing the salt to adhere to the hot vegetable surface.
Neglecting to dry beans thoroughly after washing is another common pitfall. Water is the enemy of browning. Even small amounts of residual moisture can reduce pan temperature and create steam. Use paper towels or a salad spinner to ensure complete dryness before cooking.
Overcooking past the crisp-tender stage transforms delicate vegetables into mushy disappointments. Remember that residual heat continues cooking even after you remove the pan from the burner. Remove beans when they’re just slightly firmer than your final desired texture, accounting for carryover cooking during plating and serving.


