How to Make Brown Gravy: Grandma’s Secret Recipe
Brown gravy is the ultimate comfort food companion that transforms simple mashed potatoes, roasted vegetables, and hearty meat dishes into something truly memorable. Whether you’re preparing a holiday feast or a weeknight dinner, mastering this classic sauce elevates your cooking to restaurant quality. My grandmother guarded her brown gravy recipe like a treasured heirloom, and after years of watching her work her magic in the kitchen, I finally understand why—it’s all about patience, proper technique, and understanding the fundamental principles of sauce-making.
The beauty of homemade brown gravy lies in its versatility and rich, savory depth. Unlike store-bought versions loaded with preservatives and artificial flavors, a homemade brown gravy recipe allows you complete control over ingredients and taste. This guide will walk you through every step, from creating the perfect roux to achieving that silky, luxurious texture that makes every bite unforgettable. You’ll learn grandmother’s secrets that took years to perfect, condensed into clear, actionable steps.
Essential Ingredients for Perfect Brown Gravy
The foundation of exceptional brown gravy starts with quality ingredients. You don’t need an extensive pantry—grandmother’s secret is using simple, pure components that work harmoniously together. The primary ingredients are butter, flour, and broth, but the quality of each matters tremendously. For the richest results, use unsalted butter so you can control the sodium level precisely.
Here’s what you’ll need:
- Butter: 3-4 tablespoons for creating the roux base
- All-purpose flour: 3-4 tablespoons to thicken and build flavor
- Beef or chicken broth: 2 cups, preferably homemade or low-sodium
- Drippings: ½ cup pan drippings from roasted meat (this is grandmother’s secret ingredient)
- Salt and black pepper: To taste, adjusted at the end
- Worcestershire sauce: ½ teaspoon for depth (optional but recommended)
- Fresh thyme or bay leaf: For subtle herbaceous notes
The pan drippings are absolutely crucial—they contain concentrated meat flavor that cannot be replicated. If you’re not roasting meat, you can create a flavorful base by browning ground beef or sautéing mushrooms. Understanding these ingredients and their roles helps you adapt the recipe to different situations and dietary needs.
Understanding the Roux Foundation
A roux is the backbone of any classical sauce, and mastering this technique is fundamental to making exceptional gravy. The word “roux” comes from French cuisine and simply means a mixture of equal parts fat and flour cooked together. This combination creates a thickening agent that transforms thin liquid into velvety sauce.
There are three types of roux, distinguished by cooking time and color:
- Blonde roux: Cooked 1-2 minutes, pale in color, used for light sauces
- Brown roux: Cooked 3-5 minutes, medium brown color, used for brown sauces and gravies
- Dark brown roux: Cooked 5-10 minutes, deep chocolate color, used for rich, intense gravies
For authentic brown gravy, grandmother always made a medium brown roux that develops nutty, toasted flavors without burning. The cooking time is critical—rush it and you lose the flavor development; overdo it and the roux becomes bitter and loses thickening power. The heat should be medium, allowing the flour particles to gradually brown and toast evenly.
When you combine the roux with liquid, the starch granules absorb the liquid and swell, creating the thickening effect. This is why proper technique matters—cooking the roux adequately ensures the flour is fully gelatinized, resulting in a smooth, lump-free sauce without a raw flour taste.
Step-by-Step Preparation Method
Step 1: Prepare Your Ingredients
Before you begin, gather all ingredients and have them within arm’s reach. Measure the broth into a liquid measuring cup and let it sit at room temperature. If you have fresh pan drippings from roasting, pour them into a small bowl, allowing the fat to rise to the top. You can skim some of this fat for your roux if needed.
Step 2: Melt the Butter
Place a medium saucepan over medium heat and add butter. Allow it to melt completely, watching for the moment it begins to foam. This foam indicates the water content is cooking off. Once melted and foaming slightly, you’re ready for the next step. Never let butter brown—you want a clear, golden fat for your roux base.
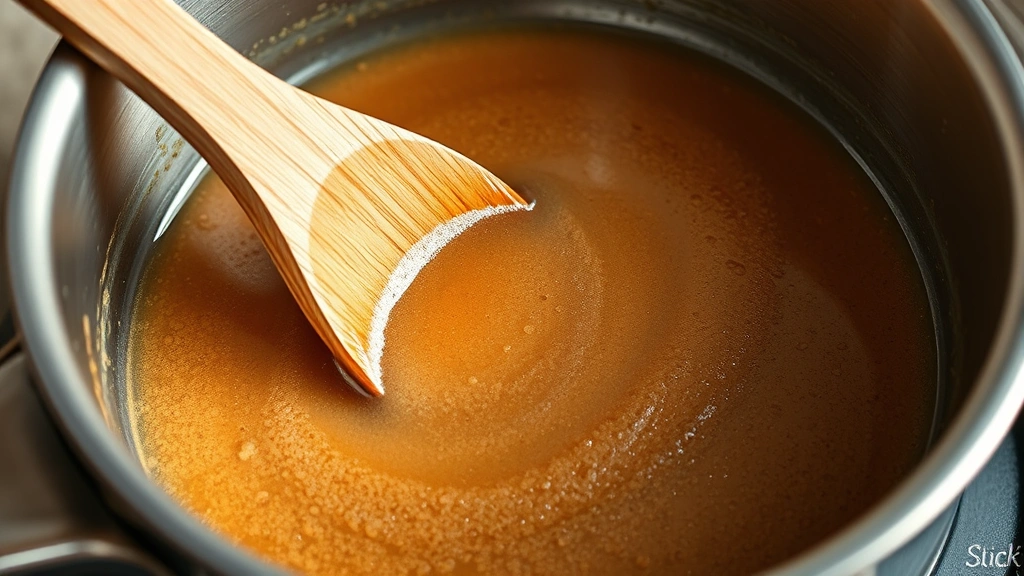
Step 3: Create the Roux
Sprinkle the flour over the melted butter while stirring constantly with a wooden spoon or whisk. Combine thoroughly until you have a smooth paste with no lumps. This mixture should sizzle gently—if it’s too quiet, your heat is too low; if it’s violent, reduce the heat slightly. Continue stirring and cooking for 3-5 minutes, watching as the mixture gradually darkens from pale tan to medium brown.
Grandmother’s tip: Keep the roux moving constantly with your spoon, scraping the bottom and corners of the pan. This prevents burning and ensures even browning. The mixture should smell nutty and toasted, never acrid or burnt.
Step 4: Add the Drippings
Once your roux reaches the desired brown color, slowly pour in the pan drippings while stirring vigorously. The mixture will bubble and steam—this is normal and expected. The heat of the roux will cause the drippings to cook rapidly, so maintain steady stirring to prevent lumps from forming. Add the drippings gradually over 30-45 seconds rather than all at once.
Step 5: Incorporate the Broth
After the drippings are fully incorporated and smooth, begin adding the broth slowly while continuing to stir. Again, gradual incorporation prevents lumps. You can add the broth in stages—half at first, stir until smooth, then add the remainder. This methodical approach guarantees a silky, lump-free sauce.
Step 6: Simmer and Thicken
Once all liquid is added, increase the heat slightly to medium-high. Bring the mixture to a gentle simmer, stirring occasionally. The gravy will thicken noticeably as it simmers—this happens as the starch continues to absorb liquid and the sauce reduces slightly. Simmer for 2-3 minutes, allowing the flavors to meld and the sauce to reach proper consistency.
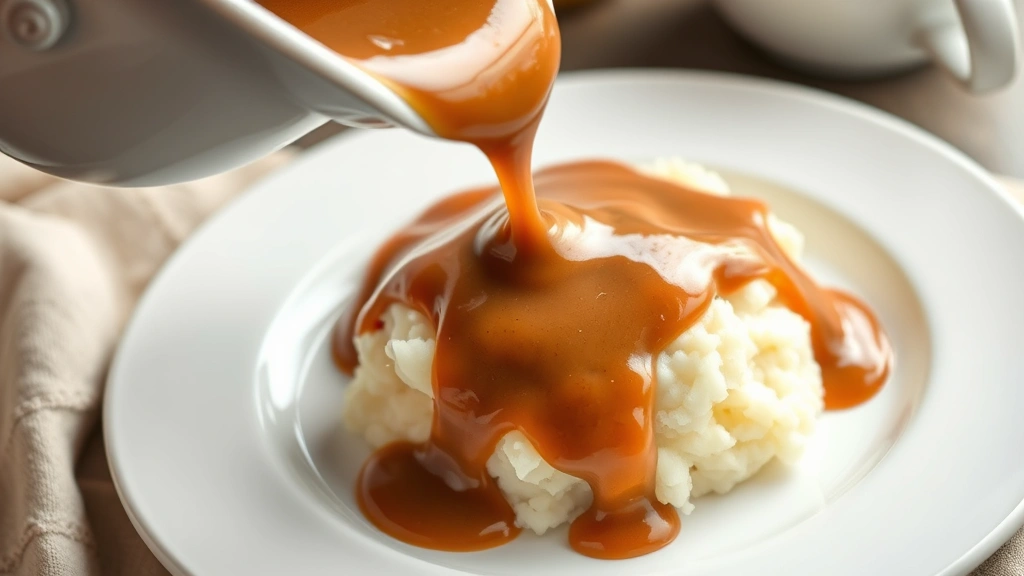
Achieving the Perfect Consistency
The ideal brown gravy consistency should coat the back of a spoon but still flow easily. It should be thick enough to cling to mashed potatoes without pooling excessively, yet thin enough to pour smoothly. Achieving this balance is where many home cooks struggle, but grandmother taught me a simple trick.
If your gravy is too thin, you have two options. The quickest method is to make a slurry—mix equal parts cold water and cornstarch in a small bowl, then whisk it into your simmering gravy. This works immediately and gives you precise control. Alternatively, you can let the gravy simmer longer, allowing more liquid to evaporate naturally, though this takes patience.
If your gravy is too thick, simply whisk in additional broth, one tablespoon at a time, until you reach the desired consistency. This is easier than trying to thin a gravy that’s become too gelatinous. Remember that gravy thickens further as it cools, so aim for slightly thinner than your target when it’s hot.
The texture should be completely smooth with no lumps or graininess. If lumps do form despite your best efforts, strain the gravy through a fine-mesh sieve or blend it briefly with an immersion blender. Grandmother always said smooth gravy is the mark of a skilled cook.
Flavor Enhancement Techniques
While simple brown gravy made from meat drippings, broth, butter, and flour is delicious, grandmother’s secret involved subtle flavor enhancements that made her version legendary. These additions should complement rather than overpower the natural savory taste.
Umami Boosters: Adding ½ teaspoon of Worcestershire sauce or a splash of soy sauce deepens the savory profile without adding obvious new flavors. These condiments contain glutamates that enhance natural meaty flavors.
Herb Integration: A single bay leaf or sprig of fresh thyme simmered in the gravy for the final minute adds subtle complexity. Remove before serving. Fresh herbs should never be added during the roux phase—they belong in the liquid phase only.
Caramelized Aromatics: For special occasions, grandmother would sauté minced shallots or garlic in the butter before adding flour. This creates a deeper flavor foundation. Cook aromatics just until golden before proceeding with the roux.
Red Wine Reduction: For a more sophisticated variation, deglaze the pan with ¼ cup red wine before adding broth. The wine’s acidity and tannins add complexity. Simmer for one minute to cook off most alcohol.
These enhancements are best discovered through experimentation. Start with the basic recipe from how to make homemade sauces, then add one enhancement at a time to understand how each affects the final result.
Common Mistakes to Avoid
Even experienced cooks occasionally encounter problems with gravy. Understanding common pitfalls helps you troubleshoot quickly and consistently produce excellent results.
Burning the Roux: This is the most common mistake. The roux must never smell burnt or taste acrid. If you detect a burnt smell, discard the roux and start over—there’s no salvaging burnt roux. Prevention is simple: use medium heat, stir constantly, and watch carefully during the browning phase.
Adding Cold Liquid to Hot Roux: This temperature shock causes lumps. Always use room-temperature or warm broth. If you only have cold broth, add it very slowly while whisking constantly, or warm it first in the microwave.
Insufficient Cooking Time: Rushing the roux prevents proper browning and flavor development. Grandmother always said good gravy requires patience—the minimum three minutes of roux cooking cannot be skipped.
Overcooking the Gravy: Extended simmering beyond 3-4 minutes can cause the sauce to break or become overly thick. Once the gravy reaches desired consistency and simmer, remove from heat.
Using Low-Quality Broth: Store-bought broth varies dramatically in quality and sodium content. Consider making your own broth or investing in premium brands. The broth quality directly impacts your final gravy quality.
Neglecting to Season: Many cooks under-season gravy. Always taste and adjust salt and pepper at the very end. Remember that flavors concentrate as the gravy reduces, so initial seasoning may seem light.
Storage and Make-Ahead Tips
Brown gravy actually improves slightly when made ahead, as flavors continue developing. This makes it perfect for meal planning and entertaining. Proper storage ensures your gravy remains delicious and safe.
Refrigerator Storage: Allow gravy to cool to room temperature, then transfer to an airtight container. Refrigerate for up to 4 days. The gravy will thicken considerably as it cools due to the starch setting. To reheat, place in a saucepan over medium-low heat, stirring occasionally. If too thick, whisk in broth gradually until you reach desired consistency.
Freezer Storage: Brown gravy freezes exceptionally well for up to 3 months. Pour cooled gravy into freezer bags, label with the date, and lay flat for space-efficient storage. Alternatively, freeze in ice cube trays for portioned servings. Thaw overnight in the refrigerator, then reheat gently on the stovetop.
Make-Ahead Strategy: You can prepare the roux up to 2 hours ahead and store it in the saucepan at room temperature. When ready to serve, simply reheat gently and proceed with adding drippings and broth. This allows you to focus on other dishes during meal preparation.
Reheating Without Breaking: Never microwave gravy, as the uneven heating can cause separation. Always reheat on the stovetop over low to medium-low heat, stirring frequently. If the gravy breaks (becomes separated or grainy), whisk in a tablespoon of cold broth and continue heating gently.
For easy dinner recipes for beginners, having gravy prepared ahead eliminates last-minute stress. Many home cooks find making gravy the day before actually produces superior results, as the flavors have time to fully develop and marry.
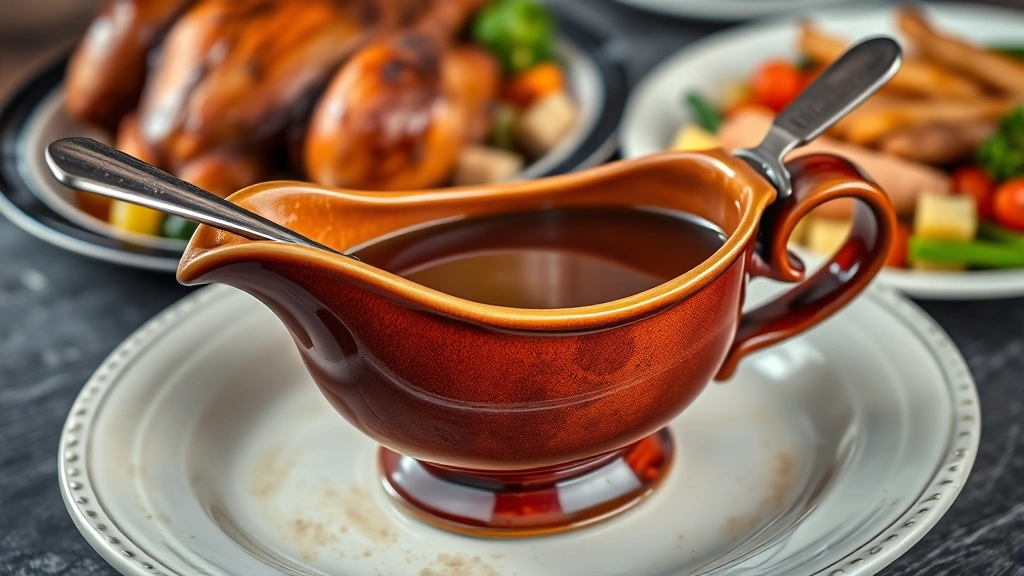
Brown gravy serves as the perfect complement to countless dishes. Pair it with low-carb dinner recipes using cauliflower mash instead of potatoes, or serve alongside traditional best healthy food recipes featuring roasted vegetables and lean proteins. The versatility of this classic sauce makes it an essential skill for any home cook.
FAQ
Can I make brown gravy without pan drippings?
Yes, though the flavor will be less rich. Substitute the drippings with additional broth or create depth by browning ground beef, sautéing mushrooms, or using beef bouillon. You can also brown onions and garlic in the butter before adding flour to build flavor complexity.
What’s the difference between brown gravy and beef gravy?
Brown gravy is a general term for any gravy made with a brown roux and typically beef or chicken broth. Beef gravy specifically uses beef drippings and beef broth. The techniques are identical—the distinction is mainly in the base liquid and drippings used.
How do I fix lumpy gravy?
Strain through a fine-mesh sieve to remove lumps, or use an immersion blender for a minute or two. To prevent lumps, always add liquid gradually while whisking constantly, or ensure your roux is fully cooked before adding any liquid.
Can I use cornstarch instead of flour for the roux?
Cornstarch works as a thickener but won’t develop the same toasted flavor as flour. For best results, use all-purpose flour for the roux. You can use a cornstarch slurry to adjust consistency if needed, but the primary roux should be flour-based.
Why does my gravy taste like raw flour?
The roux wasn’t cooked long enough. Raw flour has a starchy, unpleasant taste that disappears only after cooking for at least 2-3 minutes. Always allow the roux to brown and smell nutty before adding liquid.
Can I make brown gravy ahead for holiday meals?
Absolutely. Make it the day before and refrigerate in an airtight container. Reheat gently on the stovetop, adjusting consistency with additional broth if needed. This actually reduces stress on cooking day significantly.
What herbs work best in brown gravy?
Bay leaf, thyme, and rosemary are traditional choices. Add them to the simmering gravy for the final minute, then remove before serving. Avoid delicate herbs like basil or cilantro, which lose flavor when heated.
How thick should brown gravy be?
Ideal gravy coats a spoon without being gelatinous. It should pour smoothly but cling to food. Consistency preferences vary—thinner for pouring over potatoes, thicker for mashed vegetables.


