Chicken and Noodles? Grandma’s Secret Recipe
There’s something magical about a bowl of chicken and noodles that transcends generations. This isn’t just comfort food—it’s a culinary hug passed down through family kitchens, whispered recipes shared over steaming pots, and memories made at dining tables worn smooth by countless elbows. Grandma’s secret chicken and noodles recipe has fed families for decades, and today, we’re unlocking the techniques that make it extraordinary.
What separates an ordinary chicken and noodles dish from a legendary one? The answer lies in patience, quality ingredients, and understanding the fundamentals of building deep, satisfying flavors. This guide reveals the secrets that have made grandma’s version the dish everyone requests, the one people dream about, and the one they attempt to recreate in their own kitchens.
Whether you’re a seasoned home cook or just beginning your culinary journey, this classic recipe delivers restaurant-quality results with straightforward, proven techniques. Let’s explore what makes this timeless dish so special and how you can master it in your own kitchen.
Ingredients That Matter
The foundation of exceptional chicken and noodles begins with ingredient selection. Grandma understood that quality ingredients require less manipulation—they speak for themselves. Here’s what you’ll need for a serving of six to eight people:
- 2 whole chickens (approximately 4-5 pounds total), or 4 bone-in, skin-on chicken breasts and 4 thighs
- 12 cups of chicken stock or water
- 4 medium carrots, cut into 1-inch pieces
- 3 celery stalks, cut into 1-inch pieces
- 1 large yellow onion, quartered
- 8 ounces egg noodles or homemade pasta
- 3 bay leaves
- 1 teaspoon dried thyme
- Salt and black pepper to taste
- 2 tablespoons fresh parsley, chopped
- 2 tablespoons butter (optional, for richness)
The secret to grandma’s recipe often involves using bone-in chicken rather than boneless varieties. Bones contain collagen that converts to gelatin during cooking, creating a naturally silky, luxurious broth that store-bought broths struggle to match. This is the foundation that separates good chicken and noodles from unforgettable chicken and noodles.
Consider sourcing your chicken from a local butcher or farmers market. Free-range or pasture-raised birds have more developed flavor profiles and superior texture. The investment in quality protein pays dividends in every spoonful.
Preparing Your Chicken
Preparation is where many home cooks rush, but this is where grandma’s wisdom shines. Proper preparation sets the stage for the entire dish.
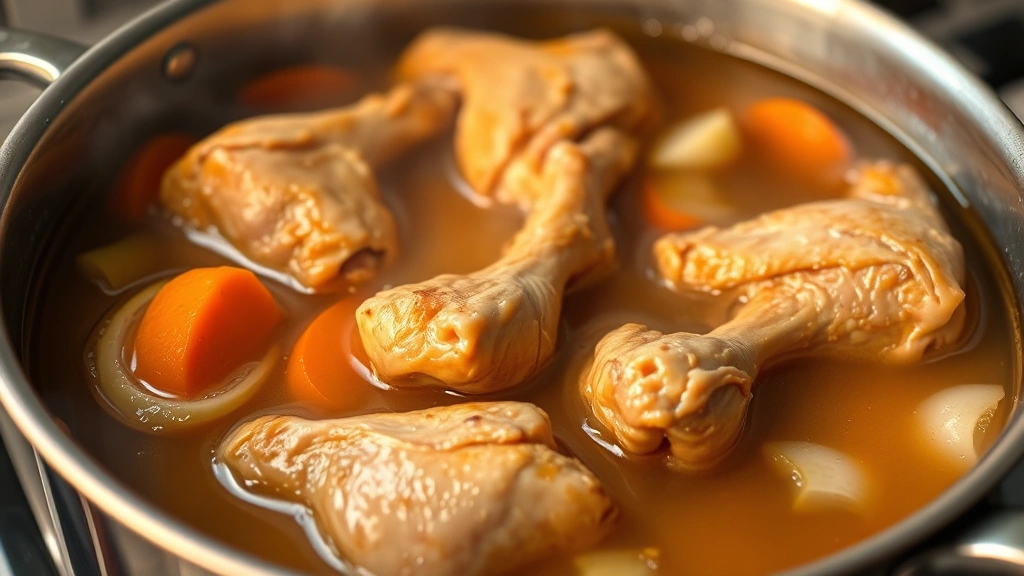
Cleaning the Chicken: Rinse your whole chickens under cold water, patting them dry with paper towels. Remove any excess fat from the cavities. If using parts, pat each piece thoroughly dry—moisture prevents proper browning and flavor development.
Optional Browning Step: While not traditional in all versions, browning your chicken in a heavy-bottomed pot or cast iron Dutch oven develops a flavorful crust through the Maillard reaction. Heat 2 tablespoons of butter or oil over medium-high heat until shimmering. Brown the chicken pieces on all sides (approximately 3-4 minutes per side), then remove and set aside. This step adds tremendous depth but isn’t mandatory if you’re pressed for time.
Why This Matters: Browning creates flavor compounds that dissolve into your broth, enriching every element of the final dish. Grandma often skipped this when making weeknight versions but included it for special occasions.
Building the Broth Foundation
The broth is the soul of chicken and noodles. This is where patience becomes your greatest ingredient. Rush this step, and you’ll have a decent dish. Give it time, and you’ll have something transcendent.
The Initial Simmer: Place your browned (or raw) chicken pieces into your pot. Pour 12 cups of cold stock or water over the chicken—the cold liquid helps extract maximum flavor from the bones. Bring the pot to a boil over high heat, then immediately reduce to a gentle simmer. You’ll notice foam rising to the surface during the first few minutes; skim this away with a spoon or ladle. This foam contains impurities that can cloud your broth.
Aromatic Vegetables: After skimming, add your quartered onion, carrot pieces, and celery. These aromatic vegetables—what the French call mirepoix—form the flavor base. Add bay leaves and dried thyme. The combination creates a sophisticated herbaceous background that makes people ask, “What’s in this?”
The Simmer Time: Let everything simmer gently for 45 minutes to 1 hour. Grandma’s secret was never rushing this. The longer the chicken sits in the hot liquid, the more collagen breaks down into gelatin, and the more flavor compounds dissolve into your broth. You should see gentle bubbles breaking the surface—never a rolling boil, which breaks apart the chicken and creates a cloudy broth.
Temperature Control: Maintain a temperature between 180-190°F if you have a thermometer. This gentle heat extracts maximum flavor while keeping the chicken tender and moist.
Straining and Shredding: After simmering, remove the chicken pieces with a slotted spoon. Set aside on a cutting board to cool slightly. Strain your broth through a fine-mesh sieve, discarding the vegetables and aromatics. Return the strained broth to your pot. Once the chicken is cool enough to handle, shred it into bite-sized pieces, discarding bones and skin.
Noodle Selection and Cooking
Noodle choice dramatically affects your final dish. Traditional versions use wide egg noodles—the kind that cradle broth beautifully and provide textural contrast to the tender chicken.
Store-Bought Versus Homemade: While store-bought egg noodles work perfectly well, many grandmothers made their own. If you’re interested in elevating this dish further, explore homemade pasta techniques. Homemade noodles have a silkier texture and richer flavor that complement the broth beautifully.
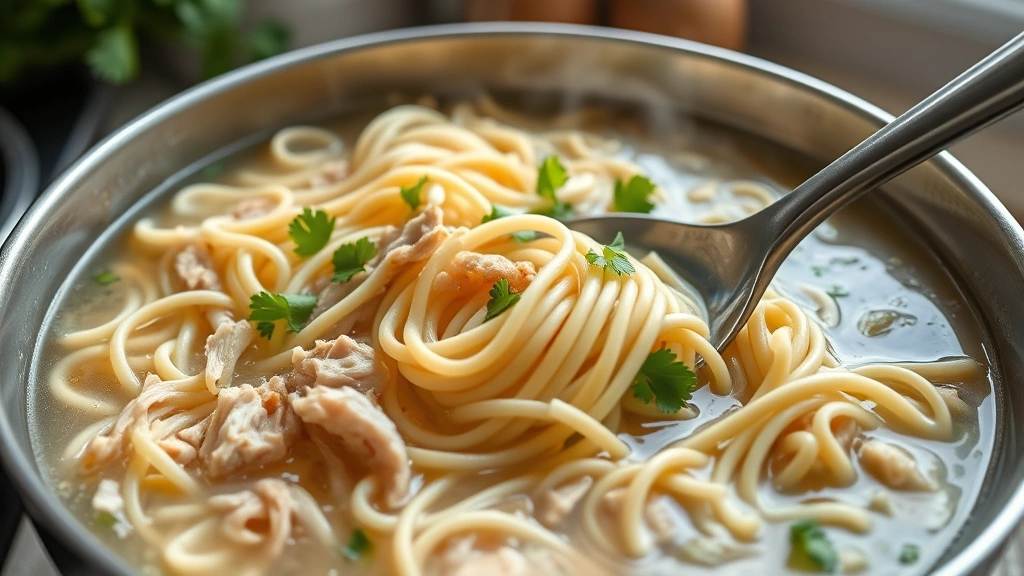
The Cooking Method: Here’s where grandma’s technique differs from standard pasta cooking. Rather than cooking noodles separately and draining them, she added them directly to the simmering broth. This allows the noodles to absorb broth flavors as they cook, creating a more integrated dish.
Step-by-Step Noodle Addition:
- Bring your strained broth back to a rolling boil
- Add noodles directly to the broth
- Stir occasionally to prevent sticking
- Cook for approximately 6-8 minutes (check package directions, as cooking times vary)
- Taste a noodle—it should be tender but still have slight resistance when bitten
- Return the shredded chicken to the pot and gently stir to combine
Timing Consideration: Add noodles only when you’re ready to serve within 15-20 minutes. Noodles sitting in broth too long become mushy and lose their structural integrity. This is why grandma often cooked noodles just before guests arrived.
Assembly and Finishing Touches
The final assembly is where your dish transforms from good to memorable. This is where grandma’s personal touches made her version legendary.
Seasoning Adjustment: Taste your chicken and noodles carefully. Season with salt and pepper gradually—you can always add more, but you can’t remove it. Many cooks find they need less salt than expected because the broth already contains sodium. Adjust slowly and taste between additions.
Richness Enhancement: For extra luxuriousness, stir in a tablespoon or two of butter just before serving. This adds a silky mouthfeel that elevates the entire experience. Some versions include a splash of heavy cream (¼ cup) for additional richness, though traditional recipes often skip this.
Fresh Herbs: Finish with fresh parsley, chopped just before serving. The brightness of fresh herbs cuts through the richness and adds visual appeal. Some grandmothers also added a pinch of fresh dill or a small amount of fresh thyme.
Garnish Ideas: Consider adding crispy fried onions for textural contrast, or a sprinkle of grated Parmesan cheese. These finishing touches should enhance rather than overpower the delicate flavors you’ve built.
Pro Tips from the Kitchen
Make It Ahead: Chicken and noodles actually improves when made a day ahead. The flavors meld and deepen overnight. Reheat gently on the stovetop, adding a splash of broth or water if the mixture has thickened too much.
Freezing Success: This dish freezes beautifully for up to three months. However, freeze the broth and chicken separately from the noodles. Cook fresh noodles when reheating to maintain optimal texture. This strategy ensures you always have restaurant-quality comfort food available.
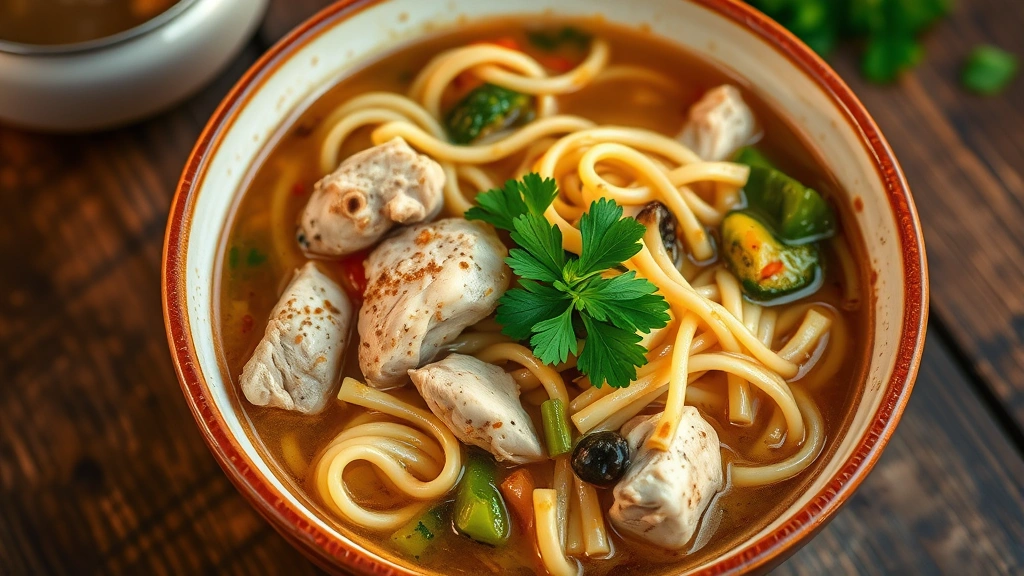
Ingredient Variations: The best healthy food recipes often include vegetable variations. Add peas in the final minute of cooking, or include mushrooms sautéed separately and stirred in at the end. Grandma sometimes added corn or diced green beans.
Broth Quality: If using store-bought stock instead of homemade broth, choose low-sodium varieties. This gives you control over final salt levels. Better yet, invest time in making your own stock—it’s surprisingly simple and makes an enormous difference.
Texture Preferences: Prefer a brothier version? Use 14-16 cups of liquid instead of 12. Like it thicker and more stew-like? Reduce to 10 cups. Grandma adjusted based on family preferences and what she had on hand.
Equipment Matters: Use a heavy-bottomed pot or Dutch oven that distributes heat evenly. This prevents hot spots that can scorch the bottom of your dish. A pot between 5-7 quarts works perfectly for this recipe.
Professional Technique: Learn from culinary experts by exploring Serious Eats, which offers deep dives into cooking techniques and food science. Understanding the why behind each step transforms you from someone following instructions to a true cook.
Consistency Control: If your chicken and noodles is too thin after cooking, you can create a slurry by whisking 1 tablespoon cornstarch with 2 tablespoons cold water. Stir this into your simmering broth and cook for 2-3 minutes until thickened. Conversely, if it’s too thick, simply add more warm broth or water.
Flavor Building: Grandma often added a parmesan rind to the broth while simmering. This adds umami depth without making the dish taste cheesy. Remove the rind before serving.
Explore America’s Test Kitchen for scientifically-tested variations and technique refinements. Their approach to comfort food cooking aligns perfectly with traditional family recipes.
FAQ
Can I use chicken breasts instead of bone-in chicken?
While boneless, skinless chicken breasts work, they lack the collagen that creates silky broth. If using breasts, reduce cooking time to 20-25 minutes and consider adding 1-2 tablespoons of gelatin to the broth to replicate the mouthfeel from bone-in chicken. For the best results, stick with bone-in pieces.
How do I make this recipe in a slow cooker or Instant Pot?
Slow Cooker Method: Add all ingredients except noodles. Cook on low for 6-8 hours or high for 3-4 hours. Cook noodles separately and add at the end. Instant Pot Method: Use the sauté function to brown chicken, then add remaining ingredients (except noodles). Cook on high pressure for 12 minutes. Quick release, add noodles, and cook on high pressure for 4 more minutes.
What’s the nutritional value of this dish?
A typical serving contains approximately 350-400 calories, 25-30g protein, 35-40g carbohydrates, and 8-10g fat. The bone broth provides collagen and minerals. This is a naturally balanced meal with protein, carbohydrates, and healthy fats. For additional nutritious recipes, explore more options on our blog.
Can I make this with other proteins?
Absolutely. Turkey works beautifully and creates a lighter variation. Beef and noodles (using beef chuck and beef broth) is equally delicious. Even fish can work with a light seafood broth, though it’s less traditional. The technique remains identical regardless of protein choice.
How long does chicken and noodles last in the refrigerator?
Properly stored in an airtight container, chicken and noodles lasts 3-4 days in the refrigerator. Reheat gently on the stovetop over medium heat, stirring occasionally. Add broth or water if the mixture has thickened too much.
What’s the difference between chicken and noodles and chicken soup?
Chicken and noodles typically has less liquid and more noodles, creating a thicker, heartier dish. Chicken soup has more broth and fewer noodles, resulting in a brothier consistency. The cooking methods are nearly identical, but the final ratio of liquid to solids differs.
Can I use rotisserie chicken to speed up this recipe?
Yes, though you’ll lose some depth. Shred a rotisserie chicken and add it to a good-quality store-bought broth with sautéed aromatics. Simmer for 20 minutes, add noodles, and cook as directed. This shortcut version takes about 30 minutes total but won’t have the complexity of the full recipe.
Visit our blog for more classic recipes and culinary inspiration. For additional insights into food preparation techniques, check out MasterClass Cooking Techniques where professional chefs share their approaches to foundational cooking methods.
Grandma’s chicken and noodles represents more than just food—it embodies love, tradition, and the understanding that the simplest dishes, made with intention and care, become the ones we treasure forever. Now that you’ve unlocked her secrets, you’re ready to create your own legacy of exceptional comfort food.


