Cowboy Candy Recipe: Proven Family Favorite!
Cowboy candy is a delightfully addictive treat that combines sweet, spicy, and smoky flavors in one irresistible package. This jalapeño-based candy has become a beloved staple in kitchens across America, particularly in Texas and the Southwest. The beauty of this recipe lies in its simplicity—just a handful of ingredients transform fresh jalapeños into a crunchy, tangy delicacy that works equally well as a snack, appetizer, or side dish.
Whether you’re hosting a backyard barbecue, looking for a unique gift from your kitchen, or simply craving something with a little kick, this cowboy candy recipe delivers exceptional results every time. The combination of brown sugar, vinegar, and spices creates a glaze that caramelizes beautifully while maintaining the jalapeño’s natural heat and texture. Once you make your first batch, you’ll understand why families have been passing this recipe down for generations.
This guide will walk you through everything you need to know about making authentic cowboy candy at home, from selecting the perfect jalapeños to storing your finished product for maximum freshness and flavor.

What Is Cowboy Candy?
Cowboy candy, also known as candied jalapeños, represents a brilliant fusion of sweet and heat that challenges traditional flavor categories. These glazed jalapeño slices are neither purely candy nor a vegetable side—they occupy a unique space in the culinary world where they enhance both savory and sweet dishes. The name itself evokes the rugged, bold flavors associated with Western cooking and ranch cuisine.
The origins of cowboy candy trace back to Southwestern cooking traditions, where preserving peppers through candying extended their shelf life while creating a delicious condiment. Today, this recipe has evolved into a beloved snack that appears at potlucks, on charcuterie boards, and in home pantries across the country. The caramelized coating creates a satisfying crunch while the jalapeño’s natural heat builds gradually, creating a complex taste experience.
What makes cowboy candy special is how it balances opposing flavors and textures. The sweetness of brown sugar plays against the pepper’s natural capsaicin heat, while vinegar adds brightness and tang. The result is a treat that keeps you coming back for more, despite the warming sensation building in your mouth with each bite.
Ingredients You’ll Need
Creating authentic cowboy candy requires just seven basic ingredients, most of which you likely already have in your pantry. This simplicity is part of what makes the recipe so appealing—minimal prep, maximum flavor.
- Fresh jalapeños: 2 pounds of medium-sized jalapeños work best. Look for firm peppers with unblemished skin at your local farmers market or grocery store.
- Brown sugar: 2 cups of packed brown sugar creates the sweet glaze. Don’t substitute white sugar, as brown sugar’s molasses content adds depth.
- Apple cider vinegar: 1½ cups provides the tangy backbone. You can use white vinegar, but apple cider vinegar offers superior flavor.
- Garlic cloves: 3-4 minced cloves add savory complexity to the candy coating.
- Red pepper flakes: ½ teaspoon amplifies the heat level without overpowering other flavors.
- Mustard seeds: ½ teaspoon optional but recommended for additional texture and spice.
- Salt: ½ teaspoon to balance the sweetness and enhance all flavors.
For those interested in understanding the chemistry of preservation and flavor development, the Institute of Food Technologists offers excellent resources on food science principles that apply to candy making and pickling processes.
Step-by-Step Instructions
Follow these detailed steps to create restaurant-quality cowboy candy in your own kitchen. Each stage builds upon the previous one, creating layers of flavor and the perfect texture.
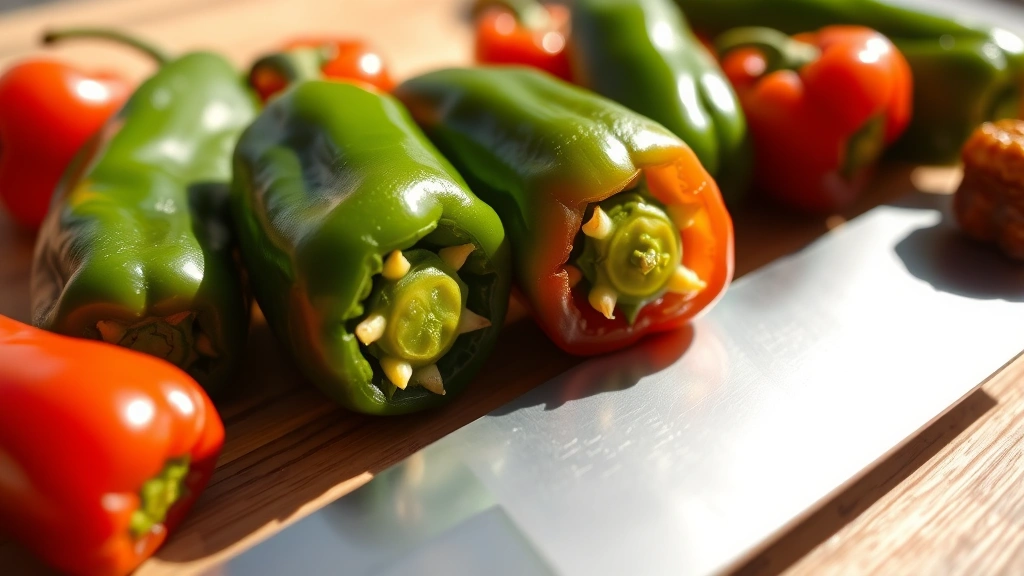
- Prepare your jalapeños: Start by washing the jalapeños thoroughly under cool running water. Using a sharp knife, slice them into ¼-inch rings, removing the stem end. For less heat, remove the white membranes and seeds with a small spoon. For maximum heat, leave them intact. Wear gloves throughout this process to protect your hands from the pepper’s oils.
- Combine wet ingredients: In a large stainless steel pot, combine the apple cider vinegar and brown sugar. Stir over medium heat until the sugar completely dissolves, about 3-4 minutes. This creates your base syrup, which should be smooth and homogeneous.
- Add aromatics: Once the sugar dissolves, add your minced garlic, red pepper flakes, mustard seeds, and salt. Stir well to distribute everything evenly. The mixture should smell fragrant and complex at this point.
- Introduce the jalapeños: Carefully add all your sliced jalapeños to the simmering syrup. Stir gently to ensure they’re all submerged and coated with the liquid. The mixture will initially seem loose, but don’t worry—it will thicken as it cooks.
- Bring to a boil: Increase the heat to medium-high and bring the entire mixture to a rolling boil. Once boiling, reduce the heat to medium and maintain a gentle boil for 15 minutes. During this time, stir occasionally to prevent sticking and ensure even cooking.
- Simmer until syrup thickens: After the initial 15-minute boil, reduce heat to low and continue simmering for another 15-20 minutes, stirring frequently. The syrup should reduce significantly and become thicker and more viscous. You’ll notice it coating the back of a spoon.
- Test for doneness: Place a small amount of the hot syrup on a cold plate. If it wrinkles when you push it with your finger, it has reached the proper consistency. If it’s still too thin, continue simmering for another 5 minutes and test again.
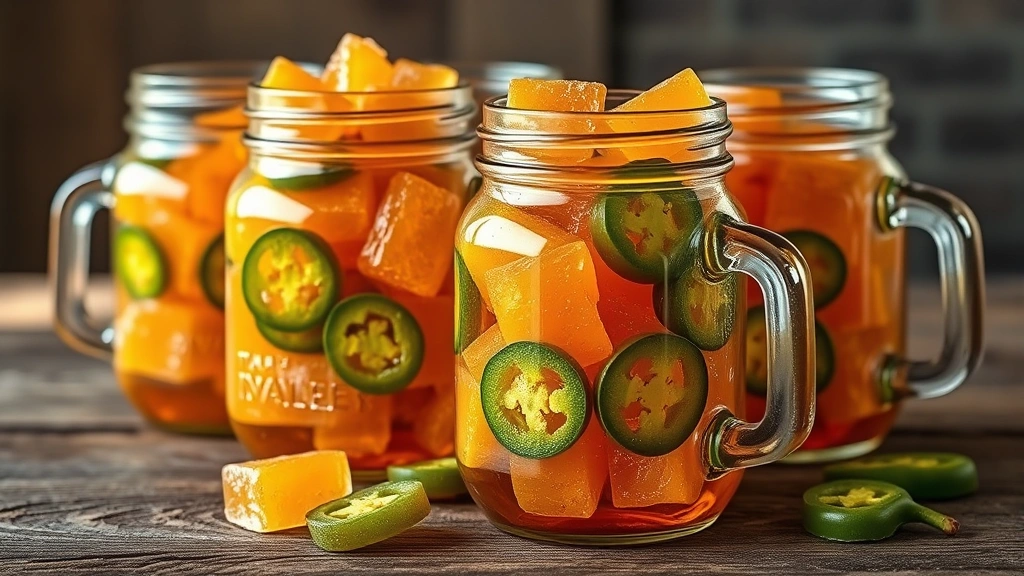
- Cool and store: Remove from heat and let the mixture cool to room temperature. As it cools, the syrup will continue to thicken. Once cooled, transfer to sterilized jars and seal. Store in the refrigerator for up to two months.
For those interested in mastering how to make homemade sauces, the principles you learn making cowboy candy translate beautifully to other preservation and glaze techniques.
Pro Tips for Perfect Results
Experienced home cooks know that the difference between good and exceptional cowboy candy lies in attention to detail. These professional tips will elevate your batch from ordinary to outstanding.
Choose the right jalapeños: Select medium-sized peppers that are firm and glossy. Avoid any with soft spots or blemishes. Fresher peppers will have better texture in the final product. If possible, purchase from a farmers market where you can inspect each pepper individually.
Don’t skip the vinegar type: Apple cider vinegar contains malic acid and natural sugars that contribute complexity. While white vinegar works technically, it produces a flatter flavor profile. Rice vinegar offers an interesting alternative if you’re experimenting.
Control the heat level: The amount of capsaicin in your candy depends on whether you remove the seeds and membranes. For mild candy, remove them completely. For medium heat, leave membranes but remove seeds. For maximum heat, keep everything intact. Adjust red pepper flakes accordingly.
Monitor temperature carefully: Use a candy or meat thermometer to track the syrup temperature. The perfect consistency develops around 220°F (104°C). This prevents under-cooking or over-cooking.
Stir frequently during cooking: Regular stirring prevents the bottom from burning and ensures even heat distribution. A wooden spoon works better than metal, which can scratch stainless steel pots.
Let it rest before jarring: Allowing the candy to cool slightly before transferring to jars prevents the glass from cracking due to temperature shock and gives you a better view of the final consistency.
Flavor Variations
Once you’ve mastered the basic recipe, explore these creative variations to keep things interesting. Each modification creates a distinctly different flavor profile while maintaining the candy’s essential character.
Smoky Cowboy Candy: Add ½ teaspoon of smoked paprika and ¼ teaspoon of liquid smoke to the syrup. This variation pairs beautifully with grilled meats and adds a campfire essence to the sweetness.
Honey-Sweetened Version: Replace 1 cup of brown sugar with 1 cup of raw honey. This creates a smoother texture and adds floral notes. The cooking time may increase slightly as honey requires different heat management than sugar.
Bourbon Barrel Candy: Add 2 tablespoons of bourbon or whiskey to the syrup just before the final simmer. This creates a sophisticated flavor that appeals to adult palates and pairs well with cheese boards.
Ginger-Spiced Candy: Include 1 tablespoon of fresh ginger juice or minced fresh ginger, plus ¼ teaspoon of ground ginger. This variation adds warming spice notes that complement the jalapeño heat beautifully.
Lime and Cilantro Candy: Add the zest of 2 limes and ¼ cup of fresh cilantro (added during the final minute of cooking). This creates a bright, herbaceous candy that works wonderfully in Latin-inspired dishes.
Check out our collection of best healthy food recipes for more creative ways to incorporate homemade condiments and candies into your daily cooking.
Storage and Shelf Life
Proper storage ensures your cowboy candy remains delicious for months. The combination of vinegar, sugar, and heat creates a naturally preserved product with impressive longevity.
Refrigerator storage: In sterilized glass jars stored in the refrigerator, cowboy candy lasts 2-3 months. The cold slows any remaining fermentation and keeps the texture crisp. Always use clean utensils when removing candy from the jar to prevent contamination.
Pantry storage: For shelf-stable storage, you can process the jars using water bath canning methods. Fill sterilized jars, leaving ½-inch headspace, and process in boiling water for 10 minutes. Properly sealed jars last 6-12 months in a cool, dark pantry. The sugar and vinegar act as natural preservatives.
Freezer storage: Cowboy candy freezes exceptionally well in airtight containers for up to one year. Thaw at room temperature before serving. Freezing actually helps preserve the vibrant color and crisp texture.
Signs of spoilage: Discard any candy that develops mold, exhibits off-odors, or shows signs of fermentation beyond the initial tang. Properly made cowboy candy should smell vinegary and sweet, not unpleasant or sour.
Serving Suggestions
Cowboy candy’s versatility makes it suitable for numerous applications beyond simple snacking. Its sweet-spicy profile enhances both traditional and innovative dishes.
Appetizers and charcuterie: Arrange cowboy candy on charcuterie boards alongside cured meats, aged cheeses, and crackers. The sweetness balances salty cured meats beautifully, while the heat cleanses your palate between bites. Consider pairing with sharp cheddar, aged gouda, or creamy brie.
Main course accompaniment: Serve alongside grilled chicken, pulled pork, or beef brisket. The candy’s acidity and sweetness complement smoky, savory proteins perfectly. Create a tasting experience by offering cowboy candy alongside other homemade sauces for comparison.
Breakfast enhancement: Top scrambled eggs, fried eggs, or breakfast burritos with a spoonful of cowboy candy. The combination of creamy eggs and sweet-spicy candy creates an unexpectedly delicious morning meal. This works particularly well with breakfast featuring bacon or sausage.
Dessert accompaniment: Believe it or not, cowboy candy pairs wonderfully with vanilla ice cream or pound cake. The spicy-sweet combination creates complexity that elevates simple desserts. This application works best with milder batches where heat doesn’t overpower sweetness.
Gift-giving: Package cowboy candy in attractive jars with handwritten labels and gift tags. It’s an impressive homemade gift that most recipients have never received before. Include serving suggestions on the label to help recipients get creative with their new treat.
Cocktail garnish: Muddle cowboy candy into whiskey cocktails or margaritas for a unique twist. The candy dissolves slightly, creating sweetness and spice while the jalapeño slices add visual appeal and flavor bursts. Check out our cocktail sauce recipe for more creative drink applications.
FAQ
Can I make cowboy candy without vinegar?
Vinegar is essential to cowboy candy’s flavor profile and preservation. It provides the tang that balances sweetness and prevents spoilage. You could substitute with lemon juice or lime juice in equal amounts, though the flavor will differ noticeably. The acidity remains crucial for both taste and food safety.
How hot will my cowboy candy be?
Heat level depends entirely on your jalapeño selection and seed removal. Medium jalapeños range from 2,500 to 8,000 Scoville units. Removing seeds and membranes reduces heat by about 70%. Red pepper flakes can be omitted entirely for milder candy. Start conservatively and adjust in future batches based on your preference.
Why is my syrup still thin after cooking?
The most common cause is insufficient cooking time. The syrup must reduce significantly to thicken properly. Continue simmering until it reaches 220°F (104°C) on a candy thermometer. Another possibility is too much liquid—ensure you’re using the exact amounts specified. High-altitude cooking may require longer cooking times.
Can I use fresh peppers other than jalapeños?
Yes! Serranos create spicier candy, while poblanos or banana peppers offer milder versions. Habaneros work but will be intensely hot. Adjust cooking time slightly based on pepper thickness—thinner peppers cook faster, thicker ones need additional time.
Is cowboy candy safe for canning?
Yes, when processed properly. The high sugar and vinegar content create an acidic environment that prevents botulism. Follow proper water bath canning procedures: use sterilized jars, leave ½-inch headspace, and process for 10 minutes in boiling water. Ensure jar seals pop down and stay sealed during storage.
What’s the difference between cowboy candy and candied jalapeños?
These terms are essentially interchangeable. Cowboy candy is the colloquial name popularized in the American Southwest, while candied jalapeños is the more formal culinary term. The preparation and ingredients are identical—it’s simply regional naming convention.
Can I double or triple this recipe?
Absolutely! The recipe scales well for larger batches. Simply multiply all ingredients by your desired factor. You may need to increase cooking time slightly when working with larger quantities, as the syrup takes longer to reduce. Use your largest pot and stir more frequently to prevent sticking.
Do I need special equipment to make cowboy candy?
No special equipment is required. A large stainless steel pot, wooden spoon, knife, cutting board, and glass jars are sufficient. A candy thermometer helps ensure perfect consistency but isn’t absolutely necessary if you understand the visual and texture cues of properly cooked syrup.
For those interested in expanding their knowledge of food preservation and pickling techniques, the National Center for Home Food Preservation offers comprehensive, science-based resources for safe preservation methods. Additionally, Serious Eats provides excellent food science explanations for cooking techniques, and King Arthur Baking Company offers detailed guides on sugar work and candy making fundamentals.
Making cowboy candy at home transforms simple jalapeños into an addictive treat that your family will request repeatedly. With this proven recipe and these professional techniques, you’ll create batches that rival anything found in specialty food shops. Start with the basic version, then experiment with flavor variations until you’ve perfected your signature batch. Your kitchen will soon fill with the wonderful aroma of caramelizing sugar and roasted peppers, signaling the creation of a true family favorite that deserves a permanent place in your culinary rotation.


