Dirt Pudding Delight: The Ultimate Kid-Approved Treat That’s Actually Fun to Make
If you’re searching for a dessert that combines whimsy, simplicity, and genuine deliciousness, look no further than dirt pudding. This playful treat has captured the hearts and taste buds of children everywhere, and honestly, adults love it just as much. The beauty of dirt pudding lies in its theatrical presentation—it literally looks like a spoonful of chocolate soil—while delivering layers of rich, creamy, and crunchy goodness that keeps kids coming back for more.
Dirt pudding isn’t just another dessert; it’s an experience. The name alone sparks curiosity and laughter in young diners, transforming what could be an ordinary pudding into an adventure. Whether you’re planning a birthday party, looking for an after-school snack, or wanting to engage children in the kitchen, dirt pudding checks all the boxes. The best part? Making it requires minimal baking skills and ingredients you likely already have in your pantry.
This comprehensive guide will walk you through everything you need to know about creating the perfect dirt pudding, from ingredient selection to creative variations that’ll keep your family entertained.
What Is Dirt Pudding?
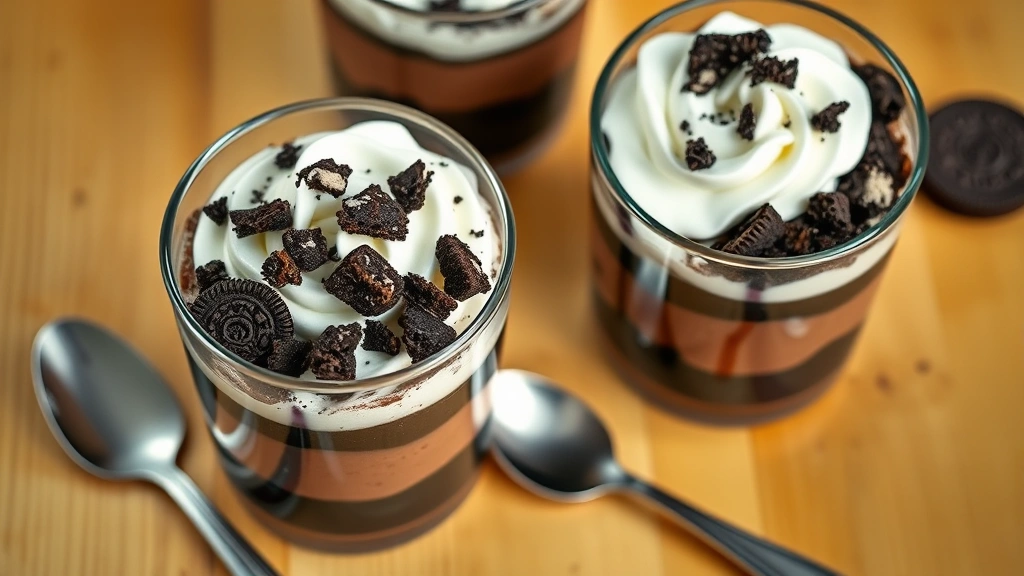
Dirt pudding is a no-bake dessert that layers chocolate pudding, crushed cookies, and whipped cream to create an edible dirt-like mixture. The appeal goes beyond mere novelty—it’s the perfect introduction to layering flavors and textures, making it an ideal gateway dessert for young cooks. The “dirt” effect comes from the combination of finely crushed chocolate sandwich cookies (typically Oreos) mixed throughout the pudding and whipped cream base.
This dessert has its roots in American casual cooking, gaining popularity in the 1980s and 1990s as part of the broader “fun food” movement aimed at making eating enjoyable for children. Unlike traditional puddings that focus on smooth, uniform textures, dirt pudding celebrates contrast—the creamy against the crunchy, the rich chocolate against lighter whipped cream.
The versatility of dirt pudding makes it perfect for various occasions. Serve it in individual cups for portion control at parties, layer it in a large trifle dish for family gatherings, or prepare it in clear glasses to showcase the beautiful layers. The visual appeal alone makes children excited to eat it, often leading them to actually finish their dessert rather than picking at it.
Essential Ingredients Breakdown
Creating authentic dirt pudding requires understanding each ingredient’s role in the final product. Here’s what you’ll need:
- Chocolate Pudding Mix or Instant Pudding: This forms the foundation of your dirt pudding. Instant pudding works best because it sets quickly and requires no cooking. One package typically serves 4-6 people, depending on portion size. You can use brand-name pudding or store-brand versions—both work equally well.
- Milk: Standard whole milk or 2% milk works perfectly. Some recipes call for mixing milk with heavy cream for extra richness, though this is optional. The milk hydrates the pudding mix and creates the creamy base.
- Chocolate Sandwich Cookies: Oreos are the traditional choice, but store-brand chocolate sandwich cookies work just fine. You’ll need approximately 15-20 cookies, depending on how “dirty” you want your pudding. These cookies are crushed into various sizes—some finely ground and some left in larger chunks for texture variation.
- Whipped Cream: This adds lightness and airiness to the dessert. Use freshly whipped heavy cream or store-bought whipped cream. Freshly whipped cream tastes superior and allows you to control the sweetness level.
- Powdered Sugar (Optional): If using fresh whipped cream, a tablespoon or two of powdered sugar sweetens it slightly, balancing the rich chocolate elements.
- Vanilla Extract (Optional): A splash of vanilla in the whipped cream adds depth and complexity to the flavor profile.
When selecting ingredients, quality matters. Higher-quality chocolate pudding mix will yield richer flavor. Similarly, premium chocolate sandwich cookies offer better chocolate flavor than budget alternatives. However, this dessert is forgiving—even basic ingredients produce delicious results.
Step-by-Step Recipe Instructions
Preparation Time: 15 minutes | Chilling Time: 5-10 minutes | Serves: 4-6 people
Ingredients:
- 1 package (3.9 oz) instant chocolate pudding mix
- 2 cups cold milk
- 1 container (8 oz) whipped cream or 1 cup heavy cream
- 15-20 chocolate sandwich cookies
- 1 tablespoon powdered sugar (if using fresh cream)
- ½ teaspoon vanilla extract (optional)
Instructions:
- Prepare the Pudding Base: Pour the instant chocolate pudding mix into a large mixing bowl. Add the cold milk gradually while whisking constantly to avoid lumps. Continue whisking for 1-2 minutes until the mixture reaches a smooth, pudding-like consistency. Set aside for 5 minutes to allow the pudding to thicken slightly.
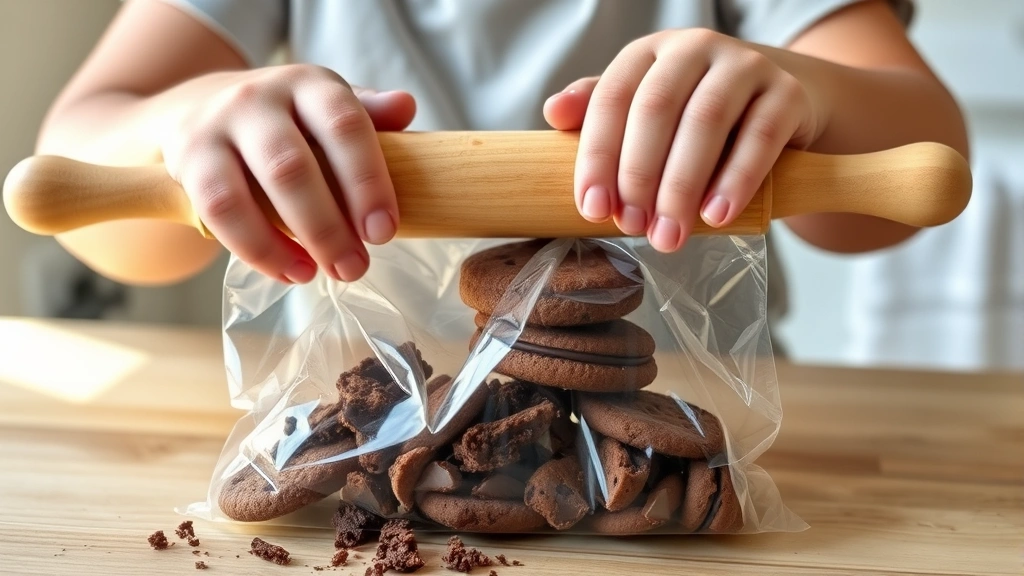
- Crush the Cookies: While the pudding sets, place your chocolate sandwich cookies in a sealed plastic bag. Using a rolling pin, hammer, or the bottom of a measuring cup, crush the cookies into various sizes. Aim for a mixture of fine crumbs and small chunks—this creates the authentic “dirt” texture. You want approximately ¾ cup of crushed cookies for the full recipe.
- Prepare the Whipped Cream: If using store-bought whipped cream, simply transfer it to a bowl. If making fresh whipped cream, pour heavy cream into a chilled bowl and whip with an electric mixer on medium-high speed until soft peaks form (about 2-3 minutes). Add powdered sugar and vanilla extract if desired, then whip for another 30 seconds to incorporate.
- Layer the First Component: Divide the chocolate pudding evenly among serving cups or glasses. Spoon approximately 2 tablespoons of pudding into each cup, creating the first layer. This base layer anchors the entire dessert.
- Add the Cookie Crumbles: Sprinkle approximately 1-2 tablespoons of crushed cookies over the pudding layer in each cup. Reserve some larger cookie chunks for the top layer to enhance the visual “dirt” effect.
- Layer the Whipped Cream: Top the cookie layer with a generous dollop of whipped cream, approximately 2-3 tablespoons per cup. Spread it gently to create an even layer without mixing it into the pudding below.
- Create the Final Dirt Layer: Top each cup with a final generous sprinkle of crushed cookies, focusing on the larger chunks for authentic appearance. This top layer creates the convincing dirt effect that makes the dessert so visually appealing.
- Chill and Serve: Refrigerate the assembled dirt pudding for at least 5-10 minutes before serving. This allows the layers to set slightly and enhances flavor development. Serve chilled with spoons, and watch the delighted reactions from your diners.
Pro tip: If preparing dirt pudding for a party, assemble individual cups up to 4 hours ahead, covering them with plastic wrap. Add the top cookie layer just before serving to maintain maximum crunchiness.
Pro Tips for Perfect Results
Temperature Control Matters: Keep all ingredients cold before assembling. Cold pudding, cold milk, and chilled whipped cream create better texture and prevent layers from melting together. Remove ingredients from the refrigerator only when ready to assemble.
Cookie Selection Strategy: Different cookie brands have varying thickness and chocolate content. Thinner cookies crush more finely, while thicker cookies maintain chunkier pieces. Experiment with different brands to find your preferred texture ratio. Double-stuffed Oreos offer more chocolate flavor if you prefer richer desserts.
Whipped Cream Consistency: Soft peaks work better than stiff peaks for dirt pudding. Stiff peaks can feel too dense and heavy, while soft peaks maintain a lighter, airier quality that contrasts beautifully with the dense pudding. If your whipped cream becomes overwhipped, fold in a tablespoon of milk to restore the proper consistency.
Layering Technique: Use the back of a spoon to gently spread layers rather than stirring. Gentle spreading maintains distinct layers, while stirring creates an undesirable muddy appearance. Each layer should be visible and distinct for maximum visual impact.
Pudding Thickness: If your pudding seems too thin after 5 minutes, whisk in an extra tablespoon of milk powder or allow it to set for another 5 minutes. Conversely, if pudding seems too thick, whisk in a splash of additional milk. The consistency should be thick enough to hold layers but not so thick it becomes difficult to spoon.
Make Ahead Strategy: Prepare pudding and crushed cookies several hours in advance, storing them separately. Assemble cups just before serving or up to 2 hours prior, adding the top cookie layer immediately before serving to preserve crunchiness.
Creative Variations and Twists
While classic chocolate dirt pudding is timeless, creative variations keep the dessert exciting for repeat servings. Consider exploring these options:
Vanilla Pudding Variation: Substitute vanilla instant pudding for chocolate, then crush chocolate cookies as usual. This creates a lighter flavor profile while maintaining the visual appeal. Top with crushed graham crackers for a different texture experience.
Cookies and Cream Dream: Use vanilla pudding as the base, incorporate crushed Oreos throughout, and add a layer of cookie crumbles between the pudding and whipped cream. This variation maximizes cookie flavor and texture.
Mint Chocolate Dirt: Prepare chocolate pudding, but add ¼ teaspoon of peppermint extract to the milk before mixing with pudding powder. Layer with crushed chocolate mint cookies or regular Oreos. The mint adds sophistication while maintaining kid-friendly appeal.
Peanut Butter Dirt: Layer chocolate pudding with crushed peanut butter cookies instead of chocolate cookies. Add a thin layer of peanut butter between the pudding and whipped cream for extra indulgence. This variation appeals to peanut butter enthusiasts.
Brownie Crumb Version: Crumble homemade or store-bought brownies instead of using cookies. This creates earthier texture and deeper chocolate flavor. Combine with chocolate pudding for maximum chocolate impact, or pair with vanilla pudding for contrast.
For families interested in healthy dessert recipes, consider substituting regular pudding with Greek yogurt-based chocolate pudding. Layer with crushed granola and fresh berries for a more nutritious version that maintains the fun presentation.
Storage and Make-Ahead Options
Dirt pudding’s convenience extends beyond preparation into storage flexibility. Understanding proper storage techniques ensures maximum freshness and quality:
Refrigerator Storage: Store assembled dirt pudding in covered containers in the refrigerator for up to 24 hours. The pudding maintains its texture and flavor throughout this period. If storing longer than a few hours, add the top cookie layer just before serving to preserve crunchiness—otherwise, cookies absorb moisture and become soggy.
Component Preparation: Prepare individual components separately and store for up to 2 days. Keep pudding in covered containers, crushed cookies in airtight containers or bags, and whipped cream in covered bowls. This approach allows quick assembly when needed, perfect for busy families.
Freezing Considerations: While you can freeze assembled dirt pudding, the texture changes significantly upon thawing. Whipped cream separates, pudding becomes icy, and cookies lose their crunch. Instead, freeze individual components: pudding in ice cube trays (then transfer to freezer bags), and crushed cookies in airtight containers. Assemble after thawing for best results.
Make-Ahead for Parties: Prepare dirt pudding cups up to 4 hours before serving. Cover individual cups with plastic wrap and refrigerate. Add the final cookie topping just before serving to maintain visual appeal and texture contrast. This strategy reduces last-minute stress while ensuring optimal presentation.
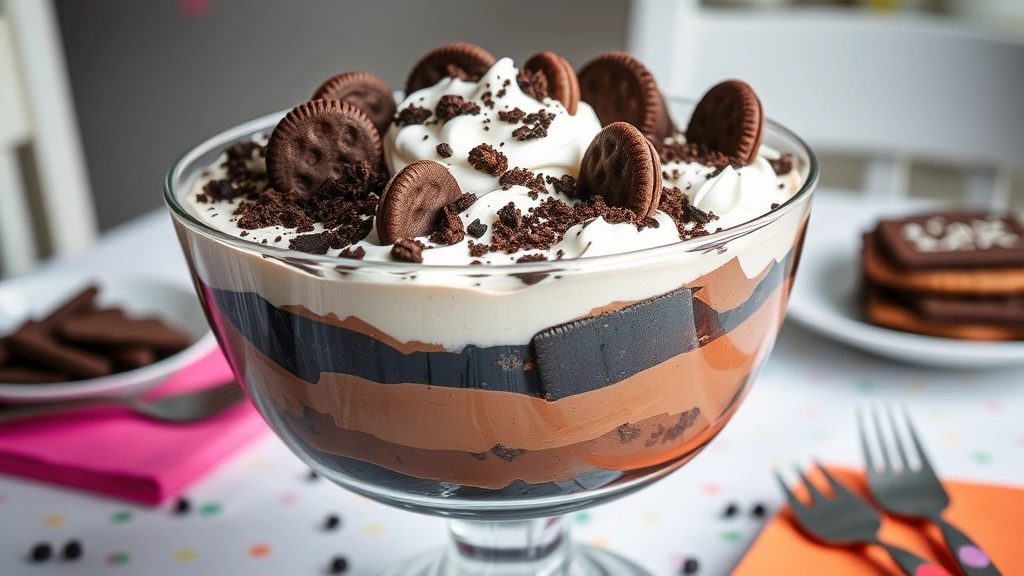
Bulk Preparation: For large gatherings, prepare a large trifle dish of dirt pudding rather than individual cups. Layer half the pudding on the bottom, add half the crushed cookies, spread all the whipped cream, layer remaining pudding, then top with final cookie layer. This approach feeds 12-15 people and looks stunning when presented in a clear glass dish.
Why Kids Love This Dessert
Understanding why children gravitate toward dirt pudding helps explain its enduring popularity and suggests ways to make it even more appealing:
Novelty and Humor: The name “dirt pudding” immediately captures children’s imagination. Kids find the concept of eating something called “dirt” hilarious and slightly transgressive, making the dessert feel like a special treat or secret indulgence. This psychological element significantly enhances enjoyment.
Textural Variety: Children’s taste preferences often center on texture as much as flavor. Dirt pudding delivers multiple textures—creamy pudding, fluffy whipped cream, and crunchy cookies—in a single spoonful. This variety maintains interest and prevents the dessert from becoming boring.
Visual Appeal: The appearance of dirt pudding creates excitement before tasting. The realistic “dirt” appearance engages children’s senses and imagination, making them eager to dig in. Clear serving cups showcase the layers, adding visual interest beyond the simple color palette.
Customization Potential: Children enjoy having choices and control. Offering different cookie options, letting kids help crush cookies, or allowing them to choose layering arrangements gives them agency in the dessert-making process. This involvement increases their investment in and enjoyment of the final product.
Interactive Element: Making dirt pudding together provides quality time and teaches basic cooking skills. Children learn about layering, texture combinations, and ingredient measurement in a low-pressure, fun environment. The hands-on experience often matters more to kids than the final dessert itself.
For families exploring best healthy food recipes, dirt pudding offers opportunities to sneak in nutritious elements while maintaining fun appeal. Consider adding crushed nuts to the cookie layer for extra protein and healthy fats, or incorporating berries between layers for fruit content.
FAQ
Can I make dirt pudding without instant pudding mix?
Yes, absolutely. Prepare chocolate pudding from scratch using cocoa powder, cornstarch, sugar, and milk heated on the stovetop. Allow homemade pudding to cool completely before layering. Homemade pudding offers richer chocolate flavor, though it requires more preparation time than instant mixes. External resource: The Culinary Institute of America offers detailed pudding-making techniques for those interested in mastering traditional methods.
What cookies work best for dirt pudding?
Chocolate sandwich cookies like Oreos are traditional, but any chocolate cookie works well. Chocolate wafers, chocolate chip cookies, or even brownies can substitute. Avoid cookies with fillings or toppings that might dominate the flavor profile. The key is selecting cookies you enjoy eating, since they comprise a significant portion of the dessert.
How can I make dirt pudding dairy-free?
Substitute dairy milk with almond, oat, or coconut milk when preparing pudding. Use dairy-free whipped cream or coconut cream for the whipped layer. Many brands now produce dairy-free instant pudding mixes, making the adaptation straightforward. The final result tastes nearly identical to traditional versions.
Is dirt pudding appropriate for picky eaters?
Often, yes. The novelty and fun presentation appeal to picky eaters who might otherwise reject traditional pudding. However, picky eaters might object to cookie chunks or specific textures. Offer customized versions where they can control which layers they include, or prepare a smooth version without crushed cookies for those preferring uniform textures.
Can I prepare dirt pudding in advance for a party?
Yes, prepare up to 4 hours ahead. Assemble individual cups, cover with plastic wrap, and refrigerate. Add the top cookie layer immediately before serving to maintain crunchiness. Alternatively, prepare components separately and assemble cups just before the party begins, ensuring optimal texture and freshness.
What’s the best way to serve dirt pudding?
Serve in clear glasses or cups to showcase layers, or in small bowls. Provide spoons for eating and consider offering small appetizer forks as fun alternatives. Serve immediately after assembly for maximum texture contrast. Pair with cold milk or hot chocolate for a complete dessert experience.
How many servings does one batch make?
One package of instant pudding mix (typically 3.9 oz) mixed with 2 cups milk, combined with 1 container of whipped cream and 15-20 crushed cookies, yields 4-6 servings depending on portion size. For smaller portions or appetizer-style servings, one batch yields 8-10 servings.
Can I substitute whipped cream with yogurt?
Yes, Greek yogurt or regular yogurt creates a tangy layer with similar texture to whipped cream. The yogurt adds nutritional value and slightly reduces richness. Sweeten yogurt with a tablespoon of honey or powdered sugar if desired. This substitution works particularly well in lighter dessert variations.
What’s the difference between dirt pudding and mud pie?
Dirt pudding is a layered no-bake dessert featuring pudding, cookies, and whipped cream. Mud pie traditionally refers to a baked chocolate dessert with a crust, chocolate filling, and whipped cream topping. While both are chocolate-forward and share similar flavor profiles, dirt pudding requires no baking and emphasizes texture contrast more prominently.
How do I prevent cookies from getting soggy?
Add the top cookie layer immediately before serving rather than assembling hours in advance. If preparing ahead, assemble the pudding and whipped cream layers, then add cookies just before serving. Store cookies separately in airtight containers until needed. This strategy preserves the crucial crunch that makes dirt pudding special.
Can children help make dirt pudding?
Absolutely—dirt pudding is perfect for involving children in the cooking process. Kids can measure milk, whisk pudding, crush cookies in bags, and assemble layers under supervision. The hands-on experience teaches basic cooking skills while creating memories and increasing their investment in the final dessert.


