Ground Venison Chili: Hunter’s Favorite Recipe
There’s nothing quite like a steaming bowl of ground venison chili after a long day in the field. This hearty, warming dish has been a staple in hunting camps and family kitchens for generations, combining the rich, lean meat of venison with aromatic spices and slow-cooked comfort. Ground venison chili delivers bold flavors that rival any beef-based version, while offering superior nutritional benefits and a distinctive taste that reflects the wild heritage of the meat.
Whether you’re a seasoned hunter looking to use your recent harvest or someone seeking authentic ground venison recipes to elevate your cooking, this guide walks you through every step of creating restaurant-quality chili in your own kitchen. We’ll explore ingredient selection, cooking techniques, and pro tips that transform simple components into an unforgettable meal.
Why Venison Makes Superior Chili
Venison possesses qualities that make it exceptionally suited for chili preparation. The meat is naturally lean, containing significantly less fat than beef, which means it won’t develop the greasy layer that sometimes appears on traditional chili. This characteristic allows the true flavors of spices and other ingredients to shine without being masked by excess fat.
The distinctive flavor profile of venison—earthy, slightly gamey, and complex—pairs beautifully with chili spices like cumin, chili powder, and oregano. According to The Culinary Institute of America’s game cooking resources, venison’s natural compounds create a depth of flavor that makes it ideal for long-simmered dishes. The extended cooking time in chili preparation actually mellows any strong gaminess while intensifying the savory qualities hunters prize.
Ground venison also offers nutritional advantages. It’s higher in protein than ground beef, lower in calories, and rich in iron and B vitamins. This makes venison chili not just delicious but genuinely nourishing—a dish that satisfies both appetite and conscience.
Essential Ingredients You’ll Need
Creating authentic hunter’s venison chili requires quality ingredients and proper proportions. Here’s what you’ll need for a batch serving 8-10 people:
- 2.5 pounds ground venison – the foundation of your chili, preferably freshly ground with a slight fat ratio for moisture
- 3 tablespoons chili powder – use authentic chili powder, not chili seasoning blends that contain salt and fillers
- 2 tablespoons ground cumin – essential for authentic flavor depth
- 1 tablespoon smoked paprika – adds subtle smokiness that complements venison’s character
- 2 large yellow onions – diced finely for even cooking
- 6 cloves garlic – minced, for aromatic foundation
- 2 cans (28 ounces each) crushed tomatoes – the liquid base of your chili
- 1 can (15 ounces) tomato sauce – deepens tomato flavor
- 2 cans (15 ounces each) kidney beans – or pinto beans for variation
- 1 can (6 ounces) tomato paste – concentrated flavor booster
- 2 cups beef broth – adds savory depth and adjusts consistency
- 3 tablespoons olive oil – for browning venison and aromatics
- 2 teaspoons dried oregano – Mediterranean herb that bridges flavors
- 1 teaspoon cayenne pepper – adjust based on heat preference
- Salt and black pepper to taste – final seasoning adjustments
- 1 tablespoon brown sugar – balances acidity from tomatoes
- 2 bay leaves – for subtle complexity
The quality of ground venison makes an enormous difference. If you’re processing your own harvest, grind the meat fresh and keep it cold until cooking. For store-bought venison, ensure it’s been handled properly and frozen if not using immediately.
Preparation Steps for Success
Proper preparation ensures even cooking and maximum flavor development. Begin by bringing all ingredients to room temperature—this applies especially to the venison, which cooks more evenly when not ice-cold.
Prepare your mise en place by dicing onions into uniform quarter-inch pieces. Uniform size ensures even cooking throughout the chili. Mince garlic finely, as larger pieces can become bitter during extended cooking. Toast your cumin and chili powder in a dry skillet over medium heat for 30-45 seconds to awaken their essential oils—this simple step dramatically amplifies their flavor contribution.
Drain and rinse your canned beans under cold water to remove excess sodium and the starchy liquid that can cloud your chili. If using dried beans, soak overnight and cook separately until tender before adding to your chili.
Open all cans and arrange ingredients near your cooking vessel for efficient workflow. Measure spices into small bowls rather than measuring directly over steam, which can cause clumping.
Cooking Method and Timing
The cooking process unfolds in distinct phases: browning, building flavor, and slow simmering. Each phase is crucial for developing the complex taste hunters expect.
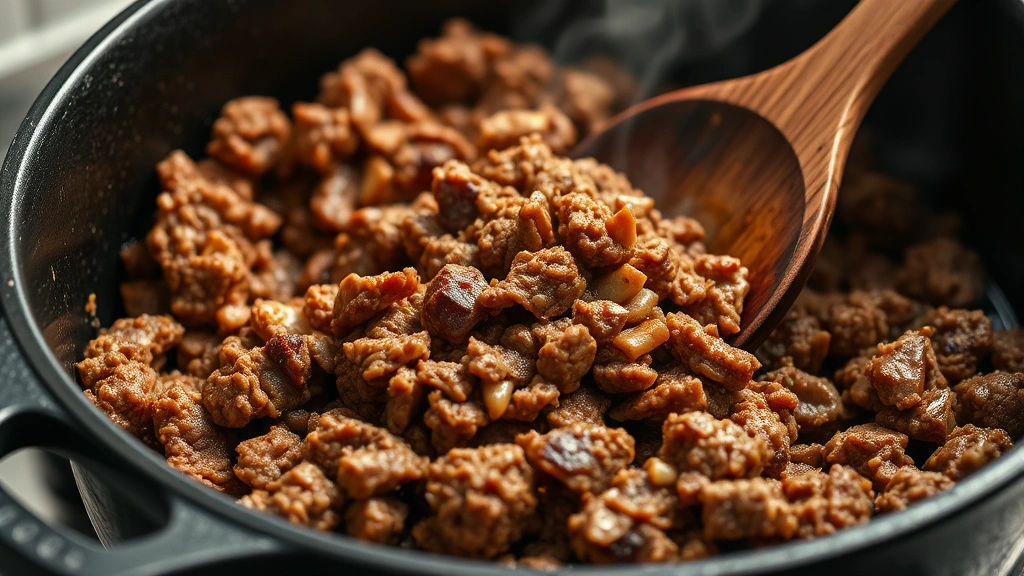
Phase One: Browning (10 minutes)
Heat olive oil in a large heavy-bottomed pot or Dutch oven over medium-high heat. Once shimmering, add the ground venison in batches, breaking it into small pieces with a wooden spoon. Don’t overcrowd the pan—venison needs space to brown rather than steam. Cook each batch until deeply browned, approximately 3-4 minutes per batch. This browning creates fond (the browned bits on the pot bottom) that adds tremendous flavor. Transfer browned venison to a plate and set aside.
Phase Two: Aromatics Foundation (8 minutes)
In the same pot with remaining fat and fond, add diced onions and cook over medium heat for 4 minutes, stirring occasionally, until they begin softening and picking up color from the pot bottom. Add minced garlic and cook for 1 minute until fragrant. This step creates the aromatic foundation that carries flavor throughout your chili.
Phase Three: Spice Blooming (2 minutes)
Add your pre-toasted cumin, chili powder, smoked paprika, oregano, and cayenne pepper to the onion mixture. Stir constantly for 1-2 minutes until the spices become fragrant and coat all ingredients. This process, called blooming, releases essential oils and prevents raw spice flavor in the finished chili.
Phase Four: Liquid Integration (5 minutes)
Add tomato paste and stir thoroughly to combine with spices and aromatics, creating a rich paste coating the pot. Cook for 1 minute, then add crushed tomatoes and tomato sauce. Stir well, scraping the pot bottom to incorporate all fond. Add beef broth, brown sugar, bay leaves, and the reserved browned venison.
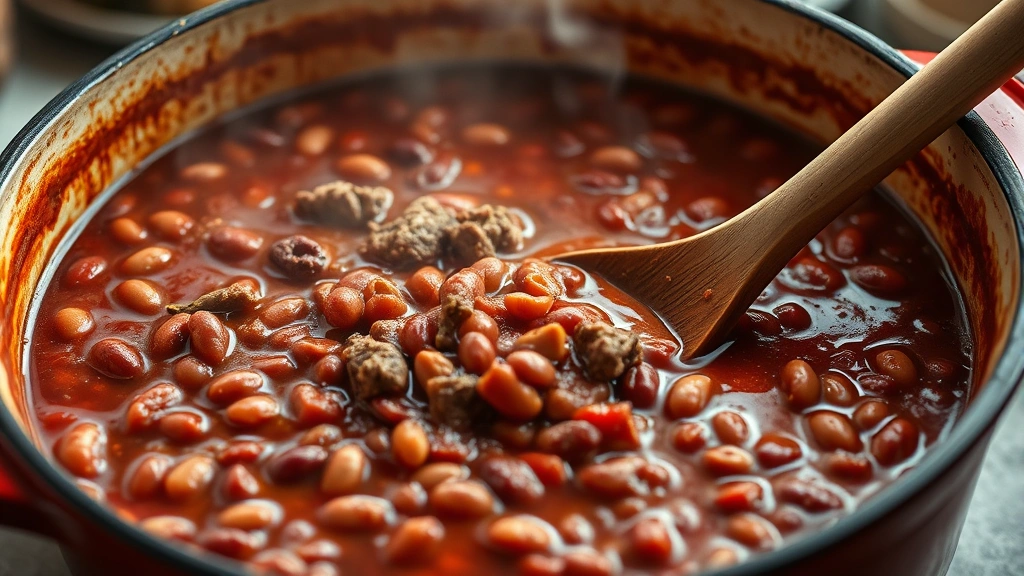
Phase Five: Slow Simmer (90 minutes)
Bring the mixture to a gentle simmer over medium heat. Once simmering, reduce heat to low and partially cover with a lid, leaving it slightly ajar to allow steam to escape. Stir every 15-20 minutes, checking that nothing sticks to the bottom. After 60 minutes of simmering, add the drained beans and continue cooking for 30 minutes more.
The extended simmering allows flavors to meld and deepen. The venison becomes incredibly tender, and the chili develops the rich, complex taste that distinguishes homemade versions from quick preparations.
Flavor Customization Guide
While this recipe provides excellent baseline flavors, customization allows you to tailor the chili to your preferences and available ingredients.
Heat Level Adjustments
Increase cayenne pepper to 1.5 teaspoons for more heat, or reduce to half a teaspoon for milder versions. Add diced jalapeños or habaneros during the aromatics phase for fresh heat. Chipotle peppers in adobo sauce contribute smoky heat—add 1-2 peppers, minced, during the liquid integration phase.
Bean Variations
Traditional Texas-style chili contains no beans, so feel free to omit them entirely if preferred. Black beans provide earthier flavor than kidney beans. Pinto beans are authentic and slightly creamier. A mixture of two bean varieties creates interesting texture contrast.
Depth Enhancement
Add 1 ounce of dark chocolate during the final 10 minutes of cooking—it adds subtle complexity without sweetness. A tablespoon of coffee or espresso powder contributes depth similar to dark chocolate. These additions are traditional in hunter’s chili.
Vegetable Additions
Diced bell peppers (added with onions) contribute sweetness and color. Diced celery adds subtle herbaceous notes. Corn kernels introduce sweetness—add during the final 15 minutes. Mushrooms contribute umami and meaty texture—sauté separately and add near the end.
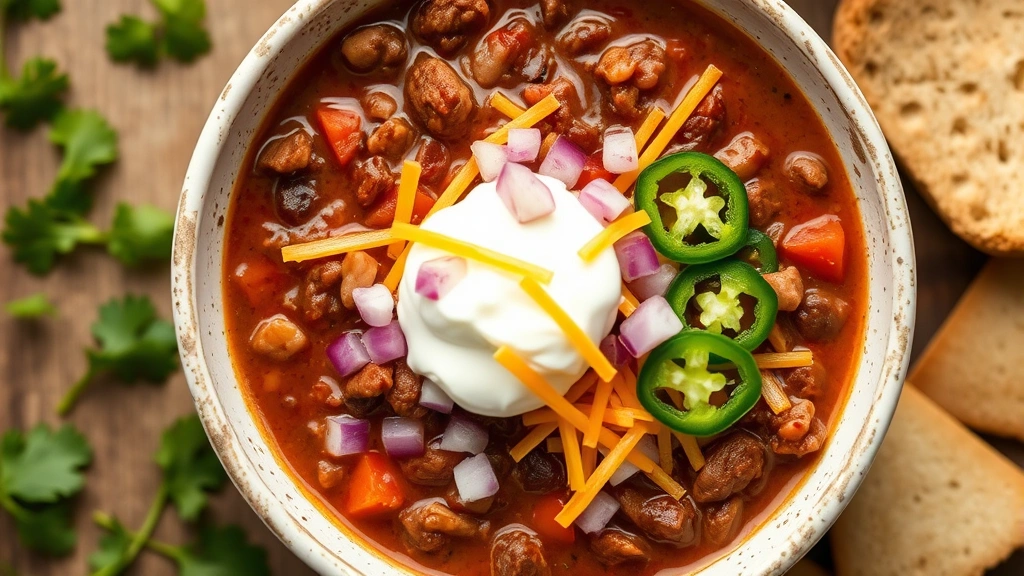
Serving Suggestions and Pairings
How you serve venison chili elevates it from simple comfort food to memorable dining. Traditional toppings include shredded cheddar cheese, sour cream, diced onions, and jalapeños. More creative options include crispy bacon bits, fresh cilantro, lime crema, or pickled red onions.
Serve with cornbread for authentic hunter’s lodge experience, or pair with rustic bread for soaking up every drop of chili. A simple quick breakfast recipes approach works too—leftover chili makes exceptional breakfast served over eggs.
For dessert, consider lighter options after such a hearty main course. A easy fudge recipe provides rich indulgence, or try marshmallow recipe variations for a lighter touch. Those with a sweet tooth might enjoy Christmas crack recipe as a palate cleanser.
Beverage pairings matter significantly. Full-bodied red wines like Zinfandel or Cabernet Sauvignon complement venison’s earthiness beautifully. Amber ales and dark beers work wonderfully with chili’s spice profile. For non-alcoholic options, sparkling water with lime or iced tea provide refreshing contrast.
Storage and Make-Ahead Tips
Venison chili actually improves over time as flavors meld and deepen. Make it a day or two ahead for optimal taste.
Refrigerator Storage
Cool chili to room temperature before transferring to airtight containers. Properly stored, it keeps for 4-5 days in the refrigerator. The chili will thicken as it cools—reheat gently over low heat, adding beef broth if needed to reach desired consistency.
Freezer Storage
Venison chili freezes excellently for up to 3 months. Portion into meal-sized containers before freezing to allow defrosting individual servings. Leave one inch of headspace for expansion during freezing. Thaw overnight in the refrigerator before reheating.
Slow Cooker Method
Brown the venison and aromatics following the stovetop method above, then transfer to a slow cooker. Add remaining ingredients and cook on low for 6-8 hours or high for 3-4 hours. This hands-off method produces equally delicious results.
Instant Pot Method
Brown venison and aromatics using the sauté function. Add remaining ingredients, then cook on high pressure for 20 minutes. Natural release for 10 minutes, then quick release remaining pressure. This method cuts cooking time dramatically while maintaining flavor development.
For make-ahead convenience, prepare your mise en place the evening before cooking. Brown the venison and aromatics, then refrigerate. The next day, simply combine with remaining ingredients and proceed with simmering.
FAQ
Can I use ground beef instead of venison?
Yes, though the final flavor differs. Use 80/20 ground beef and increase browning time slightly. You may need to drain excess fat after browning. The result will be milder and richer than venison chili.
How do I reduce the gamey flavor?
Venison chili’s distinctive flavor is actually desirable, but if you prefer milder taste, soak ground venison in milk for 2 hours before cooking, then pat dry. This reduces wild flavors while maintaining venison’s nutritional benefits.
Should I add beans or not?
This depends on regional preference. Texas-style chili traditionally excludes beans, while other regions embrace them. Both approaches are valid—choose based on your preference and texture desired.
What’s the best way to grind venison?
Use a meat grinder with a quarter-inch die, keeping all components cold. If processing your own harvest, grind meat fresh and refrigerate or freeze immediately. For store-bought venison, ensure it comes from reputable sources handling meat properly.
Can I make this recipe without tomato paste?
Yes, but increase crushed tomatoes to 3 cans and reduce beef broth to 1.5 cups. The result will be slightly thinner but still delicious. Alternatively, simmer longer to achieve desired thickness.
How thick should the finished chili be?
Proper chili consistency is thick enough that a spoon stands upright briefly before falling over. If too thick after cooking, add broth gradually. If too thin, simmer uncovered for 15-20 additional minutes.
Is venison chili healthy?
Yes, significantly so. Venison is lean, high in protein, and rich in iron and B vitamins. Unlike beef chili, it’s lower in calories and fat while offering superior nutritional density. The beans add fiber and plant-based protein.
What if I don’t have smoked paprika?
Regular paprika works fine, though you lose the smoky note. Alternatively, add a quarter teaspoon of liquid smoke to the chili during the simmering phase for comparable depth.


