Easy Energy Balls Recipe: Nutritionist Approved Snacks
Energy balls have become a kitchen staple for anyone seeking quick, nutritious snacks that actually taste like treats. These no-bake wonders pack protein, healthy fats, and natural sugars into bite-sized portions that satisfy cravings without the guilt. Whether you’re meal prepping for the week or need a pick-me-up during an afternoon slump, homemade energy balls deliver sustained energy far better than store-bought alternatives loaded with preservatives.
What makes energy balls truly special is their versatility and simplicity. You don’t need advanced cooking skills or specialized equipment—just a mixing bowl, your hands, and quality ingredients. Nutritionists love recommending these because they’re naturally sweetened, portion-controlled, and customizable to fit any dietary preference. From date-based classics to chocolate peanut butter combinations, the possibilities are endless.
Why Energy Balls Are Perfect for Busy Lives
In today’s fast-paced world, finding time to prepare healthy snacks feels impossible. Energy balls solve this problem beautifully. Unlike elaborate recipes requiring ovens and precise timing, these require minimal preparation and zero cooking. You can whip up a batch in under 15 minutes, then enjoy them throughout the week.
The beauty of energy balls lies in their grab-and-go nature. Toss a few in your bag before work, keep them in your desk drawer, or stash them in your gym locker. They’re perfect for athletes, students, busy professionals, and parents juggling multiple responsibilities. Since they’re naturally sweet and satisfying, they help curb cravings for unhealthy processed snacks.
Energy balls also make excellent additions to quick breakfast recipes or pre-workout fuel. Pair them with coffee, tea, or a smoothie for a balanced snack that provides sustained energy without the crash associated with refined sugar products.
Essential Ingredients You’ll Need
The foundation of any great energy ball recipe starts with quality base ingredients. Here’s what you’ll need for the classic version:
- Dates: Medjool dates work best—they’re naturally sweet, moist, and bind ingredients together perfectly
- Nuts: Almonds, walnuts, or cashews provide protein and healthy fats
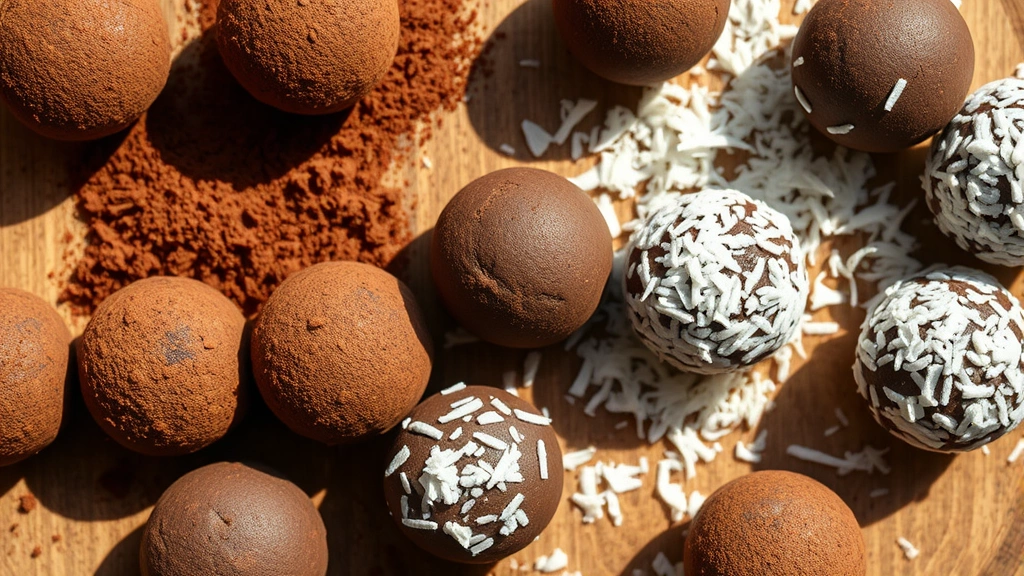
- Cocoa powder: Unsweetened cocoa adds rich chocolate flavor without added sugar
- Nut butter: Almond or peanut butter increases creaminess and protein content
- Vanilla extract: A teaspoon elevates flavor complexity
- Sea salt: A pinch balances sweetness and enhances overall taste
- Shredded coconut: Optional, but adds texture and tropical notes
When selecting ingredients, quality matters significantly. Choose organic, unsweetened cocoa powder from reputable culinary resources that emphasize ingredient transparency. Opt for raw or dry-roasted nuts without added oils or salt. Natural nut butters—those containing only ground nuts and salt—work better than heavily processed varieties.
For those following specific diets, substitutions are straightforward. Use sunflower seed butter instead of peanut butter for nut allergies, swap dates with raisins or figs, or use seeds like pumpkin or sunflower as your base ingredient.
Step-by-Step Recipe Instructions
Ingredients:
- 1 cup Medjool dates, pitted
- 1 cup raw almonds
- ¼ cup unsweetened cocoa powder
- ¼ cup almond butter
- 1 teaspoon vanilla extract
- ¼ teaspoon sea salt
- ¼ cup shredded coconut (optional)
- 2 tablespoons dark chocolate chips (optional)
Instructions:
- Process the base: Add pitted dates and raw almonds to a food processor. Pulse until the mixture resembles coarse breadcrumbs. This should take 30-45 seconds. You want texture—not a smooth paste.
- Combine wet ingredients: In a separate small bowl, whisk together almond butter, vanilla extract, and sea salt. This ensures even distribution of flavor throughout your batch.
- Add cocoa powder: Sprinkle cocoa powder over the date-nut mixture in your food processor. Pulse 3-4 times to incorporate evenly. Overmixing can make the mixture too dense.
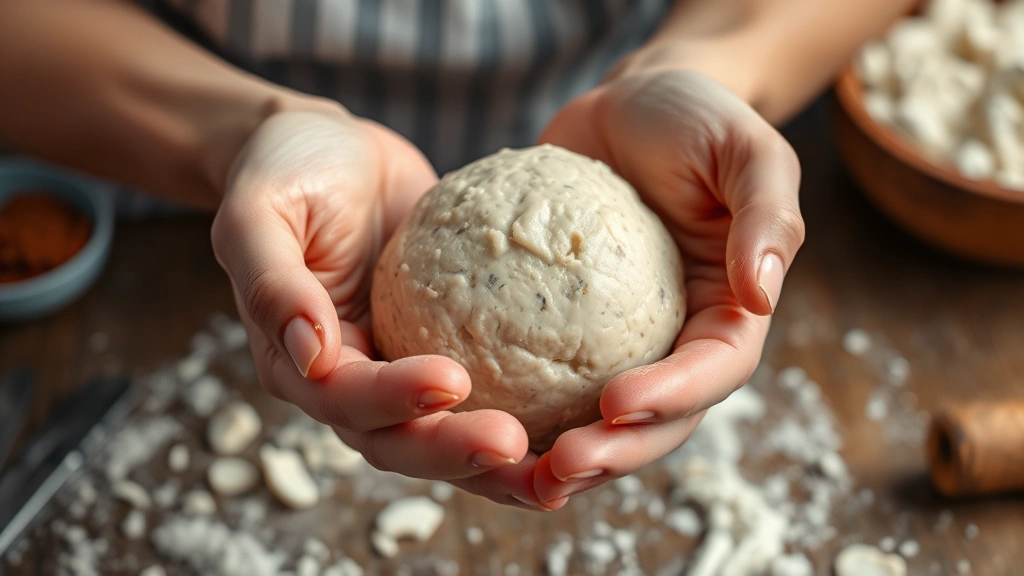
- Combine everything: Transfer the processed mixture to a large mixing bowl. Pour the wet ingredient mixture over the dry ingredients. Using your hands (clean hands work best), fold and knead the mixture until everything is thoroughly combined. The mixture should hold together when squeezed.
- Add optional ingredients: If using shredded coconut or dark chocolate chips, fold them in at this stage. Mix gently to distribute evenly.
- Shape the balls: Scoop the mixture using a small cookie scoop or tablespoon measure. Roll each portion between your palms to form a smooth sphere, about 1 inch in diameter. If the mixture feels too sticky, lightly dampen your hands with water.
- Coat if desired: Roll finished balls in additional cocoa powder, shredded coconut, or finely chopped nuts for extra flavor and texture.
- Chill: Arrange balls on a parchment-lined plate and refrigerate for at least 30 minutes before storing or consuming.
The entire process takes approximately 20 minutes from start to finish. This makes energy balls incredibly time-efficient compared to traditional baking recipes requiring oven time and cooling periods.
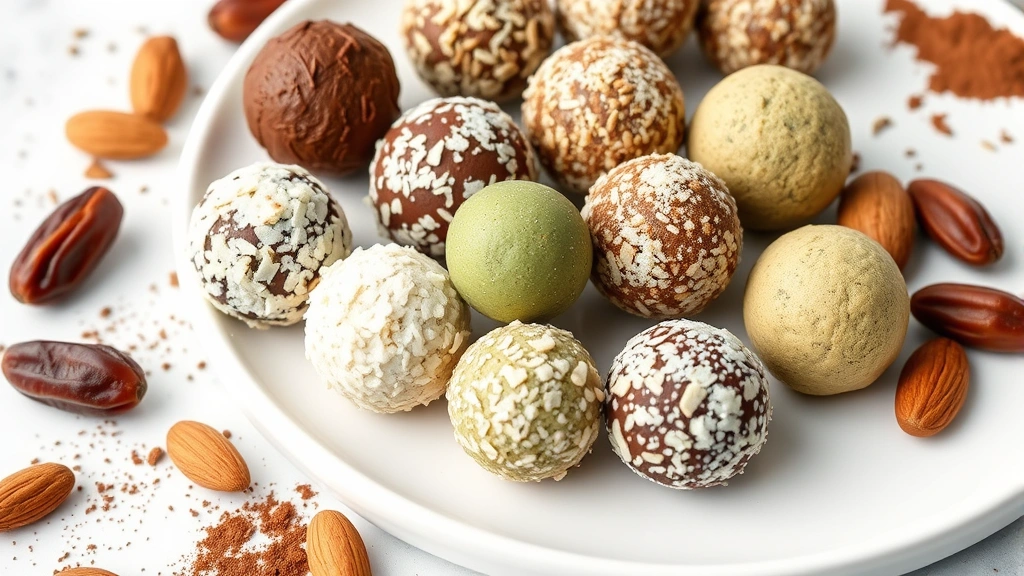
Popular Flavor Variations
Once you’ve mastered the basic recipe, experimentation becomes fun. Here are nutritionist-approved variations that maintain health benefits while offering exciting flavor profiles:
Peanut Butter Cup Energy Balls: Replace almond butter with peanut butter and add 2 tablespoons of dark chocolate chips. These taste like healthier versions of classic candy while providing sustained energy from protein and healthy fats.
Coconut Mango Energy Balls: Substitute half the dates with dried mango pieces and increase shredded coconut to ½ cup. Add ½ teaspoon of turmeric for anti-inflammatory benefits. These work wonderfully as part of quick breakfast recipes.
Espresso Chocolate Energy Balls: Mix in 1 tablespoon of instant espresso powder with the cocoa powder. Add a pinch of cayenne pepper for subtle heat. Perfect for pre-workout fuel or afternoon energy boosts.
Matcha Green Tea Energy Balls: Replace 2 tablespoons of cocoa powder with matcha powder. Keep almond butter but reduce vanilla to ½ teaspoon. Add white chocolate chips for balance. These provide L-theanine for calm focus.
Cashew Cardamom Energy Balls: Use cashews instead of almonds and cashew butter instead of almond butter. Add ½ teaspoon ground cardamom and a pinch of cinnamon. These offer sophisticated, warming spice notes.
Feel free to combine ingredients from different variations. The versatility of energy balls means you can create custom recipes matching your taste preferences and nutritional goals.
Storage and Make-Ahead Tips
Proper storage ensures your energy balls maintain optimal texture and flavor throughout the week. Keep them in an airtight container in the refrigerator for up to two weeks. Layer them between parchment paper to prevent sticking.
For longer storage, freeze energy balls for up to three months. Simply thaw at room temperature for 10-15 minutes before eating, or enjoy them partially frozen for a firmer texture. This makes energy balls excellent for meal prep, allowing you to prepare large batches when time permits.
Consider making multiple flavor variations simultaneously. Prepare the base mixture, then divide it into separate portions before adding flavor-specific ingredients. This approach maximizes efficiency and provides variety throughout your week.
Energy balls also make thoughtful homemade gifts. Package them in small jars tied with ribbon, or arrange them in decorative boxes. Include a simple ingredient list for recipients, especially those following specific diets. They’re particularly appreciated by athletes, fitness enthusiasts, and anyone seeking healthier snack options.
Unlike easy dinner recipes for beginners that require immediate consumption, energy balls improve with time as flavors meld and mature. Make them several days before you plan to eat them for even better taste development.
Nutritional Benefits Explained
Nutritionists consistently recommend energy balls because they deliver impressive nutritional benefits in convenient portions. Understanding what makes them healthy helps you make informed choices about ingredients and variations.
Protein Content: Nuts and seeds provide plant-based protein crucial for muscle recovery and satiety. A single energy ball typically contains 3-5 grams of protein, making them more satisfying than carbohydrate-only snacks. This protein content makes them particularly valuable for athletes and those following nutrition guidelines from professional organizations.
Healthy Fats: Nuts and nut butters contain monounsaturated and polyunsaturated fats that support heart health and brain function. These fats also slow digestion, preventing blood sugar spikes that lead to energy crashes.
Natural Sweetness: Dates provide natural sugars without refined processing. They’re rich in fiber, which aids digestion and promotes stable energy levels. This makes energy balls superior to candy or processed granola bars.
Micronutrients: Almonds offer magnesium and vitamin E, cocoa provides antioxidants, and dates contain potassium. Together, these ingredients create nutritionally dense snacks supporting overall wellness.
Low Glycemic Impact: The combination of fiber, protein, and healthy fats means energy balls won’t cause rapid blood sugar fluctuations. This is especially important for people managing energy levels throughout the day or those with blood sugar sensitivities.
Compared to commercial energy bars often containing corn syrup, artificial flavors, and preservatives, homemade energy balls offer transparent nutrition. You control every ingredient, knowing exactly what you’re consuming.
For specific nutritional information, consult food composition databases where you can calculate macros based on your exact ingredient choices. This helps those tracking calories or macronutrients for specific fitness goals.
FAQ
Can I make energy balls without a food processor?
Absolutely. Finely chop dates and nuts using a sharp knife, then combine with other ingredients. It requires more effort but produces excellent results. Alternatively, place nuts in a sealed plastic bag and crush them with a rolling pin or mallet.
Are energy balls suitable for children?
Yes, energy balls are kid-friendly and provide nutritious snacks for growing bodies. However, supervise young children due to choking risk from nuts. Consider making nut-free versions using seeds or creating smaller portions for toddlers. They’re a healthier alternative to quick breakfast recipes involving refined cereals.
Can I use different types of dates?
Yes, though Medjool dates work best due to their moisture and sweetness. Deglet Noor dates work but may require slightly more liquid. Avoid date paste with added sugars or oils. Adjust quantities based on date sweetness preference.
How do I prevent sticky hands while shaping?
Slightly dampen your hands with water or coconut oil. Keep a damp cloth nearby to wipe hands between rolling. Alternatively, wear food-safe gloves. Refrigerating the mixture for 15 minutes before shaping also helps.
Are energy balls vegan and gluten-free?
Yes, the basic recipe is naturally vegan (using plant-based ingredients) and gluten-free. Ensure all ingredients, especially nut butters and cocoa powder, are certified gluten-free if you have celiac disease or gluten sensitivity.
What’s the difference between energy balls and protein balls?
Energy balls emphasize natural sweetness and whole food ingredients, while protein balls often include added protein powder. Both provide sustained energy, but protein balls specifically target muscle recovery. You can add protein powder to energy ball recipes for hybrid versions.
Can I mail energy balls as gifts?
Yes, refrigerated energy balls ship well in insulated packaging with ice packs. Frozen energy balls actually ship better than fresh ones. Include instructions for thawing and storage. Check local regulations if mailing commercially.
How many energy balls should I eat daily?
One to two balls make an ideal snack, providing 150-250 calories and 5-10 grams of protein. Adjust portions based on your activity level and dietary goals. They work well alongside quick and easy pasta recipes as balanced meal components rather than standalone meals.


