Fluffy Instant Pot Rice? Chef-Approved Guide
Cooking perfect rice in an Instant Pot has transformed how home cooks approach this everyday staple. Gone are the days of monitoring water levels, managing heat, and crossing your fingers that you’ll achieve that ideal fluffy texture. The Instant Pot’s precision pressure-cooking environment creates consistently excellent results that rival professional kitchens.
Whether you’re preparing a quick weeknight side dish or building the foundation for easy dinner recipes for beginners, mastering Instant Pot rice opens countless culinary possibilities. This guide walks you through everything from water ratios to advanced techniques that professional chefs use daily.
Why Instant Pot Rice Works So Well
The Instant Pot succeeds where traditional stovetop methods sometimes fail because of its sealed pressure-cooking environment. Inside the pot, steam pressure rises to 10-11 PSI (pounds per square inch), raising the boiling point of water to approximately 250°F. This higher temperature gelatinizes the rice starch more efficiently and uniformly than conventional boiling.
Traditional rice cooking requires constant monitoring. Heat levels fluctuate, water evaporates unpredictably, and timing becomes guesswork. The Instant Pot eliminates these variables through computerized pressure regulation. Once you seal the lid and set the timer, the machine maintains consistent conditions throughout the cooking cycle.
Rice grains absorb water through a process called imbibition. Under pressure, this absorption happens faster and more completely. The result? Every grain reaches the same doneness level simultaneously, producing that coveted fluffy texture where grains remain separate rather than clumping together. Professional cooking schools across North America have adopted Instant Pot methods in their curricula because of this reliability.
Another advantage involves the natural release method. After the cooking timer finishes, allowing pressure to drop gradually (rather than quick-releasing) permits continued moisture absorption without overcooking the exterior. This final phase is where amateur cooks often stumble, but understanding its importance separates mediocre results from restaurant-quality outcomes.
Essential Equipment and Ingredients
You’ll need surprisingly minimal equipment to achieve perfect rice. An Instant Pot (6-quart or 8-quart models work equally well for home cooking) forms the foundation. While any generation of Instant Pot functions adequately, newer models with improved pressure sensors provide marginal consistency improvements.
Inside the pot, you’ll use:
- Stainless steel insert pot (comes with your Instant Pot)
- Trivet or steamer rack (optional but useful for certain techniques)
- Measuring cups (standard dry measuring cups, not liquid ones)
- Wooden or silicone spoon (metal utensils can scratch the insert)
- Instant-read thermometer (helpful for learning proper doneness)
Regarding ingredients, rice quality dramatically impacts your final dish. Purchase rice from reputable grain suppliers that guarantee freshness. Older rice (stored longer than 2-3 years) absorbs water differently than freshly harvested rice, requiring ratio adjustments.
Water quality matters more than many home cooks realize. Chlorinated tap water can impart subtle off-flavors. Professional kitchens often use filtered water for this reason. If your tap water tastes strongly of chlorine, consider using filtered water for noticeably better results.
Salt enhances rice flavor significantly. While optional, adding 1/2 teaspoon per cup of uncooked rice elevates the final dish substantially. This follows the principle that foods rich in antioxidants and properly seasoned meals taste fresher and more vibrant.
The Perfect Water-to-Rice Ratio
This ratio represents the most crucial variable in Instant Pot rice cooking. Unlike stovetop methods where you might use 1.5 to 2 cups water per cup of rice, pressure cooking requires less water because evaporation decreases dramatically in a sealed environment.
For most white rice varieties (jasmine, basmati, medium-grain white), use a 1:1 ratio—one cup uncooked rice to one cup water. This seems counterintuitive for cooks accustomed to boiling, but pressure cooking’s efficiency makes it work perfectly.
Brown rice and other whole grains require more water due to their protective bran layer. Use a 1:1.25 ratio for brown rice—one cup rice to 1.25 cups water. Wild rice needs even more: a 1:1.5 ratio.
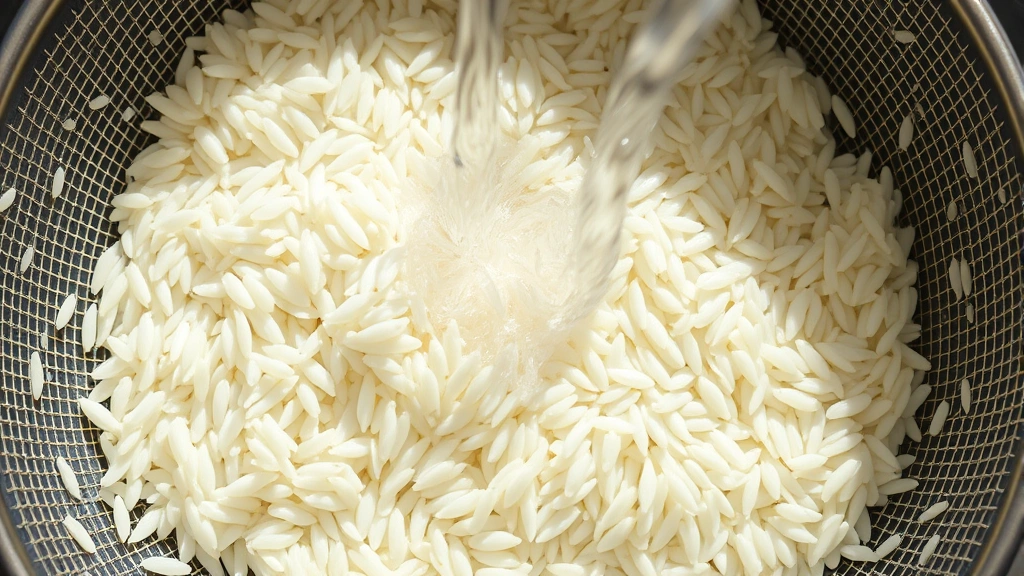
Here’s the critical technique many guides overlook: always rinse your rice before cooking. Place rice in a fine-mesh strainer and run cool water through it while stirring gently with your fingers. This removes excess starch that would otherwise create a gummy texture. Continue rinsing until the water runs nearly clear (usually 2-3 minutes). This single step explains why some home cooks achieve fluffy results while others get mushy rice.
After rinsing, add the precise water amount to the insert pot, then add rinsed rice. Stir once to distribute evenly. This initial stir prevents the bottom layer from sticking while ensuring even water distribution throughout the cooking vessel.
Step-by-Step Cooking Instructions
Step 1: Prepare Your Rice
Measure rice using dry measuring cups (not liquid measuring cups). For most home meals, one cup uncooked rice yields approximately three cups cooked rice. Rinse thoroughly under cool running water, stirring gently until water runs clear. This removes surface starch that would otherwise create clumping.
Step 2: Add Water and Seasonings
Pour the appropriate water amount into the Instant Pot insert (use 1:1 for white rice, 1:1.25 for brown rice). Add salt if desired—typically 1/2 teaspoon per cup of uncooked rice. Add rinsed rice directly to the water. Stir once to ensure even distribution and prevent sticking on the bottom.
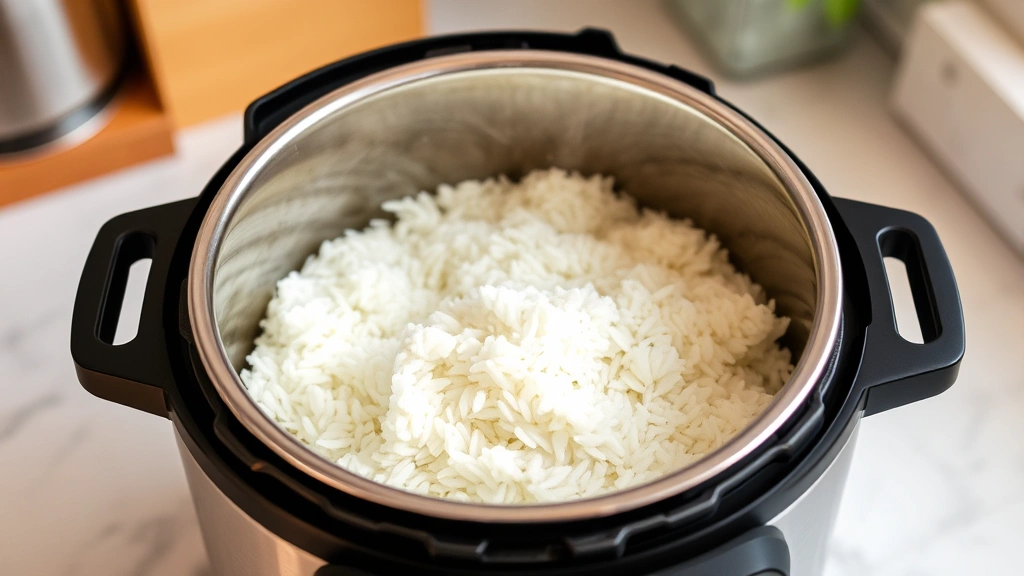
Step 3: Seal and Set Pressure
Place the trivet inside the pot (optional—it’s not necessary for rice cooking). Close the sealing lid and ensure the pressure release valve is in the sealing position (not venting). Press the pressure cook or manual button, then set the timer. For white rice, use 3 minutes at high pressure. For brown rice, use 22-25 minutes at high pressure.
Step 4: Natural Release
This step separates amateur results from professional-quality rice. When the timer finishes, do not immediately open the valve. Instead, allow the pressure to release naturally for 10 minutes. During this phase, residual heat and steam continue cooking and hydrating the rice. After 10 minutes, you can manually release any remaining pressure by carefully moving the valve to the venting position.
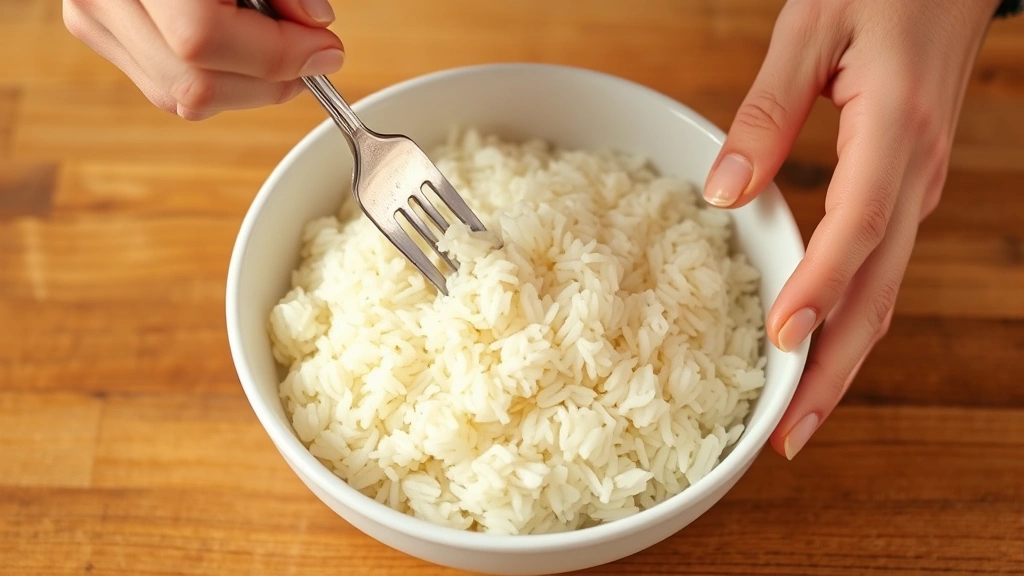
Step 5: Fluff and Rest
Open the lid carefully (steam will escape). Let rice rest undisturbed for 2-3 minutes. Using a fork (not a spoon, which crushes grains), gently fluff the rice by lifting and separating grains. Transfer to a serving dish immediately. The warm residual heat will continue evaporating excess moisture, enhancing the fluffy texture.
Pro Tips from Professional Chefs
Executive chefs at Michelin-starred restaurants employ several techniques that home cooks rarely discover through casual cooking:
Butter or Oil Addition
Adding one tablespoon of butter or neutral oil per cup of uncooked rice prevents sticking and enhances flavor. Stir this into the water before cooking. This technique, borrowed from risotto methodology, creates a subtle richness that elevates simple rice into a restaurant-quality side dish.
Aromatics Infusion
Place a cinnamon stick, bay leaf, or few whole cardamom pods in the water before cooking. These aromatics infuse subtle flavors without overwhelming the dish. Remove them after cooking finishes. This approach works beautifully when serving rice with shredded chicken recipes or curries.
Broth Instead of Water
Professional kitchens rarely cook rice in plain water. Chicken, vegetable, or seafood broth dramatically enhances flavor complexity. Use the same ratio as water (1:1 for white rice) and adjust salt accordingly since broth contains sodium.
The Saute Step
Before adding water, select the saute function and toast unrinsed rice in a small amount of oil for 1-2 minutes. This step, called toasting, develops nutty flavors and creates a subtle textural difference. Cool the rice slightly before adding water to prevent splattering.
Ingredient Quality Matters
Purchase rice from specialty markets rather than supermarket bulk bins. Freshly milled rice (typically labeled with harvest dates) absorbs water more predictably. This consistency allows professional cooks to replicate results perfectly, meal after meal.
Troubleshooting Common Issues
Mushy or Gummy Rice
This occurs from too much water or insufficient rinsing. Starch buildup creates a starchy coating that glues grains together. Solution: rinse rice more thoroughly (aim for completely clear water), and reduce water quantity by 2 tablespoons for your next batch. Also ensure you’re using a 10-minute natural release minimum.
Hard or Undercooked Rice
This indicates insufficient water or cooking time. Increase water by 2 tablespoons and extend cooking time by 1 minute if cooking white rice. For brown rice, this usually means insufficient natural release time—extend it to 15 minutes. Hard rice often results from opening the lid prematurely before pressure fully releases.
Rice Sticking to Bottom
The bottom layer burns if rice contacts the pot directly without adequate water. Always stir rice into water after rinsing. Some cooks add a tablespoon of butter or oil to reduce friction. Ensure the sealing ring is properly seated and the valve is in sealing position.
Overcooked Rice at High Altitude
At elevations above 3,000 feet, water boils at lower temperatures, requiring longer cooking times. Increase cooking time by 5 minutes for white rice and 10 minutes for brown rice. Alternatively, increase water slightly.
Rice Varieties and Cook Times
Different rice varieties possess different starch structures and bran layers, requiring adjusted cooking times:
White Rice Varieties
- Jasmine Rice: 3 minutes high pressure + 10 minutes natural release. Produces aromatic, slightly sticky grains perfect for Asian cuisines.
- Basmati Rice: 4 minutes high pressure + 10 minutes natural release. Long grains remain separate; ideal for pilafs and Indian dishes.
- Medium-Grain White Rice: 3 minutes high pressure + 10 minutes natural release. More forgiving than jasmine or basmati.
- Short-Grain Rice: 3 minutes high pressure + 10 minutes natural release. Creates naturally stickier texture suitable for sushi.
Brown Rice and Whole Grains
- Brown Rice: 22-25 minutes high pressure + 10 minutes natural release. The bran layer requires extended cooking. Soak for 30 minutes beforehand to reduce cooking time to 15 minutes if preferred.
- Wild Rice: 26-30 minutes high pressure + 5 minutes natural release. Blend with white rice if you prefer less chewiness.
- Forbidden Black Rice: 17 minutes high pressure + 10 minutes natural release. Creates dramatic purple color and slightly nutty flavor.
- Red Rice: 20 minutes high pressure + 10 minutes natural release. Nutty flavor and chewy texture.
Specialty Rices
- Arborio (Risotto Rice): 6 minutes high pressure + 5 minutes natural release. Creates creamy texture through starch release.
- Sushi Rice: 4 minutes high pressure + 5 minutes natural release. Season after cooking with rice vinegar and sugar.
When cooking rice blends or unfamiliar varieties, consult rice industry standards organizations for specific guidance on that particular grain’s characteristics.
Creative Serving Ideas
Once you’ve mastered basic Instant Pot rice, elevate it into memorable dishes:
Fried Rice Foundation
Fluffy Instant Pot rice works beautifully for fried rice because individual grains remain separate. Cool cooked rice completely (refrigerate if possible), then stir-fry with eggs, vegetables, and soy sauce. Day-old rice actually works better than fresh rice for fried rice preparation.
Rice Bowl Bases
Layer fluffy rice with chili recipe crockpot creations, roasted vegetables, and protein sources for customizable meal bowls. The fluffy texture provides the perfect neutral foundation.
Soup Additions
Add cooked rice to broths and soups for heartiness. Cook rice separately to avoid starch cloudiness in clear broths.
Rice Pilaf Variations
Toast rice before cooking with herbs and spices from preserved herb collections. Add dried fruits, nuts, and vegetables during cooking for one-pot meals.
Grain Bowls and Salads
Cool cooked rice and toss with vinaigrette, vegetables, and proteins for refreshing grain salads. The firm texture holds up well during mixing.
Risotto-Style Dishes
While true risotto requires constant stirring, you can create risotto-adjacent dishes by cooking arborio rice in broth, then finishing with butter and cheese for creamy results without the labor.
FAQ
Can I cook rice and other foods simultaneously in the Instant Pot?
Yes, using the trivet or steamer rack. Place the trivet in the pot, add water (minimum 1 cup for safety), then place a smaller bowl containing rice on the trivet. Add other foods around it. Adjust cooking times since heat distribution differs. Most professionals recommend cooking rice separately for consistency.
What’s the difference between high and low pressure for rice?
High pressure (10-11 PSI) cooks rice faster and is the standard method. Low pressure (5-6 PSI) requires nearly double the cooking time. High pressure is recommended for home cooks seeking consistent results.
Can I double or triple the rice recipe?
Yes, maintaining the same water ratio (1:1 for white rice). Cooking time remains identical regardless of quantity. Fill the pot no more than halfway with rice and water combined.
How do I store leftover Instant Pot rice?
Cool rice completely, then transfer to airtight containers. Refrigerate for up to 5 days. Rice can be frozen for up to 3 months. Reheat by adding a tablespoon of water and microwaving or using the saute function on the Instant Pot.
Why is my rice still hard after cooking?
Hard rice indicates insufficient water or inadequate natural release time. Increase water by 2-3 tablespoons and extend natural release to 15 minutes for your next batch. Alternatively, you may be undercooking—add 1 minute to the cook time.
Is rinsing rice absolutely necessary?
For white rice, rinsing significantly improves texture by removing surface starch. For brown rice and whole grains, rinsing is less critical but still beneficial. Professional kitchens rinse virtually all rice varieties before cooking.
Can I use vegetable or bone broth instead of water?
Absolutely. Use broth in place of water using the same ratio. Reduce added salt since broth contains sodium. Bone broth adds richness and depth that elevates simple rice into a more sophisticated side dish.
What’s the best way to reheat leftover rice?
Add one tablespoon of water per cup of cooked rice, cover, and microwave for 1-2 minutes, or use the Instant Pot’s saute function with a splash of water. Avoid reheating without added moisture, which dries rice out.


