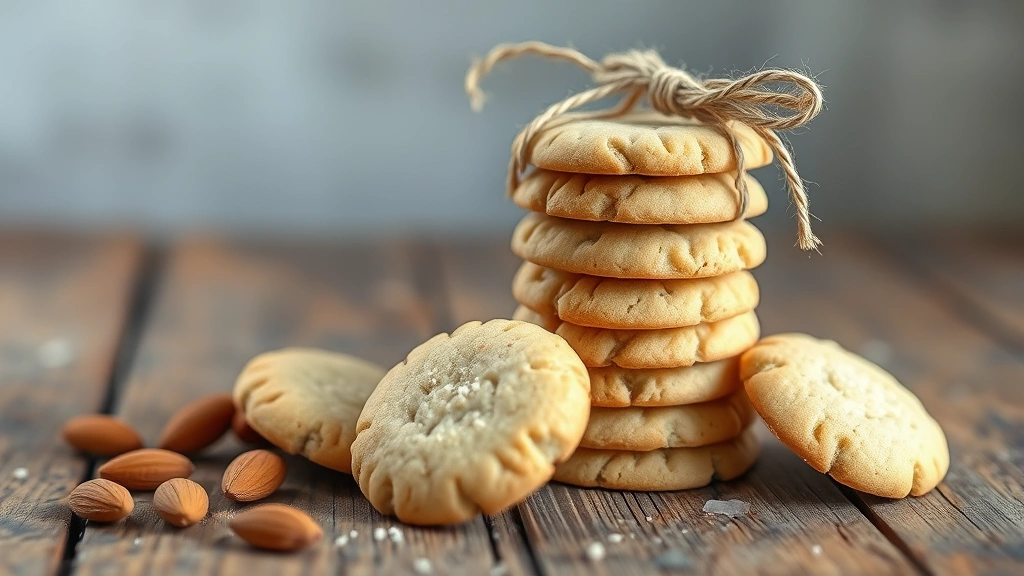
Perfect Almond Cookies? Grandma’s Secret Recipe
There’s something magical about biting into a perfectly crispy almond cookie—that delicate snap followed by a buttery, nutty flavor that melts on your tongue. My grandmother guarded her almond cookie recipe like it was liquid gold, and for good reason. After years of watching her work in the kitchen and finally convincing her to share her secrets, I’ve discovered that the difference between mediocre almond cookies and extraordinary ones comes down to a few crucial techniques and ingredient choices that most home bakers overlook.
These aren’t just any almond cookies; they’re the kind that transport you back to cherished memories with each bite. Whether you’re baking for a special occasion or simply want to impress your family with homemade treats, this grandma-approved recipe will become your go-to. The combination of high-quality almonds, proper creaming methods, and precise baking temperatures creates cookies that are crispy on the outside with a tender, delicate interior.
The History Behind Grandma’s Almond Cookies
My grandmother learned to make these almond cookies from her mother, who brought the recipe from the old country. The tradition of almond-based cookies spans centuries across Mediterranean and European cultures, where almonds were a precious commodity. These cookies became symbols of hospitality and celebration, often prepared during holidays and special gatherings.
What makes my grandmother’s version unique is her insistence on using blanched almonds and a specific ratio of butter to sugar that creates the perfect texture. She always said that rushing the creaming process was the biggest mistake home bakers make. After testing her methods repeatedly, I understand exactly what she meant. The creaming process incorporates air into the butter, which creates lift and that signature delicate crumb structure that makes these cookies so special.
If you love traditional baking techniques, you might also enjoy exploring vintage grandma recipes that have been passed down through generations. These time-tested methods often produce superior results compared to modern shortcuts.
Essential Ingredients for Success
The beauty of this recipe lies in its simplicity—there are no complicated ingredients or hard-to-find items. However, the quality of each component matters significantly. Here’s what you’ll need:
- Blanched Almond Flour: This is the star ingredient. Use high-quality, finely ground almond flour, not the coarse version. The texture directly impacts your final cookies.
- Unsalted Butter: Room temperature is absolutely critical. Cold butter won’t cream properly, and the cookies will be dense instead of delicate.
- Granulated Sugar: Standard white sugar works best for this recipe, as it creates the right crystalline structure.
- Egg White: This binds the ingredients and creates structure without adding too much moisture.
- Vanilla Extract: Use pure vanilla, not imitation. The flavor difference is noticeable in these simple cookies.
- Almond Extract: A small amount intensifies the almond flavor beautifully.
- Sea Salt: Just a pinch to enhance all the flavors and prevent the cookies from tasting one-dimensional.
For the exact measurements and variations, explore Trader Joe’s recipes for quality ingredient sourcing tips, as many specialty ingredients come from reliable suppliers.
Step-by-Step Instructions
Follow these detailed steps to achieve perfect almond cookies every time:
- Prepare Your Workspace: Preheat your oven to 325°F (160°C). Line two baking sheets with parchment paper. This lower temperature is crucial—higher heat will brown the cookies too quickly before the interior cooks through.
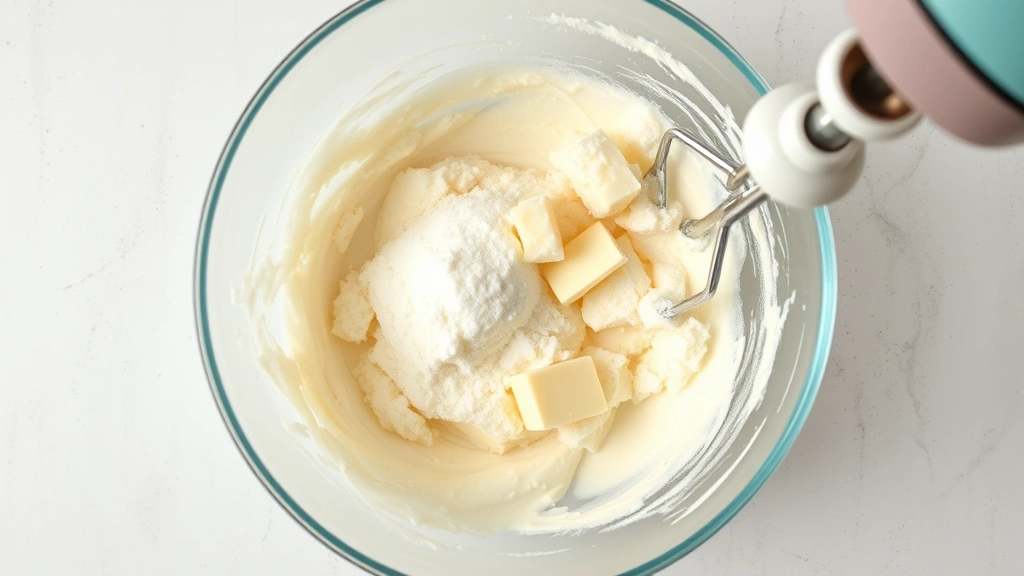
- Cream the Butter and Sugar: In a large mixing bowl, combine 1 cup (2 sticks) of softened unsalted butter with ¾ cup of granulated sugar. Using an electric mixer on medium speed, beat for 4-5 minutes until the mixture is pale, fluffy, and noticeably lighter in color. This is the most important step. Don’t skip or rush it.
- Add the Egg White: Separate one large egg carefully, reserving the yolk for another use. Add the egg white to the creamed mixture and beat on medium speed for 1-2 minutes until fully incorporated and the mixture looks slightly mousse-like.
- Incorporate Flavorings: Add 1 teaspoon of pure vanilla extract and ½ teaspoon of almond extract. Mix on low speed until combined, about 30 seconds.
- Combine Dry Ingredients: In a separate bowl, whisk together 2 cups of blanched almond flour, ¼ teaspoon of sea salt, and ¼ teaspoon of baking powder. This gentle mixing prevents lumps.
- Fold in the Almond Mixture: Add the dry ingredients to the wet ingredients. Using a rubber spatula, fold gently until just combined. Don’t overmix—you want a tender crumb, not a dense one. The dough should be slightly sticky but workable.
- Chill the Dough: Cover the bowl with plastic wrap and refrigerate for at least 30 minutes. This step prevents the cookies from spreading too much during baking and makes them easier to handle.
- Shape the Cookies: Using a small cookie scoop or teaspoon, drop rounded portions onto your prepared baking sheets, spacing them about 2 inches apart. Slightly flatten each cookie with the bottom of a glass or your damp fingers.
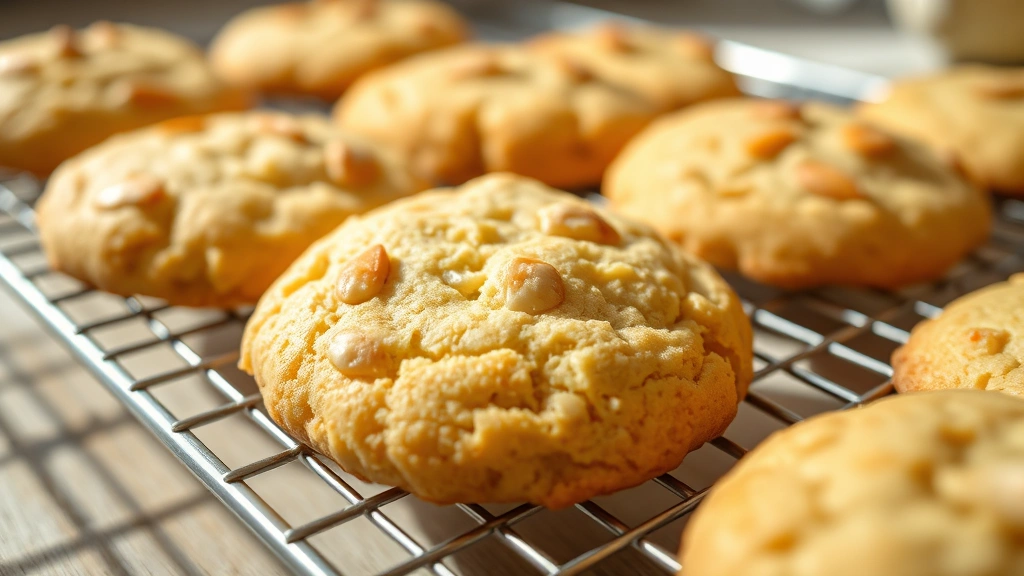
- Bake with Precision: Bake for 12-15 minutes, until the edges are light golden brown but the centers still look slightly underbaked. This is the secret to achieving that crispy-outside, tender-inside texture. The cookies continue cooking on the hot baking sheet after removal from the oven.
- Cool Properly: Allow the cookies to cool on the baking sheet for 5 minutes, then transfer to a wire rack to cool completely. This gradual cooling process is essential.
Expert Tips for Perfect Results
Temperature Control is Everything: The most common mistake is baking at too high a temperature. At 325°F, these cookies bake gently and evenly. If your oven runs hot, use an oven thermometer to verify the actual temperature.
Don’t Overbake: This cannot be emphasized enough. The cookies should look slightly underdone when you remove them from the oven. They firm up as they cool, and you’ll achieve that perfect texture that makes these cookies so special.
Use Room Temperature Butter: Cold butter won’t incorporate air properly, and the cookies will be tough and dense. Leave your butter out for 30-45 minutes before starting.
Quality Almond Flour Matters: Store-bought almond flour varies significantly in texture and fineness. Finely ground almond flour produces better results than coarse versions. If you can find blanched almond flour from specialty food stores, it’s worth the investment.
Measure by Weight: If you have a kitchen scale, use it. Measuring flour and almond flour by weight is far more accurate than by volume, especially with almond flour, which compacts easily.
Variations and Flavor Combinations
Once you’ve mastered the basic recipe, you can create exciting variations. Here are my favorite adaptations:
Rose Water Almond Cookies: Replace ¼ teaspoon of the vanilla extract with ½ teaspoon of rose water for a delicate floral note. This variation is inspired by Greek recipes that often feature rose water in traditional sweets.
Cardamom Spiced Version: Add ¼ teaspoon of ground cardamom to the dry ingredients. The warm spice complements the almond flavor beautifully.
Chocolate-Dipped Elegance: Once cooled, dip the bottom half of each cookie into melted dark chocolate. Place on parchment paper and allow the chocolate to set at room temperature or in the refrigerator.
Orange Zest Enhancement: Add 1 tablespoon of fresh orange zest to the creamed butter and sugar mixture. The citrus brightens the almond flavor.
Pistachio Blend: Replace 1 cup of the almond flour with ½ cup almond flour and ½ cup finely ground pistachio flour for a nutty twist.
Storage and Make-Ahead Guide
These cookies are perfect for meal planning and gift-giving because they store beautifully.
Room Temperature Storage: Keep cooled cookies in an airtight container at room temperature for up to 5 days. Place parchment paper between layers to prevent sticking.
Freezer Storage: Baked cookies freeze well for up to 3 months. Layer them in an airtight freezer container with parchment paper between layers. Thaw at room temperature for about 1 hour before serving.
Dough Freezing: You can also freeze the dough for up to 1 month. Scoop the dough onto a baking sheet, freeze until solid, then transfer to a freezer bag. Bake directly from frozen, adding 2-3 minutes to the baking time.
Make-Ahead Advantage: This recipe is ideal for preparing several days in advance. The flavors actually improve slightly as they sit, and the cookies maintain their crispness when stored properly.
For additional make-ahead strategies and batch cooking ideas, explore healthy chili recipe preparation methods, which offer similar advance preparation benefits for entertaining.
FAQ
Can I make these cookies without almond extract?
Yes, you can omit the almond extract, but the cookies won’t have quite the same depth of flavor. If you prefer, increase the vanilla extract to 1½ teaspoons instead. The cookies will still be delicious but will taste more like a butter cookie than an almond-forward treat.
What if my dough is too sticky to handle?
This usually means the dough needs more chilling time. Refrigerate for an additional 15-30 minutes. If it’s still sticky after adequate chilling, you might be using coarser almond flour. Finely ground almond flour absorbs moisture better and creates a more workable dough.
Why are my cookies spreading too much?
Several factors could cause excessive spreading: your oven temperature might be too high, the dough wasn’t chilled long enough, or your butter was too warm when creamed. Always verify your oven temperature with a thermometer and ensure adequate chilling time.
Can I use regular all-purpose flour instead of almond flour?
These aren’t traditional wheat flour cookies, so substituting all-purpose flour will change the recipe significantly. The texture and flavor profile depend on the almond flour. However, you could create a hybrid by using 1 cup almond flour and ½ cup all-purpose flour if you want to experiment, though the result will be different.
How do I know when the cookies are done baking?
The edges should be light golden brown, and the centers should still look slightly pale and slightly underbaked. They’ll continue cooking on the hot baking sheet. If you wait until they look fully baked in the oven, they’ll be overbaked once cooled.
Are these cookies naturally gluten-free?
Yes! Since they’re made with almond flour instead of wheat flour, these cookies are naturally gluten-free. Just ensure your baking powder is certified gluten-free if that’s important for your dietary needs.
Can I make these in a food processor?
While you could mix the dough in a food processor, it’s not ideal. The creaming process requires proper incorporation of air, which is difficult to achieve with a food processor. An electric mixer or hand mixer gives superior results.
These almond cookies represent generations of baking wisdom distilled into a simple, elegant recipe. The techniques and secrets my grandmother passed down create cookies that stand apart from ordinary treats. Whether you’re baking for yourself, your family, or special occasions, this recipe will become a cherished favorite. The combination of quality ingredients, proper technique, and patience produces results that justify the extra care required. Share these cookies with people you love, and you’ll understand why my grandmother considered this recipe one of her greatest kitchen treasures.


