Easy Beef Liver Recipe: Grandma’s Favorite Made Simple
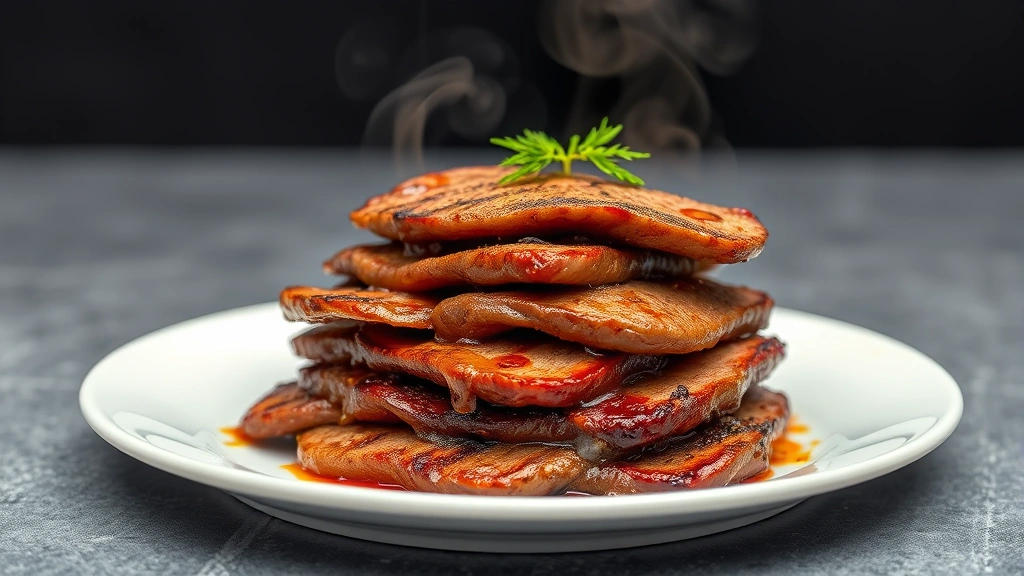
Beef liver has long been a staple in home kitchens, passed down through generations as a nutrient-dense protein that transforms from intimidating to delicious with the right technique. Grandma knew something many modern cooks are rediscovering: properly prepared beef liver is tender, flavorful, and absolutely craveable. This classic dish combines crispy caramelized edges with a buttery interior, topped with sweet sautéed onions that have been cooking low and slow until they’re golden and jammy. If you’ve avoided liver in the past due to its strong flavor or tough texture, this recipe will change your mind completely.
The secret to exceptional beef liver lies in three fundamental principles: quality sourcing, proper soaking, and precise cooking temperature. When you slice your liver thin and soak it in milk beforehand, you neutralize much of the metallic taste that deters many home cooks. The milk bath works chemically to break down the proteins that cause that characteristic liver flavor, resulting in a milder, more approachable dish. Combined with high-heat searing and generous caramelized onions, you’ll create something restaurant-quality in under thirty minutes. This recipe has graced family dinner tables for decades because it delivers comfort, nutrition, and genuine satisfaction with minimal fuss.
Why Beef Liver Deserves a Place on Your Table
Beef liver is one of nature’s most concentrated sources of essential nutrients, packed with iron, B vitamins, and copper. A single three-ounce serving provides more than half your daily iron requirement, making it particularly valuable for anyone managing anemia or seeking to boost energy levels naturally. Unlike supplements, these nutrients come in bioavailable forms your body readily absorbs and utilizes. The foods rich in antioxidants category includes liver, which contains selenium and vitamins A and E that protect your cells from oxidative stress.
Beyond nutrition, beef liver offers incredible versatility and economy. It’s typically one of the most affordable proteins at your butcher counter, yet delivers sophisticated flavor when prepared correctly. Grandma’s generation understood that using every part of the animal meant stretching food budgets while maximizing nutrition. Today’s nose-to-tail cooking movement has restored beef liver to culinary prominence, with chefs at acclaimed restaurants featuring it on tasting menus. This recipe honors that tradition while making the dish accessible to anyone seeking easy dinner recipes for beginners that deliver real nourishment.
The flavor profile of properly cooked beef liver is rich and savory, with subtle mineral notes that pair beautifully with acidic elements like vinegar or bright herbs. When you cook it using Grandma’s method, the exterior develops a gorgeous mahogany crust through the Maillard reaction, while the interior stays tender and succulent. This contrast in textures and the interplay of sweet caramelized onions with umami-rich liver creates a dish far more interesting than the rubbery, one-dimensional liver many people remember from cafeteria meals.
Ingredients and Preparation
For the Beef Liver:
- 1.5 pounds beef liver, sliced 1/4-inch thick
- 1 cup whole milk (for soaking)
- 1/2 cup all-purpose flour
- 1 teaspoon kosher salt
- 1/2 teaspoon freshly ground black pepper
- 1/4 teaspoon garlic powder
- 3 tablespoons butter, divided
- 2 tablespoons olive oil
For the Caramelized Onions:
- 4 large yellow onions, thinly sliced
- 2 tablespoons butter
- 1 tablespoon balsamic vinegar
- 1 teaspoon fresh thyme leaves (or 1/2 teaspoon dried)
- 1/2 teaspoon salt
- Pinch of sugar
Preparation Steps:
- Start by selecting fresh beef liver from a trusted butcher. Ask them to slice it 1/4-inch thick, or do this yourself using a sharp knife and steady hand. Place slices in a shallow bowl and cover completely with whole milk. This soaking step is non-negotiable for reducing the liver’s strong flavor. Cover and refrigerate for at least 30 minutes, though 2-4 hours is ideal.
- While the liver soaks, begin preparing the onions. Slice them into thin, even pieces roughly 1/4-inch wide. Consistent sizing ensures even cooking. Set aside in a bowl.
- Combine flour, salt, pepper, and garlic powder in a shallow dish. Whisk together thoroughly so seasonings distribute evenly throughout the flour. This coating will be essential for achieving that crispy exterior.
- Remove the liver from the milk and pat each slice completely dry using paper towels. Moisture prevents proper browning, so don’t skip this step. Any lingering milk will create steam instead of that desirable crust.
Step-by-Step Cooking Instructions
Caramelizing the Onions (Start this first, as it takes 25-30 minutes):
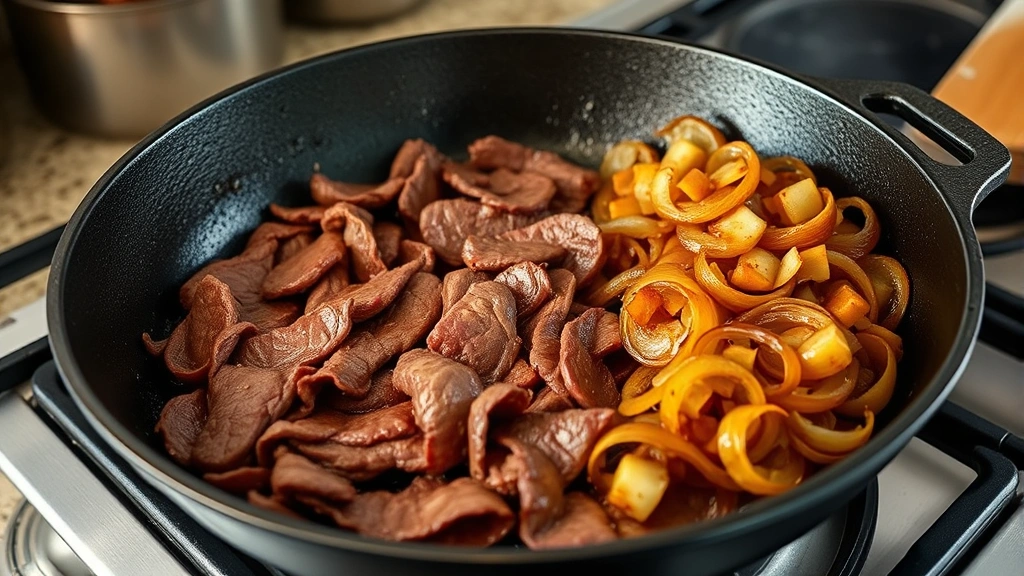
- Heat 2 tablespoons of butter in a large skillet over medium heat. Once foaming, add the sliced onions and stir to coat evenly with butter.
- Cook for 8-10 minutes, stirring occasionally, until onions begin releasing their moisture and become translucent. Don’t rush this stage.
- Reduce heat to medium-low and continue cooking for 15-20 minutes, stirring every 3-4 minutes. The onions will gradually turn golden, then deep amber as their natural sugars caramelize. This slow, patient cooking is what transforms ordinary onions into liquid gold.
- In the final 2 minutes, add the balsamic vinegar, fresh thyme, salt, and pinch of sugar. Stir well and taste, adjusting seasoning as needed. The onions should be very soft, sweet, and deeply colored. Transfer to a warm plate and cover loosely with foil to keep warm.
Searing the Beef Liver:
- Heat a large cast-iron or stainless steel skillet over high heat until it’s very hot. This takes about 3-4 minutes. You want the pan almost smoking—this high temperature is crucial for proper browning.
- While the pan heats, working in batches, dredge each dried liver slice in the seasoned flour mixture, coating both sides generously. Shake off excess flour. Don’t coat all slices at once; the flour will become damp and clumpy.
- Add 1.5 tablespoons butter and 1 tablespoon olive oil to the hot skillet. The oil raises the smoke point of the butter, allowing it to reach higher temperatures without burning.
- Once the fat is shimmering and just beginning to smoke, carefully place 4-5 liver slices in the pan. Don’t crowd the pan; they should sit in a single layer with space between each piece. Overcrowding drops the temperature and creates steam instead of a crust.
- Cook without moving for exactly 2-3 minutes. Resist the urge to flip or stir. The liver needs this uninterrupted time to develop that golden-brown crust. You’ll know it’s ready when the bottom releases easily from the pan.
- Flip each slice and cook the other side for 2 minutes. The internal temperature should reach 160°F for food safety, though many prefer it slightly less cooked for tenderness. Remove to a warm plate.
- Repeat steps 2-6 with remaining liver slices, adding more butter and oil to the pan as needed. Keep finished liver warm on a plate loosely covered with foil.
Final Assembly:
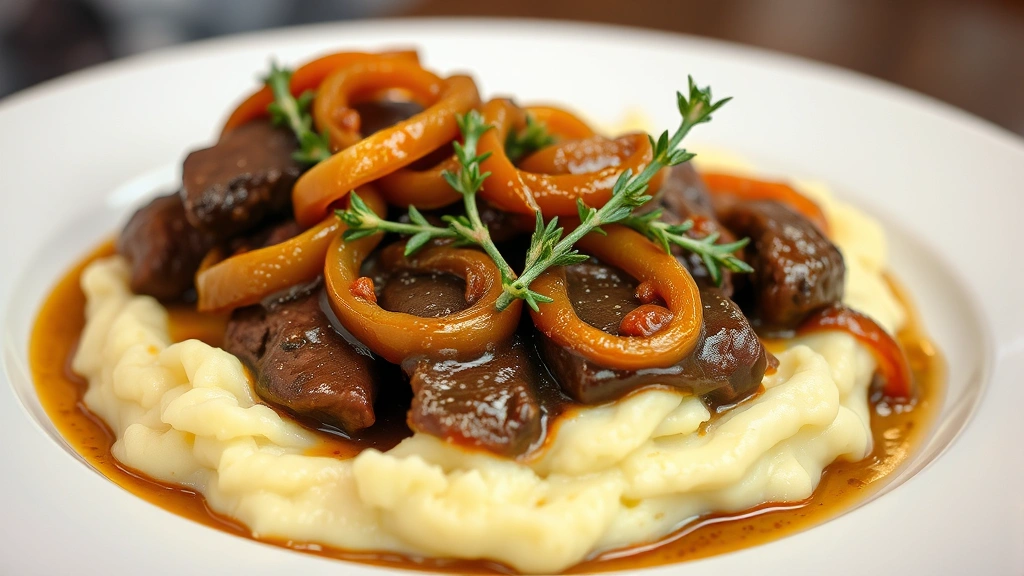
Arrange the seared liver slices on a serving platter or individual plates. Top generously with the warm caramelized onions, allowing some of their sweet juices to drape over the liver. Serve immediately while everything is still hot. The contrast between the crispy, seared exterior of the liver and the soft, yielding interior, combined with those sweet, jammy onions, creates an absolutely craveable dish.
Pro Tip: Have all your components ready before you start cooking the liver. Beef liver cooks very quickly, and you want to serve it immediately from the pan. If your onions finish before the liver, simply cover them loosely with foil to keep them warm without drying out.
Serving Suggestions and Pairings
Grandma’s beef liver recipe shines when paired with simple, complementary sides that don’t compete with its rich flavor. Creamy mashed potatoes are the classic choice—their buttery smoothness provides the perfect canvas for the liver and onions. Alternatively, try serving over buttered egg noodles or a bed of polenta. The starch soaks up those delicious pan juices beautifully.
For vegetable sides, consider steamed or sautéed green beans, roasted Brussels sprouts, or a simple spinach salad dressed with lemon vinaigrette. The slight acidity of these options balances the richness of the liver. You could also serve this alongside rice bowl recipes, creating a more casual presentation that’s equally satisfying.
If you want to incorporate more fresh herbs, consider making a quick pan sauce by deglazing the skillet with red wine or beef broth after removing the liver, then whisking in a knob of cold butter and fresh parsley. Pour this over the plated liver and onions for restaurant-quality presentation.
Beverage pairings matter with liver’s distinctive flavor. A light red wine like Pinot Noir or a Côtes du Rhône complements the dish beautifully. If you prefer white wine, choose something with good acidity like a Sauvignon Blanc. For non-alcoholic options, sparkling apple cider or a dry ginger ale works surprisingly well.
Pro Tips and Common Mistakes
Sourcing Your Liver: The quality of your beef liver dramatically affects the final dish. Visit a local butcher and ask for grass-fed liver if possible. The animals’ diet influences the liver’s flavor profile, with grass-fed liver tending toward milder, cleaner tastes. Avoid pre-packaged liver from supermarkets when possible; it’s often been sitting longer and develops off-flavors. Your butcher can slice it fresh to your specifications.
The Milk Soak is Essential: Don’t skip this step or substitute with water. Milk’s casein proteins bind to compounds that create liver’s strong flavor, effectively neutralizing them. The longer you soak (up to 4 hours), the milder the final dish. This technique has been used in European cooking for centuries and truly makes a difference.
Thickness Matters: Slices that are too thin (under 1/4-inch) will become tough and rubbery. Slices that are too thick (over 1/2-inch) won’t cook through properly while developing a crust. The 1/4-inch thickness is the goldilocks zone where you get a crispy exterior and tender interior.
Don’t Overcook: Liver is very lean and toughens quickly when overcooked. Aim for an internal temperature of 160°F for food safety, but don’t go much beyond that. If you prefer it slightly more cooked, 165°F is the absolute maximum before texture suffers significantly.
Temperature Control for Pan Searing: High heat is your friend here. A properly hot pan creates the Maillard reaction that develops that gorgeous crust. If your pan isn’t hot enough, the liver will steam rather than sear, resulting in a gray, unappetizing exterior.
Common Mistake—Moving the Liver Too Much: Beginners often flip the liver repeatedly or move it around the pan, preventing crust formation. Resist this urge. Let each side sit undisturbed for 2-3 minutes to develop that mahogany brown color.
Batch Cooking: If cooking for a crowd, keep finished liver warm in a 200°F oven on a plate loosely covered with foil rather than piling it on top of itself, which will cause it to steam.
Recipe Variations
Grandma’s Liver with Bacon: Cook 4-6 strips of bacon until crispy, then crumble over the finished dish. The bacon fat adds richness, and the crispy texture provides wonderful contrast.
Italian-Style Beef Liver: Replace the thyme with fresh basil and oregano. Add 1/2 cup diced tomatoes to the onions during the final cooking stage. Serve over pasta or polenta for a Mediterranean twist.
Liver with Mushrooms: Sauté 8 ounces sliced mushrooms (cremini or shiitake work beautifully) in butter alongside the onions. Add them to the pan in the final 5 minutes of cooking. Mushrooms’ umami compounds complement liver’s savory notes perfectly.
Liver and Onions Sandwich: Chop the cooked liver and onions, pile onto toasted bread with a schmear of horseradish mayo, and enjoy as a hearty sandwich. Grandma would approve of this resourceful way to use leftovers.
Braised Variation: If you prefer a gentler cooking method, braise the floured liver in beef broth with onions and herbs at 325°F for 25-30 minutes instead of pan-searing. This method produces incredibly tender results, though you’ll miss that crispy exterior.
You might also explore pairing this recipe with how to preserve herbs to maintain fresh seasonings year-round, or learn about organic vs non-organic food when sourcing your beef liver.
FAQ
Can I use chicken liver instead of beef liver?
While you can technically use chicken liver, the flavor and texture differ significantly. Chicken liver is milder and more delicate, cooking much faster (1 minute per side). It won’t hold up to the same robust preparation as beef liver. If you prefer milder organ meats, chicken liver might be your starting point, but Grandma’s recipe is specifically designed around beef liver’s characteristics.
How do I know when the liver is done cooking?
Use a meat thermometer inserted into the thickest slice. The USDA recommends 160°F for food safety. At this temperature, the liver is fully cooked and safe, though some prefer it slightly less done (around 155°F) for maximum tenderness. If you don’t have a thermometer, cut into the thickest slice; it should have no pink interior but still be slightly moist.
Can I make this recipe ahead of time?
Beef liver is best served immediately after cooking. However, you can prepare components ahead: soak the liver in milk 4 hours in advance, and caramelize onions up to 2 days ahead, storing them in the refrigerator. Reheat onions gently before serving. Cook the liver just before eating for optimal texture.
What if I find the liver too strong-tasting even after soaking?
Extend the milk soak to 4 hours or overnight. Pair it with more acidic elements—add extra balsamic vinegar to the onions, serve with a squeeze of fresh lemon juice, or include a bright vinaigrette on the side. Some people also find that cooking liver with apple or onion flavors helps mask the taste they find objectionable.
Is beef liver safe to eat?
Absolutely, when sourced from reputable suppliers and cooked properly. The liver is an organ that filters toxins, but this doesn’t mean it accumulates dangerous levels. The filtering process actually makes liver highly nutritious. Cook to 160°F internal temperature to eliminate any foodborne pathogens. Pregnant women should consult their healthcare provider about organ meat consumption due to high vitamin A content.
Can I freeze beef liver?
Yes, raw beef liver freezes well for up to 3 months. Wrap individual slices in plastic wrap, then place in a freezer bag with the air removed. Thaw in the refrigerator overnight before cooking. Cooked liver also freezes acceptably for up to 2 months, though texture may be slightly softer upon reheating.
What’s the best way to reheat leftover beef liver?
Gently reheat in a low oven (300°F) covered with foil for 8-10 minutes, rather than using a microwave which can make it tough. Alternatively, reheat in a skillet over low heat with a splash of beef broth. Liver is best fresh, but this method preserves quality better than other reheating approaches.
How does this recipe compare to other beef liver recipes?
Grandma’s version emphasizes simplicity and technique over complicated sauces or excessive seasoning. The milk soak distinguishes this recipe from many others, as does the focus on high-heat searing to develop proper browning. This approach yields incredibly tender, flavorful results without requiring restaurant equipment or advanced culinary training.
This beef liver recipe represents generations of home cooking wisdom distilled into an accessible, delicious dish. Whether you’re reconnecting with family traditions or discovering organ meats for the first time, Grandma’s method delivers results that will change how you think about beef liver. The combination of proper technique, quality ingredients, and patient cooking transforms what many consider an intimidating ingredient into something truly special. Start with this classic preparation, master the fundamentals, and you’ll find yourself returning to it again and again.


