Easy Cherry Pie Filling? Grandma’s Secret Recipe
There’s something magical about homemade cherry pie filling that transforms a simple dessert into a treasured family heirloom. My grandmother guarded her cherry pie filling recipe like a secret ingredient to happiness, and after years of watching her work in the kitchen, I finally unlocked the techniques that make her version so exceptionally delicious. This isn’t just any cherry pie filling recipe—it’s a time-tested formula that balances tartness, sweetness, and texture in perfect harmony.
What makes this cherry pie filling recipe truly special is its simplicity combined with insider tricks that most home bakers never discover. The secret isn’t found in exotic ingredients or complicated procedures, but rather in understanding how to select the right cherries, the proper thickening method, and the timing that creates that perfect consistency. Whether you’re planning to bake a classic double-crust pie, use it as a topping for ice cream, or incorporate it into other desserts, this easy cherry pie filling will become your go-to recipe.
Why Homemade Cherry Pie Filling Surpasses Store-Bought
The difference between homemade and commercial cherry pie filling is immediately apparent when you taste them side by side. Store-bought versions often contain artificial flavors, excessive corn syrup, and thickening agents that create an unnatural gel-like texture. When you make your own cherry pie filling at home, you control every single component, ensuring that the natural fruit flavor shines through without any chemical aftertaste.
My grandmother always emphasized that fresh cherries deserve respect. She believed that the filling should enhance the cherry flavor, not mask it. Commercial products often use lower-quality fruit and rely on added sugars and flavorings to compensate for lack of natural taste. Homemade filling lets the actual cherry essence become the star of your dessert. Additionally, homemade versions are significantly more cost-effective, especially if you have access to fresh cherries during peak season.
Another advantage is customization. You can adjust the sweetness level, control the thickness, and even experiment with complementary flavors like almond extract or vanilla. This flexibility allows you to create a filling that matches your exact preferences and dietary needs. If you’re looking to expand your dessert repertoire, exploring best healthy food recipes can inspire new ways to incorporate fresh fruit into your cooking.
Essential Ingredients for Perfect Cherry Pie Filling
The foundation of exceptional cherry pie filling starts with quality ingredients. Here’s what you’ll need for a standard 9-inch pie:
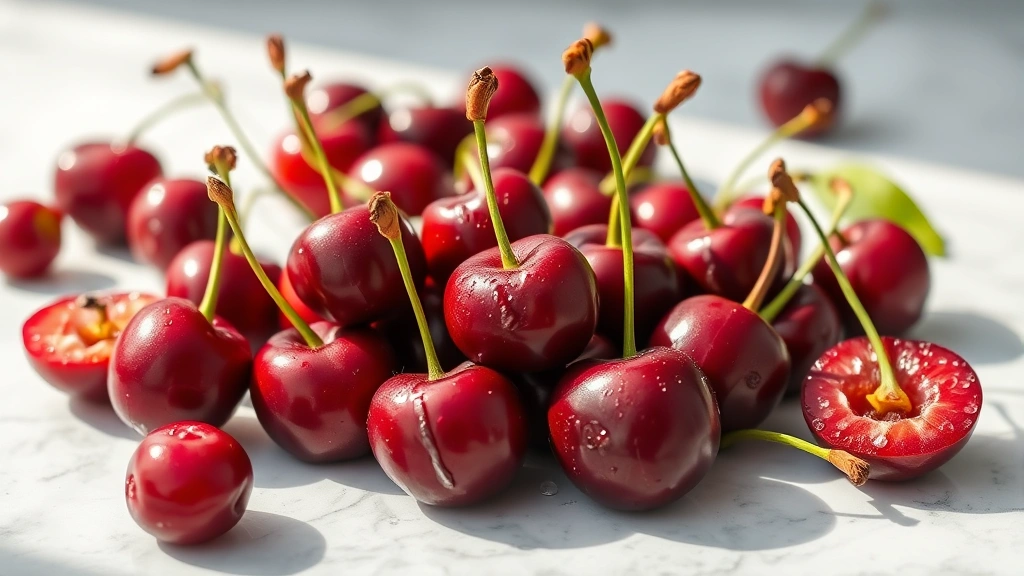
- Fresh cherries: 4-5 pounds of fresh, ripe cherries (or 6 cups pitted), preferably Bing or Montmorency varieties. The choice between sweet and tart cherries affects the final flavor profile significantly.
- Granulated sugar: 1 cup provides sweetness while allowing the cherry flavor to remain prominent
- Cornstarch: 3 tablespoons acts as the thickening agent, creating a glossy, cohesive filling without cloudiness
- Fresh lemon juice: 2 tablespoons brightens the flavor and prevents the filling from becoming overly sweet
- Salt: ¼ teaspoon enhances all flavors and balances sweetness
- Almond extract: ½ teaspoon (optional but highly recommended) is grandma’s secret weapon for deepening cherry flavor
- Vanilla extract: ½ teaspoon adds complexity and warmth
- Butter: 1 tablespoon enriches the filling with subtle flavor and glossy appearance
The type of cherry you choose dramatically influences your filling. Bing cherries offer a sweeter profile with deeper color, making them ideal for those who prefer less tartness. Montmorency or sour cherries provide a traditional, more complex flavor that professional bakers favor. Many home cooks use a combination of both varieties to achieve balanced taste. If fresh cherries aren’t available, high-quality frozen cherries work exceptionally well—they’re often picked at peak ripeness and frozen immediately, preserving their flavor integrity.
Step-by-Step Instructions for Easy Cherry Pie Filling
Creating this easy cherry pie filling follows a straightforward process that even novice bakers can master. The key is understanding each step’s purpose and maintaining proper temperature control.
Step 1: Prepare Your Cherries Start by washing fresh cherries thoroughly under cool running water. Pat them completely dry with paper towels—moisture can affect the filling’s final consistency. Using a cherry pitter, carefully remove the pits, catching all juices in a bowl. This step is crucial because cherry juice contributes significant flavor to your filling. If you don’t have a cherry pitter, a small knife or even a chopstick works, though it requires more patience.
Step 2: Combine Dry Ingredients In a medium bowl, whisk together the cornstarch, sugar, and salt. This pre-mixing prevents lumps from forming when you add liquid. The cornstarch particles need to be evenly distributed throughout the sugar to thicken the filling uniformly. Make sure there are no visible clumps of cornstarch in the mixture.
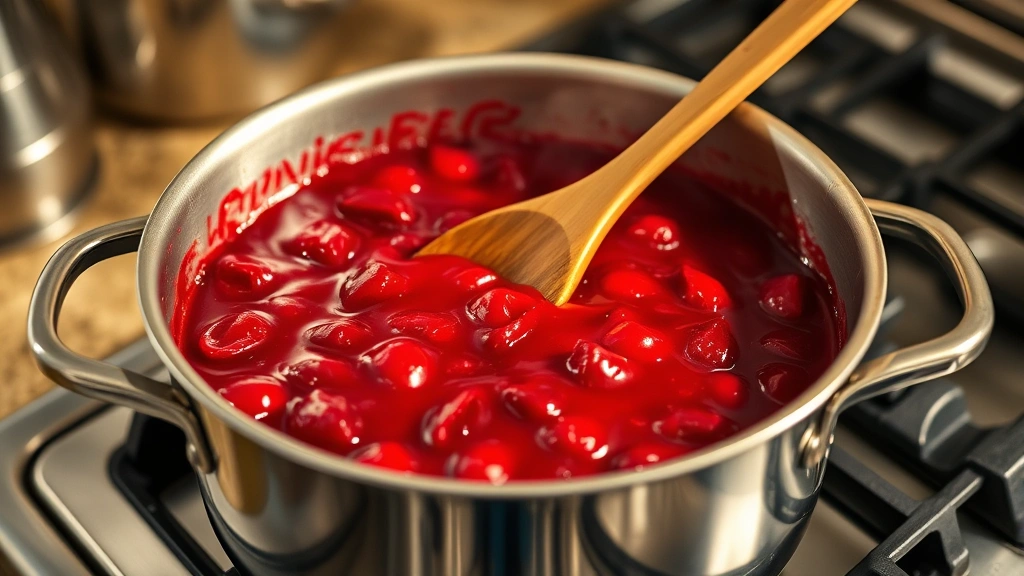
Step 3: Prepare the Filling Base Pour the pitted cherries and their collected juice into a large saucepan over medium heat. Add the lemon juice immediately—this prevents enzymatic browning and adds brightness to the flavor profile. Stir gently and allow the cherries to warm for about 2-3 minutes until they begin releasing their natural juices. You should notice the mixture becoming slightly translucent and the cherries softening slightly.
Step 4: Add Thickening Agents Once the cherry mixture is warm but not boiling, gradually sprinkle the dry ingredient mixture over the cherries while stirring constantly. This gradual approach prevents clumping and ensures even thickening. Continue stirring for 1-2 minutes as the cornstarch begins absorbing the cherry juice. The mixture will become noticeably thicker and more opaque during this stage.
Step 5: Achieve Proper Consistency Increase heat to medium-high and bring the mixture to a gentle boil, stirring frequently. Once it reaches a boil, maintain it for exactly 1 minute—this step fully activates the cornstarch and eliminates any starchy taste. The filling should transform into a glossy, deep red mixture with visible cherry pieces suspended throughout. If it seems too thick, add 1-2 tablespoons of water; if too thin, mix 1 tablespoon cornstarch with 2 tablespoons water and stir it in.
Step 6: Incorporate Flavor Enhancers Remove from heat and stir in the almond extract, vanilla extract, and butter. The residual heat will melt the butter completely, creating a silky texture. The extracts should be added after cooking to preserve their delicate flavors. Stir thoroughly for about 30 seconds to ensure even distribution.
Step 7: Cool Before Using Pour the filling into a bowl and allow it to cool to room temperature, approximately 30 minutes. This cooling period is essential because hot filling will make your pie crust soggy. If you’re using the filling immediately, you can also spread it on a baking sheet to cool faster. Stir occasionally during cooling to ensure even temperature distribution.
Grandma’s Secret Techniques Revealed
My grandmother’s approach to cherry pie filling involved several techniques that elevate the final result beyond typical recipes. Understanding these methods transformed my baking success dramatically.
The Juice Concentration Method Grandma always reserved about ¼ cup of the cherry juice before adding the dry ingredients. After the filling cooled, she would taste it and occasionally reduce the reserved juice separately in a small saucepan for 2-3 minutes, then fold it back in. This concentrated juice added intense cherry flavor without diluting the filling’s consistency. This technique works particularly well with milder cherry varieties that need flavor enhancement.
The Flavor Layering Approach Rather than adding all extracts at once, she would add half the almond extract during cooking and the remainder after cooling. This dual-addition method creates complex flavor layers—some extract cooks into the filling while some remains fresh on the palate. This subtle technique is the difference between good filling and extraordinary filling that people can’t quite identify but absolutely love.
The Maceration Trick For maximum flavor extraction, grandma sometimes macerates the pitted cherries with half the sugar for 1-2 hours before cooking. This draws out the cherry juices and creates a more intensely flavored filling. If you have time, this extra step is absolutely worth the investment.
Temperature Control Precision Grandma emphasized never allowing the filling to reach a rolling boil—just a gentle, steady boil for that crucial 1 minute. Excessive heat can break down the fruit structure and create a muddy flavor. She used a thermometer to monitor temperature, keeping it between 210-215°F during the boiling phase.
These techniques have been passed down through our family for decades, and they consistently produce filling that tastes noticeably superior to standard recipes. For inspiration on other family-favorite recipes, explore low carb dinner recipes that emphasize quality ingredients like our cherry filling approach.
Storage and Make-Ahead Tips
One of the greatest advantages of homemade cherry pie filling is its excellent shelf life and make-ahead potential. Proper storage ensures you can enjoy this filling long after cherry season ends.
Refrigerator Storage Cooled cherry pie filling keeps perfectly in an airtight container for up to 5 days in the refrigerator. Make sure the container is completely sealed to prevent odor absorption and moisture loss. The filling may thicken slightly during refrigeration as the cornstarch continues absorbing moisture—this is normal and actually preferable for pie-making.
Freezer Storage For longer storage, freeze the filling in airtight containers or freezer bags for up to 3 months. Pour cooled filling into containers, leaving ½ inch headspace for expansion. Label with the date and contents. When ready to use, thaw overnight in the refrigerator and bring to room temperature before using. Frozen filling maintains its flavor and consistency remarkably well, making it perfect for off-season pie baking.
Ice Cube Method For maximum flexibility, freeze filling in ice cube trays. Once frozen solid, transfer cubes to freezer bags. This allows you to use exactly the amount needed for individual desserts or ice cream toppings. Each cube contains roughly 2 tablespoons of filling.
Make-Ahead Strategy for Pie Day Prepare the filling up to 2 days before baking your pie. This advance preparation reduces stress on baking day and allows flavors to meld and deepen. Simply reheat gently on the stovetop or in the microwave before using if it’s been refrigerated.
Troubleshooting Common Issues
Filling Too Thin If your filling lacks the proper consistency, you have several solutions. The most straightforward approach is mixing 1 tablespoon cornstarch with 2 tablespoons cold water, stirring until smooth, then adding this slurry to the filling while heating gently. Alternatively, simmer the filling uncovered for 2-3 additional minutes to allow excess moisture to evaporate. Avoid adding cornstarch directly to the filling without mixing with water first, as this creates lumps.
Filling Too Thick Overly thick filling can result from too much cornstarch or overcooking. Remedy this by stirring in 1-2 tablespoons of water or cherry juice at a time until reaching desired consistency. Remember that filling thickens further as it cools, so aim for slightly looser consistency while warm.
Grainy or Lumpy Texture Lumps indicate inadequately mixed cornstarch. Prevention is the best solution—always whisk cornstarch with sugar before adding to fruit. If lumps develop, strain the filling through a fine-mesh sieve, pressing solids through while leaving lumps behind. Most of the filling passes through while removing the problematic texture.
Insufficient Cherry Flavor If your filling tastes bland, the cherries may have been underripe or of poor quality. Add ¼ teaspoon additional almond extract and 1 tablespoon cherry juice concentrate (if available) to boost flavor. For future batches, source cherries from farmers markets where you can taste before purchasing.
Filling Separating During Storage Sometimes liquid pools at the bottom of stored filling. This is normal and doesn’t indicate spoilage. Simply stir well before using. If excessive separation occurs, the cornstarch may be breaking down—use slightly more cornstarch in your next batch.
Creative Uses Beyond Pie
While cherry pie filling is traditionally used for pies, its versatility extends to numerous other desserts and dishes. Understanding these applications maximizes your investment in this delicious filling.
Ice Cream Topping Drizzle warm or cooled filling over vanilla, almond, or cheesecake ice cream. The tartness of the cherries provides perfect contrast to rich ice cream. This simple dessert requires no baking and impresses guests effortlessly.
Yogurt Parfaits Layer yogurt with granola and cherry filling for a sophisticated breakfast or light dessert. The filling’s tartness complements both Greek and regular yogurt beautifully.
Cheesecake Topping Spread cooled filling over baked cheesecake for classic elegance. The cherry flavor pairs exceptionally well with rich cheesecake, creating balanced sweetness.
Pastry Filling Use filling in danish pastries, hand pies, or puff pastry tarts. The pre-thickened consistency prevents sogginess during baking, resulting in perfect texture.
Cake Layer Filling Spread between cake layers for unique flavor dimension. Works particularly well with vanilla, almond, or chocolate cakes.
Thumbprint Cookies Drop a small spoonful in the center of cookie dough before baking. The filling bakes into a jammy center that’s absolutely delicious.
Cocktail Garnish Professional bartenders use cherry filling in craft cocktails. A spoonful adds fruity sweetness and visual appeal to drinks.
For those interested in expanding their culinary repertoire, exploring easy chicken casserole recipe options demonstrates how quality ingredients enhance any dish. Similarly, quality cherry pie filling elevates simple desserts into memorable experiences.
FAQ
Can I use frozen cherries for this filling?
Absolutely! Frozen cherries work exceptionally well because they’re picked at peak ripeness and frozen immediately. Thaw them completely before using and drain excess liquid, then proceed with the recipe as written. You may need slightly less cornstarch since frozen cherries release more liquid during thawing.
What’s the difference between Bing and Montmorency cherries?
Bing cherries are sweet with deep color and mild flavor, ideal for those preferring less tartness. Montmorency cherries are tart with brighter flavor, favored by professional bakers. Many recipes combine both for balanced complexity. Choose based on your taste preferences and availability.
Can I reduce the sugar in this recipe?
Yes, you can decrease sugar to ¾ cup, though this may require reducing cornstarch slightly to 2½ tablespoons since less sugar means less liquid absorption. Taste and adjust cornstarch as needed. Remember that sugar also provides texture and helps preserve the filling.
Is almond extract really necessary?
While optional, almond extract is grandma’s secret for deepening cherry flavor dramatically. If you dislike almond flavor, substitute with ¼ teaspoon of vanilla extract instead, though the result will be slightly less complex.
How do I know when the filling is properly thickened?
Properly thickened filling should coat the back of a spoon when cool. When warm, it should flow slowly rather than run quickly. It will continue thickening as it cools, so aim for slightly looser consistency while hot.
Can I make this filling without cornstarch?
You can substitute with arrowroot powder (use same amount), tapioca starch (use 2½ tablespoons), or instant pudding mix (use 3 tablespoons vanilla pudding). Each creates slightly different texture, so experimentation may be needed. Avoid flour, which creates cloudy, starchy-tasting filling.
Why does my filling taste bitter?
Bitterness typically results from overheating or using cherry pits in the filling. Always remove pits completely and avoid boiling excessively. If bitterness occurs, add 1 teaspoon of honey or corn syrup to balance the flavor.
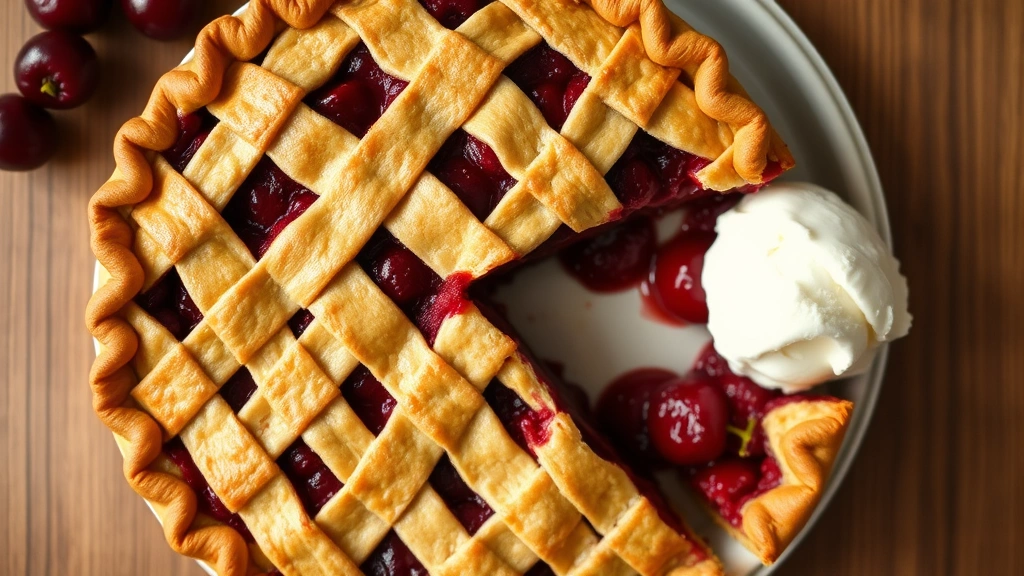
How much filling do I need for a 9-inch pie?
This recipe yields approximately 3½ cups of filling, which perfectly fills a standard 9-inch pie. If making a deep-dish pie, increase all ingredient amounts by 25%.


