Crispy Chicken Wings? Game Day Favorite!
There’s nothing quite like biting into a perfectly crispy chicken wing while cheering on your favorite team. Whether you’re hosting a watch party, planning a tailgate, or simply craving a satisfying snack, crispy chicken wings are the ultimate crowd-pleaser. The secret to achieving that golden, crunchy exterior while keeping the meat tender and juicy inside lies in understanding the right techniques, ingredients, and cooking methods.
In this comprehensive guide, we’ll walk you through everything you need to know about making restaurant-quality crispy chicken wings at home. From selecting the best cuts to mastering different cooking techniques, you’ll discover why these game day favorites have become a staple on tables across America. Let’s dive into the world of perfectly crispy wings and transform your next gathering into a culinary touchdown.

Selecting and Preparing Your Chicken Wings
The foundation of great crispy chicken wings starts with quality ingredients. When shopping for wings, you have several options: whole wings with skin on (the best choice), boneless wings, or pre-separated drumettes and flats. Whole wings with skin are superior because the skin crisps up beautifully and protects the meat underneath, keeping it moist and flavorful.
Begin by patting your wings completely dry with paper towels. This step is absolutely critical for achieving crispiness. Any moisture on the surface creates steam during cooking, which prevents the skin from becoming crispy. Don’t skip this step—spend a full minute thoroughly drying each wing.
Next, trim any excess skin or fat hanging from the wings, but leave the protective skin intact. This prevents flare-ups during frying and ensures even cooking. If your wings are frozen, thaw them completely in the refrigerator overnight. Never cook frozen wings directly, as they’ll cook unevenly and won’t crisp properly.
For enhanced flavor and texture, consider brining your wings for 2-4 hours before cooking. A simple brine of salt, sugar, and water seasons the meat from within and helps retain moisture. After brining, pat them dry again before proceeding with your chosen cooking method.

The Science Behind Crispy Wings
Understanding the science helps you achieve consistent results every time. Crispiness comes from the Maillard reaction—a chemical process that occurs when proteins and sugars in food are exposed to high heat, creating that golden-brown color and complex flavors.
The chicken skin contains collagen, which breaks down into gelatin when heated. If you cook wings slowly at low temperatures, you’ll get gelatinous, soft skin. However, high heat causes the remaining water in the skin to evaporate quickly, leaving behind crispy, shattered skin. This is why temperature control matters tremendously.
Salt plays an unexpected role in crisping. When you salt wings before cooking, the salt draws out moisture through osmosis. This seems counterintuitive, but the moisture that emerges mixes with the salt, creating a brine on the surface that actually helps the skin dry out faster and become crispier. Apply salt 40 minutes to 24 hours before cooking for optimal results.
The Maillard reaction occurs between 300-330°F (149-165°C), but for wings, we typically cook at higher temperatures (350-375°F/175-190°C) to achieve maximum crispiness while still cooking the interior properly. This dual-temperature approach—high heat for crispiness, moderate heat for cooking through—is the key to perfect wings.
Classic Deep-Fried Method
Deep frying remains the gold standard for achieving the crispiest possible wings. You’ll need a deep pot, heavy-bottomed Dutch oven, or dedicated deep fryer, along with a reliable thermometer.
Equipment and Setup:
- Heavy-bottomed pot or Dutch oven (at least 5-quart capacity)
- Instant-read or candy thermometer
- Slotted spoon or spider strainer
- Paper towels or wire rack for draining
- Neutral oil with high smoke point (peanut, vegetable, or canola)
Fill your pot with 3-4 inches of oil and heat to 350°F (175°C). Use your thermometer to monitor temperature throughout cooking. Oil temperature is everything—too cool and wings absorb oil and become greasy; too hot and the exterior burns before the interior cooks.
Carefully lower 5-6 wings into the hot oil (don’t overcrowd the pot, as this lowers oil temperature). The wings should sizzle immediately but not aggressively. Fry for 8-10 minutes, stirring occasionally to ensure even cooking. The skin should turn deep golden brown.
Remove wings with a slotted spoon and place on a wire rack set over paper towels. Never stack wings on paper towels alone, as the steam trapped underneath makes them soggy. The wire rack allows air circulation underneath, maintaining crispiness.
For extra-crispy wings, use the double-fry method: fry wings at 325°F (163°C) for 6-8 minutes, remove and rest for 5-10 minutes, then fry again at 375°F (190°C) for 2-3 minutes. This technique separates the skin from the meat slightly, allowing maximum crispiness.
Oven-Baked Crispy Wings
Not everyone has access to a deep fryer, and that’s perfectly fine. Oven-baked wings can achieve impressive crispiness with proper technique. This method is also healthier and safer than deep frying, making it ideal for home cooks.
Preheat your oven to 250°F (120°C). Line a large baking sheet with aluminum foil for easy cleanup. Arrange your dried wings on the sheet in a single layer, skin-side up. Bake for 30 minutes at this low temperature. This renders out the fat from the skin without browning it—a crucial preparatory step.
After 30 minutes, increase oven temperature to 425°F (220°C) and bake for an additional 30-40 minutes, until wings are deep golden brown and crispy. The initial low-temperature phase renders the fat, while the high-temperature finish crisps the skin.
For even better results, place a second baking sheet on the rack above your wings. This traps some heat and helps render fat more efficiently. Remove the upper sheet for the final 15 minutes to allow direct heat exposure for crisping.
Toss wings with your desired sauce or seasoning while still hot—the heat helps flavors adhere better. If you prefer unsauced wings, sprinkle with fleur de sel or your favorite seasoning immediately after removing from the oven.
Air Fryer Technique
Air fryers have revolutionized quick, crispy cooking. These countertop appliances circulate hot air at high speeds, creating a convection effect that crisps food remarkably well with minimal oil.
Pat your wings completely dry and lightly coat with oil (about 1 teaspoon per pound of wings). This oil coating is essential—it helps the air fryer’s heat transfer efficiently to the skin. Season wings generously with salt and any desired spices.
Arrange wings in a single layer in your air fryer basket. Don’t overcrowd; wings should touch but not overlap. Set temperature to 380°F (193°C) and cook for 15-20 minutes, shaking the basket halfway through cooking. The exact time depends on your air fryer model and wing size.
Wings are done when the skin is deep golden brown and meat is cooked through (165°F/74°C internal temperature). The skin should shatter when bitten, providing that satisfying crunch. Air fryer wings cook faster than oven-baked versions and rival deep-fried wings in crispiness while using a fraction of the oil.
Air fryers work best for smaller batches. If you’re serving a crowd, you may need to cook wings in multiple batches, which is actually advantageous—wings stay warm while you cook subsequent batches.
Sauce and Seasoning Ideas
Once you’ve mastered the crispy exterior, sauces and seasonings transform your wings into flavor-packed masterpieces. The beauty of wings is their versatility—they pair with countless flavor profiles.
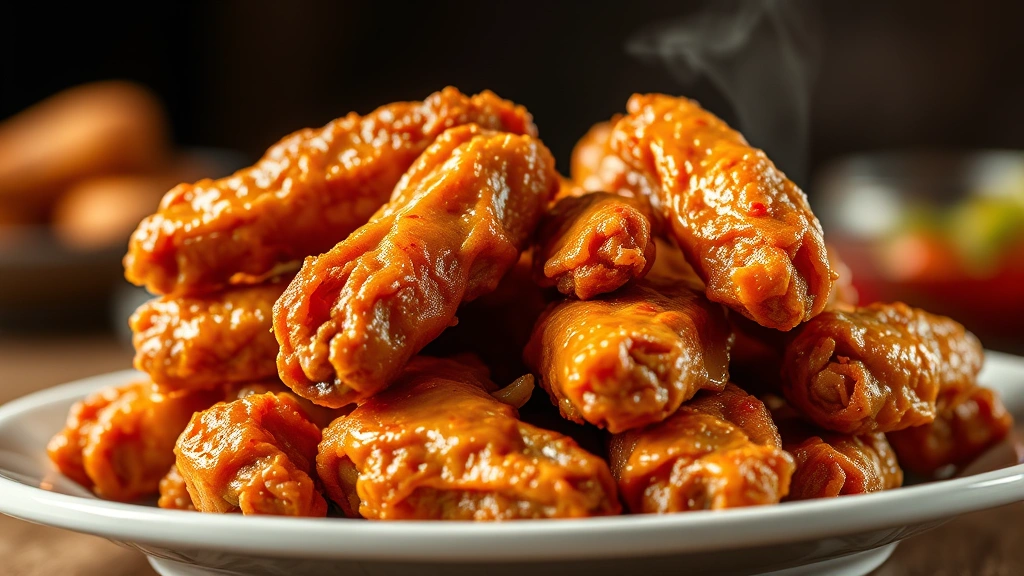
Classic Buffalo Sauce: Combine melted butter with hot sauce (Frank’s RedHot is traditional) in a 1:1 ratio. Toss hot wings in the mixture and serve with blue cheese dressing and celery. This iconic combination has defined game day for decades.
Honey Garlic Glaze: Whisk together honey, soy sauce, minced garlic, rice vinegar, and a touch of sesame oil. Brush onto hot wings and garnish with sesame seeds and chopped scallions. This Asian-inspired sauce balances sweet and savory beautifully.
Lemon Pepper Seasoning: Toss hot wings with melted butter, lemon zest, cracked black pepper, and garlic powder. Finish with fresh lemon juice and chopped parsley. This lighter option celebrates the natural chicken flavor while adding brightness.
Spicy Korean Gochujang: Mix gochujang (Korean red chili paste) with honey, soy sauce, minced garlic, and sesame oil for a complex, spicy-sweet sauce. Toss with wings and top with toasted sesame seeds.
Dry Rub Method: Combine paprika, garlic powder, onion powder, cayenne, brown sugar, salt, and pepper. Toss hot wings in this mixture before they cool. Dry rubs create texture contrast and allow the crispy skin to remain maximally crunchy.
Apply sauces to still-hot wings for best adherence. If wings cool, gently reheat them for 2-3 minutes before saucing. Always have sides ready—blue cheese or ranch dip, celery sticks, and carrot sticks are essential accompaniments that complement the richness of wings.
Storage and Reheating Tips
Leftover wings (if you have any!) can be stored properly to maintain quality. Place cooled wings in an airtight container and refrigerate for up to 4 days. For longer storage, freeze wings in a freezer bag for up to 3 months.
To reheat, place wings on a baking sheet and warm in a 375°F (190°C) oven for 8-10 minutes until heated through and skin recrisps. Never microwave wings, as microwaving makes them soggy and ruins the texture you worked hard to achieve.
For meal prep, you can prepare wings in advance and store them uncooked. Pat dry, season, and refrigerate for up to 24 hours before cooking. This actually improves seasoning penetration and can enhance crispiness due to the salt drawing out surface moisture.
When serving at gatherings, keep cooked wings warm in a low oven (200°F/93°C) for up to 2 hours. Place them on a wire rack over a baking sheet to maintain crispiness. If wings begin to soften, increase oven temperature to 300°F (149°C) for 5 minutes to re-crisp them.
For healthier eating, check out our guide on best healthy food recipes to discover ways to incorporate wings into balanced meals. You can also learn about food waste reduction tips to use every part of your chicken efficiently.
FAQ
Why aren’t my wings getting crispy?
The most common culprit is insufficient drying. Wings must be completely dry before cooking. Also verify your cooking temperature—use a thermometer to confirm oil reaches 350°F or your oven hits 425°F. Finally, ensure you’re not overcrowding your cooking vessel, which lowers temperature and creates steam.
Can I make wings ahead of time for a party?
Yes! Prepare wings up to 24 hours in advance, season them, and refrigerate. Cook them just before serving for maximum crispiness. If you must cook earlier, reheat in a 375°F oven for 8-10 minutes to re-crisp the skin before serving.
What’s the best oil for frying wings?
Use neutral oils with high smoke points: peanut oil (450°F), vegetable oil (450°F), or canola oil (400°F). Avoid olive oil and butter, which have lower smoke points and will break down at the temperatures needed for frying.
How do I know when wings are fully cooked?
Use an instant-read thermometer to check that the thickest part of the thigh reaches 165°F (74°C). Visual cues include deep golden-brown skin and juices running clear when pierced.
Are boneless wings as good as bone-in wings?
Bone-in wings are superior because they stay juicier during cooking and develop better flavor. However, boneless wings are convenient and still delicious when cooked properly. They cook slightly faster than bone-in varieties.
Can I use frozen wings directly?
No. Frozen wings cook unevenly and won’t crisp properly. Always thaw wings completely in the refrigerator overnight before cooking.
What’s the difference between drumettes and flats?
Drumettes are the meatier, drumstick-shaped portion, while flats are the thinner, two-bone section. Both are equally delicious; drumettes have more meat while flats crisp up slightly faster due to their thinner profile.
For more Fresh Plate Daily Blog recipes and cooking tips, explore our comprehensive collection. You might also enjoy learning how to make homemade pasta for expanding your cooking repertoire, or dive deeper into food quality with our organic vs non-organic food guide.
Master the art of crispy chicken wings and become the hero of your next game day gathering. Whether you choose deep frying, oven baking, or air frying, these techniques deliver restaurant-quality results that will impress everyone at your table. The key is understanding the science, respecting the details, and practicing until you achieve your perfect wing. Now get cooking, and may your wings be forever crispy!


