Fluffy Coconut Cake? Grandma’s Secret Recipe
There’s something magical about a slice of fluffy coconut cake that transports you straight to grandma’s kitchen. The way the light, airy crumb melts on your tongue, combined with the delicate coconut flavor and creamy frosting, makes this dessert an absolute showstopper. But here’s the truth: achieving that signature fluffiness isn’t just about following any recipe. It’s about understanding the techniques, the ingredient ratios, and the little secrets that professional bakers have perfected over generations.
My grandmother guarded her coconut cake recipe like treasure, and after years of baking alongside her, I finally understood why. It wasn’t just one special ingredient—it was a combination of methods, timing, and attention to detail that transformed a simple cake into something truly extraordinary. Today, I’m sharing her complete technique with you, breaking down every step so you can create this beloved classic in your own kitchen.
Why This Coconut Cake Is Different
Most home bakers struggle with dense, heavy coconut cakes that fall flat. The difference between a mediocre coconut cake and an exceptional one lies in three fundamental principles: proper aeration, moisture balance, and technique precision. Grandma’s secret wasn’t a magic ingredient—it was understanding how each component of the recipe worked together to create the perfect structure.
The key to fluffiness starts with how you treat your ingredients before they even hit the mixing bowl. Room temperature ingredients blend more smoothly, creating smaller air pockets that distribute evenly throughout the batter. This even distribution of air bubbles is what gives the final cake its characteristic tender crumb. Additionally, the ratio of fat to flour, the type of leavening agents used, and the order in which ingredients are combined all play crucial roles in determining the final texture.
When you follow traditional methods—like the creaming technique my grandmother used—you’re essentially building a foundation of tiny air bubbles that expand during baking. Each step, from creaming butter and sugar to gently folding in egg whites, contributes to this structure. Understanding why each step matters transforms you from someone following instructions to someone who truly understands cake science.
Essential Ingredients for Fluffiness
Before diving into the method, let’s talk about ingredient selection. The quality and type of ingredients you choose directly impact your cake’s texture and flavor. For this recipe, you’ll need:
- Unsalted butter (1 cup/2 sticks, room temperature) – Provides richness and helps create air pockets through creaming
- Granulated sugar (2 cups) – Essential for aerating the butter and sweetening
- Large eggs (4, room temperature) – Helps bind and adds moisture; room temperature eggs incorporate more smoothly
- Coconut milk (1 cup full-fat) – Provides moisture and authentic coconut flavor
- All-purpose flour (2.5 cups) – Structure; measure by spooning and leveling, not scooping
- Unsweetened shredded coconut (1.5 cups) – Intense flavor; unsweetened prevents excessive sweetness
- Baking powder (2.5 teaspoons) – Primary leavening agent
- Baking soda (0.5 teaspoon) – Reacts with buttermilk or acidic ingredients
- Sea salt (0.75 teaspoon) – Enhances coconut flavor and balances sweetness
- Vanilla extract (2 teaspoons) – Adds depth to coconut flavor
- Egg whites (2 additional, room temperature) – Creates extra lift and fluffy texture
The ingredient quality matters tremendously. Use pure vanilla extract, not imitation. Choose full-fat coconut milk from the canned goods aisle, not the reduced-fat version. These choices ensure your cake has the authentic flavor and proper moisture content that grandma’s recipe demands.
The Creaming Method Explained
The creaming method is where the magic begins. This technique, which has been used in baking for centuries, is the foundation of fluffy layer cakes. Here’s exactly how to do it:
- Bring butter to room temperature – Cut unsalted butter into tablespoon-sized pieces and let sit for 30-45 minutes. You should be able to easily press your finger into the butter, leaving a slight indent that doesn’t spring back immediately.
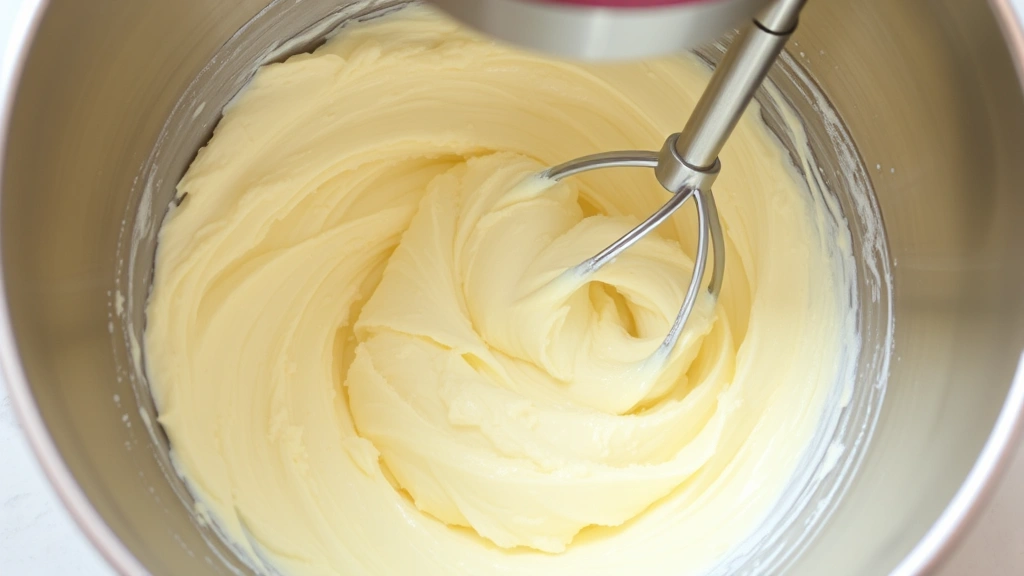
- Place butter in a large mixing bowl – Use an electric mixer on medium speed. Beat the butter alone for 2-3 minutes until it becomes pale yellow and slightly fluffy. This initial beating begins incorporating air.
- Gradually add sugar – Add the granulated sugar in four additions, mixing for about 1 minute between each addition. This gradual incorporation is crucial—adding sugar all at once can cause the mixture to break down.
- Continue beating for 5-7 minutes total – After all sugar is incorporated, continue beating until the mixture is light, fluffy, and pale (nearly white). This extended beating creates hundreds of tiny air bubbles that will expand during baking, creating fluffiness.
- Scrape down the bowl frequently – Stop the mixer and scrape the sides and bottom of the bowl with a spatula every 1-2 minutes. This ensures even incorporation of all ingredients.
The creaming process is non-negotiable for achieving grandma’s fluffy texture. Many bakers rush this step, but spending the full 5-7 minutes here directly translates to a lighter, airier final cake. You’ll notice the mixture transforming from dense and yellow to light and pale—this visual change indicates proper aeration.
Preparing Your Pans Properly
While your batter comes together, prepare your baking pans. Grandma always said that a poorly prepared pan could ruin even the best batter. Use three 8-inch round cake pans (or bake in batches with two pans) lined with parchment paper.
- Preheat your oven – Set to 350°F (175°C) for at least 15 minutes before baking. An accurate oven temperature is essential for proper rise and even baking.
- Grease pans thoroughly – Use softened butter or non-stick spray, covering the bottom and sides completely.
- Add parchment paper circles – Cut parchment paper to fit the bottom of each pan. Press the greased parchment into place. This prevents sticking and makes removal easier.
- Dust lightly with flour – Add a light coating of flour, tapping out excess. This provides additional insurance against sticking.
- Place pans on baking sheets – Setting cake pans on baking sheets creates a more even heat distribution, preventing bottom browning.
Proper pan preparation ensures your cake releases cleanly and bakes evenly. This step might seem tedious, but it’s worth every second when you remove a perfectly intact cake layer from the pan.
Mixing and Baking Techniques
Now comes the critical part where technique separates good cakes from exceptional ones. After completing the creaming process, your next steps are:
- Add eggs one at a time – With the mixer on medium-low speed, add one room-temperature egg. Beat for about 30 seconds until fully incorporated before adding the next. This gradual incorporation prevents the mixture from looking curdled or separated.
- Add vanilla extract – Mix in vanilla after all eggs are incorporated.
- Prepare dry ingredients – In a separate bowl, whisk together flour, baking powder, baking soda, and salt. Whisking combines these ingredients and adds air.
- Combine wet and dry ingredients – Reduce mixer speed to low. Alternate adding dry ingredients and coconut milk, starting and ending with dry ingredients. Add in three additions of dry and two of coconut milk. This alternating method prevents overmixing and keeps the batter tender.
- Fold in shredded coconut – Remove the bowl from the mixer. Using a rubber spatula, gently fold in the unsweetened shredded coconut with as few strokes as possible. Overmixing at this stage can deflate your carefully created air bubbles.
- Whip egg whites separately – In a clean bowl, beat the two additional egg whites on high speed until stiff peaks form (about 3-4 minutes). These whites add extra lift.
- Fold in egg whites gently – Fold the whipped egg whites into the batter in two additions, using a gentle hand. This adds volume without deflating the whites.
The alternating method of combining wet and dry ingredients is crucial. When you add all dry ingredients at once, you risk overmixing as you try to incorporate them. The alternating method allows thorough combination with minimal mixing strokes, preserving the air bubbles you’ve worked so hard to create.
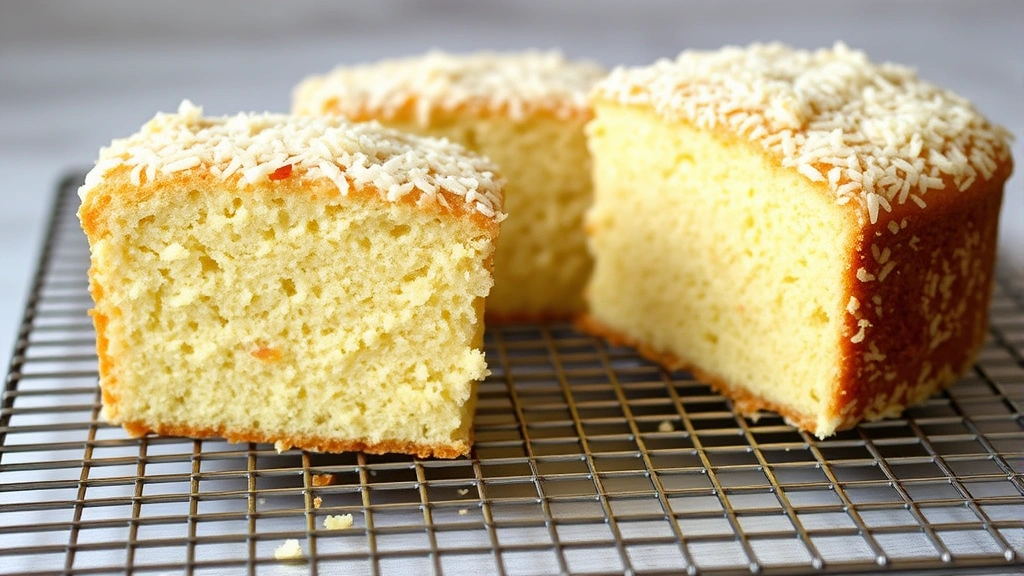
For baking, divide batter equally among prepared pans. Bake at 350°F for 25-30 minutes, until a toothpick inserted in the center comes out with just a few moist crumbs. The cakes should spring back lightly when touched. Remove from the oven and cool in pans for 15 minutes, then turn out onto wire racks to cool completely before frosting. This cooling period is essential—frosting a warm cake causes the frosting to melt and slide off.
Making the Perfect Coconut Frosting
A fluffy cake deserves equally excellent frosting. Grandma’s frosting is a classic American buttercream with a coconut twist:
Ingredients for frosting:
- Unsalted butter (1.5 cups/3 sticks, room temperature)
- Powdered sugar (4 cups, sifted)
- Coconut milk (3-4 tablespoons)
- Unsweetened shredded coconut (1 cup)
- Vanilla extract (1 teaspoon)
- Sea salt (pinch)
Method:
- Beat room-temperature butter for 2-3 minutes until creamy and pale
- Add sifted powdered sugar in two additions, beating well after each
- Add coconut milk one tablespoon at a time, beating until you reach a spreadable consistency
- Stir in vanilla extract and salt
- Fold in shredded coconut gently to preserve texture
If your frosting seems too soft, refrigerate for 15-20 minutes before using. If it’s too stiff, add more coconut milk by the teaspoon. The ideal consistency spreads smoothly without being runny.
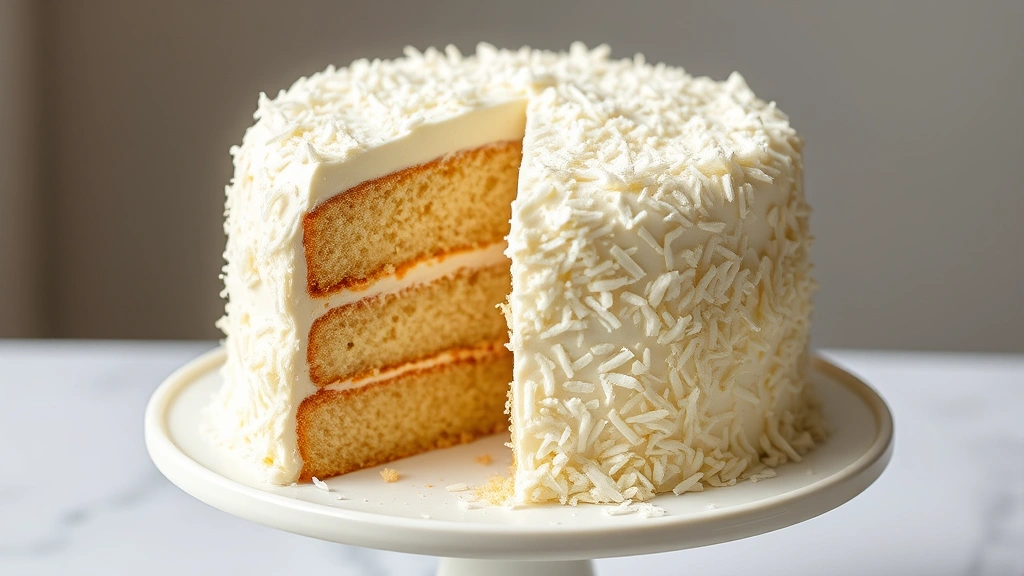
To assemble, place the first cake layer on a cake plate or turntable. Spread a thin layer of frosting on top, then add the second layer. Repeat with the third layer. Finally, frost the top and sides of the entire cake. For a beautiful presentation, press additional shredded coconut onto the sides and top of the frosted cake while the frosting is still slightly soft.
Assembly and Storage Tips
After all your work creating this masterpiece, proper storage ensures it stays fresh and delicious. Store your finished coconut cake in an airtight container at room temperature for up to two days. The frosting keeps the cake moist during this time. For longer storage, refrigerate for up to five days—the cold actually helps the frosting firm up for cleaner slices.
You can also freeze unfrosted cake layers for up to one month. Wrap each layer individually in plastic wrap and aluminum foil before freezing. Thaw at room temperature for about an hour before frosting and assembling. This strategy is excellent for bakers who want to prepare ahead for special occasions.
When slicing your cake, use a long serrated knife dipped in hot water and wiped dry between each slice. This technique creates clean cuts without tearing the delicate crumb. The fluffiness you’ve worked to achieve will be beautifully apparent in every slice.
For more preservation techniques, check out our guide on how to preserve herbs and ingredients, which covers storage methods for various baking components. If you’re interested in other preservation projects, our complete guide to making fruit preserves offers comprehensive storage strategies that apply to many desserts.
Understanding cake science transforms your baking. Resources like Serious Eats offer deep dives into baking chemistry, while King Arthur Baking Company provides tested recipes and techniques. For professional-level instruction, Le Cordon Bleu offers comprehensive baking courses that cover foundational techniques like the creaming method in depth.
If you’re exploring other easy recipes for beginners, remember that mastering baking fundamentals will enhance your overall cooking confidence. The techniques you learn with this coconut cake apply to countless other desserts and baked goods.
FAQ
Why is my coconut cake dense instead of fluffy?
Dense cakes usually result from one of three issues: insufficient creaming time, overmixing the batter, or room-temperature ingredients that weren’t actually room temperature. Ensure you cream butter and sugar for the full 5-7 minutes, and use a thermometer to verify ingredients are actually around 70°F. Additionally, don’t skip the separate egg white whipping step—this adds crucial lift.
Can I use fresh coconut instead of shredded?
Fresh coconut will work but produces different results. Fresh coconut contains more moisture than dried shredded coconut, which can make your cake wetter and denser. If using fresh, reduce the coconut milk to ¾ cup and use 1 cup of fresh coconut. Toast the fresh coconut lightly in a 325°F oven for 5-8 minutes to enhance flavor.
What if I don’t have three cake pans?
You can bake in batches using two pans. Divide the batter in half, baking two layers first. Cool completely, then wash and prepare the pans again for the third layer. This takes longer but produces equally excellent results. Alternatively, you can make a two-layer cake using all the batter, baking for slightly longer (32-35 minutes) until a toothpick comes out with just a few moist crumbs.
How do I prevent my frosting from melting in warm weather?
American buttercream frosting can soften in heat. For warm climates or summer events, refrigerate the frosted cake for at least one hour before serving. You can also substitute Swiss or Italian meringue buttercream, which holds better in heat. These cooked frostings are slightly more complex but worth learning for summer baking.
Can I make this cake dairy-free?
Yes, with substitutions. Use dairy-free butter (make sure it’s solid at room temperature, not spreadable margarine) and coconut milk for both the cake and frosting. The texture and flavor will be very similar. Some bakers find that adding an extra tablespoon of coconut milk to the batter and frosting helps achieve the same richness as the traditional version.
Why should I whip egg whites separately?
Whipped egg whites incorporate more air than whole eggs beaten with other ingredients. This extra air creates additional lift, resulting in a fluffier, more tender crumb. The proteins in egg whites form a network that traps air bubbles, and beating them separately allows maximum aeration before they’re gently folded into the batter.


