Mouthwatering Corn Dip: The Ultimate Party Favorite Recipe
There’s something undeniably magical about a warm, creamy corn dip that brings people together at any gathering. Whether you’re hosting a casual game night, a holiday celebration, or a summer barbecue, this corn dip recipe delivers crowd-pleasing flavors that disappear faster than you can refill the bowl. The combination of sweet corn kernels, melted cheese, and savory seasonings creates a dip that’s both comforting and sophisticated enough to impress even the pickiest guests.
What makes this corn dip truly special is its versatility and ease of preparation. Unlike complicated appetizers that require culinary school training, this recipe comes together in minutes and can be made ahead of time, making it perfect for busy hosts. The beauty of this dish lies in how it transforms simple pantry staples into something restaurant-quality that your guests will ask you about for years to come.
What Makes This Corn Dip Recipe Special
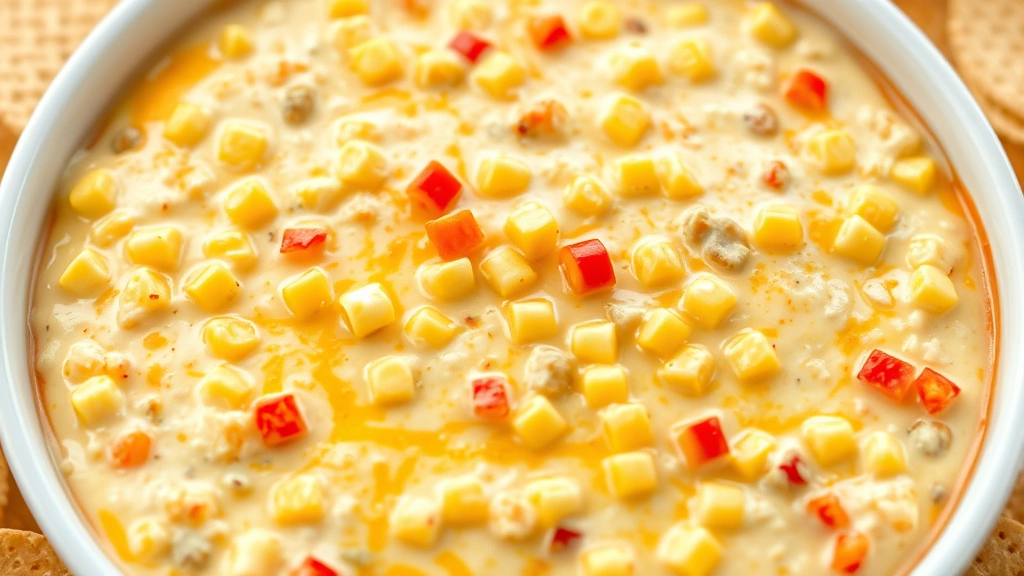
This particular corn dip stands out from countless other appetizer recipes because it achieves the perfect balance of textures and flavors. The corn provides natural sweetness that’s complemented by sharp cheddar cheese, while cream cheese and sour cream create an irresistibly smooth, creamy base. Unlike dips that become watery or separated during serving, this recipe maintains its consistency from the moment it comes out of the oven until the last spoonful disappears.
The secret to this corn dip’s success involves understanding how different ingredients interact during cooking. When you combine dairy products with fresh or frozen corn and season them properly, you create a dish that tastes homemade and authentic. Many party hosts rely on homemade sauce techniques to elevate their appetizers, and this dip applies those same professional principles to create something exceptional.
What truly sets this recipe apart is how it can be customized to suit any dietary preference or flavor profile. Whether you prefer a spicier version loaded with jalapeños, a lighter take using Greek yogurt, or a vegetable-packed variation, the foundation remains solid and adaptable. This flexibility makes it the perfect go-to recipe when you’re unsure about your guests’ preferences.
Essential Ingredients You’ll Need
Before you start mixing, gather these quality ingredients that form the foundation of an exceptional corn dip:
- Frozen or fresh corn kernels (2-3 cups) – Fresh corn during summer provides superior flavor, but frozen works beautifully year-round
- Cream cheese (8 oz, softened) – The backbone that creates the creamy texture
- Sour cream (1 cup) – Adds tanginess and helps achieve the perfect consistency
- Shredded cheddar cheese (2 cups) – Sharp cheddar provides bold flavor; mild works if you prefer subtlety
- Green onions or scallions (½ cup, chopped) – Provides fresh, onion-forward notes
- Red bell pepper (½ cup, finely diced) – Adds sweetness and vibrant color
- Jalapeño peppers (2-3, minced, optional) – For those who enjoy heat
- Garlic (3-4 cloves, minced) – Deepens savory flavors
- Cumin (½ teaspoon) – Adds warmth and complexity
- Chili powder (¼ teaspoon) – Subtle smoky undertones
- Salt and black pepper (to taste) – Essential for seasoning balance
- Paprika (¼ teaspoon) – Optional garnish for visual appeal
The quality of your ingredients directly impacts the final result. Use full-fat dairy products rather than low-fat alternatives, as they provide superior creaminess and flavor. Fresh garlic and peppers make a noticeable difference compared to pre-minced versions that may have lost potency.
Step-by-Step Preparation Instructions
Follow these detailed steps to create a corn dip that impresses every single time:
- Prepare your ingredients: Before you begin mixing, ensure your cream cheese is softened to room temperature. This prevents lumps and ensures smooth incorporation. If you’re using fresh corn, cut kernels from the cob. If using frozen, thaw and drain any excess moisture thoroughly.
- Combine dairy products: In a large mixing bowl, combine softened cream cheese and sour cream. Using an electric mixer on medium speed, beat these ingredients until completely smooth and well combined, about 2-3 minutes. This step is crucial for eliminating any lumps that could affect texture.
- Fold in cheese: Gently fold in your shredded cheddar cheese using a spatula, stirring until the mixture is uniform. Reserve about ½ cup of cheese for the top garnish if desired.
- Prepare fresh vegetables: While your dairy mixture rests, finely dice your red bell pepper, mince your garlic, chop your green onions, and prepare any jalapeños. Proper vegetable preparation ensures even distribution throughout the dip.
- Combine dry seasonings: In a small bowl, whisk together cumin, chili powder, salt, and black pepper. This ensures your spices distribute evenly rather than clumping in one area.
- Incorporate vegetables and seasonings: Add your corn, diced peppers, green onions, minced garlic, and the seasoning mixture to your cheese base. Using a sturdy spatula or wooden spoon, fold everything together gently but thoroughly until all ingredients are evenly distributed. The mixture should look cohesive and speckled with vegetables.
- Taste and adjust: Before baking, taste your mixture and adjust seasonings as needed. Remember that flavors intensify slightly during baking, so err on the side of slight underseasoning.
This methodical approach ensures every component contributes to the final dish. Many home cooks rush through preparation, but taking time to properly combine ingredients results in superior texture and flavor distribution.
Baking and Serving Tips
Once your mixture is prepared, proper baking technique ensures the best results:
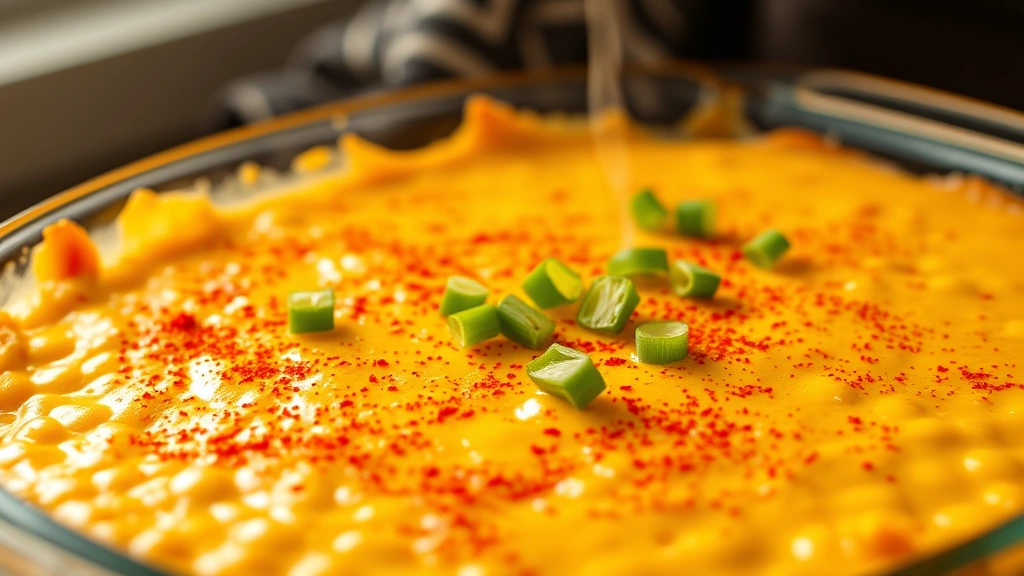
Oven preparation: Preheat your oven to 350°F (175°C). While the oven heats, transfer your corn dip mixture into a 9×13-inch baking dish or similar-sized casserole. Smooth the top with a spatula and, if desired, sprinkle reserved cheddar cheese and paprika over the surface for an attractive finish.
Baking process: Bake for 25-30 minutes until the dip is heated through and the edges begin to bubble. The center should appear set but still slightly creamy. Overbaking causes the dip to dry out and separate, so watch carefully during the final minutes. A toothpick inserted in the center should come out clean with no raw mixture.
Resting period: Allow the corn dip to rest for 5 minutes after removing it from the oven. This brief cooling period helps it set slightly, making it easier to scoop and preventing burns to eager guests.
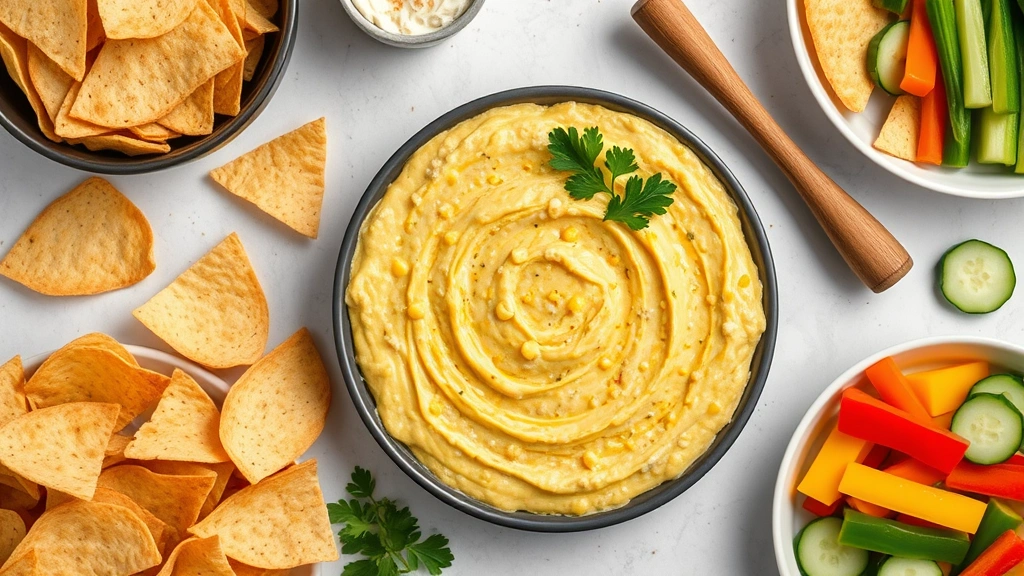
Serving suggestions: Transfer your corn dip to a serving bowl or leave it in the baking dish if you’re serving directly from the kitchen. Arrange tortilla chips, pita chips, crackers, or fresh vegetable crudités around the dip. Corn chips pair particularly well with this recipe, as do scoop-style tortilla chips that hold generous amounts of dip.
Temperature maintenance: If your party extends beyond an hour, keep the dip warm using a slow cooker on the lowest setting or place the serving bowl over a pot of gently simmering water. Stir occasionally to maintain even temperature and prevent a skin from forming on the surface.
Delicious Variations to Try
Once you’ve mastered the classic recipe, experiment with these creative variations that expand your repertoire:
Spicy Corn Dip: Increase jalapeños to 4-5, add ½ teaspoon cayenne pepper, and include a drained can of diced tomatoes with green chiles. This version delivers serious heat while maintaining the dip’s creamy character.
Southwestern Style: Add ¾ cup black beans (drained and rinsed), ¼ cup fresh cilantro, 1 teaspoon lime zest, and 2 tablespoons fresh lime juice. This variation adds protein and brightness, making it more substantial.
Lighter Version: Replace sour cream with Greek yogurt and reduce cream cheese to 4 oz, supplementing with an additional cup of Greek yogurt. This maintains creaminess while reducing calories and fat content.
Bacon and Cheddar: Cook 6-8 bacon strips until crispy, crumble, and fold into the mixture along with ½ cup crispy fried onions. Top with additional bacon bits before serving for maximum appeal.
Roasted Garlic: Roast an entire head of garlic until soft and golden, then squeeze the cloves into your mixture. This creates a more sophisticated, less sharp garlic flavor that appeals to refined palates.
Herb-Infused Version: Add 2 tablespoons fresh basil, 1 tablespoon fresh thyme, and 1 tablespoon fresh parsley. Fresh herbs elevate the dip from casual to elegant, perfect for more formal gatherings.
These variations demonstrate how the basic corn dip formula adapts beautifully to different flavor profiles. Experiment fearlessly to discover your personal favorite combination.
Storage and Make-Ahead Options
Refrigerator storage: Leftover corn dip keeps well in an airtight container for up to 4 days when properly stored in the refrigerator. The flavors often intensify slightly, making day-two dip even more delicious.
Freezer preparation: You can prepare the corn dip mixture completely, transfer it to a freezer-safe container, and freeze for up to 3 months. Thaw overnight in the refrigerator before baking. Frozen dip may have slightly different texture upon thawing, but it remains delicious and convenient for unexpected entertaining.
Make-ahead strategy: Prepare your mixture up to 24 hours in advance and refrigerate in your baking dish covered with plastic wrap. Simply remove from the refrigerator 30 minutes before baking to allow it to come closer to room temperature, then bake as directed. Add 5-10 minutes to baking time if the mixture hasn’t warmed sufficiently.
Component preparation: Dice vegetables the morning of your event and store them separately in sealed containers. Combine everything just before baking for maximum freshness and vibrant vegetable flavor. This approach works particularly well when hosting multiple events throughout a season.
Understanding proper storage extends this recipe’s usefulness beyond single parties. Many hosts find that making double batches and freezing portions ensures they always have an impressive appetizer ready for unexpected guests.
Whether you’re preparing this corn dip for a casual weeknight gathering or an elaborate holiday celebration, the recipe’s flexibility and reliability make it an invaluable addition to your entertaining arsenal. The combination of fresh vegetables, quality cheese, and proper technique creates something that tastes homemade and sophisticated. Your guests will marvel at how you managed to create something so delicious while appearing completely relaxed and in control.
For additional appetizer inspiration, explore our blog for more party recipes that will impress your guests. If you’re planning a complete menu, check out our breakfast food recipes for morning gatherings or quick pasta recipes for more substantial fare.
FAQ
Can I make this corn dip without cream cheese?
Yes, you can substitute cream cheese with additional sour cream or Greek yogurt, though the texture will be slightly different. Use 12 oz total of sour cream and yogurt combined. The dip will be less rich but still delicious and more suitable for those avoiding dairy or seeking lighter options.
What’s the best way to reheat leftover corn dip?
Transfer your leftover dip to an oven-safe dish and reheat at 350°F for 10-15 minutes until warmed through. Alternatively, use a microwave in 30-second intervals, stirring between each interval. Avoid high heat, which can cause separation or scorching.
Can I use canned corn instead of frozen?
Absolutely. Drain canned corn thoroughly and pat dry with paper towels to remove excess moisture. Canned corn works well, though fresh or high-quality frozen corn provides better texture and flavor. Avoid creamed corn, which contains added ingredients that alter the recipe’s balance.
How far in advance can I prepare this dip?
You can prepare the complete mixture up to 24 hours ahead and refrigerate it in your baking dish. You can also freeze the unbaked mixture for up to 3 months. Simply thaw overnight and bake as directed, adding a few extra minutes to the baking time.
What should I serve with this corn dip?
Tortilla chips, pita chips, scoop-style chips, and crackers all work wonderfully. For a lighter option, serve with fresh vegetable crudités like bell pepper strips, cucumber slices, carrot sticks, and celery. Corn chips provide the most complementary flavor pairing.
Can I make this in a slow cooker?
Yes, prepare the mixture as directed, then transfer to a slow cooker set on low. Cook for 1-2 hours until heated through, stirring occasionally. This method is ideal for parties where you need to maintain temperature for extended periods without frequent oven access.
Is this recipe gluten-free?
Yes, this corn dip is naturally gluten-free as long as you serve it with gluten-free chips or crackers. All the ingredients—corn, cheese, cream cheese, sour cream, and seasonings—are naturally gluten-free. Always verify packaging if guests have celiac disease or severe gluten sensitivity.


