Cream Style Corn Recipe: A Family Favorite That’s Easy to Master
Cream style corn is the ultimate comfort food side dish that brings warmth and nostalgia to any dinner table. This silky, rich preparation transforms fresh or frozen corn into a luxurious accompaniment that pairs beautifully with everything from roasted chicken to grilled steaks. Whether you’re preparing a holiday feast or a simple weeknight dinner, mastering this creamy corn recipe will elevate your cooking game and have your family requesting it again and again.
The beauty of cream style corn lies in its simplicity and versatility. Unlike canned cream corn that often contains additives and preservatives, homemade versions allow you to control the ingredients, adjust the consistency to your preference, and infuse the dish with fresh flavors. This recipe delivers restaurant-quality results in under 30 minutes, making it perfect for busy home cooks who refuse to compromise on taste or quality.
What Is Cream Style Corn?
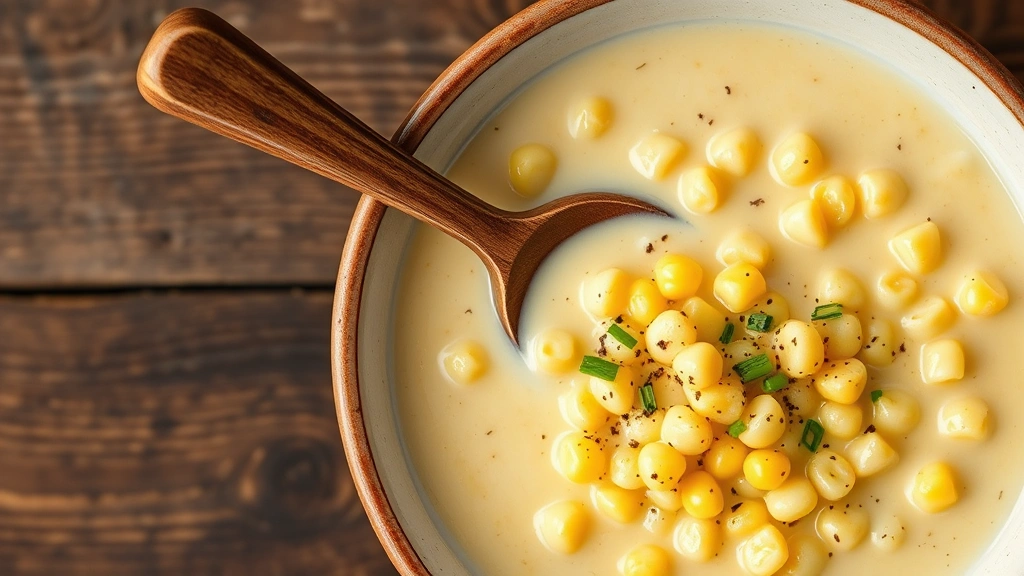
Cream style corn is a side dish where corn kernels are cooked in a rich, creamy sauce made from butter, cream, and seasonings. The dish achieves its signature texture through a combination of whole kernels suspended in a velvety sauce that coats your palate with buttery goodness. Some recipes incorporate corn puree or a flour-based roux to thicken the mixture, while others rely on the natural starch released by the corn itself.
This preparation method differs significantly from simple buttered corn or corn on the cob. The creaminess comes from the sauce rather than just melted butter, creating a more luxurious and indulgent experience. Many families consider this dish a holiday essential, though it’s delicious enough to serve year-round. The contrast between tender corn kernels and smooth, rich sauce makes each spoonful deeply satisfying.
Understanding the basic concept helps you troubleshoot any issues and customize the recipe to match your family’s preferences. Some prefer a thicker, more sauce-forward version, while others like a lighter preparation with more visible corn kernels. Once you understand the fundamentals, you can adjust ratios and ingredients accordingly.
Essential Ingredients for Perfect Results
Creating authentic cream style corn requires quality ingredients and proper proportions. Here’s what you’ll need for a standard recipe serving 6-8 people:
- Fresh or frozen corn kernels: 6 cups (about 6-8 ears of fresh corn, or 4 frozen packages). Fresh corn delivers superior flavor, but high-quality frozen corn works beautifully year-round.
- Butter: 4 tablespoons, unsalted and divided. Butter forms the flavor foundation and helps create the creamy texture.
- Heavy cream: 1 cup, cold. This ingredient provides the luxurious richness that defines this dish.
- Half-and-half: 1/2 cup, as an alternative or combination with heavy cream for a lighter version.
- All-purpose flour or cornstarch: 2-3 tablespoons, for thickening. Cornstarch provides a silkier texture than flour.
- Salt and white pepper: To taste. White pepper maintains the cream color better than black pepper.
- Nutmeg: A pinch, adds subtle depth without overpowering the corn flavor.
- Garlic powder: 1/2 teaspoon, optional but recommended for extra savory notes.
- Onion powder: 1/4 teaspoon, enhances the overall flavor profile.
The quality of your butter and cream directly impacts the final dish. Choose whole milk cream and good-quality butter for the best results. If using fresh corn, select ears with bright green husks and plump kernels. To remove kernels from fresh corn, place the ear on a cutting board and run a sharp knife down the length, rotating as you go.
Step-by-Step Cooking Instructions
Follow these detailed instructions to create perfect cream style corn every time:
Step 1: Prepare Your Ingredients Gather all ingredients and measure them before beginning. If using fresh corn, remove kernels and set aside. Allow the cream to sit at room temperature for about 10 minutes so it incorporates more smoothly into the warm corn mixture.
Step 2: Melt the Butter In a large skillet or saucepan over medium heat, melt 2 tablespoons of butter. The butter should foam slightly and smell nutty, but never brown. This takes about 2-3 minutes. Avoid high heat, which can burn the butter and create bitter flavors.
Step 3: Create the Roux Sprinkle the flour or cornstarch over the melted butter while whisking constantly. Continue whisking for 1-2 minutes to cook out the raw flour taste. The mixture should resemble wet sand. This roux forms the thickening agent for your cream sauce.
Step 4: Slowly Add the Cream Reduce heat to medium-low and slowly pour in the heavy cream while whisking continuously. Work gradually to prevent lumps from forming. The sauce should become smooth and thicken noticeably. This step typically takes 3-4 minutes.
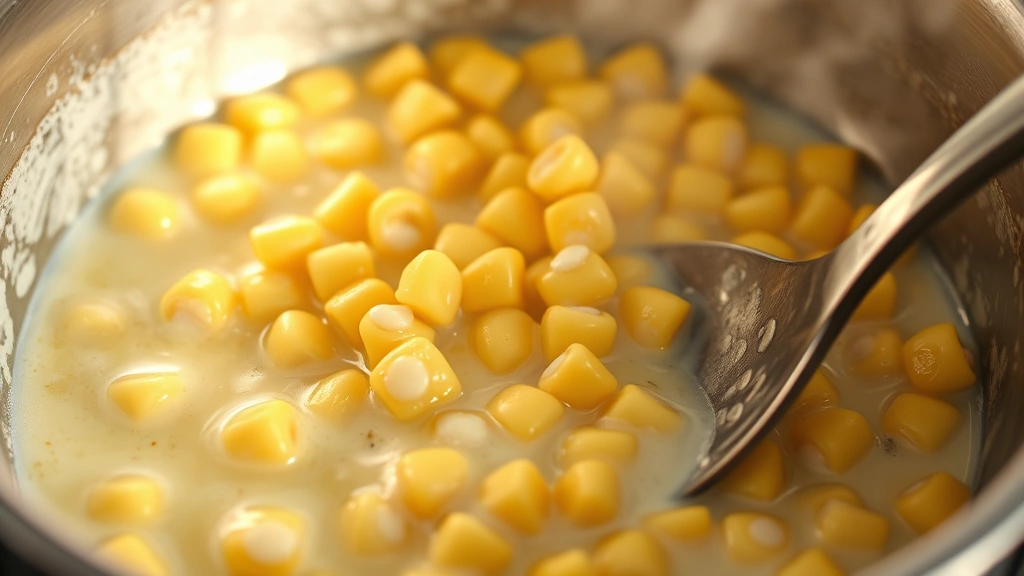
Step 5: Add the Corn Stir in the corn kernels and the remaining 2 tablespoons of butter. Mix thoroughly to distribute the kernels evenly throughout the cream sauce. Increase heat to medium and bring the mixture to a gentle simmer.
Step 6: Season to Perfection Add salt, white pepper, nutmeg, garlic powder, and onion powder. Taste and adjust seasonings as needed. Remember that salt intensifies as the mixture reduces, so start conservatively. Simmer for 5-10 minutes, stirring occasionally, until the corn is heated through and flavors meld together.
Step 7: Final Consistency Check The cream should coat the back of a spoon and flow slowly off it. If the mixture seems too thin, simmer longer to reduce. If it’s too thick, whisk in a tablespoon of heavy cream at a time until reaching desired consistency.
Pro Tips for Creamier Texture
Achieving the perfect creamy consistency requires attention to detail and understanding how different techniques affect the final dish. Consider these professional tips:
- Use cornstarch instead of flour: Cornstarch creates a silkier, glossier texture than wheat flour. It also doesn’t impart any floury taste and works better for gluten-free preparations.
- Blend half the corn: For ultra-creamy texture, remove half the corn kernels after cooking and blend them until smooth with a stick blender or food processor. Return the puree to the pan and stir. This creates a naturally thickened sauce without extra starch.
- Add cream cheese: Whisk in 2-3 ounces of softened cream cheese after the initial cream incorporation. This adds richness and creates an exceptionally creamy texture.
- Don’t skip the roux: The roux is essential for proper thickening and creating a silky mouthfeel. It prevents the cream from separating or becoming grainy.
- Maintain gentle heat: High heat causes cream to break and curdle. Keep the temperature at medium or medium-low throughout cooking.
- Add corn liquid: If using canned or frozen corn, reserve the packing liquid and use it in place of some cream for a more corn-forward flavor and lighter texture.
- Incorporate sour cream: For tang and extra creaminess, stir in 1/4 cup sour cream at the end of cooking. Add it off heat to prevent curdling.
These techniques transform a good cream style corn into an exceptional dish that tastes homemade and refined. Experiment with different approaches to discover which method aligns best with your preferences and cooking style.
Flavor Variations to Try
Once you’ve mastered the basic recipe, explore these delicious variations to keep the dish fresh and exciting:
Roasted Garlic and Herb Version Roast 4-5 garlic cloves until soft and golden, then mash into the cream sauce. Add fresh thyme, sage, or tarragon for an herbaceous twist. This variation pairs beautifully with dishes cooked with cast iron techniques for a rustic, elevated presentation.
Bacon and Cheddar Cream Corn Cook 4-5 strips of bacon until crispy, crumble, and set aside. Sauté diced onions in the bacon fat, then proceed with the cream sauce. Stir in 1 cup sharp cheddar cheese and the crumbled bacon. This version becomes a show-stopping side that satisfies even the pickiest eaters.
Jalapeño and Lime Variation Add diced jalapeños (seeds removed for less heat) to the cream mixture and finish with fresh lime juice and cilantro. This Southwestern-inspired version complements grilled meats and Mexican-inspired meals perfectly.
Truffle Oil Luxury Version Finish the cream corn with a drizzle of high-quality truffle oil and a sprinkle of Parmesan cheese. The earthy, luxurious truffle notes elevate this dish to special-occasion status.
Corn Bisque Style Blend the entire finished corn mixture until completely smooth for a soup-like consistency. Serve in bowls with crusty bread for a lighter meal that showcases corn’s natural sweetness.
Smoked Corn Variation Use smoked corn kernels or add 1/2 teaspoon of liquid smoke to the cream sauce. Smoked paprika also adds wonderful depth and complexity to the flavor profile.
These variations demonstrate the versatility of the basic cream corn recipe. You can adapt it to match any cuisine or complement specific main courses. The foundation remains consistent while flavor profiles shift dramatically.
Storage and Make-Ahead Options
Planning ahead makes weeknight dinners significantly easier. Here’s how to store and prepare cream style corn in advance:
Refrigerator Storage Store leftover cream style corn in an airtight container for up to 4 days. The sauce may thicken as it cools; simply reheat gently over medium-low heat, stirring frequently and adding a splash of cream if needed to restore the original consistency. Never use high heat, which causes the cream to separate.
Freezing Guidelines Cream style corn freezes reasonably well for up to 3 months, though the texture becomes slightly grainy upon thawing. To freeze, cool completely, transfer to freezer-safe containers, and label with the date. Thaw overnight in the refrigerator before reheating. The texture works best when reheated in a saucepan rather than a microwave, which can cause uneven heating and separation.
Make-Ahead Strategy Prepare the cream sauce base up to 2 days ahead, storing it separately from the corn. When ready to serve, reheat the sauce gently, fold in the corn kernels, and simmer for 5 minutes to heat through. This approach ensures the corn maintains better texture than if combined and stored together.
Freezing Corn Kernels If preparing fresh corn, you can blanch and freeze the kernels separately for up to 6 months. Blanch for 4 minutes in boiling salted water, cool in ice water, drain thoroughly, and freeze in airtight containers or freezer bags. This allows you to prepare the complete dish from scratch whenever desired.
Meal Prep Containers Divide finished cream style corn into individual meal prep containers for grab-and-go side dishes throughout the week. Reheat in the microwave for 2-3 minutes, stirring halfway through, or transfer to a saucepan for gentler reheating.
Proper storage ensures you can enjoy this family favorite multiple times without starting from scratch each time. The flexibility of make-ahead options fits perfectly into busy schedules while maintaining quality.

FAQ
Can I use canned cream of corn soup instead of making my own cream sauce?
While canned cream of corn soup provides convenience, homemade versions taste superior and allow complete control over ingredients. If time is limited, combine one can of cream of corn soup with 2 cups fresh corn kernels, 2 tablespoons butter, and 1/2 cup heavy cream for an acceptable shortcut. However, the homemade approach delivers better flavor and texture with minimal additional effort.
What’s the difference between cream style corn and corn chowder?
Cream style corn is a thick side dish with a high corn-to-liquid ratio, while corn chowder is a soup with more broth and often includes potatoes, celery, and other vegetables. Chowder has a pourable consistency suitable for serving in bowls, whereas cream style corn is a scoopable side dish. Both feature corn in a creamy base, but the applications and consistency differ significantly.
How do I prevent my cream sauce from becoming grainy or separated?
Graininess typically results from high heat or rapid temperature changes. Always cook at medium or medium-low temperature, whisk cream slowly into the roux, and avoid boiling the finished dish. If separation occurs, remove from heat and whisk in a tablespoon of cold cream while whisking vigorously. The cold cream helps re-emulsify the sauce.
Can I make this recipe dairy-free?
Yes, substitute heavy cream with full-fat coconut cream or cashew cream for a dairy-free version. Use dairy-free butter or coconut oil instead of regular butter. The flavor profile changes slightly, but the dish remains creamy and delicious. Coconut cream creates a subtle sweetness that complements corn beautifully, while cashew cream delivers neutral richness.
Is it possible to make cream style corn without flour or cornstarch?
Absolutely. Blend half the cooked corn kernels until completely smooth, then return the puree to the pan. The natural corn starch thickens the cream sauce naturally without additional thickeners. This method creates a slightly grainier texture than flour-thickened versions but works well and delivers pure corn flavor.
What’s the best way to serve cream style corn?
Serve warm as a side dish alongside roasted or grilled proteins. It pairs wonderfully with turkey, ham, chicken, beef, and seafood. Cream style corn also complements vegetarian mains beautifully. Serve it in a warm serving dish to maintain temperature, and consider garnishing with fresh parsley, chives, or crispy bacon for visual appeal and extra flavor.
Can I add vegetables to cream style corn?
Definitely. Consider adding diced bell peppers, peas, diced carrots, or corn kernels that have been lightly charred. Sauté these vegetables in butter before adding the cream sauce, or stir them in during the final minutes of cooking. Be mindful of cooking times for each vegetable to ensure everything reaches doneness simultaneously.
How do I know when the cream sauce is properly thickened?
The finished sauce should coat the back of a spoon and flow slowly when tilted. It shouldn’t be pourable like soup, but shouldn’t be stiff like mashed potatoes either. The consistency should be similar to pudding. If uncertain, remember you can always simmer longer to reduce and thicken further, but you can’t easily thin an over-thickened sauce.


