Simple Granola Recipe Anyone Can Master!
Granola is one of those magical recipes that feels fancy but requires absolutely no culinary degree to execute. Whether you’re looking for a quick breakfast option, a crunchy topping for yogurt, or a portable snack for hiking adventures, homemade granola delivers on all fronts. The beauty of making your own granola lies in complete control—you decide the sweetness level, choose your favorite nuts and dried fruits, and avoid the mysterious additives lurking in store-bought boxes. This easy granola recipe breaks down the process into manageable steps that guarantee crispy, golden clusters every single time.
What makes this recipe truly beginner-friendly is that it requires minimal equipment and straightforward techniques. You don’t need a stand mixer, food processor, or specialized baking tools. A simple mixing bowl, measuring cups, and a standard oven handle everything beautifully. The ingredient list reads like a pantry staple collection: oats, honey, oil, nuts, and dried fruits. In about thirty minutes from start to finish, you’ll have a batch of homemade granola that tastes infinitely better than anything you’d find on supermarket shelves, and it costs a fraction of the price.
Why Homemade Granola Wins
Commercial granola often contains refined sugars, artificial flavors, and preservatives that undermine its health benefits. When you make granola at home, you understand every single ingredient that goes into your bowl. You can adjust sweetness to your preference, eliminate allergens, and create custom flavor profiles that match your taste buds perfectly. The cost savings alone justify the minimal effort required—homemade granola typically costs one-third the price of quality store brands.
Beyond economics and health considerations, homemade granola tastes substantially better. The toasting process develops deep, nutty flavors that commercial production often misses. Freshly made granola has superior texture—truly crispy clusters rather than the sometimes-soft or overly-crunchy results from long storage and shipping. Making your own granola also means you can enjoy it at peak freshness, capturing those precious first days when the texture remains ideal.
If you enjoy baking projects, homemade granola represents a perfect gateway recipe. It teaches fundamental techniques like toasting nuts, caramelizing honey, and achieving even browning—skills that transfer directly to more complex recipes. Consider pairing this with other breakfast recipes like our cinnamon coffee cake recipe for weekend entertaining.

Essential Ingredients Explained
Rolled Oats (3 cups): The foundation of any granola, rolled oats provide texture, nutrition, and substance. Use old-fashioned rolled oats, not instant varieties which break down during baking. Rolled oats contain soluble fiber and beta-glucans that support heart health, making them an excellent breakfast choice.
Raw Nuts (1.5 cups): Almonds, walnuts, pecans, or cashews all work beautifully. Raw nuts toast during baking, developing deeper flavors than pre-roasted varieties. Chop them into bite-sized pieces—not too fine, or they’ll become powder; not too chunky, or they’ll feel overwhelming. Nuts provide healthy fats and protein that keep you satisfied through the morning.
Honey (½ cup): This acts as the binding agent that creates those satisfying clusters. Honey caramelizes during baking, contributing sweetness and that golden-brown color. Avoid using maple syrup or agave as direct substitutes without adjusting quantities, as they have different viscosities and moisture content.
Coconut Oil or Olive Oil (¼ cup): Oil helps distribute heat evenly and prevents sticking. Coconut oil imparts subtle coconut notes, while neutral olive oil lets other flavors shine. Melted butter works too, though it browns more quickly.
Sea Salt (1 teaspoon): Salt heightens sweetness perception and balances flavors. This seemingly small ingredient elevates granola from good to absolutely crave-worthy. Don’t skip it.
Vanilla Extract (1 teaspoon): Pure vanilla extract adds warmth and complexity. Imitation vanilla works, though pure extract delivers superior flavor development during baking.
Dried Fruit (1 cup): Raisins, cranberries, apricots, or dates provide natural sweetness and chewiness. Add dried fruit after baking to prevent burning and maintain texture. Unlike nuts, dried fruit doesn’t benefit from toasting.
Step-by-Step Instructions
Step 1: Preheat and Prepare Begin by preheating your oven to 325°F (165°C). Line a large baking sheet with parchment paper, which prevents sticking and simplifies cleanup. Having everything ready before mixing ensures smooth workflow.
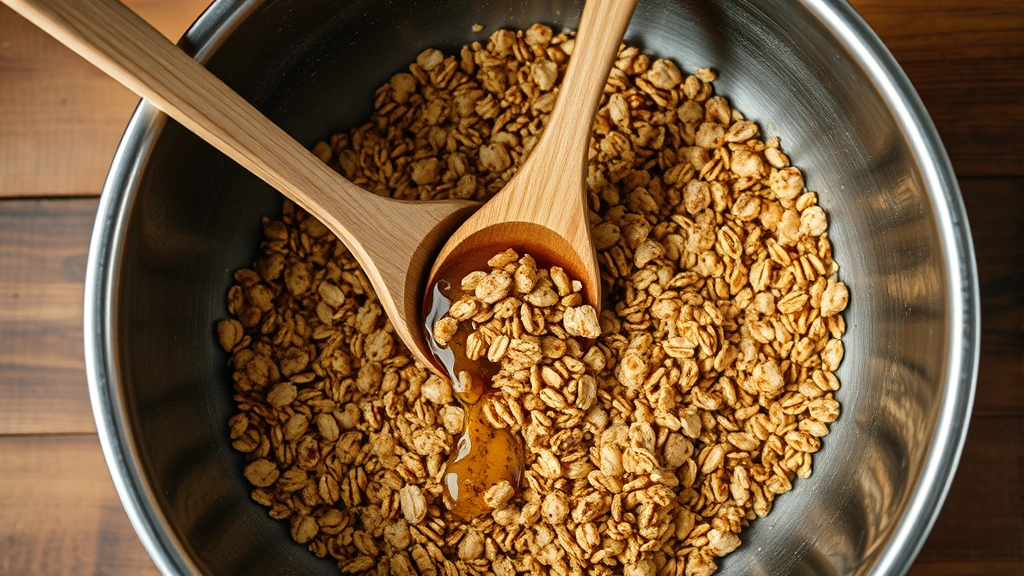
Step 2: Combine Dry Ingredients In a large mixing bowl, combine three cups rolled oats with 1.5 cups chopped nuts and one teaspoon sea salt. Stir thoroughly to distribute salt evenly. This initial mixing ensures salt disperses throughout rather than settling at the bottom.
Step 3: Warm Wet Ingredients In a small saucepan, gently warm half a cup honey with quarter cup coconut oil over low heat. You’re not cooking—just warming until the mixture becomes pourable and fully combined, about two to three minutes. Remove from heat and stir in one teaspoon vanilla extract. This step makes the wet mixture easier to distribute evenly.
Step 4: Combine Everything Pour the warm honey mixture over the oat mixture. Using a sturdy spoon or silicone spatula, stir vigorously until every oat and nut piece is coated. This is the most labor-intensive step, but crucial for even browning. Make sure no dry oats remain hiding at the bottom of the bowl.
Step 5: Spread on Baking Sheet Transfer the mixture to your prepared baking sheet, spreading it in a relatively even layer about three-quarters of an inch thick. You want it dense enough to form clusters but not so thick that the center stays undercooked. Leave some texture variation—perfectly smooth granola won’t cluster as nicely.
Step 6: Bake to Golden Perfection Bake for twenty to twenty-five minutes, stirring halfway through. At the halfway point (around twelve minutes), stir the granola thoroughly, pushing the edges toward the center and breaking up any clumps forming. This ensures even browning and prevents burning. The granola is ready when it’s golden brown and fragrant, but still slightly soft to the touch—it will crisp up as it cools.
Step 7: Cool Completely This step cannot be rushed. Spread the hot granola on a clean baking sheet or cooling rack for at least thirty minutes. Don’t stir it during cooling, as it needs time to set and form clusters. Stirring too early breaks clusters apart. The granola will continue crisping as it cools to room temperature.
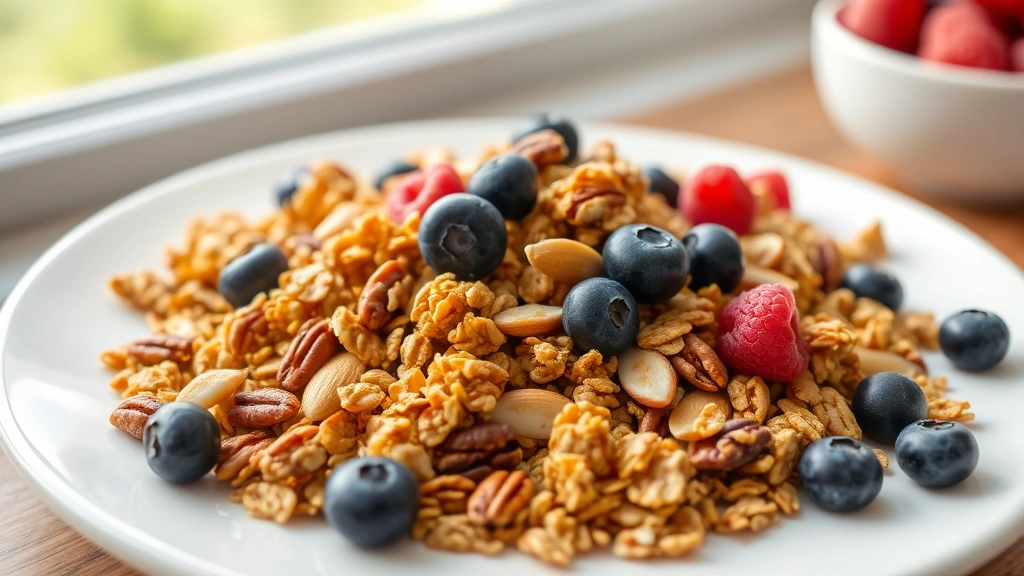
Step 8: Add Dried Fruit Once completely cooled, stir in one cup dried fruit of your choice. This final addition ensures the dried fruit maintains its chewy texture rather than becoming hard from oven time. Break apart any large clusters if desired, or leave them intact for satisfying crunchiness.
Delicious Flavor Variations
Chocolate Lover’s Granola: Reduce honey to three-eighths cup and add two tablespoons unsweetened cocoa powder to the dry ingredients. After cooling, fold in half a cup dark chocolate chips. This variation pairs wonderfully with chocolate-themed desserts like our chocolate truffles recipe.
Tropical Paradise Granola: Substitute half the nuts with shredded coconut and use dried mango, pineapple, and papaya as your fruit. Add half a teaspoon lime zest to the honey mixture for brightness. This variation evokes vacation vibes every breakfast.
Spiced Autumn Granola: Add one teaspoon cinnamon, half a teaspoon nutmeg, quarter teaspoon cloves, and quarter teaspoon ginger to the dry ingredients. Use dried apples, dried cranberries, and chopped pecans. The warm spices create cozy, comforting flavors.
Protein-Boosted Granola: Replace half a cup oats with plant-based protein powder or collagen peptides. This increases protein content without significantly changing texture or flavor. Particularly useful for fitness enthusiasts looking to incorporate more protein into breakfast.
Nut-Free Granola: Substitute nuts with seeds—sunflower seeds, pumpkin seeds, hemp seeds, or flax seeds work beautifully. Seeds toast similarly to nuts and provide comparable nutrition. This version works perfectly for those with nut allergies.
Storage and Shelf Life
Proper storage determines how long your granola maintains its crispy texture and fresh flavor. Once completely cooled, transfer granola to an airtight container—glass jars work excellently and let you see when you’re running low. Store at room temperature away from direct sunlight and heat sources. Properly stored homemade granola stays fresh and crispy for two to three weeks, though it rarely lasts that long.
Humidity is granola’s enemy. If your kitchen tends toward moisture, place a small packet of silica gel in the storage container to absorb excess humidity. Alternatively, store granola in the freezer for extended shelf life up to two months. Frozen granola thaws quickly and maintains crispness better than room-temperature storage in humid climates.
Unlike store-bought granola with preservatives, homemade versions rely on proper storage for longevity. Never store warm or even lukewarm granola, as residual heat creates condensation inside containers, softening the granola. Always ensure it’s completely cooled before sealing containers.
Common Mistakes to Avoid
Mistake 1: Uneven Coating If some oats appear dry and uncoated, you haven’t stirred enough during the mixing step. Take extra time to ensure every piece gets coated with the honey mixture. Dry oats will brown too quickly and taste bland.
Mistake 2: Burning the Granola Ovens vary significantly in temperature accuracy. If your granola frequently burns, try lowering the temperature to 300°F and extending baking time to thirty minutes. Every oven behaves differently, so adjust based on your results.
Mistake 3: Adding Dried Fruit Too Early Dried fruit added before baking hardens excessively and can burn. Always add it after the granola cools completely. This preserves the chewy texture that makes dried fruit enjoyable.
Mistake 4: Not Stirring Halfway Skipping the halfway stir results in burned edges and undercooked centers. Mark a timer and commit to stirring at the midpoint. It takes just two minutes and makes an enormous difference.
Mistake 5: Skipping the Cooling Period Granola must cool completely before storing. Warm granola releases steam, which softens it into a clumpy mess. Patience during cooling ensures crispness in storage.
Serving Suggestions
Granola shines in countless applications beyond simple cereal bowls. Layer it with Greek yogurt and fresh berries for a parfait that feels indulgent yet nutritious. Sprinkle it over smoothie bowls for textural contrast. Use it as a crust for cheesecake or baked goods—mix with melted butter and press into pie pans.
Granola pairs beautifully with other breakfast recipes. Serve alongside our low carb chicken recipes for a balanced brunch menu. Top oatmeal with granola for double-grain texture. Mix into ice cream for homemade granola clusters. Include in gift baskets during holidays—homemade granola impresses recipients and costs less than store-bought alternatives.
For lunch boxes, granola serves as a satisfying snack that doesn’t require refrigeration. Pack it in small jars for on-the-go eating. Mix with nuts and dried fruit for custom trail mix. The versatility makes it an excellent recipe to master and keep in regular rotation.
FAQ
Can I use instant oats instead of rolled oats?
Instant oats will create a granola with finer texture and less satisfying crunch. Rolled oats are specifically designed to maintain structure during baking. If you only have instant oats, reduce baking time slightly as they brown faster.
What’s the difference between raw and roasted nuts?
Raw nuts toast during baking, developing deeper flavors. Pre-roasted nuts may over-brown or burn. Always use raw nuts for this recipe unless you specifically want a more toasted flavor profile.
Can I use brown sugar instead of honey?
Brown sugar won’t bind ingredients as effectively as honey. You’d need to increase the oil and adjust quantities. Honey is specifically chosen for its binding properties and caramel flavor development.
How do I make granola without honey?
Maple syrup works, though it’s thinner than honey—use three-eighths cup. Agave nectar also works at the same ratio as honey. Avoid artificial sweeteners, which don’t caramelize or bind properly.
Why is my granola not crunchy?
Insufficient cooling time is the primary culprit. Granola must cool completely before storing. If it still seems soft after thirty minutes, it may not have baked long enough. Bake an additional few minutes next time.
Can I double this recipe?
Yes, doubling works perfectly. Use two baking sheets and distribute the mixture evenly. Baking time remains similar—twenty to twenty-five minutes—since thickness stays consistent.
Is this recipe gluten-free?
Yes, assuming you use certified gluten-free oats. Standard rolled oats may contain gluten from cross-contamination, so verify your oat source if you’re avoiding gluten.
Can granola be made vegan?
Absolutely. This recipe is naturally vegan—honey is the only non-vegan ingredient. Substitute with maple syrup or agave nectar at three-eighths cup quantity. All other ingredients remain plant-based.


