
Ermine Frosting Recipe: Grandma’s Classic Guide
Ermine frosting, also known as boiled milk frosting or cooked flour frosting, is a luxurious and silky frosting that has graced American desserts for generations. This old-fashioned frosting was particularly popular during the mid-20th century, when home bakers relied on simple pantry staples to create elegant, restaurant-quality finishes on their cakes. Unlike modern buttercream frostings that depend heavily on butter and powdered sugar, ermine frosting combines cooked flour, milk, and butter in a unique emulsification process that produces an incredibly light, fluffy texture with a subtle sweetness that doesn’t overwhelm delicate cake flavors.
What makes ermine frosting truly special is its ability to hold its shape beautifully while maintaining an almost mousse-like quality on the palate. Grandmothers across America kept this recipe close at hand because it’s surprisingly stable, holds up well in warmer temperatures better than standard buttercream, and uses ingredients that were always readily available in the pantry. Whether you’re recreating a cherished family recipe or discovering this frosting for the first time, this comprehensive guide will walk you through every step of the process, from the science behind the technique to troubleshooting common issues.
What is Ermine Frosting and Why You Should Make It
Ermine frosting represents a fascinating intersection of culinary technique and kitchen chemistry. The name itself has mysterious origins—some food historians suggest it comes from the historical association with luxury and elegance, while others propose it’s a corruption of the French word “ermite” (hermit). Regardless of etymology, this frosting deserves a place in your baking repertoire.
The magic of ermine frosting lies in its unique composition. Unlike cream cheese frosting or traditional American buttercream, ermine frosting begins with a flour-based paste that’s cooked with milk. This roux-like base is then whipped together with softened butter and sugar, creating a stable emulsion that’s lighter and less greasy than buttercream but more substantial than whipped cream frosting. The result is a frosting that tastes less sweet, has superior spreadability, and develops an almost cloud-like texture when properly whipped.
Home bakers love ermine frosting for several practical reasons. First, it’s incredibly forgiving—the cooked flour base prevents the frosting from breaking as easily as other frostings might. Second, it holds decorative piping details beautifully, making it ideal for intricate cake designs. Third, it’s more heat-stable than traditional buttercream, making it perfect for outdoor summer celebrations or for serving in warmer climates. Finally, the ingredient list is refreshingly simple and inexpensive, requiring only flour, milk, butter, sugar, and vanilla.
If you’re exploring classic Betty Crocker recipes, you’ll find that ermine frosting frequently appears alongside vintage cake recipes from the golden age of American home baking. This frosting pairs beautifully with white cake, yellow cake, or any delicate-flavored cake that shouldn’t be overwhelmed by heavy frosting.
Essential Ingredients and Substitutions
Creating perfect ermine frosting begins with understanding your ingredients and their roles in the final product. Here’s what you need and why each component matters:
- All-Purpose Flour: This is the foundation of ermine frosting. The flour cooks with milk to create a paste that stabilizes the entire frosting. Use regular all-purpose flour—specialty flours can produce unpredictable results. Measure by weight if possible (30 grams) for consistency, or spoon flour into your measuring cup and level it off without packing.
- Whole Milk: Full-fat milk works best because it creates a richer, more luxurious final frosting. While you can technically use low-fat milk, the results won’t be quite as silky. Never use sweetened condensed milk or evaporated milk, as these will throw off the recipe’s balance.
- Unsalted Butter: This is where much of the frosting’s flavor and texture come from. Butter must be softened to room temperature—not melted, not cold. Room temperature butter incorporates air more effectively when whipped, creating that signature fluffy texture. Use high-quality butter if possible; the difference is noticeable in the final frosting.
- Granulated Sugar: Standard white granulated sugar provides sweetness and helps stabilize the whipped frosting. Don’t substitute with brown sugar or alternative sweeteners without understanding how they’ll affect flavor and texture.
- Vanilla Extract: Pure vanilla extract adds depth and complexity. Imitation vanilla will work in a pinch, but pure vanilla creates a noticeably superior frosting.
For ingredient substitutions, consider these options cautiously:
- Cornstarch for Flour: Some bakers substitute cornstarch (using slightly less, about 20 grams) for a silkier final texture. This works reasonably well but produces a slightly less stable frosting.
- Almond or Vanilla Extract: You can replace some or all of the vanilla with other extracts, but start with half the amount and taste before adding more, as extracts vary in intensity.
- Coconut Milk: For a dairy-free version, use full-fat canned coconut milk instead of regular milk. The frosting will have a subtle coconut flavor and may be slightly less stable.
Step-by-Step Instructions
Ingredients Needed:
- ¼ cup all-purpose flour (30g)
- 1 cup whole milk
- 1 cup unsalted butter, softened to room temperature
- 1 cup granulated sugar
- 2 teaspoons pure vanilla extract
- Pinch of salt (optional)
Step 1: Create the Flour Paste Base
In a small saucepan, whisk together the flour and milk until completely smooth with no lumps. This step is crucial—any remaining flour lumps will create a grainy frosting. Take your time here, whisking thoroughly to ensure the flour is fully incorporated and the mixture is completely lump-free. If you do end up with stubborn lumps, strain the mixture through a fine-mesh sieve before proceeding.
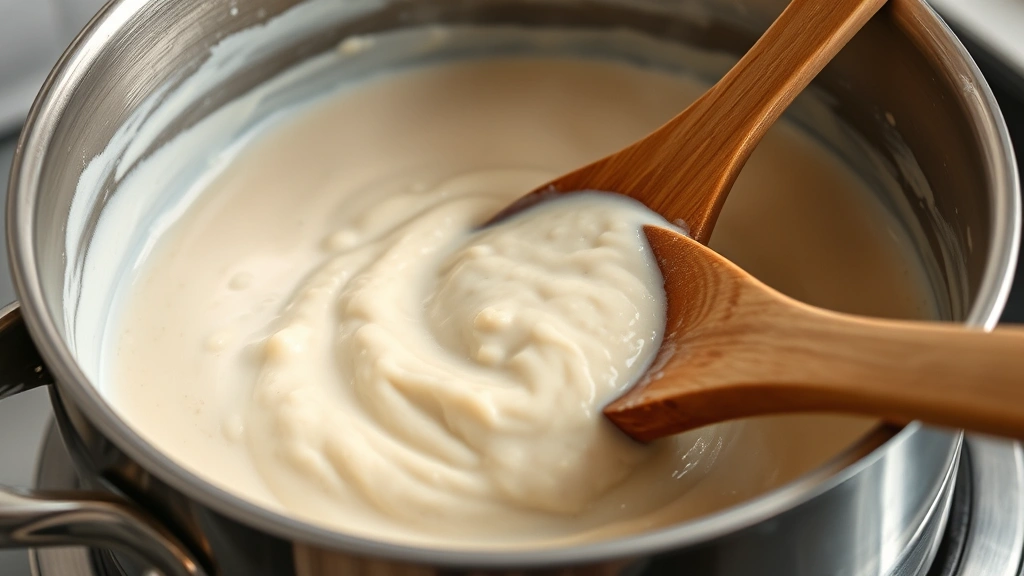
Step 2: Cook the Mixture
Place the saucepan over medium heat and cook, stirring constantly with a whisk or wooden spoon, until the mixture thickens into a pudding-like paste. This typically takes 5-8 minutes. You’ll notice the mixture transitioning from thin and pourable to thick and glossy. Continue stirring constantly to prevent scorching on the bottom of the pan. The mixture should coat the back of a spoon when ready. Don’t rush this step—proper cooking is essential for the right texture in the final frosting.
Step 3: Cool the Paste
Remove the pan from heat and transfer the cooked flour paste to a clean bowl. Let it cool to room temperature—this is important because adding warm paste to softened butter will cause the butter to melt. You can speed up cooling by placing the bowl in an ice bath or simply letting it sit for 15-20 minutes while you prepare the remaining ingredients. The paste should be cool but not cold when you proceed to the next step.
Step 4: Prepare the Butter and Sugar Mixture
In a large mixing bowl, beat the softened butter and sugar together using an electric mixer on medium-high speed for 3-5 minutes. This process is called creaming, and it’s essential for incorporating air into the frosting. The mixture should become pale, fluffy, and noticeably lighter in color and texture. Scrape down the sides of the bowl occasionally to ensure everything is evenly incorporated. This step is what gives ermine frosting its characteristic light, fluffy consistency, so don’t skip or rush it.
Step 5: Combine the Mixtures
Add the cooled flour paste to the creamed butter and sugar mixture. Beat on medium speed for 2-3 minutes, scraping down the bowl frequently. The frosting will initially look slightly separated or curdled—this is normal and temporary. Continue beating, and it will eventually come together into a smooth, creamy frosting. If the frosting seems to be taking longer than 3 minutes to come together, ensure your butter was truly softened and your flour paste was at room temperature.
Step 6: Add Vanilla and Final Whipping
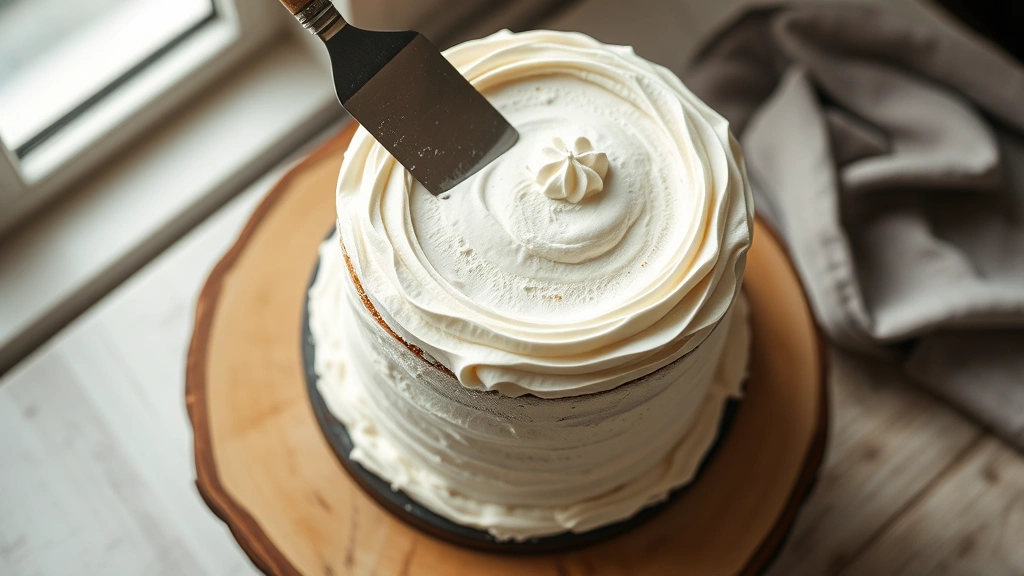
Add the vanilla extract and a pinch of salt (if using). Beat on medium-high speed for an additional 2-3 minutes. This final whipping incorporates additional air and creates the signature light, mousse-like texture that makes ermine frosting special. The frosting should be noticeably lighter and fluffier than it was immediately after combining the mixtures. Stop beating when the frosting is light, airy, and holds stiff peaks.
Your ermine frosting is now ready to use. If it seems too soft, refrigerate it for 15-30 minutes before frosting your cake. If it seems too stiff, let it sit at room temperature for a few minutes.
Tips for Perfect Results Every Time
Temperature is Everything: This cannot be overstated. All your ingredients, especially the butter and flour paste, must be at the correct temperature. Cold butter won’t cream properly, and warm flour paste will melt the butter. Room temperature is truly the sweet spot.
Don’t Skip the Cooling Step: Patience at this stage prevents grainy, separated frosting. While it’s tempting to rush, letting the flour paste cool completely ensures success.
Invest in an Electric Mixer: While you can technically make ermine frosting by hand, an electric mixer makes the process dramatically easier and produces superior results. The sustained, consistent beating is difficult to achieve manually.
Quality Butter Makes a Difference: European-style butter with higher fat content produces noticeably richer, more luxurious frosting. If you’re making this for a special occasion, the investment in quality butter is worthwhile.
Use a Whisk for the Flour Paste: A whisk is far more effective than a spoon for eliminating lumps in the flour-milk mixture. Take time to whisk thoroughly.
Prevent Lumps in the Final Frosting: If your finished frosting is grainy or lumpy, it’s likely because the flour paste wasn’t fully cooled or the flour wasn’t properly incorporated into the milk initially. Strain the frosting through a fine-mesh sieve to salvage it, though prevention is preferable.
Adjust Consistency as Needed: If your frosting is too soft, refrigerate it. If it’s too stiff, beat it a bit more at room temperature or add a tablespoon of milk and re-beat. The frosting should be spreadable but hold its shape.
Flavor Variations and Enhancements
One of ermine frosting’s greatest strengths is its versatility. The neutral base accepts countless flavor additions beautifully. Here are some creative variations to try:
- Almond Frosting: Replace vanilla extract with ½ teaspoon almond extract for a classic pairing with white cake.
- Chocolate Ermine: Melt 2 ounces of high-quality chocolate and cool it slightly, then fold it into the finished frosting. Alternatively, add 2-3 tablespoons of cocoa powder during the butter-sugar creaming stage, adding a touch more milk if needed to maintain consistency.
- Lemon Frosting: Add 2 tablespoons of fresh lemon juice and 1 tablespoon of lemon zest to the finished frosting. This bright variation pairs beautifully with vanilla or white cake.
- Strawberry Frosting: Fold in ½ cup of fresh strawberry puree (strained to remove seeds) into the finished frosting. This creates a delicate pink frosting with subtle fruit flavor.
- Coffee Frosting: Dissolve 1-2 tablespoons of instant espresso powder in the milk before cooking with the flour, or add strong brewed coffee to taste in the final stages.
- Maple Frosting: Replace ¼ cup of the sugar with ¼ cup of maple syrup and add ½ teaspoon of maple extract.
When adding liquid ingredients like fruit purees or citrus juice, reduce the milk slightly to maintain proper consistency. Start with less flavoring than you think you need and add more gradually—it’s easier to increase flavor than to dilute it.
Storage and Make-Ahead Guide
Ermine frosting is one of the most make-ahead-friendly frostings you can prepare. Here’s how to store it for maximum freshness:
- Room Temperature: Properly made ermine frosting will hold at room temperature for 2-3 hours, making it excellent for decorating cakes during the day.
- Refrigerator: Store ermine frosting in an airtight container in the refrigerator for up to 5 days. Before using, let it come to room temperature and re-beat briefly with an electric mixer to restore its fluffy texture. The frosting will firm up when chilled, which is actually helpful for detailed piping work.
- Freezer: Ermine frosting freezes beautifully for up to 3 months. Freeze in an airtight container or even pipe it directly onto parchment paper, freeze until solid, then transfer to a freezer bag. Thaw in the refrigerator overnight, then re-beat to restore fluffiness.
- Frosted Cakes: A cake frosted with ermine frosting keeps well in the refrigerator for 2-3 days. Cover loosely with plastic wrap to prevent it from drying out. For longer storage, freeze the frosted cake for up to 1 month.
The stability of ermine frosting makes it ideal for baking multiple days ahead of an event. Many professional bakers prefer this frosting specifically because it can be made days in advance without quality degradation.
When working with quick and easy recipes or planning best healthy food recipes, remember that ermine frosting, while indulgent, uses proportionally less sugar than many modern frostings, making it a reasonable choice for those watching sugar intake. The flour base adds subtle nutritional value compared to pure buttercream.
FAQ
Why is my ermine frosting grainy or lumpy?
Graininess typically results from one of three issues: (1) flour wasn’t fully incorporated into the milk before cooking, (2) the flour paste wasn’t cooled sufficiently before mixing with the butter, or (3) the butter wasn’t softened to room temperature. To prevent this, whisk the flour-milk mixture thoroughly, cool the paste completely, and ensure your butter is soft but not melted.
Can I make ermine frosting without an electric mixer?
While technically possible, it’s extremely difficult to achieve the proper fluffy texture by hand. The beating step is crucial for incorporating air, which creates the signature light consistency. If you must make it by hand, use a sturdy whisk and plan on 15-20 minutes of vigorous beating.
What’s the difference between ermine frosting and American buttercream?
American buttercream is made from butter and powdered sugar beaten together, while ermine frosting uses a cooked flour-milk base whipped with butter and granulated sugar. Ermine frosting is less sweet, more stable in warm temperatures, and has a lighter texture. American buttercream is quicker but greasier and more prone to breaking.
How much ermine frosting do I need for a standard cake?
This recipe yields approximately 3-4 cups of frosting, enough to fill and frost a standard two-layer 8 or 9-inch cake with a modest frosting layer. For thicker frosting or a three-layer cake, double the recipe.
Can I color ermine frosting with food coloring?
Absolutely. Add gel food coloring a few drops at a time during the final beating stage. Gel coloring works better than liquid coloring because it doesn’t alter the frosting’s consistency. Mix thoroughly to distribute color evenly.
Is ermine frosting dairy-free or vegan?
Traditional ermine frosting contains both milk and butter, so it’s not dairy-free or vegan. However, you can create a plant-based version using full-fat coconut milk and vegan butter (though results may vary slightly in texture).
What’s the best cake to pair with ermine frosting?
Ermine frosting pairs beautifully with delicate-flavored cakes that shouldn’t be overwhelmed by heavy frosting. White cake, yellow cake, vanilla cake, and angel food cake are classic pairings. The frosting also works wonderfully with lemon cake and almond cake.
Can I use salted butter instead of unsalted?
While you can technically use salted butter, unsalted is preferable because it gives you control over the final salt content. If using salted butter, omit the optional salt and taste the frosting before serving to ensure it’s not too salty.
How do I know when the flour paste is cooked enough?
The mixture should thicken noticeably and coat the back of a spoon. When you run your finger across the spoon, the line should hold without the mixture immediately flowing back together. This typically takes 5-8 minutes of constant stirring over medium heat.
Why did my frosting separate after mixing?
Separation usually occurs when the temperature differential between components is too great. Ensure both the flour paste and butter are at room temperature before combining. If separation occurs, continue beating—the frosting will usually come together after 3-5 minutes of additional mixing.
For additional inspiration on classic baking techniques, explore King Arthur Baking Company, which offers extensive resources on traditional frosting methods and cake decorating. You might also consult Serious Eats for in-depth explorations of baking science and technique. Cook’s Illustrated provides tested recipes and detailed explanations of cooking methods. For those interested in the historical context of classic American recipes, The Food Timeline offers fascinating research on culinary history, and The Pioneer Woman celebrates traditional home cooking with modern accessibility.
Ermine frosting represents the best of American baking heritage—simple ingredients, straightforward technique, and impressive results. Whether you’re recreating your grandmother’s beloved recipe or discovering this classic frosting for the first time, mastering ermine frosting adds an elegant tool to your baking toolkit. The light, fluffy texture and subtle sweetness make it perfect for special occasions, and its stability makes it practical for everyday baking. With the detailed guidance in this recipe, you’re well-equipped to create restaurant-quality frosting that will impress family and friends for generations to come.


