Best Eye of Round Roast? Chef’s Secret Recipe
The eye of round roast is one of the most misunderstood cuts of beef in the kitchen. Many home cooks shy away from it, believing it’s tough and flavorless, but the truth is far different. When prepared with the right techniques and understanding of its unique characteristics, this lean, economical cut transforms into something truly spectacular. This chef’s secret recipe reveals how to coax maximum tenderness and flavor from this underrated roast, making it a showstopper for family dinners and special occasions alike.
Eye of round comes from the rear leg of the cow and is prized by professional chefs for its deep, beefy flavor and impressive presentation. Unlike fattier cuts that forgive cooking mistakes, this lean muscle requires precision and care. However, that’s exactly where the magic happens. Understanding the science behind proper seasoning, temperature control, and resting periods transforms this budget-friendly cut into restaurant-quality beef that rivals more expensive options. Whether you’re preparing a weeknight dinner or hosting guests, mastering this roast will elevate your cooking repertoire significantly.
Understanding the Eye of Round Cut
The eye of round is a lean, tender muscle that sits within the bottom round section of the beef hindquarter. It’s called the “eye” because of its distinctive oval shape when viewed from certain angles. This cut contains minimal intramuscular fat, which means it lacks the marbling that keeps fattier cuts moist during cooking. This characteristic makes it essential to employ low-and-slow cooking methods or very careful high-heat searing followed by precise temperature control.
Nutritionally, eye of round is exceptional. It contains approximately 25 grams of protein per 3-ounce serving with only 4 grams of fat, making it one of the leanest beef cuts available. This makes it perfect for health-conscious cooks who don’t want to sacrifice flavor or satisfaction. The cut’s density and lean nature mean that when cooked properly, it yields beautiful, thin slices ideal for serving a crowd.
Professional butchers and chefs particularly appreciate this cut because it’s forgiving in terms of presentation. Unlike irregular cuts that vary in thickness, eye of round maintains consistent shape, allowing for even cooking and elegant plating. When you understand how to work with its lean nature rather than against it, you unlock culinary potential that surprises most home cooks.
Selection and Preparation
Selecting a quality eye of round roast begins at the butcher counter. Look for a roast that weighs between 2 to 4 pounds—this size range cooks evenly and is manageable for most home kitchens. The meat should be bright red in color, not dark or brown, which indicates freshness. Ask your butcher to remove the thin outer fat cap but leave a thin layer (about 1/8 inch) for protection during cooking.
The surface should feel firm to the touch and have no soft spots or discoloration. If possible, request that the roast be tied with butcher’s twine in a uniform shape. This ensures even heat distribution and helps the roast cook at the same rate throughout. Many butchers will do this at no extra charge, and it’s absolutely worth asking for.
Preparation begins 24 hours before cooking. Remove the roast from refrigeration and place it uncovered on a plate in the coldest part of your refrigerator. This dry-aging process, even for just one day, concentrates flavors and allows the surface to dry slightly, which promotes better browning during searing. This simple step is something many home cooks overlook but professionals never skip.
Chef’s Secret Recipe
Ingredients:
- One 3-pound eye of round roast, tied
- 3 tablespoons kosher salt
- 2 tablespoons freshly ground black pepper
- 1 tablespoon garlic powder
- 1 tablespoon onion powder
- 2 teaspoons dried thyme
- 1 teaspoon smoked paprika
- 3 tablespoons high-smoke-point oil (avocado or vegetable)
- 4 cloves garlic, crushed
- 3 sprigs fresh rosemary
- 2 cups beef stock
- 1 cup red wine (optional but recommended)
- 2 tablespoons butter
- 1 tablespoon tomato paste
The Secret Seasoning Blend: The foundation of this recipe lies in the seasoning mixture. Combine kosher salt, black pepper, garlic powder, onion powder, dried thyme, and smoked paprika in a small bowl. This blend provides multiple layers of flavor—the salt enhances natural beef flavors, the garlic and onion add umami depth, thyme brings herbaceous notes, and smoked paprika adds subtle complexity. The key is using kosher salt rather than table salt, which has larger crystals that adhere better to the meat’s surface.
Apply this mixture generously to all surfaces of the roast, pressing gently so the seasoning adheres. Don’t be shy—this is not the time for restraint. The lean nature of this cut means you need bold seasoning to create depth of flavor. After seasoning, allow the roast to sit at room temperature for 45 minutes before cooking. This permits the salt to penetrate the meat and allows the interior to reach a more even temperature before searing.
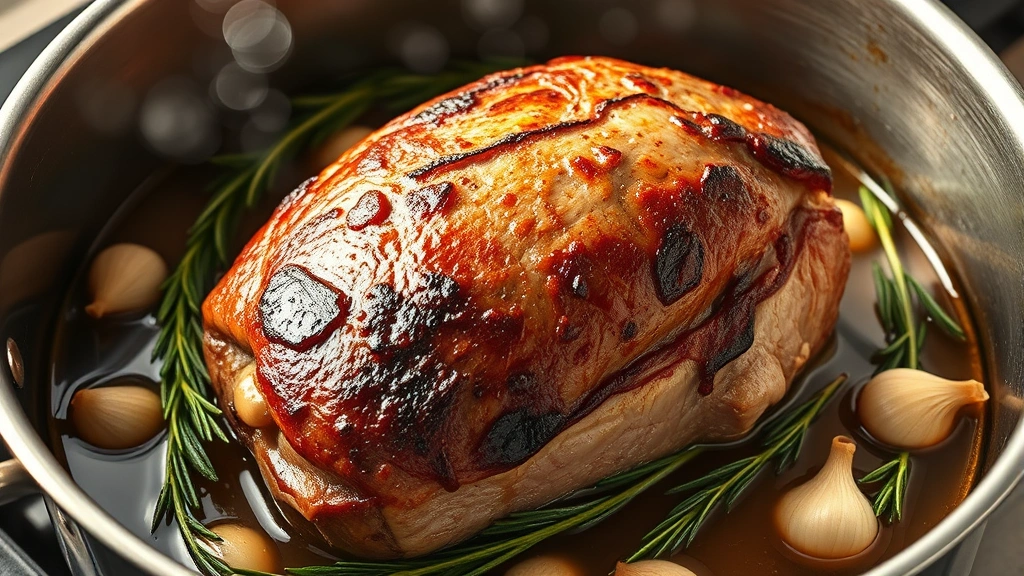
Searing for Flavor: Heat your oil in a heavy-bottomed Dutch oven or large oven-safe pot over medium-high heat until it shimmers. The oil should be hot enough that when you place the roast in the pan, it creates an immediate, vigorous sizzle. Sear the roast for 3-4 minutes on each side until a deep golden-brown crust develops. This Maillard reaction creates hundreds of new flavor compounds that make beef taste unmistakably beefy.
After searing all sides, remove the roast and set it aside. Add the crushed garlic cloves and fresh rosemary to the pan, stirring for about 1 minute until fragrant. This step builds the aromatic foundation for your braising liquid. Add the tomato paste and stir for another minute, allowing it to caramelize slightly against the hot pan.
Building the Braising Liquid: Deglaze the pan with red wine (if using), scraping up all the browned bits stuck to the bottom. These bits, called fond, contain concentrated beef and caramelized flavors essential to the final result. If not using wine, skip directly to adding beef stock. Pour in 2 cups of beef stock and stir well. Return the roast to the pan, positioning it so it’s partially submerged in the liquid. The liquid should come about halfway up the roast’s sides.
Bring the liquid to a gentle simmer, then cover the pot with a lid and transfer to a preheated 325°F oven. This temperature is crucial—it’s hot enough for gentle, steady cooking but not so hot that the exterior overcooks before the interior reaches the proper temperature. Cook for approximately 2.5 to 3 hours, or about 50 minutes per pound, until the internal temperature reaches 130-135°F for medium-rare.
Cooking Methods and Techniques
While the traditional oven-braising method described above is excellent, eye of round roast adapts well to several cooking techniques. Understanding these alternatives helps you choose the best method for your situation. For easy Instant Pot recipes, this roast is particularly well-suited. The pressure-cooking environment tenderizes the lean meat efficiently, reducing cooking time to roughly 60-75 minutes for a 3-pound roast.
If using a slow cooker, the cooking time extends significantly—plan for 6-8 hours on low heat. This method is perfect for easy dinner recipes for beginners because it requires minimal intervention. Simply sear the roast as described, add it to the slow cooker with liquid and aromatics, and let it cook unattended. The extended cooking time allows collagen in the connective tissue to convert to gelatin, creating a naturally tender result.
For a reverse-sear method using a sous-vide approach, seal the seasoned roast in a vacuum bag and cook in a water bath at exactly 131°F for 3-4 hours. Then sear it in a screaming-hot pan for 1-2 minutes per side to develop color. This method provides the most precise doneness control and is favored by many professional chefs. The low-temperature environment ensures even cooking from edge to center without any gray, overcooked band around the exterior.
Regardless of which method you choose, the fundamental principle remains: cook low and slow, monitor internal temperature carefully, and never exceed 135°F for medium-rare results. This approach respects the lean nature of the cut while maximizing tenderness.
Seasoning and Flavor Profiles
Beyond the basic seasoning blend, eye of round roast pairs beautifully with numerous flavor profiles. Consider your accompanying sides and desired final presentation when choosing your seasoning approach. A Mediterranean variation incorporates dried oregano, basil, and marjoram instead of thyme, with the braising liquid boosted by white wine and fresh lemon juice. This profile works wonderfully with roasted vegetables and pairs elegantly with crusty bread.
An Asian-inspired approach replaces traditional herbs with ginger, garlic, soy sauce, and star anise in the braising liquid. This creates a deeply savory, slightly sweet result that’s exceptional when sliced thin and served with steamed rice. The umami-rich soy sauce complements the beef’s natural richness without overwhelming its natural flavors.
A French bistro approach emphasizes pearl onions, mushrooms, and bacon lardons in the braise. This classic preparation, sometimes called “Pot Roast à la Bourguignonne,” transforms the roast into something rustic and comforting. The rendered bacon fat adds richness that compensates for the lean meat, while the vegetables create natural sweetness that balances the savory elements.
The secret to successful seasoning with lean cuts is understanding that bold flavors aren’t excessive—they’re necessary. The lack of fat means there’s no rich, unctuous mouthfeel to carry subtle flavors. Therefore, don’t hesitate to use generous amounts of aromatics, herbs, and spices. This is where the real magic of cooking eye of round roast emerges.
Resting and Slicing
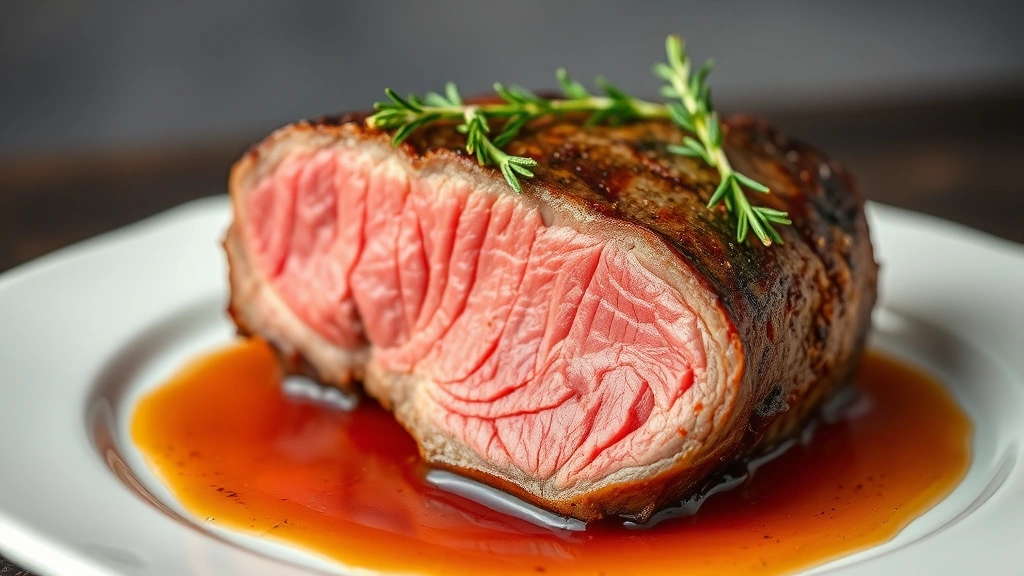
This step is absolutely non-negotiable for achieving perfect results. Once the roast reaches its target internal temperature, remove it from the oven and let it rest, loosely tented with foil, for 15-20 minutes. During this resting period, the muscle fibers relax and reabsorb moisture that was driven toward the surface during cooking. Cutting into the roast immediately after cooking causes all these precious juices to run out onto the cutting board rather than remaining in the meat.
After resting, transfer the roast to a cutting board and remove the butcher’s twine. Using a very sharp knife—a thin-bladed slicing knife is ideal—cut the roast perpendicular to the muscle fibers. This is crucial: slicing against the grain shortens the muscle fibers you’re cutting through, resulting in more tender bites. If you slice parallel to the grain, you’ll create long, chewy pieces.
Aim for slices about 1/4 inch thick. This thickness is thin enough to showcase tenderness but thick enough to provide satisfying, substantial bites. Professional carvers often use a slightly damp cloth to wipe the blade between cuts, which prevents meat particles from accumulating and affecting slice quality.
The braising liquid remaining in the pot becomes your sauce. Strain it through a fine-mesh sieve to remove solids, then return it to the stove. Whisk in 2 tablespoons of cold butter to create a glossy, silky finish. This technique, called mounting with butter, adds richness and improves mouthfeel without overwhelming the lean meat. Season the sauce with salt and pepper to taste, then drizzle it over the sliced roast for serving.
Serving Suggestions and Sides
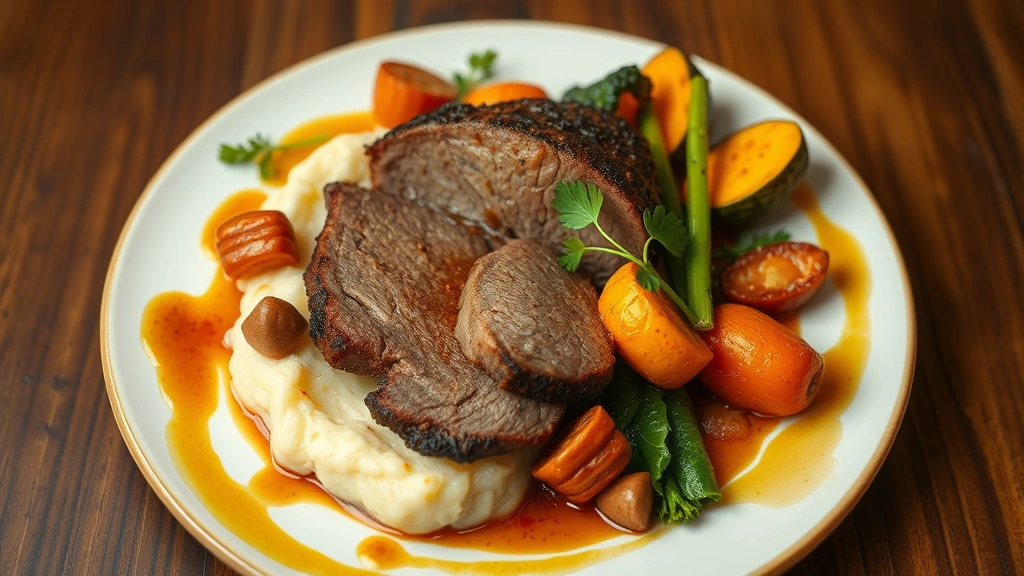
Eye of round roast’s elegant appearance and rich flavor deserve equally impressive accompaniments. Creamy mashed potatoes provide the ultimate comfort element and are perfect for soaking up the pan sauce. For something more sophisticated, try a celery root purée, which adds subtle earthiness that complements beef beautifully without competing for attention.
Roasted root vegetables—carrots, parsnips, beets, and turnips—create a visually stunning presentation when arranged around the sliced roast. The natural sweetness of roasted vegetables balances the savory beef, and their caramelized surfaces echo the seared crust on the roast. Toss them with the same herbs used in the roast for flavor cohesion.
Green vegetables provide freshness and color contrast. Sautéed spinach with garlic, steamed broccoli with lemon, or crispy Brussels sprouts all work beautifully. The slight bitterness of these vegetables cuts through the richness of the beef and sauce, providing palate refreshment between bites.
For how to make homemade bread, consider pairing your eye of round roast with a crusty sourdough or rustic country loaf. The bread serves double duty—it provides textural contrast to the tender meat and is perfect for mopping up every drop of sauce from your plate.
If preparing a lighter meal, consider serving the roast over a simple green salad dressed with a light vinaigrette. The cool, crisp greens provide refreshing contrast to the warm, savory beef. This approach is perfect for spring or summer entertaining when heavy sides feel out of place.
FAQ
What’s the difference between eye of round and bottom round roast?
Eye of round is a specific muscle within the bottom round section. It’s smaller, more tender, and more uniformly shaped than the entire bottom round. The eye of round is ideal for even cooking and elegant slicing, while bottom round is better suited to ground beef or stew meat.
Can I cook eye of round roast to medium or medium-well?
While you can cook it to these temperatures, it’s not recommended. The lean nature of this cut means higher internal temperatures result in drier meat. Stick to medium-rare (130-135°F) for the best results. If you prefer more done meat, consider cooking to 140°F for medium, but understand that some moisture loss is inevitable.
How do I know when the roast is done?
Use an instant-read meat thermometer inserted into the thickest part of the roast, avoiding any bones. For medium-rare, target 130-135°F. Remember that the roast will continue cooking slightly during resting, so remove it from the oven when it reaches 128-132°F, then let it rest for 15-20 minutes.
Can I make this recipe in a slow cooker?
Absolutely. Follow the searing steps, then transfer the roast and all liquid to a slow cooker. Cook on low for 6-8 hours until fork-tender. The extended cooking time will make the meat very tender, though you’ll sacrifice some of the textural quality that oven-braising provides.
What should I do with leftover eye of round roast?
Leftover roast is incredibly versatile. Slice it thin and serve cold on sandwiches with horseradish cream, reheat it gently in the remaining sauce, or shred it for beef tacos or grain bowls. Store leftovers in an airtight container with some of the braising liquid for up to 4 days.
Why is my roast tough even though I cooked it properly?
The most common cause is slicing parallel to the grain rather than against it. Always slice perpendicular to the muscle fibers. If you’re confident about your slicing, the issue might be overcooking. Lean cuts like eye of round become progressively tougher as temperature increases. Stick to 130-135°F for the best texture.
Can I sear the roast ahead of time?
Yes. Sear the roast up to 8 hours ahead, then refrigerate it. When ready to cook, let it come to room temperature for 30 minutes before adding it to the braising liquid and transferring to the oven. This advance preparation is perfect for entertaining, as it reduces day-of cooking stress.
What external resources help me master beef cooking techniques?
The Culinary Institute of America offers comprehensive guides on beef cookery and meat science. Serious Eats provides detailed explorations of cooking techniques with scientific backing. Amazing Ribs covers meat cooking with precision and clarity. For ingredient knowledge, Food Science Notes explains the chemistry behind cooking. Gourmet Guerrilla offers professional chef perspectives on technique and flavor development.


