How to Cook Farro? Chef’s Favorite Method
Farro is one of those ancient grains that professional chefs and home cooks absolutely love. With its nutty flavor, chewy texture, and impressive nutritional profile, farro transforms simple dishes into something memorable. Whether you’re preparing a hearty salad, a creamy risotto-style dish, or a wholesome side, mastering the proper cooking technique is essential. This guide walks you through everything you need to know about cooking farro perfectly every time.
The beauty of farro lies in its versatility and resilience. Unlike more delicate grains, farro can handle longer cooking times and bold flavor combinations without falling apart. Chefs particularly appreciate how it absorbs flavors while maintaining its structural integrity, making it ideal for both warm and cold preparations. Understanding the basic cooking method opens doors to countless culinary possibilities in your kitchen.
Understanding Farro: Types and Preparation
Before diving into cooking methods, it’s important to understand what you’re working with. Farro comes in three main varieties: whole grain farro (also called hulled farro), semi-pearled farro, and pearled farro. Each type has different cooking times and nutritional characteristics.
Whole grain farro retains its outer bran layer, making it the most nutritious option but requiring longer cooking—typically 45-60 minutes. Semi-pearled farro has some of the bran removed, reducing cooking time to about 30-40 minutes while maintaining decent nutrition. Pearled farro cooks the fastest in just 20-30 minutes, though it loses some nutrients in processing. Most home cooks prefer semi-pearled farro as the sweet spot between nutrition and convenience.
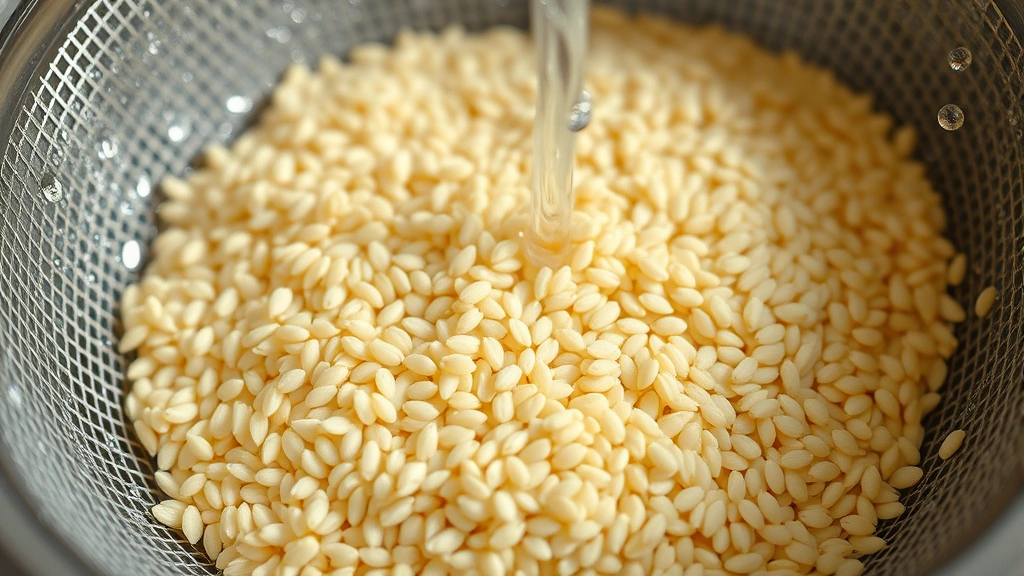
Preparation is straightforward but worthwhile. Always rinse your farro under cold water using a fine-mesh strainer. This removes dust and debris that naturally accumulate during storage and processing. While optional, some chefs toast their farro in a dry skillet for 2-3 minutes before cooking. This enhances the nutty flavor and creates a slightly deeper, more complex taste profile that elevates the final dish.
When selecting farro for your organic versus conventional options, consider that organic farro often contains higher mineral content and avoids synthetic pesticides. The choice depends on your dietary preferences and budget.
The Basic Cooking Method
The foundational ratio for cooking farro is crucial: use three parts liquid to one part farro. This simple formula works reliably whether you’re cooking one cup or five cups of grain. The liquid can be water, vegetable broth, or chicken broth—each choice imparts different flavors to your finished grain.
Here’s the step-by-step process that professional chefs rely on:
- Measure your farro and rinse thoroughly under cold running water
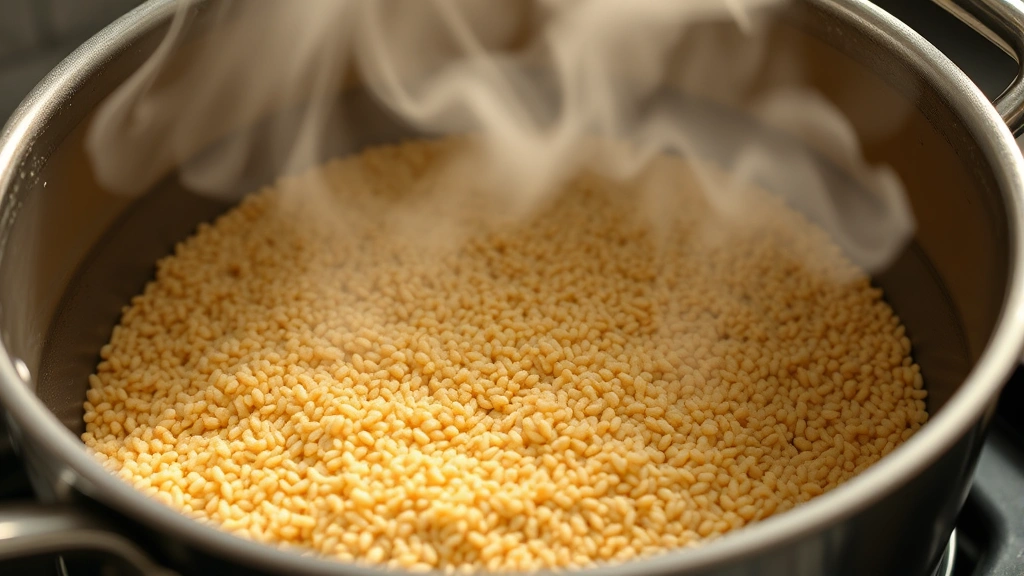
- In a medium saucepan, bring your chosen liquid to a rolling boil
- Add rinsed farro and a pinch of salt (about ½ teaspoon per cup of farro)
- Reduce heat to low and simmer, covered, for the appropriate time based on your farro type
- Once tender, drain any excess liquid using a fine-mesh strainer
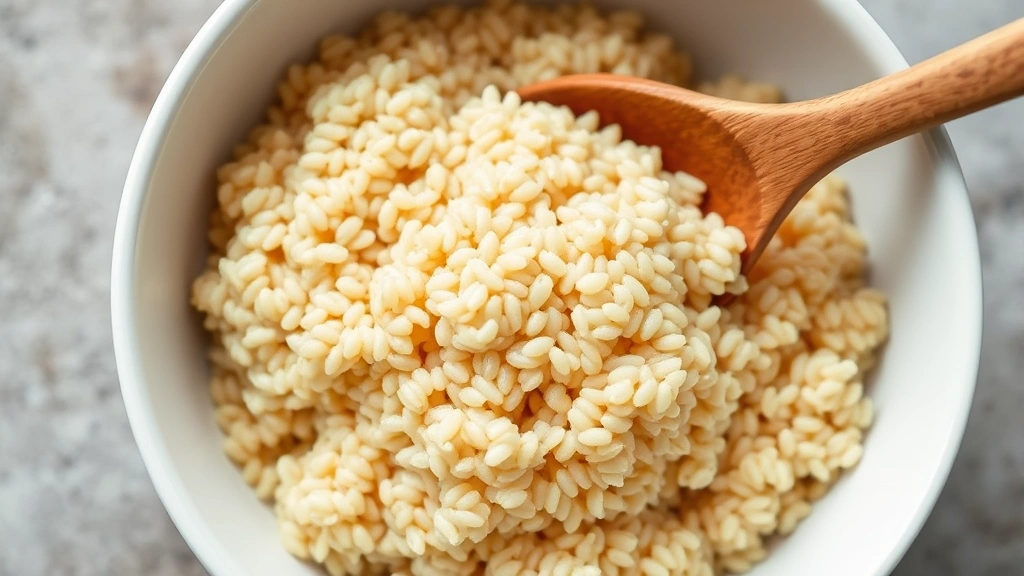
- Fluff with a fork and let rest for 5 minutes before serving
The cooking time varies significantly based on farro type. Semi-pearled farro, the most common variety, typically requires 30-35 minutes. Check doneness by tasting a grain—it should be tender yet maintain a slight chew, never mushy. If your farro still feels hard after the recommended time, add ¼ cup more liquid and continue cooking for another 5-10 minutes.
Chef’s Stovetop Technique
Professional chefs often employ a slightly modified method that produces superior results. This technique involves toasting the grain first and using a combination of techniques to maximize flavor absorption.
The Toasting Step
Heat a medium saucepan over medium heat without any oil. Add your rinsed farro and stir constantly for 2-3 minutes. You’ll notice the grains becoming slightly darker and smelling wonderfully nutty. This step isn’t just about flavor—it also helps prevent the grains from sticking together during cooking. The dry heat activates the grain’s natural oils and creates a more complex taste profile.
Building Flavor Foundation
After toasting, add your liquid of choice. Many chefs prefer using umami-rich broths that complement farro’s earthy nature. Vegetable broth works beautifully for vegetarian dishes, while chicken broth adds subtle depth. Add aromatics at this stage: a bay leaf, a crushed garlic clove, or a sprig of fresh thyme. These elements infuse the cooking liquid, and the farro absorbs these flavors as it cooks.
The Cook
Bring the liquid to a boil, then immediately reduce heat to maintain a gentle simmer. Cover with a tight-fitting lid—this is crucial for even cooking. Don’t stir the farro during cooking; this can break down the grains and create a mushy texture. Simply let it simmer undisturbed for 30-40 minutes depending on your farro variety.
The Finish
About 5 minutes before the farro should be done, taste a grain. It should be creamy inside with a slight firmness when you bite it. This texture—tender but with a subtle resistance—is what separates properly cooked farro from overdone mush. Once it reaches this perfect doneness, remove from heat and let rest, covered, for 5 minutes. This allows residual heat to finish the cooking process gently.
The beauty of this method is its consistency. Once you master these steps, you’ll produce restaurant-quality farro every single time. The technique works equally well whether you’re preparing a simple side dish or building a complex grain-based salad.
Pro Tips from Professional Kitchens:
- Use a heavy-bottomed saucepan for even heat distribution
- Maintain a gentle simmer, not a rolling boil, to prevent uneven cooking
- Never skip the rinsing step—it removes excess starch that causes gumminess
- Toast the grain even when short on time; it takes just three minutes and dramatically improves flavor
- Reserve some cooking liquid before draining; it’s perfect for adjusting consistency in finished dishes
Farro Recipe Ideas and Serving Suggestions
Once you’ve mastered basic farro cooking, the culinary applications become endless. This grain pairs beautifully with both vegetables and proteins, making it suitable for virtually any cuisine.
Farro Salads
Cooked farro creates exceptional cold salads. The grain’s chewy texture holds up beautifully when tossed with vinaigrettes and fresh vegetables. Combine cooked farro with roasted vegetables, fresh herbs like parsley and mint, crumbled feta cheese, and a lemon-olive oil dressing. The result is a protein-rich, satisfying salad that improves as it sits. These salads are perfect for meal prep, actually tasting better after a day in the refrigerator as flavors meld.
Farro as a Base for Proteins
Serve your cooked farro as a bed for proteins. The grain’s nutty flavor complements healthy chicken recipes beautifully, particularly roasted or grilled preparations. Similarly, miso salmon pairs wonderfully with farro, as the grain’s earthiness balances the fish’s richness. Top your farro base with seasonal vegetables and a sauce for a complete meal.
Creamy Farro Risotto-Style Dishes
While not technically risotto, farro can be prepared using risotto techniques. Cook farro in broth, adding liquid gradually while stirring occasionally. Finish with butter and cheese for a creamy, luxurious side dish. This method requires more attention than basic cooking but produces incredibly silky results.
Breakfast Applications
Cooked farro works surprisingly well in breakfast contexts. Mix with Greek yogurt, fresh berries, and honey for a nutritious bowl. The grain’s chewiness provides textural contrast to soft yogurt, while its subtle nuttiness complements both sweet and savory breakfast preparations. You can even incorporate farro into protein muffin recipes for added nutrition and texture.
Soups and Stews
Farro is exceptional in hearty soups and stews. Add partially cooked farro to simmering broths with vegetables and legumes. The grain absorbs the surrounding flavors while adding body and substance to light broths. This technique is particularly popular in Italian cuisine, where farro soup represents comfort food at its finest.
Troubleshooting Common Farro Cooking Issues
Farro Remains Hard After Cooking
If your farro hasn’t softened after the recommended cooking time, you likely have whole grain farro rather than semi-pearled. Whole grain varieties require 45-60 minutes. Add additional liquid—about ¼ cup—and continue cooking. Check the package to confirm the farro type for future reference.
Farro Turns Mushy
Mushiness typically results from overcooking or using too much liquid. If this happens, reduce cooking time by 5 minutes next time and use exactly three parts liquid to one part farro. Additionally, avoid stirring during cooking, which breaks down grains and creates a mushy texture.
Farro Clumps Together
Clumping usually means insufficient rinsing before cooking. Always rinse farro thoroughly under cold water. If clumping occurs after cooking, spread the warm farro on a sheet pan and gently break up clumps with a fork. In the future, don’t stir the farro while it cooks—this is the primary cause of clumping.
Bland Farro
Farro cooked in plain water tastes, well, plain. Always use broth instead of water, and add aromatics like bay leaves or garlic during cooking. You can also toast the grain before cooking to enhance its natural nutty flavor. Finally, season properly with salt—don’t be shy.
Uneven Cooking
Some grains finish tender while others remain firm. This usually indicates inconsistent heat or frequent lid-lifting during cooking. Use a heavy-bottomed saucepan, maintain a gentle simmer, and resist the urge to check on your farro constantly. Let it cook undisturbed for the full duration before checking doneness.
Storage is straightforward: cooked farro keeps in the refrigerator for up to five days in an airtight container. You can also freeze cooked farro for up to three months. Reheat gently with a splash of water or broth to restore the proper texture.
FAQ
Can you cook farro in a rice cooker?
Yes, absolutely. Use the same three-to-one liquid ratio and cook on the regular rice setting. Results are slightly less controlled than stovetop cooking, but rice cookers produce perfectly acceptable farro. The grain may be slightly softer than stovetop-cooked versions, but still delicious.
How much does farro expand when cooked?
Farro roughly triples in volume when cooked. One cup of dry farro yields approximately three cups of cooked grain. Keep this in mind when planning portions and selecting cookware.
Is farro gluten-free?
No, farro is not gluten-free. It’s an ancient wheat variety and contains gluten. Those with celiac disease or gluten sensitivity must avoid farro. Alternatives include quinoa, millet, or certified gluten-free oats.
What’s the difference between farro and barley?
While similar, farro and barley are different grains. Farro has a nuttier flavor and slightly chewier texture, while barley is earthier and softer. Farro also contains more protein. The cooking methods are nearly identical, though barley sometimes requires slightly longer cooking times.
Can you make farro ahead of time?
Definitely. Cook farro up to five days in advance and store in the refrigerator. You can also freeze cooked farro for up to three months. This makes meal prep incredibly convenient—cook a large batch on Sunday for use throughout the week.
What broth works best for cooking farro?
Any quality broth works well: vegetable, chicken, or beef. Choose based on how you plan to use the farro. Vegetable broth is most versatile, chicken broth adds subtle richness, and beef broth suits hearty winter dishes. Avoid broths with heavy spicing that might overpower farro’s delicate nuttiness.
Why does my farro taste bitter?
Bitterness usually indicates over-toasting before cooking. Toast for only 2-3 minutes, stirring constantly, until the grain smells pleasantly nutty, not burnt. If bitterness persists, your broth might be the culprit—some broths contain bitter herbs or excessive salt.
How do you know when farro is done cooking?
Taste a grain. It should be tender enough to bite through easily but maintain a slight firmness—not mushy. The texture should be similar to al dente pasta. Once it reaches this point, remove from heat and let rest for five minutes before serving.


