Crispy Fried Chicken Wings? Pro Chef’s Guide
Achieving restaurant-quality crispy fried chicken wings at home requires mastering three essential elements: proper preparation, temperature control, and technique. Professional chefs understand that the difference between soggy, greasy wings and perfectly crispy, golden specimens lies in meticulous attention to detail throughout every stage of the cooking process. This comprehensive guide reveals the exact methods used in commercial kitchens to deliver wings with an irresistibly crunchy exterior and juicy, tender meat inside.
Whether you’re preparing wings for a casual weeknight dinner, game day gathering, or special occasion, understanding the science behind frying will transform your results. From selecting the right cut and drying methods to achieving optimal oil temperature and timing, each step contributes to the final outcome. Professional techniques that seemed mysterious will become second nature once you understand the principles driving them.
Selecting and Preparing Your Chicken Wings
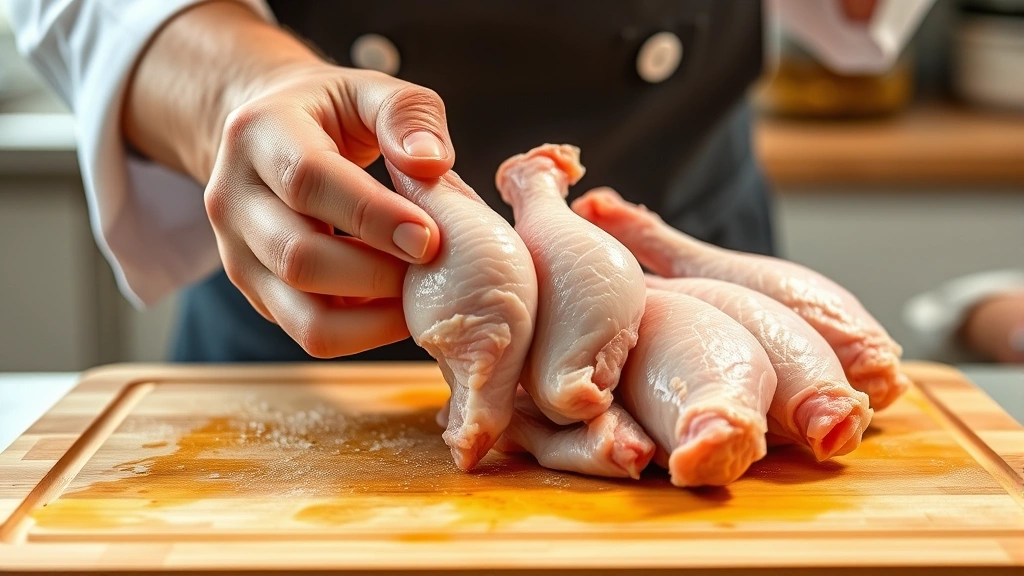
The foundation of exceptional fried chicken wings begins before you ever reach for the oil. Professional chefs start by selecting high-quality poultry with skin that hasn’t been damaged or discolored. Look for wings with a pale, unblemished surface and no visible bruising. The weight and firmness indicate freshness—avoid wings that feel limp or have a grayish appearance.
When purchasing, you have three options: whole wings, drumettes (the first joint), or flats (the middle section). Most professionals prefer whole wings for superior presentation, though some restaurants separate them for consistent cooking times. If using whole wings, have your butcher separate them, or learn to do this yourself using a sharp knife and the natural joint lines as guides.
Proper storage is crucial before cooking. Keep wings refrigerated at 40°F or below and use within two days of purchase for optimal freshness. If you’ve frozen them, thaw wings slowly in the refrigerator overnight rather than at room temperature—this prevents bacterial growth and maintains meat quality. Pat wings completely dry with paper towels before any preparation step; moisture is the enemy of crispness.
The Dry Brining Method
Dry brining is a technique used by professional kitchens that dramatically improves the final texture and flavor of fried chicken wings. Unlike wet brining, which adds moisture that works against crispness, dry brining uses salt to penetrate the meat while allowing surface moisture to evaporate, creating ideal conditions for browning.
Begin by placing your prepared wings on a wire rack set over a baking sheet. This elevation allows air circulation around all surfaces. Sprinkle kosher salt generously over both sides—approximately 1 teaspoon per pound of wings. The salt draws moisture from the meat through osmosis, which then re-absorbs along with the salt, seasoning the chicken throughout rather than just on the surface.
Let the wings sit uncovered in the refrigerator for 8 to 24 hours. During this time, enzymatic activity breaks down proteins, which improves browning and creates a more tender final product. The longer brining period—up to 24 hours—yields noticeably superior results compared to shorter durations. After brining, pat the wings dry again with fresh paper towels; this step is absolutely critical for achieving maximum crispness during frying.
Professional chefs emphasize that this dry brining step separates good fried wings from exceptional ones. The improved browning, enhanced seasoning, and superior texture justify the advance planning required. Many restaurants prepare wings a full day ahead specifically to take advantage of this technique.
Coating and Seasoning Strategies
The coating creates the signature crunch that defines great fried chicken wings. Most professional recipes use a flour-based mixture, though some incorporate cornstarch, baking powder, or even a small amount of baking soda to enhance crispness. The baking soda creates tiny gas pockets in the coating through a chemical reaction, resulting in a lighter, crunchier texture.
Here’s a professional coating formula that yields excellent results: combine 1 cup all-purpose flour, 2 tablespoons cornstarch, 1 tablespoon baking powder, 2 teaspoons kosher salt, 1 teaspoon black pepper, 1 teaspoon garlic powder, 1 teaspoon paprika, and ½ teaspoon cayenne pepper. Adjust the cayenne based on your heat preference. Some chefs add a pinch of sugar to enhance browning through the Maillard reaction.
For even coating distribution, place your dry mixture in a large bowl or resealable plastic bag. Add wings in batches and toss thoroughly, ensuring every surface receives coating. Some professional kitchens double-coat by dipping wings in a thin buttermilk or egg wash between coating applications, which creates an extra-thick, crunchier crust. This additional step takes more time but produces noticeably superior results for special occasions.
Allow coated wings to rest on a wire rack for 15 to 30 minutes before frying. This resting period allows the coating to adhere better and creates a more secure crust that won’t separate during cooking. Alternatively, you can refrigerate coated wings for up to 4 hours, which further improves adhesion and crispness.
Oil Temperature and Equipment
Temperature control is absolutely fundamental to successful fried chicken wings. Too-cool oil results in greasy, soggy wings; too-hot oil burns the exterior before the interior cooks through. Professional kitchens use calibrated thermometers to maintain precise temperatures throughout the frying process.
The ideal frying temperature for chicken wings is 325°F to 350°F. Many professional chefs prefer starting at 325°F for the first fry, then finishing at 350°F for a second fry that creates maximum crispness—a technique called double-frying. This method allows the interior to cook gently during the first fry, then the second fry at higher temperature creates a shatteringly crisp exterior.
Invest in a reliable deep-fry or candy thermometer that reads accurately in the temperature range you need. Digital instant-read thermometers work well for monitoring temperature throughout cooking. Check temperature frequently, as oil cools when cold food is added and requires time to return to target temperature.
Select an oil with a high smoke point—peanut oil, vegetable oil, canola oil, or refined safflower oil all work excellently. Peanut oil is the professional favorite due to its neutral flavor and exceptional smoke point of 450°F. Never use olive oil or butter for deep frying, as their lower smoke points cause degradation and off-flavors.
Use a heavy-bottomed pot or Dutch oven that retains heat well and won’t warp. Fill with enough oil to submerge wings completely—typically 2 to 3 quarts depending on pot size. Professional kitchens often use specialized deep fryers with temperature regulation, but a quality pot and reliable thermometer yields equally excellent results at home.
Frying Techniques for Maximum Crispness
Proper frying technique is where preparation meets execution. Begin by bringing your oil to 325°F and maintaining this temperature throughout the process. Working in batches to avoid overcrowding, carefully place wings into the hot oil. Overcrowding causes temperature drop and steam generation, both of which prevent crispness.
A good rule is never fill more than one-third of the pot’s surface area with wings at once. This ensures adequate oil circulation around each piece and allows temperature recovery between batches. Professional kitchens time each batch carefully—first-fry wings for 8 to 12 minutes depending on size, until they achieve a light golden color.
Remove wings with a slotted spoon and place them on a wire rack positioned over paper towels. The rack elevation allows air circulation underneath, preventing steam accumulation that would soften the coating. Never place fried wings directly on paper towels, as trapped steam creates soggy bottoms.
Allow 5 minutes between batches for oil temperature recovery. Once all wings have completed the first fry, increase oil temperature to 350°F. Return wings to the hot oil for a second fry lasting 2 to 3 minutes, until they reach deep golden-brown color. This second fry shatters any remaining moisture on the coating surface, creating the signature crunch.
Remove finished wings and place on the wire rack again. Season immediately with additional salt and any desired spices while the coating is still hot and slightly adhesive. This timing ensures seasonings stick effectively rather than sliding off cooled wings.
Professional chefs emphasize that the double-fry method is not optional for optimal results—it’s the difference between good wings and exceptional wings. The slight additional time investment yields dramatically superior texture and appearance.
If you’re preparing multiple batches or want to make shredded chicken dishes alongside wings, timing your oil management becomes important. Keep finished wings warm in a 200°F oven while completing remaining batches.
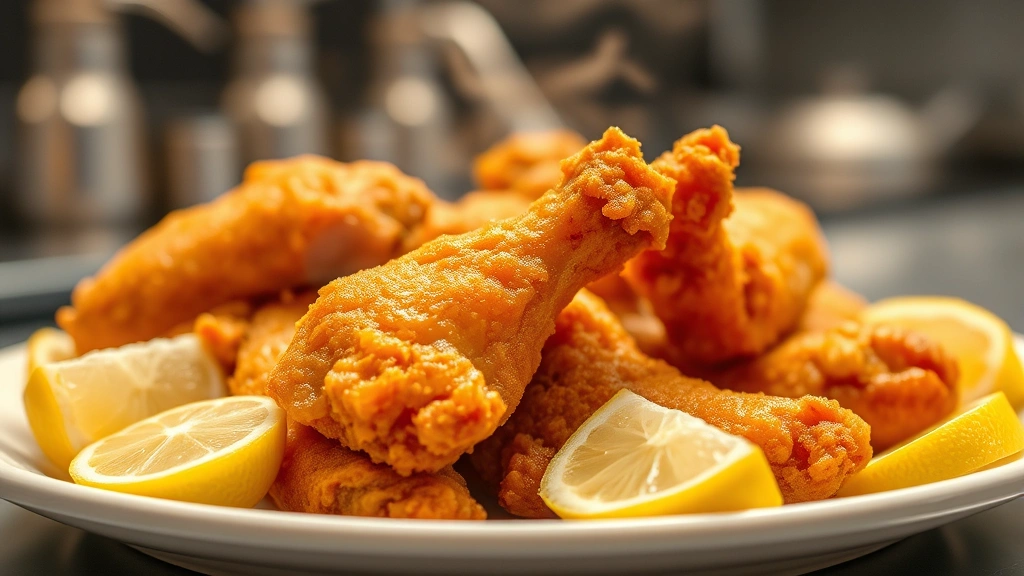
” alt=”Golden crispy fried chicken wings on white plate with fresh lemon wedges, steam rising from wings, professional kitchen lighting”/>
Resting and Finishing Touches
The resting period after frying is often overlooked but contributes significantly to the final eating experience. Allow wings to rest for 3 to 5 minutes on the wire rack before serving. This brief rest allows carryover cooking to finish gently and allows the exterior to set completely, maintaining crispness even as the wings cool slightly.
During this resting period, any residual oil drains completely, and the coating becomes maximally crunchy. Wings served immediately after resting maintain their ideal texture far longer than those served piping hot straight from the oil.
For service, transfer wings to a serving platter or bowl lined with parchment paper rather than paper towels. Parchment paper doesn’t absorb oil the way paper towels do, and it prevents moisture reabsorption that would compromise crispness. Some professional restaurants line serving vessels with absorbent paper, then place a wire rack on top before adding wings—this elevated presentation maintains air circulation and maximum crispness.
Fresh garnishes enhance both appearance and flavor. Scatter fresh herbs like chopped parsley or chives over finished wings. Fresh lemon or lime wedges provide brightness and acidity that cuts through richness. Thinly sliced scallions add color and subtle onion notes.
Sauces and Serving Suggestions
While perfectly fried wings are excellent plain, complementary sauces elevate the experience. Professional kitchens toss wings in sauce immediately after plating, or serve sauces on the side to maintain crispness. Tossing warm wings in sauce allows flavors to penetrate while the coating remains structurally sound.
Classic Buffalo sauce combines hot sauce with melted butter and a splash of vinegar—the acidity brightens the richness. Asian-inspired glazes using soy sauce, ginger, garlic, and a touch of honey create savory-sweet profiles. BBQ sauces, ranch dressings, and spicy mayo all pair beautifully with crispy wings.
For a lighter option, try a green goddess dressing that provides herbaceous freshness alongside the rich fried coating. The bright flavors complement rather than overwhelm the chicken’s natural taste.
Consider serving wings alongside traditional accompaniments. Celery and carrot sticks with ranch dip provide cooling contrast and textural variety. Cornbread or biscuits soak up sauce beautifully. For a more substantial meal, pair wings with rice dishes or hearty stews that balance the richness of fried food.
Make-ahead strategies work well with fried chicken wings. Prepare through the coating stage the day before, refrigerating until frying time. Alternatively, fry wings several hours ahead and reheat in a 375°F oven for 8 to 10 minutes, which restores crispness better than microwave reheating. This advance preparation is particularly valuable for entertaining, allowing you to focus on final touches and guests rather than last-minute cooking.
Professional chefs also appreciate the versatility of perfectly fried wings. Beyond serving as appetizers or main courses, they work beautifully in grain bowls, salads, or as protein additions to various cuisines. The crispy exterior and tender meat adapt to numerous flavor profiles and serving styles.
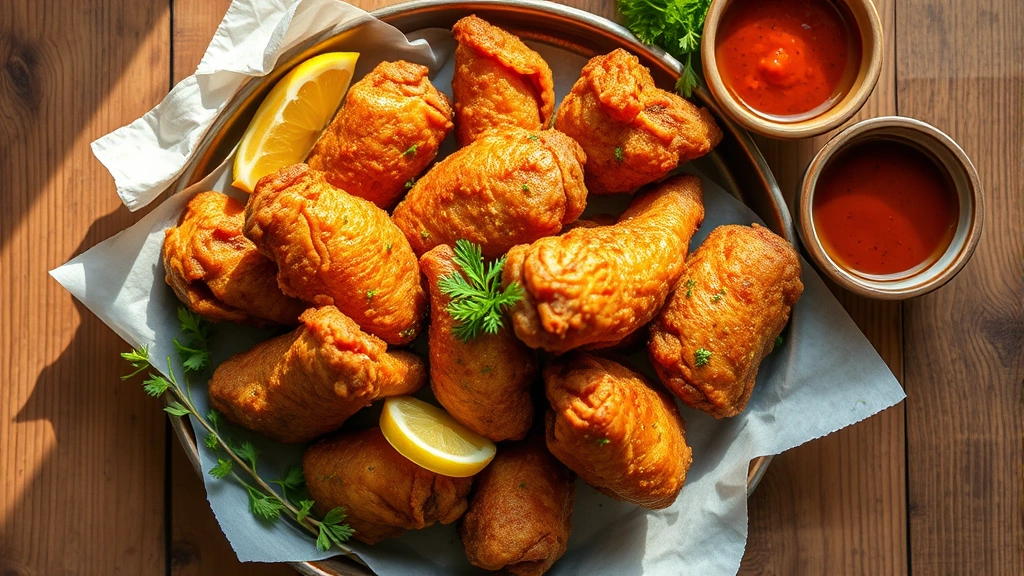
” alt=”Overhead view of fried chicken wings plated with fresh herbs, lemon, and dipping sauces in small bowls, rustic wooden table”/>
FAQ
How far in advance can I prepare fried chicken wings?
Fried wings are best served within 30 minutes of cooking when crispness is maximum. However, you can prepare wings through the coating stage up to 24 hours ahead by refrigerating them on a wire rack. Alternatively, fry wings several hours in advance and reheat in a 375°F oven for 8 to 10 minutes to restore crispness. Avoid refrigerating cooked wings, as the moisture reabsorption significantly compromises texture.
What’s the difference between single and double frying?
Single frying cooks wings completely in one oil immersion, typically taking 12 to 15 minutes at 325°F to 350°F. Double frying uses two separate oil immersions: a gentle first fry at 325°F for 8 to 12 minutes, followed by a second fry at 350°F for 2 to 3 minutes. Double frying creates superior crispness and more even browning, making it the professional standard for exceptional results.
Can I use a different oil for frying?
Yes, any oil with a smoke point above 400°F works acceptably. Peanut oil is the professional favorite due to its neutral flavor and 450°F smoke point. Vegetable oil, canola oil, and refined safflower oil all work well. Avoid olive oil, coconut oil, or butter, which have lower smoke points and impart flavors that may not complement fried chicken.
Why are my wings coming out greasy?
Greasy wings typically result from oil temperature that’s too low, causing the coating to absorb excessive oil before the exterior sets. Use a reliable thermometer and maintain 325°F for the first fry and 350°F for the second fry. Additionally, ensure wings are thoroughly dried before coating, and avoid overcrowding the oil, which causes temperature drop. Finally, allow cooked wings to drain on a wire rack rather than paper towels.
How do I know when wings are fully cooked?
The meat should reach an internal temperature of 165°F, which you can verify with a meat thermometer inserted into the thickest part without touching bone. Visually, the coating should be deep golden brown and crispy, and any juices that run from the meat should be clear rather than pink. With practice, you’ll recognize the ideal color and texture that indicates proper doneness.
Can I make fried wings without a deep fryer?
Absolutely. A heavy-bottomed pot or Dutch oven filled with 2 to 3 quarts of oil works excellently when paired with a reliable thermometer. The key is maintaining proper temperature and avoiding overcrowding. Professional home cooks achieve results identical to commercial kitchens using this simple setup. Specialized deep fryers offer temperature regulation convenience but aren’t necessary for excellent results.
What’s the best way to reheat leftover fried wings?
Reheating in a 375°F oven for 8 to 10 minutes restores crispness far better than microwave reheating, which produces soggy wings. Place wings on a wire rack over a baking sheet to allow air circulation. If wings have been refrigerated, bring them to room temperature first for more even reheating. For best results, consume fried wings within a few hours of cooking.
Should I marinate wings before frying?
Wet marinades add moisture that works against crispness, so they’re not recommended for fried wings. However, dry brining with salt for 8 to 24 hours significantly improves flavor and texture. If you want additional flavor complexity, incorporate spices into your coating mixture or season the finished wings immediately after frying while the coating is still hot and slightly adhesive.


