Crispy Fried Corn? Tried & True Recipe
There’s something absolutely magical about crispy fried corn that transforms this humble vegetable into an irresistible side dish or appetizer. The exterior crackles between your teeth while the inside remains tender and sweet, creating a textural contrast that keeps people coming back for more. Whether you’re planning a casual weeknight dinner or preparing food for a gathering, this fried corn recipe delivers restaurant-quality results every single time.
Corn is one of those versatile ingredients that works beautifully in both savory and slightly sweet preparations. When you fry it properly, you unlock flavors and textures that boiling or grilling simply cannot achieve. The key lies in understanding the science behind the frying process, selecting the right corn, and mastering a few essential techniques that separate mediocre fried corn from the truly exceptional versions that deserve a place on your regular rotation.
In this comprehensive guide, we’ll walk you through everything you need to know about making crispy fried corn at home, from ingredient selection through plating. You’ll discover insider tips that professional cooks use, troubleshooting advice for common mistakes, and creative variations that let you customize this dish to your preferences.
Why Fried Corn Deserves a Place on Your Table
Fried corn represents one of those beautiful culinary moments where simplicity meets sophistication. Unlike deep-fried foods that often feel heavy or indulgent, properly prepared fried corn maintains the vegetable’s natural sweetness while adding complexity through the Maillard reaction—the chemical process that creates those desirable golden-brown colors and nutty flavors.
The appeal extends beyond taste. Crispy fried corn offers visual appeal with its golden exterior and glistening finish. It requires minimal ingredients, making it an economical choice for feeding crowds. The cooking process takes just minutes, so you can prepare it even on busy weeknights. When you serve it alongside dishes like fried chicken wings recipe, you create a cohesive menu with complementary textures and flavors.
From a nutritional perspective, corn provides fiber, antioxidants, and B vitamins. While frying adds calories through oil absorption, the portion sizes tend to be modest since the richness satisfies quickly. Many home cooks find that homemade fried corn tastes fresher and lighter than restaurant versions because you control the oil quality and cooking temperature.
Essential Ingredients and Equipment
Ingredients you’ll need:
- Fresh corn on the cob (6-8 ears for serving 4 people)
- All-purpose flour or cornstarch (½ cup)
- Cornmeal (¼ cup for extra crunch)
- Salt and black pepper
- Paprika or cayenne pepper (optional)
- Garlic powder (½ teaspoon)
- Vegetable oil for frying (3-4 cups)
- Butter for finishing (2 tablespoons)
- Fresh herbs like cilantro or parsley (optional)
Equipment essentials:
- Heavy-bottomed pot or deep skillet (at least 3 inches deep)
- Cooking thermometer (digital is most accurate)
- Slotted spoon or spider strainer for safe removal
- Paper towels for draining
- Shallow bowls for coating mixture
- Tongs for handling corn
Investing in a reliable thermometer makes the biggest difference in your results. Oil temperature directly impacts whether your corn becomes crispy or greasy. A quality thermometer removes guesswork and ensures consistency across batches.
Selecting and Preparing Your Corn
The foundation of exceptional fried corn starts at the market. Choose ears with bright green husks, moist silk, and kernels that feel plump and full. Avoid corn with brown spots, dried-out husks, or shriveled kernels. The fresher your corn, the sweeter and more tender your final dish will be.
For this recipe, you’ll cut corn kernels from the cob rather than frying whole ears. Here’s the proper technique:
- Remove the husk and silk from each ear completely
- Stand the ear upright on a cutting board
- Using a sharp knife, carefully cut downward along the cob, rotating as you go
- Collect kernels in a bowl
- Pat kernels dry with paper towels—this step is crucial for crispiness
Why pat them dry? Excess moisture creates steam during frying, which prevents the exterior from achieving that desirable crunch. This seemingly small step makes a remarkable difference in your final texture.
If fresh corn isn’t available, frozen corn kernels work surprisingly well. Simply thaw them completely and pat dry before proceeding. Canned corn tends to be too soft and soggy for this application, so avoid that option.
Step-by-Step Cooking Instructions
Preparation phase:
Mix your dry ingredients in a shallow bowl. Combine flour, cornmeal, salt, pepper, paprika, and garlic powder. The flour creates the initial crust while cornmeal adds textural interest and crunch. Some cooks prefer using only cornstarch for a lighter, crispier coating—experiment to find your preference.
Heat your oil to 350°F (175°C). This temperature is critical. Too cool, and your corn absorbs excess oil and becomes greasy. Too hot, and the exterior burns before the interior cooks properly. Use your thermometer to verify the temperature before adding corn.
Frying process:
- Working in batches to avoid crowding the pan, coat a handful of corn kernels in the flour mixture, shaking off excess
- Carefully add coated kernels to the hot oil
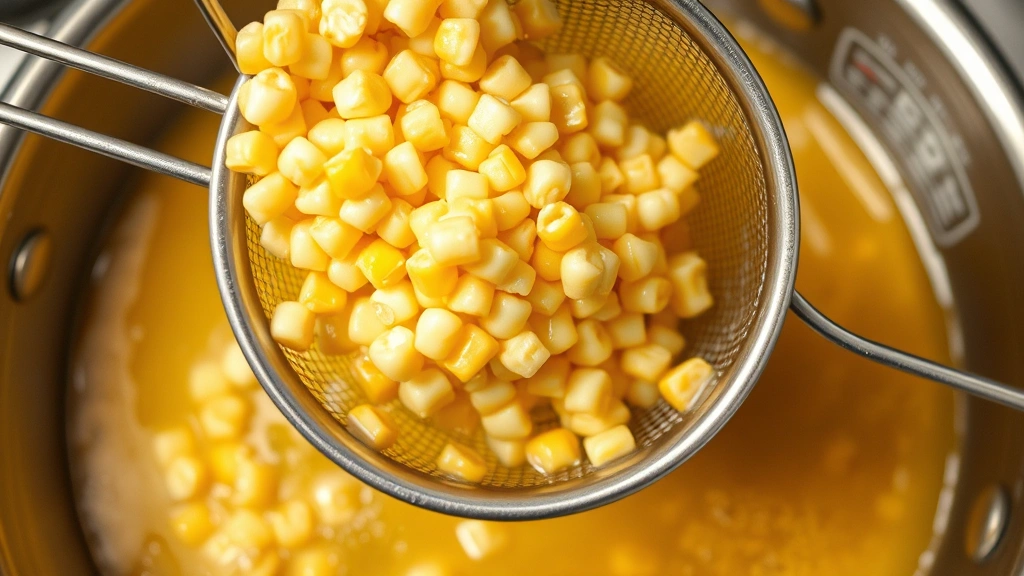
- Fry for 3-4 minutes, stirring occasionally with a slotted spoon
- Kernels should turn golden brown and float to the surface when done
- Remove with a slotted spoon or spider strainer to paper towels
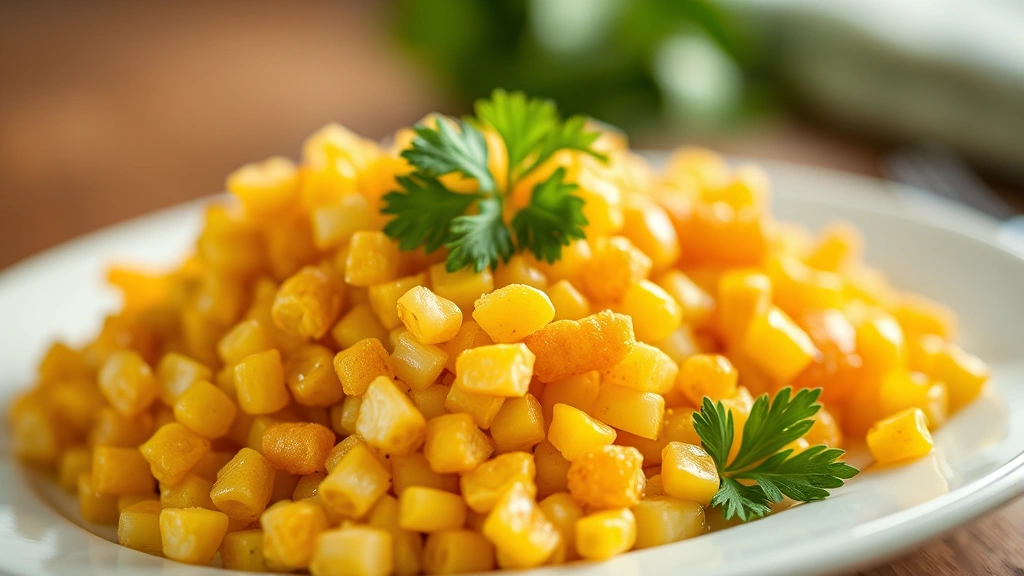
- Immediately sprinkle with fresh salt while still hot
- Repeat with remaining corn
Avoid overcrowding your cooking vessel. When too many kernels cook simultaneously, they lower the oil temperature and steam rather than fry. This is why cooking in batches produces superior results.
The cooking time seems brief—that’s intentional. You’re not cooking the corn through since the kernels are tender to begin with. You’re simply creating a crispy coating and lightly toasting the kernels for enhanced flavor.
Seasoning and Flavor Combinations
While salt immediately after frying provides the classic preparation, consider these creative variations to expand your repertoire:
Cajun-spiced version: Add cayenne pepper, smoked paprika, garlic powder, and onion powder to your coating mixture. Finish with a sprinkle of fresh thyme.
Herb-forward approach: Mix dried herbs like oregano, basil, or Italian seasoning into your coating. Toss finished corn with fresh parsley and finely grated Parmesan cheese.
Honey-butter glaze: Melt butter with a touch of honey and drizzle over hot corn. This works beautifully as an accompaniment to ham and cheese sliders recipe for a sweet-savory combination.
Spicy lime finish: Toss finished corn with lime zest, chili powder, and a pinch of salt. This brings brightness and heat that complements seafood dishes.
Garlic parmesan style: Toss hot fried corn with melted butter infused with minced garlic, then coat with grated Parmesan and fresh cracked black pepper.
The beauty of this recipe lies in its adaptability. You control the flavor profile to match your menu and preferences. Start with the classic salt version, then experiment as you become more comfortable with the technique.
Serving Suggestions and Pairings
Fried corn works beautifully across multiple meal contexts. Serve it as a side dish alongside grilled proteins—it pairs exceptionally well with chicken, fish, or beef. The crispy texture provides pleasant contrast to soft or sauce-heavy main courses.
As an appetizer, fried corn impresses guests and can be prepared ahead and reheated briefly in a 350°F oven. Offer it in small cups or on skewers for elegant presentation at cocktail parties. This makes an excellent addition to a menu that includes old fashioned recipe cocktails or gin martini recipe options.
For casual gatherings, serve fried corn in a bowl as a snack, similar to popcorn. People naturally reach for more, making it perfect for game day or movie night. The portion sizes adjust easily—you can prepare as much or as little as needed.
Vegetable-forward meals benefit tremendously from fried corn’s richness and texture. Pair it with grilled vegetables, fresh salads, or grain bowls for balanced nutrition and appealing variety on the plate.
Storage and Make-Ahead Tips
Fried corn is best enjoyed immediately after cooking while the exterior remains maximally crispy. However, you can prepare components ahead to streamline service:
Advance preparation: Cut and dry your corn kernels the morning of serving. Store them in an airtight container in the refrigerator. Prepare your coating mixture and store in an airtight container at room temperature.
Reheating: If you have leftover fried corn, spread it on a baking sheet and warm in a 350°F oven for 5-7 minutes. This restores crispiness better than microwaving, which tends to make it soggy.
Storage duration: Properly stored fried corn keeps for 2-3 days in an airtight container in the refrigerator. The texture gradually softens over time, so consume sooner rather than later for optimal eating experience.
Freezing: You can freeze cooled fried corn for up to one month. Place it in a freezer-safe container with parchment between layers. Reheat directly from frozen in a 375°F oven for 8-10 minutes.
Planning ahead prevents last-minute stress. If you’re serving fried corn for a special occasion alongside dishes like honey deuce recipe or cadillac margarita recipe, you can have the corn prepped and ready to fry in just minutes when guests arrive.
FAQ
Can I use frozen corn for fried corn?
Yes, frozen corn works well for this recipe. Thaw it completely and pat it very dry before coating and frying. The drying step becomes even more important with frozen corn since it typically contains more surface moisture than fresh kernels.
What oil temperature is best for frying corn?
350°F (175°C) is the ideal temperature. This allows the coating to crisp and brown without burning while the corn kernels heat through gently. Use a reliable thermometer to verify temperature before beginning.
Why is my fried corn turning out greasy?
Greasiness typically indicates oil that’s too cool. If the temperature drops below 340°F, the corn absorbs excess oil instead of frying properly. Ensure your thermometer is accurate and allow oil to fully reheat between batches.
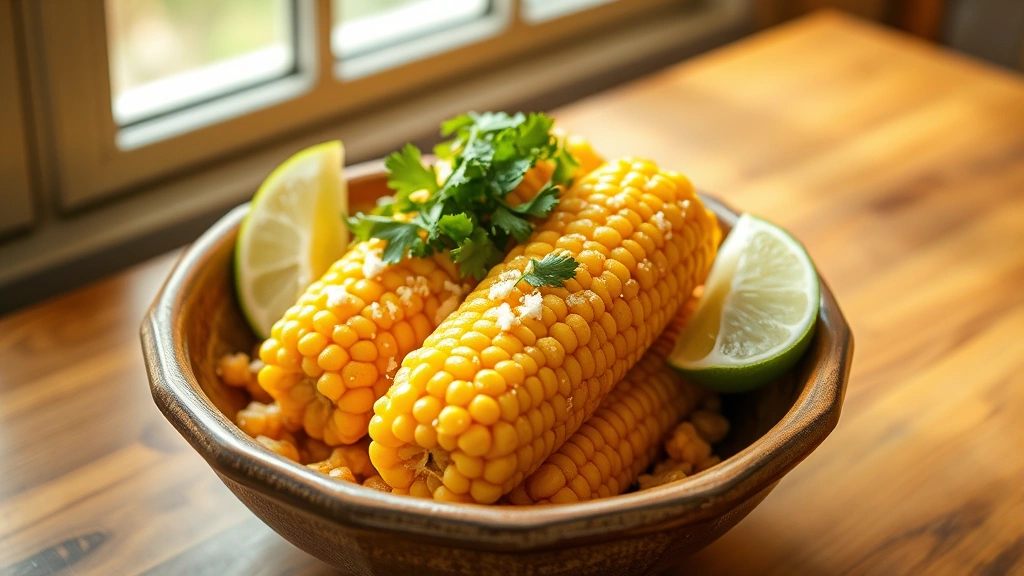
Can I deep fry whole corn ears instead of kernels?
While technically possible, whole ears require significantly longer cooking time and more oil. Frying kernels is more practical and produces better results for home cooks. If you prefer whole ears, blanch them first to partially cook, then fry at 325°F for 8-10 minutes.
What’s the difference between cornstarch and flour in the coating?
Cornstarch creates a lighter, crispier coating that stays crisp longer. Flour produces a more substantial crust with slightly more browning. Many cooks use a combination of both for optimal texture. Experiment to determine your preference.
How can I make fried corn healthier?
Use an air fryer set to 380°F for 12-15 minutes, shaking the basket halfway through. While not traditional deep frying, this method significantly reduces oil content while maintaining crispiness. You’ll need to coat the air fryer basket with cooking spray first.
Can I prepare the coating mixture in advance?
Absolutely. Mix your dry ingredients the day before and store in an airtight container at room temperature. This actually helps flavors meld slightly and makes last-minute preparation more convenient.


