Craft Authentic Ginger Beer: Expert Tips Inside
Ginger beer has experienced a remarkable resurgence in popularity, moving far beyond its historical roots as a fermented beverage to become a beloved mixer and standalone refreshment. Unlike mass-produced versions found on supermarket shelves, homemade ginger beer offers superior flavor complexity, customizable spice levels, and the satisfaction of creating something truly authentic from scratch. This comprehensive guide will walk you through every step of crafting exceptional ginger beer, whether you’re interested in the traditional fermented method or the faster non-alcoholic approach.
The beauty of making ginger beer at home lies in your complete control over ingredients and intensity. You’ll discover how fresh ginger’s natural pungency transforms through proper preparation, fermentation timing, and carbonation techniques. Whether you’re looking to impress guests at your next gathering or simply enjoy a refreshing homemade beverage, understanding the fundamentals of ginger beer production will elevate your home beverage game considerably.
Understanding Ginger Beer Fundamentals
Ginger beer differs fundamentally from ginger ale, despite what many assume. Traditional ginger beer is a fermented beverage that develops its characteristic bite through natural yeast and bacterial cultures, creating a more complex flavor profile with subtle carbonation and depth. Modern ginger beer can be either fermented or non-fermented, with both methods yielding delicious results depending on your preferences and time constraints.
The fermentation process involves creating a “ginger bug”—a starter culture of wild yeast and beneficial bacteria that gradually builds strength over several days. This living culture transforms your ginger-infused sugar syrup into a lightly alcoholic beverage with natural carbonation. The non-fermented method, conversely, relies on added carbonation and immediate consumption, making it ideal for those seeking quicker gratification or avoiding any trace alcohol content.
Understanding the science behind ginger beer helps you troubleshoot issues and achieve consistent results. The fermentation process requires proper temperature control, cleanliness, and patience. Temperature fluctuations, contamination, or inadequate fermentation time can result in flat, overly sweet, or off-flavored batches. Most home brewers find the process straightforward once they grasp these fundamental principles.
Essential Ingredients and Sourcing
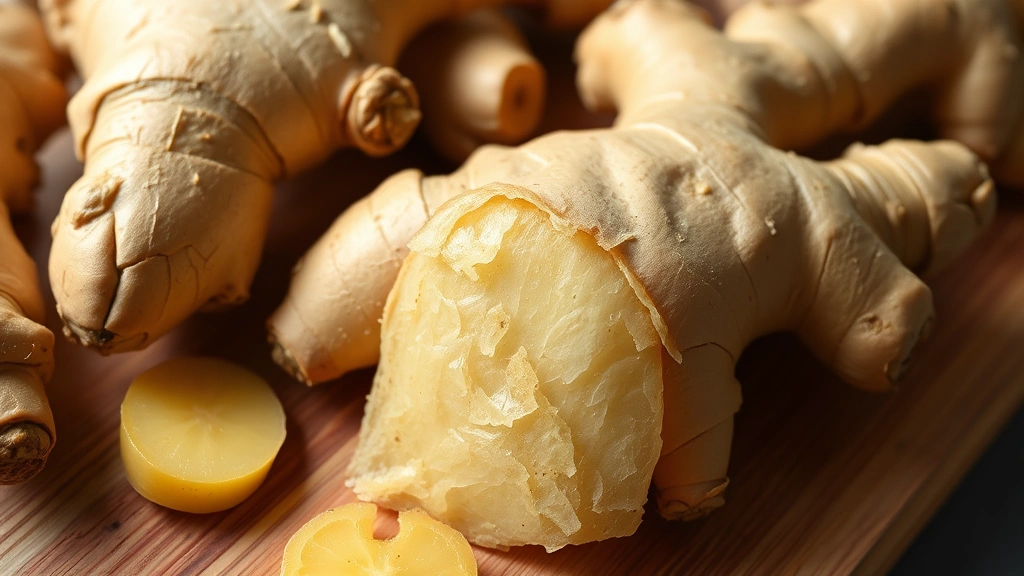
Quality ingredients form the foundation of exceptional ginger beer. Fresh ginger root remains the star ingredient, providing the distinctive spicy kick and aromatic complexity that defines authentic ginger beer. When selecting ginger, choose firm rhizomes with smooth, unblemished skin and a pungent aroma. Older ginger typically contains more fiber and less juice, so younger, thinner-skinned specimens often work better for beverage making.
Beyond ginger, you’ll need high-quality cane sugar or other fermentable sugars. Avoid refined white sugar when possible, as organic cane sugar or coconut sugar contributes subtle flavor notes. For the fermentation method, you’ll need water—preferably filtered to remove chlorine, which can inhibit fermentation. Lemon or lime juice adds brightness and helps preserve the final product. Optional ingredients include fresh turmeric, cardamom, cloves, and cayenne pepper for depth and complexity.
For fermented ginger beer, you’ll need to establish a ginger bug starter culture using only ginger, sugar, and water. Some brewers add whey or other probiotic sources, though this isn’t strictly necessary if your water and ingredients are reasonably clean. Consider sourcing ingredients from farmers’ markets or specialty suppliers for optimal freshness and flavor potential.
Preparing Your Ginger Base
Proper ginger preparation significantly impacts your final product’s quality. Begin by scrubbing fresh ginger under cold running water to remove any soil. Many recipes recommend peeling ginger, but the skin contains valuable compounds and can be left intact if you prefer. For a cleaner final beverage, peeling is advisable. Use a sharp vegetable peeler or the edge of a spoon to remove the thin outer layer.
Once peeled, you have several preparation options. Grating ginger finely increases surface area for extraction but can result in pulp in your final beverage. Slicing ginger into thin coins provides easier straining while still allowing good flavor extraction. For maximum clarity, some brewers use a microplane to create fine shreds that can be easily filtered out. A typical batch uses 2-3 ounces of fresh ginger per quart of finished beverage, though this varies based on desired intensity.
To create your initial infusion, combine prepared ginger with hot (not boiling) water. Boiling water can diminish ginger’s fresh, bright qualities and destroy some beneficial compounds. Water heated to approximately 160-180°F works optimally. Steep the ginger for 20-30 minutes, allowing the flavors to fully extract. Strain through fine mesh or cheesecloth, pressing gently to extract maximum liquid without forcing through fine particles.
The Fermentation Process Explained
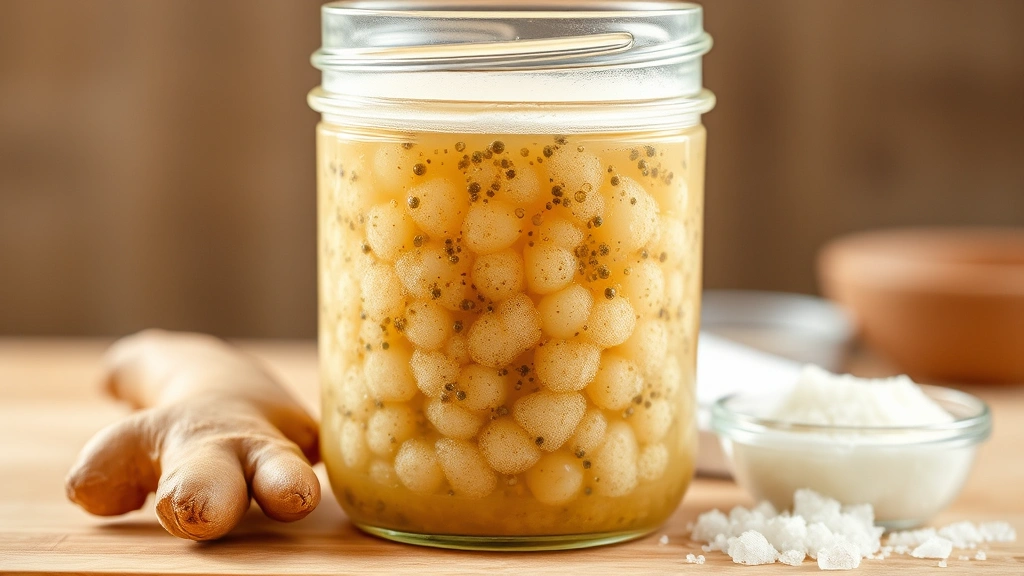
Creating a ginger bug starter is the first critical step in fermented ginger beer production. This living culture of wild yeast and Lactobacillus bacteria will eventually ferment your main batch. To begin, combine 2 tablespoons of grated or finely chopped fresh ginger, 2 tablespoons of organic cane sugar, and 1/4 cup of filtered water in a clean jar. Stir well and cover loosely with a cloth or coffee filter, securing with a rubber band to allow airflow while preventing contamination.
Each day for 5-7 days, add another 2 tablespoons each of ginger and sugar plus 1/4 cup water. You should notice bubbling activity beginning around day 3-4, indicating active fermentation. The ginger bug is ready when it’s bubbly and smells pleasantly sour and yeasty—not vinegary or unpleasant. This process teaches patience but rewards you with a reliable starter culture.
Once your ginger bug is active, prepare your main ginger beer batch. Combine your prepared ginger infusion with dissolved sugar (typically 1 cup of sugar per quart of ginger water), lemon or lime juice, and any desired spices. Cool this mixture to room temperature before adding your ginger bug starter. The fermentation temperature should ideally remain between 65-75°F for optimal results. Bottle in clean, airtight containers and allow to ferment for 2-5 days, tasting daily to achieve your preferred flavor balance.
During fermentation, carbon dioxide builds naturally within sealed bottles, creating carbonation. This is why proper bottling is crucial—flip-top bottles or sturdy glass bottles with caps work best. Never use bottles that can’t withstand pressure, as they may explode. Some brewers perform a “burp” daily, cracking the cap slightly to release excess pressure before resealing. This prevents over-carbonation while maintaining proper fizz levels.
Non-Fermented Quick Method
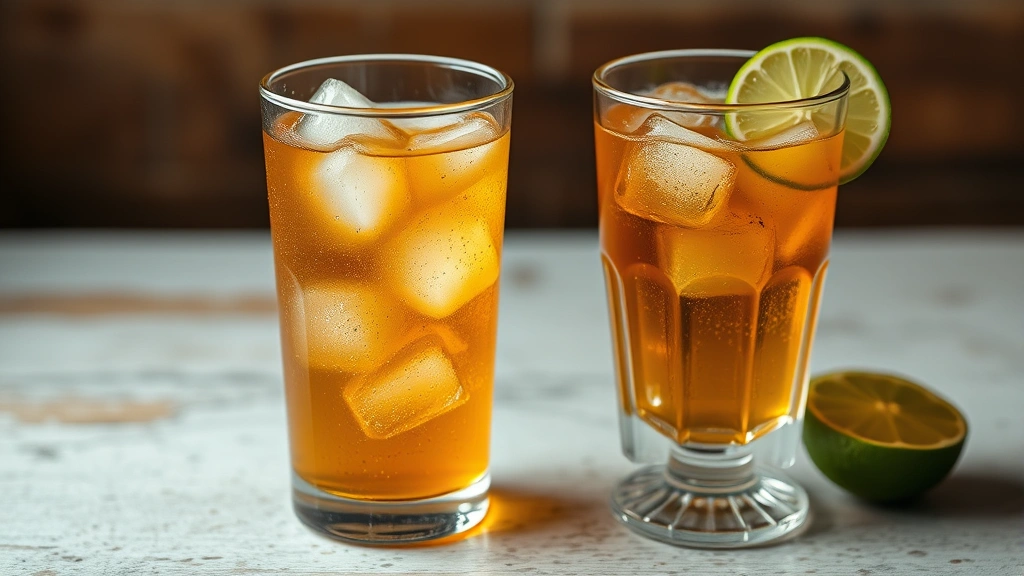
If fermentation seems intimidating or you need ginger beer quickly, the non-fermented method delivers excellent results within hours. This approach uses carbonated water or soda siphons to create fizz, bypassing the fermentation step entirely. While lacking the subtle complexity that fermentation provides, this method produces refreshing ginger beer suitable for summer entertaining.
Prepare your ginger infusion as previously described, then combine with dissolved sugar and lemon juice, cooling completely. For every 3 parts ginger syrup, add 1 part carbonated water, adjusting the ratio to your preferred strength. Alternatively, use a soda siphon with CO2 cartridges to carbonate your chilled ginger syrup directly. This method allows immediate consumption and eliminates concerns about fermentation variables.
Some home cooks create concentrated ginger syrups that can be stored for weeks, then carbonated fresh as needed. This approach offers maximum flexibility—you can enjoy ginger beer whenever desired without maintaining active cultures. The non-fermented method also works beautifully for those avoiding any alcohol content, as fermentation can produce trace amounts depending on starter activity and fermentation duration.
Carbonation Techniques
Achieving proper carbonation is crucial for authentic ginger beer texture and mouthfeel. Natural carbonation from fermentation creates fine, persistent bubbles that feel elegant on the palate. If using the fermentation method, monitor carbonation by opening a bottle after 2-3 days and assessing fizz levels. Fermentation continues until you reach your preferred carbonation level, typically 2-4 volumes of CO2 (meaning the liquid contains that many times its volume in carbon dioxide).
For non-fermented methods, a soda siphon provides precise control over carbonation levels. Fill your chilled ginger syrup into the siphon, charge with one or two CO2 cartridges depending on desired fizz intensity, and shake well before dispensing. This method eliminates guesswork and allows consistent results batch after batch. The disadvantage is the ongoing cost of replacement cartridges.
Bottle conditioning offers another carbonation approach, particularly when combining fermented and non-fermented elements. After your initial fermentation, you can add a small amount of sugar and re-bottle, creating secondary fermentation that produces additional carbonation. This technique requires careful attention to prevent over-carbonation but rewards you with naturally fizzy ginger beer that continues developing complexity.
Flavor Variations and Customization
One of homemade ginger beer’s greatest advantages is customization potential. Beyond basic ginger, sugar, and lemon, countless flavor combinations enhance your beverage. Fresh turmeric adds earthiness and gorgeous golden color, while cardamom provides warm, slightly floral notes. A pinch of cayenne pepper intensifies the heat, creating a spicy kick that pairs wonderfully with aged rum in classic cocktails.
Citrus variations expand possibilities significantly. While lemon is traditional, lime offers different brightness, and orange provides subtle sweetness and complexity. Some brewers incorporate fresh mint, cinnamon, or black pepper for additional depth. When experimenting, start with small quantities of new ingredients—you can always add more, but removing flavors proves impossible.
Creating quick flavor additions allows you to customize individual servings without changing your base recipe. Prepare a concentrated ginger beer, then add complementary flavors—fresh ginger slices, spice infusions, or herbal elements—when serving. This approach maximizes flexibility and prevents failed batches from over-experimentation.
Storage and Shelf Life
Proper storage ensures your ginger beer remains fresh and carbonated for extended periods. Fermented ginger beer keeps longer than non-fermented versions due to the acidic environment created during fermentation. Store bottles in cool, dark conditions—a basement, pantry, or refrigerator works well. Temperature stability matters more than absolute coldness; fluctuating temperatures can cause over-carbonation or flat results.
Fermented ginger beer typically remains fresh for 2-4 weeks when properly stored, with flavor actually improving slightly over the first week as fermentation completes. Non-carbonated ginger syrup (before carbonation) stores for several months in the refrigerator, making it ideal for preparing ahead. Once carbonated with soda siphon or bottle-conditioned, consume within 2-3 weeks for optimal fizz and flavor.
Check bottles regularly for any signs of contamination—off-odors, mold, or unusual discoloration indicate spoilage. The acidic nature of ginger beer makes contamination relatively rare, but vigilance prevents problems. Some brewers pasteurize their finished ginger beer by heating bottles to 170°F for 10 minutes, extending shelf life significantly at the expense of some subtle flavor complexity.
If your ginger beer develops excessive carbonation or pressure, open bottles carefully in a sink or over a bowl to prevent explosive overflow. This indicates continued fermentation—either enjoy it as-is or refrigerate to slow yeast activity. Understanding these storage nuances ensures you always have fresh, delicious ginger beer available.
FAQ
What’s the difference between ginger beer and ginger ale?
Ginger beer traditionally refers to fermented beverages with a spicier, more complex flavor profile and natural carbonation from fermentation. Ginger ale is typically non-fermented, carbonated with added CO2, and often sweeter with less pronounced ginger character. Homemade ginger beer usually falls into the traditional fermented category, offering superior flavor complexity compared to commercial ginger ales.
Can I make ginger beer without fermentation?
Absolutely. The non-fermented quick method produces excellent ginger beer using carbonated water or soda siphons. While you’ll miss the subtle complexity that fermentation provides, this approach is faster, requires less equipment, and eliminates fermentation variables. Many people prefer the simplicity of non-fermented ginger beer, particularly for casual entertaining.
How long does fermentation take?
Initial ginger bug creation requires 5-7 days of daily feeding. Once established, your main ginger beer batch ferments for 2-5 days depending on temperature and desired carbonation levels. Warmer temperatures accelerate fermentation, while cooler conditions slow it. Most brewers achieve satisfactory results within 3-4 days of fermenting their main batch.
What temperature is best for fermentation?
Ideal fermentation temperature ranges from 65-75°F (18-24°C). Temperatures below 60°F slow fermentation significantly, while temperatures above 80°F can create off-flavors or encourage undesirable microbial growth. Consistent temperature matters more than achieving perfect numbers—fluctuating temperatures create inconsistent results.
Can I use ground ginger instead of fresh?
Ground ginger works in a pinch but produces inferior results compared to fresh ginger. Fresh ginger offers superior flavor, aroma, and fermentation potential. If using ground ginger, reduce quantities significantly—typically 1 tablespoon ground ginger per quart of water, though results won’t match fresh ginger’s complexity.
How do I know my ginger bug is ready?
An active ginger bug displays obvious bubbling when stirred, releases a pleasant sour-yeasty aroma, and shows clear signs of fermentation activity. It should smell appetizing, not vinegary or off. The mixture may separate slightly, with sediment at the bottom—this is normal. Once these signs appear consistently, your ginger bug is ready to use.
Is homemade ginger beer alcoholic?
Fermented ginger beer contains trace amounts of alcohol—typically 0.5-1.5% ABV depending on fermentation duration and conditions. This is generally considered non-alcoholic for practical purposes, though those strictly avoiding alcohol should use the non-fermented method instead. The alcohol content is similar to kombucha or other naturally fermented beverages.
What if my ginger beer tastes too sweet?
Reduce sugar in your next batch or extend fermentation time, allowing yeast to consume more sugar. You can also increase ginger intensity to balance sweetness. For existing batches, dilute with carbonated water or serve over ice with additional lemon juice. Some people prefer naturally sweet ginger beer, so taste preferences vary considerably.
Can I reuse my ginger bug?
Yes, your ginger bug can be reused indefinitely with proper care. After using it to ferment a batch, feed it again with daily additions of ginger, sugar, and water for several days before using for the next batch. Store it at room temperature between uses, keeping it active. Many brewers maintain their ginger bugs for years with consistent care.


