
Fluffy Gluten-Free Bread? Baker’s Secret to Perfect Loaves Every Time
Baking gluten-free bread has long been considered one of the most challenging tasks in the kitchen. Without gluten’s natural elasticity and structure, many home bakers struggle with dense, crumbly loaves that crumble at the slightest touch. But here’s the baker’s secret that changes everything: understanding the science behind gluten substitutes and mastering the right combination of ingredients and techniques transforms your gluten-free bread game completely.
The difference between a disappointing brick and a pillowy, delicious loaf comes down to three critical factors: the right flour blend, proper hydration, and understanding how binding agents work. Whether you’re baking for dietary restrictions, personal preference, or family members with celiac disease, this comprehensive guide reveals exactly what professional bakers know about creating consistently fluffy gluten-free bread that rivals traditional recipes.
Understanding Gluten and Why It Matters
Gluten is a naturally occurring protein found in wheat, barley, and rye that creates an elastic network throughout dough. This network traps gas bubbles during fermentation and baking, creating the light, airy crumb structure we associate with excellent bread. When you remove gluten, you remove the primary structural component that gives bread its texture and rise.
This is why gluten-free bread often turns out dense or gummy. Without gluten’s scaffolding, the dough collapses during baking, and moisture distributes unevenly. The baker’s secret to success involves replacing gluten’s functionality with a strategic combination of alternative flours, starches, and binding agents. Understanding this fundamental principle guides every decision you’ll make in your gluten-free baking journey.
Professional bakers recognize that gluten-free baking isn’t about finding a one-to-one wheat flour replacement. Instead, it’s about building a support system using multiple ingredients that work synergistically. This approach requires precision, but once you master it, you’ll produce bread that even non-gluten-free eaters will praise.
The Perfect Flour Blend Formula
The foundation of fluffy gluten-free bread starts with choosing the right flour blend. Many home bakers make the mistake of using a single gluten-free flour, which rarely produces optimal results. Instead, professional bakers layer different flours and starches to achieve the ideal texture and flavor profile.
The winning combination includes:
- Brown rice flour – provides structure and a slightly nutty flavor
- Tapioca starch – creates lightness and helps trap moisture
- Potato starch – adds tenderness and prevents excessive browning
- Sorghum flour or millet flour – contributes fiber and improves texture
- Cornstarch – enhances crumb structure and creates a lighter crumb
A reliable base formula uses 40% brown rice flour, 20% tapioca starch, 15% potato starch, 15% sorghum flour, and 10% cornstarch. This blend balances structure, lightness, and flavor. However, commercial King Arthur Baking Company’s gluten-free flour blend offers a convenient pre-mixed option that performs exceptionally well if you prefer not to blend your own.
The key insight many bakers miss is that starches aren’t just fillers—they’re essential functional ingredients. Tapioca starch, for example, creates a tender crumb and helps bread rise more efficiently. Potato starch prevents the bread from becoming overly dense by creating a more open crumb structure. When you understand each ingredient’s role, you can adjust ratios based on your preferences and available ingredients.
Binding Agents That Create Structure
Since gluten provides elasticity and structure, you need binding agents to replace these functions. The most effective binders for gluten-free bread include xanthan gum, psyllium husk, and eggs. Each works differently, and understanding their properties helps you choose the best option for your recipe.
Xanthan gum is the most commonly used binding agent in gluten-free baking. Just 1 teaspoon per cup of flour creates viscosity and helps trap moisture. Xanthan gum mimics gluten’s elasticity by thickening the dough and allowing it to stretch slightly without tearing. However, too much xanthan gum (over 1.5 teaspoons per cup) creates a gummy, unpleasant texture.
Psyllium husk powder offers a natural alternative that many artisanal bakers prefer. This soluble fiber absorbs water, creating a dough with excellent hydration properties. Psyllium husk also improves the bread’s ability to hold its shape and creates a more authentic bread texture. Use about 1-2 tablespoons per loaf, and increase hydration slightly since psyllium absorbs significant moisture.
Eggs contribute structure through their protein content and act as natural binders. The yolk’s fat content enriches the dough, while the white’s protein provides additional structure. For enriched gluten-free breads, eggs are invaluable, though they’re less suitable for vegan applications.
Many professional bakers combine binding agents for optimal results. A mixture of xanthan gum (for elasticity) and psyllium husk (for moisture retention) creates superior results compared to using either alone. This layered approach to binding mirrors how nature works—complexity creates resilience.
Hydration and Moisture Balance
Hydration—the ratio of liquid to flour—is where gluten-free baking diverges most dramatically from traditional bread baking. Gluten-free doughs require significantly more water because starches absorb moisture differently than gluten proteins. However, excessive hydration creates sticky, unmanageable doughs that don’t rise properly.
The ideal hydration for gluten-free bread ranges from 85-95%, compared to 60-70% for traditional bread. This higher hydration means your dough will feel wetter and stickier, which actually indicates you’re on the right track. The wet dough allows starches to fully hydrate and bindings agents to work effectively, creating a lighter crumb structure.
Calculating proper hydration: If your flour blend totals 500 grams, aim for 425-475 grams of liquid (water plus other liquids like eggs, milk, or yogurt). Start with 425 grams and increase gradually if the dough seems too stiff. Remember that dough will continue absorbing moisture as it rests, so slightly wetter dough at mixing time is preferable to dough that becomes too stiff during fermentation.
Temperature also affects hydration. Warmer environments increase fermentation speed, which means dough absorbs moisture faster. Cold kitchens require slightly longer fermentation times and may benefit from marginally increased hydration. Experienced bakers adjust hydration based on kitchen conditions, humidity levels, and even the specific brand of flour used.
Step-by-Step Baking Process
Mastering the baking process transforms inconsistent results into reliable success. Professional bakers follow precise steps that account for gluten-free dough’s unique characteristics. This isn’t just about mixing ingredients—it’s about understanding timing, temperature, and technique.
Step 1: Bloom Your Flours
Before mixing, combine all dry ingredients (flours, starches, xanthan gum, salt, and yeast) and let them rest for 5-10 minutes. This “blooming” process allows starches to absorb some moisture from the air and distributes yeast evenly throughout the flour blend. This simple step improves fermentation consistency and rise quality.
Step 2: Combine Wet and Dry Ingredients
Add warm liquid (around 110°F for instant yeast) to the dry mixture. Use a stand mixer with the paddle attachment rather than a dough hook—gluten-free dough needs mixing, not kneading. Mix on medium speed for 2-3 minutes until the dough reaches a thick batter consistency. This is thicker than traditional bread dough but thinner than cake batter.
Step 3: First Rise (Bulk Fermentation)
Allow the dough to rise in a warm place (75-80°F) for 1-2 hours until it increases by about 50% in volume. Gluten-free dough rises more slowly than traditional dough because it lacks gluten’s elastic support. Don’t expect it to double in size—50% rise is actually ideal for gluten-free bread. Overproofing causes the dough to collapse under its own weight.
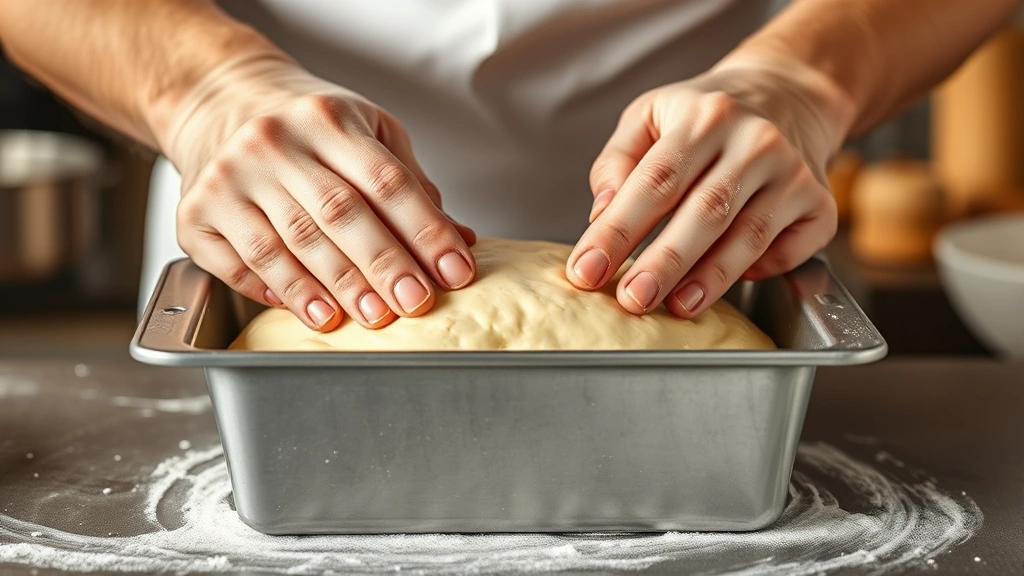
Step 4: Prepare Your Pan
While dough rises, prepare a loaf pan by greasing it thoroughly or lining it with parchment paper. Gluten-free dough sticks more readily than traditional dough, so thorough preparation prevents frustrating removal issues.
Step 5: Shape and Second Rise
Gently transfer the dough into the prepared pan. Smooth the top with wet fingers or a spatula. Cover loosely with plastic wrap and allow a second rise for 45-60 minutes at room temperature. The dough should rise slightly above the pan’s rim but not dramatically.
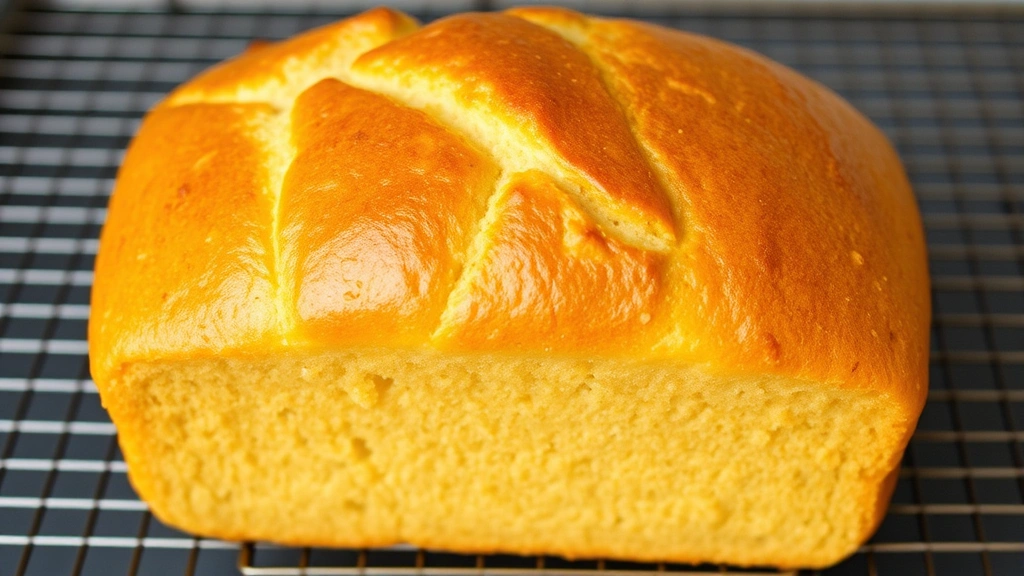
Step 6: Score and Bake
Preheat your oven to 400°F (200°C). Optionally score the top of the loaf with a sharp knife for a professional appearance. Bake for 35-45 minutes until the internal temperature reaches 205-210°F (96-99°C). The crust should be golden brown, and the loaf should sound hollow when tapped on the bottom.
Step 7: Cool Completely
Remove the bread from the pan and cool on a wire rack for at least 2 hours before slicing. This cooling period allows the interior crumb to set properly. Slicing warm bread results in a gummy texture, even if the bread is perfectly baked. Patience at this stage rewards you with superior results.
Troubleshooting Common Problems
Even with perfect technique, bakers encounter challenges. Understanding why problems occur helps you adjust and improve future batches. These solutions come from professional bakers who’ve encountered and solved every gluten-free baking obstacle.
Dense, Heavy Crumb
Causes include insufficient hydration, under-fermentation, or too much xanthan gum. Increase hydration by 25-50 grams of liquid, extend bulk fermentation by 20-30 minutes, and reduce xanthan gum to exactly 1 teaspoon per cup of flour. Also ensure your leavening agents (yeast and baking powder) are fresh.
Gummy Interior
This indicates either under-baking or slicing while the loaf is still warm. Increase oven temperature by 25°F and bake until the internal temperature reaches 210°F. Always cool completely before slicing—this cannot be rushed without sacrificing texture.
Bread Collapses After Baking
Over-fermentation causes this problem. Reduce bulk fermentation time by 15-20 minutes and monitor dough volume carefully. The dough should rise only 50%, not double. Also ensure you’re not over-mixing, which can incorporate too much air that escapes during baking.
Dry, Crumbly Texture
Insufficient hydration or excessive baking time causes dryness. Increase hydration by 50 grams and reduce baking time by 5-10 minutes. Additionally, psyllium husk powder helps retain moisture—add 1-2 tablespoons per loaf.
Uneven Crumb Structure
Large holes indicate over-proofing or insufficient degassing before baking. Gently press the dough down after the second rise to release excess gas, and reduce second rise time by 10-15 minutes. Uneven browning suggests oven temperature inconsistency—use an oven thermometer to verify actual temperature.
Storage and Make-Ahead Tips
Proper storage extends your gluten-free bread’s shelf life and maintains quality. Unlike traditional bread, gluten-free bread often becomes dry more quickly due to its composition.
Room Temperature Storage
Store cooled bread in an airtight container or bag at room temperature for 2-3 days. The airtight seal prevents moisture loss while preventing mold growth. Avoid storing bread in the refrigerator, as cold temperatures accelerate staling in gluten-free bread.
Freezing for Long-Term Storage
Slice cooled bread, wrap slices individually in plastic wrap, and place them in a freezer bag. Frozen bread maintains quality for up to 3 months. Toast frozen slices directly from the freezer for convenient breakfasts. This approach lets you enjoy fresh-tasting bread anytime without daily baking.
Make-Ahead Dough
Mix dough, cover tightly, and refrigerate for up to 24 hours before the first rise. Cold fermentation develops flavor and allows you to bake fresh bread on your schedule. Remove dough from refrigeration, allow it to reach room temperature (about 30 minutes), then proceed with bulk fermentation as normal.
You can also prepare dough, complete the first rise, shape it, and freeze the shaped dough. Thaw at room temperature for 2-3 hours before the second rise and baking. This flexibility makes gluten-free bread baking fit seamlessly into busy schedules.
Understanding these storage techniques means you can pair your gluten-free bread with other favorite recipes. Consider serving it alongside brown gravy recipe for a comforting meal, or use it as the foundation for Cracker Barrel hashbrown casserole recipe breakfasts. Quality bread elevates every meal.
For complementary sides and main dishes, explore chicken and potatoes recipe options or instant pot chicken thigh recipes that pair beautifully with fresh bread. You might also enjoy candied yams recipe as a sweet side, or experiment with Bisquick pancake recipe variations using your gluten-free flour blend.
FAQ
What’s the difference between xanthan gum and psyllium husk?
Xanthan gum creates elasticity similar to gluten and works quickly, making it ideal for everyday baking. Psyllium husk absorbs moisture and creates a more authentic bread texture with better hydration properties. Many bakers use both together for optimal results—xanthan gum for structure and psyllium husk for moisture retention.
Can I use regular all-purpose flour in a gluten-free recipe?
No, regular all-purpose flour contains gluten and won’t work for gluten-free baking. Use certified gluten-free flour blends or create your own using the formula provided in this guide. Even trace gluten amounts can affect people with celiac disease or severe sensitivities.
Why does my gluten-free bread have a yeasty smell?
Strong yeasty aromas indicate over-fermentation. Reduce fermentation time by 15-20 minutes and ensure your kitchen temperature isn’t above 75°F. Yeast produces more aromatic compounds with extended fermentation, so shorter fermentation times reduce this effect.
How do I know when gluten-free bread is fully baked?
Use an instant-read thermometer inserted into the center of the loaf. Gluten-free bread is done when the internal temperature reaches 205-210°F. This temperature ensures the interior is fully cooked without over-baking the crust.
Is gluten-free bread healthier than regular bread?
Gluten-free bread isn’t inherently healthier—it depends on ingredients used. Many commercial gluten-free breads contain added sugars and sodium. Homemade versions using whole grain gluten-free flours and minimal additives offer nutritional benefits. Focus on ingredient quality rather than the gluten-free label.
Can I make gluten-free sourdough bread?
Yes, though it requires patience and technique adjustments. Gluten-free sourdough starters ferment more slowly and need longer fermentation times. Use a blend of gluten-free flours with adequate binding agents, and expect the process to take 2-3 times longer than traditional sourdough.
What’s the best gluten-free flour brand for bread?
Professional bakers recommend Bob’s Red Mill 1-to-1 Baking Flour for convenience or King Arthur Gluten-Free Flour for superior performance. However, custom blends using individual flours and starches often produce superior results for serious bakers.


