How to Make Ham Bone Soup: Grandma’s Recipe
There’s something deeply comforting about a steaming bowl of ham bone soup that takes you straight back to your grandmother’s kitchen. This timeless recipe transforms a humble ham bone—often destined for the trash—into a rich, nourishing broth that forms the foundation of one of the most satisfying soups you’ll ever taste. What makes this dish special isn’t just the depth of flavor, but the wisdom behind it: using every part of the ham to create something greater than the sum of its parts.
Grandma’s ham bone soup recipe is a testament to resourceful cooking and generations of culinary knowledge passed down through families. The magic happens when you slowly simmer that bone with aromatic vegetables, creating a golden broth infused with natural gelatin and collagen. This isn’t just comfort food—it’s liquid gold for your body, packed with minerals and nutrients that store-bought broths simply cannot replicate. Whether you’re recovering from illness, seeking warming comfort on a cold day, or looking to minimize food waste through smart cooking practices, this recipe delivers on every level.
Essential Ingredients for Authentic Ham Bone Soup
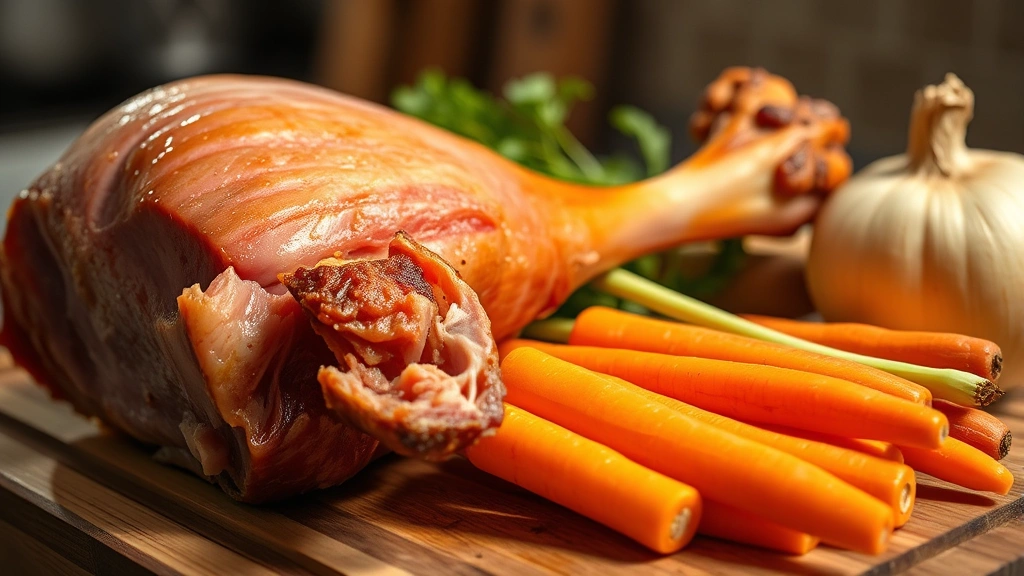
The beauty of ham bone soup lies in its simplicity and the quality of its core ingredients. At its heart, you need one substantial ham bone—preferably from a bone-in ham that still has some meat clinging to it. This is where the flavor comes from, and why it’s worth saving that bone instead of discarding it. The bone itself contributes gelatin and minerals, while any remaining meat adds body and richness to your broth.
Beyond the star ingredient, you’ll need aromatic vegetables that form the traditional mirepoix base: onions, celery, and carrots. These three vegetables are the foundation of countless soups and stocks across culinary traditions worldwide. Choose fresh, firm vegetables without blemishes. One large onion (roughly 1 pound), three to four celery stalks, and four to five medium carrots create the perfect ratio for a gallon of water.
Water is your next essential—about 8 to 10 cups for a standard pot. Some cooks prefer using chicken broth instead of water for added depth, though traditionalists stick with water to let the ham bone’s natural flavor shine. Add bay leaves (2-3), fresh thyme sprigs (a small handful), and black peppercorns (about a teaspoon). These aromatics infuse the broth without overpowering it.
For the vegetable additions that transform broth into soup, gather diced potatoes (about 3 cups), dried split peas (1 to 1.5 cups), and fresh or frozen corn (1 cup). The split peas are crucial—they break down slightly during cooking, creating a subtle creaminess without any actual cream. If you want to create rice bowl recipes as a serving option, consider adding diced ham meat back into the finished soup.
Preparing Your Ham Bone and Vegetables
Proper preparation sets the stage for exceptional flavor. Start by examining your ham bone carefully. If it’s fresh from a recently carved ham, it may have a thin layer of fat on the outside. You can leave this on for extra richness, or trim it back if you prefer a lighter soup. Rinse the bone under cold running water, scrubbing gently to remove any debris or seasoning residue from the original ham preparation.
For your vegetables, proper cutting technique matters more than you might think. Cut the onion into quarters—no need to peel it completely; leaving the papery skin on adds color and minerals to your broth. Slice the celery into 2-inch pieces, keeping the leafy tops if they’re fresh and green; these add wonderful herbaceous notes. Cut carrots into 2-inch rounds. This uniform sizing ensures even cooking and easier straining later.
If you’re following food waste reduction tips, save your vegetable scraps. Carrot tops, celery leaves, and onion skins all contribute valuable nutrients and flavor to the broth. However, avoid using any moldy or damaged portions.
Rinse your split peas under cold water, checking for any small stones or debris. This step prevents unpleasant surprises when eating. If you have time, soak the peas for 30 minutes to an hour in cold water—this reduces cooking time and can minimize digestive discomfort some people experience with legumes.
The Slow Simmering Process
This is where patience becomes your greatest ingredient. Place your ham bone in a large stockpot or Dutch oven and cover with cold water. The reason for starting with cold water is that it allows proteins and impurities to gradually release and rise to the surface, where you can skim them away. Bring the water slowly to a gentle boil over medium-high heat—this should take about 15-20 minutes.
Once boiling, you’ll notice a gray foam rising to the surface. This is denatured protein and impurities. Using a fine mesh skimmer or slotted spoon, remove this foam for about 5 minutes. This step creates a clearer, cleaner-tasting broth. Don’t skip it, even though it seems tedious. This technique is taught at Auguste Escoffier School of Culinary Arts as a fundamental skill for stock-making.
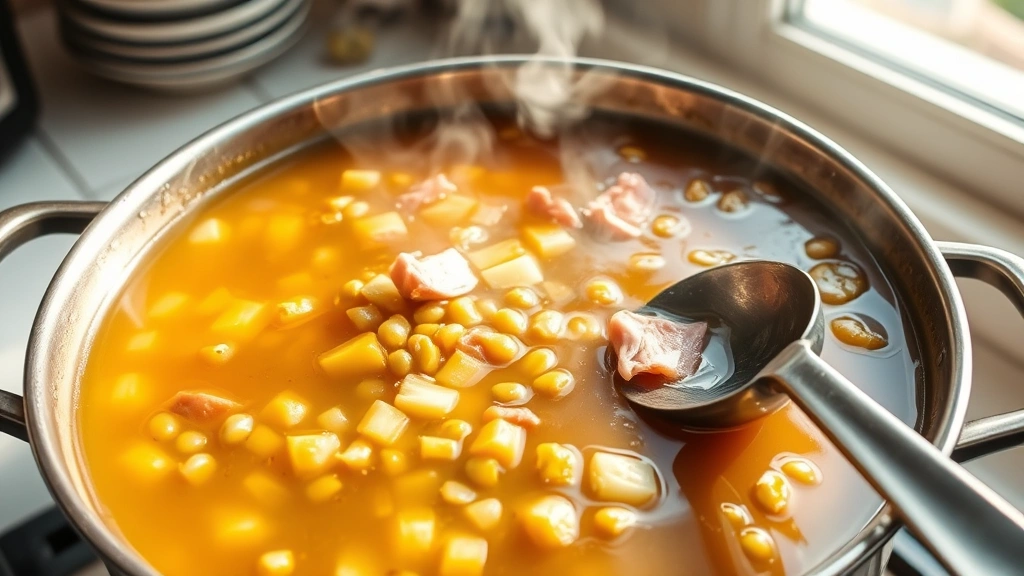
Add your prepared aromatics—the quartered onion, celery pieces, carrot rounds, bay leaves, thyme sprigs, and peppercorns. Reduce heat to low, establishing a gentle simmer where just a few bubbles break the surface occasionally. Cover partially and let this simmer for 3 to 4 hours. The longer you simmer, the more developed your broth becomes, extracting maximum flavor and nutrition from the bone.
During the last hour of simmering, add your rinsed split peas. They need about 1 hour of cooking to break down properly and thicken the broth. About 30 minutes before you’re ready to finish, add your diced potatoes so they cook through but don’t become mushy.
Building Layers of Flavor
After the initial 3-4 hour simmer, strain your broth through a fine mesh sieve into a clean pot or large bowl. The solids—the ham bone, vegetables, and aromatics—have given everything they have to offer. Discard the vegetables and aromatics, but set the ham bone aside to cool slightly.
Once the bone is cool enough to handle, pick off any remaining meat and set it aside. This meat is delicious and adds substance to your final soup. Discard the bone itself. If you want to incorporate meat-forward variations, consider how you might adapt this technique to ground lamb recipes or shredded chicken recipes in the future.
Return your strained broth to the pot and bring it back to a simmer. Now begins the layering of flavor that transforms simple broth into memorable soup. Add the picked ham meat back to the pot. Taste the broth and season with salt and freshly ground black pepper. Remember that ham is already salty, so taste before adding more salt—you may need less than you expect.
At this point, add your corn (whether fresh, frozen, or canned), along with any additional vegetables you’d like. Some cooks add diced tomatoes for brightness, fresh spinach for earthiness, or kale for nutritional boost. If you prefer a creamier soup reminiscent of traditional preparations, stir in a splash of heavy cream or a splash of evaporated milk, though this is entirely optional and not part of Grandma’s original recipe.
Consider adding depth with a splash of apple cider vinegar or a squeeze of fresh lemon juice—just a teaspoon or two to brighten all the flavors without making the soup taste sour. Some families add a pinch of nutmeg or a touch of smoked paprika for subtle complexity. These additions should enhance, not dominate, the natural ham flavor.
Finishing Touches and Serving Suggestions
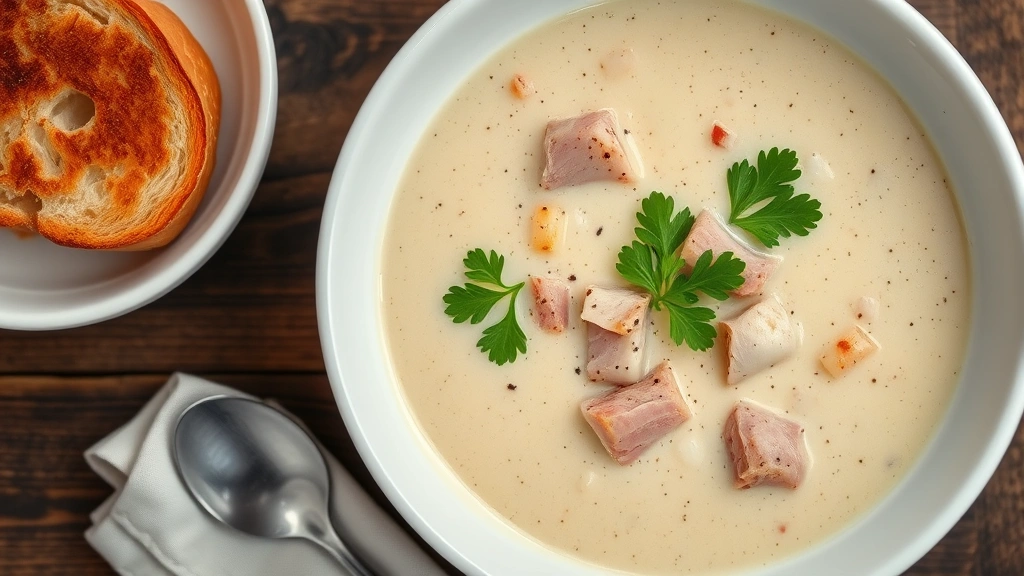
A proper finishing of ham bone soup involves fresh herbs added at the very end. Chop fresh parsley, dill, or chives and sprinkle over each bowl just before serving. These fresh additions provide color, aroma, and a brightness that contrasts beautifully with the deep, rich broth.
Serve your soup piping hot in warm bowls. Pair it with crusty bread for dunking, oyster crackers for crunch, or cornbread for a Southern-style accompaniment. A simple green salad with chicken seasoning recipe applied to croutons provides a nice textural contrast.
For a heartier meal, serve your ham bone soup alongside roasted veggies recipe on the side, or top each bowl with a dollop of sour cream and fresh chives. Some families enjoy adding a poached egg to their bowl, creating an elegant presentation that elevates the humble soup to something special.
The aesthetic presentation matters too. Ladle the soup into bowls with care, ensuring each serving gets a good distribution of vegetables, meat, and broth. Sprinkle herbs over the top, add a crack of fresh black pepper, and perhaps a small pat of butter floating on the surface for richness and shine.
Storage and Make-Ahead Tips
One of the greatest advantages of ham bone soup is that it actually improves with time. The flavors continue to develop and meld as it sits, making it an ideal make-ahead dish. Let the soup cool to room temperature before refrigerating—this usually takes about an hour. Store in an airtight container in the refrigerator for up to 4 days.
For longer storage, freeze your soup in portions. Leave about half an inch of headspace in freezer containers to allow for expansion. Properly stored frozen soup keeps for up to 3 months. To reheat, thaw overnight in the refrigerator, then warm gently on the stovetop over medium heat, stirring occasionally. You can also reheat directly from frozen on low heat, though this takes longer.
Pro tip: freeze soup in ice cube trays for convenient portions. Once frozen solid, pop the cubes into freezer bags. These small portions are perfect for individual servings or for adding to other dishes. A cube or two of ham bone soup broth elevates rice dishes, adds depth to gravies, or enriches other soups.
If your soup separates slightly during storage with a layer of fat on top, don’t discard it. This is liquid gold—it protects the soup below from oxidation and adds wonderful flavor. Simply stir it back in when reheating, or skim it off if you prefer a lighter version.
FAQ
Can I make ham bone soup in a slow cooker or Instant Pot?
Absolutely. For a slow cooker, add all ingredients together and cook on low for 8-10 hours. For an Instant Pot, use the high pressure setting for 45 minutes, then allow natural pressure release. Both methods produce excellent results, though the traditional stovetop method allows better control over the skimming process.
What if my ham bone has very little meat on it?
The bone itself still provides tremendous flavor through gelatin and minerals. If you’re concerned about meat content, add diced ham from another source, or boost the soup with shredded chicken or additional vegetables. The broth quality won’t suffer.
Can I use ham hocks instead of ham bones?
Yes, ham hocks work beautifully and often have more meat attached. Simmer for 4-5 hours since hocks are denser than bones. The technique remains exactly the same.
How do I make this soup vegetarian?
This wouldn’t be traditional ham bone soup, but you could create a similar split pea soup using vegetable broth and adding smoked paprika or liquid smoke for that ham flavor. Simmer vegetables and split peas for 1.5-2 hours instead of the longer bone-based cooking time.
Should I skim fat from the surface?
This is personal preference. Traditional recipes often leave the fat for flavor and richness. If you prefer a lighter soup, skim most of it, but leave a little for authentic flavor. You can also refrigerate the soup overnight—the fat will solidify on top and be easy to remove if desired.
What’s the difference between this and split pea soup?
Ham bone soup uses the bone as the primary flavoring agent and includes more varied vegetables, while split pea soup focuses on the peas as the star ingredient. Ham bone soup is brothier; split pea soup is often thicker and creamier.


